In the time frame of 5 days, we will design and model a wall, concluding the exercise with the exporting of its G-code, ready to print. There are three design drivers for the work: the weight, the introduction of connection details and the integration of an architectural narrative in order to inform the design.
As introduced in the previous workshop, this assignment is part of the Living Prototypes project that will be installed in Berlin this December.
This exercise will serve in order to continue our development into modelling 3d printing solutions. After the Detail workshop this workshop extends to the larger scale of the wall. We will use the same design and modelling methodology, going from tangent to curves, and from curves to surfaces. During the week, we will be going through a development of various catalogues or design iterations used in order to discuss and select the best direction for the project.
As stated above, a good design will need to match three conditions.
The weight: for structural reasons, the weight of our prints can not exceed a given maximum (which will be communicated in class), otherwise it might endanger the stability of the museum’s building. For this reason, you will need to evaluate whatever you model in terms of production numbers: print length, surface area, weight and print time.
The integration of details: integrate the work of the previous week in strategic locations in order to ensure the connection to the other architectural elements of the installation (cellulose panels and fibre slabs as well as the splitting of our walls). In order to achieve this, we will work with a strategy of subdivision of a wall into cells and play with the introduction of exceptions, this will be further explained in class.
Architectural intentions: the Living Prototype installation rests on a floor plan that describes an apartment. Each of the walls is therefore located within a living environment and they might require some additional features. For example a wall delimiting an interior from an exterior space might have two very different surface treatments, wavy on the outside to provide self-shading and flat in the inside for a domestic wall finish.
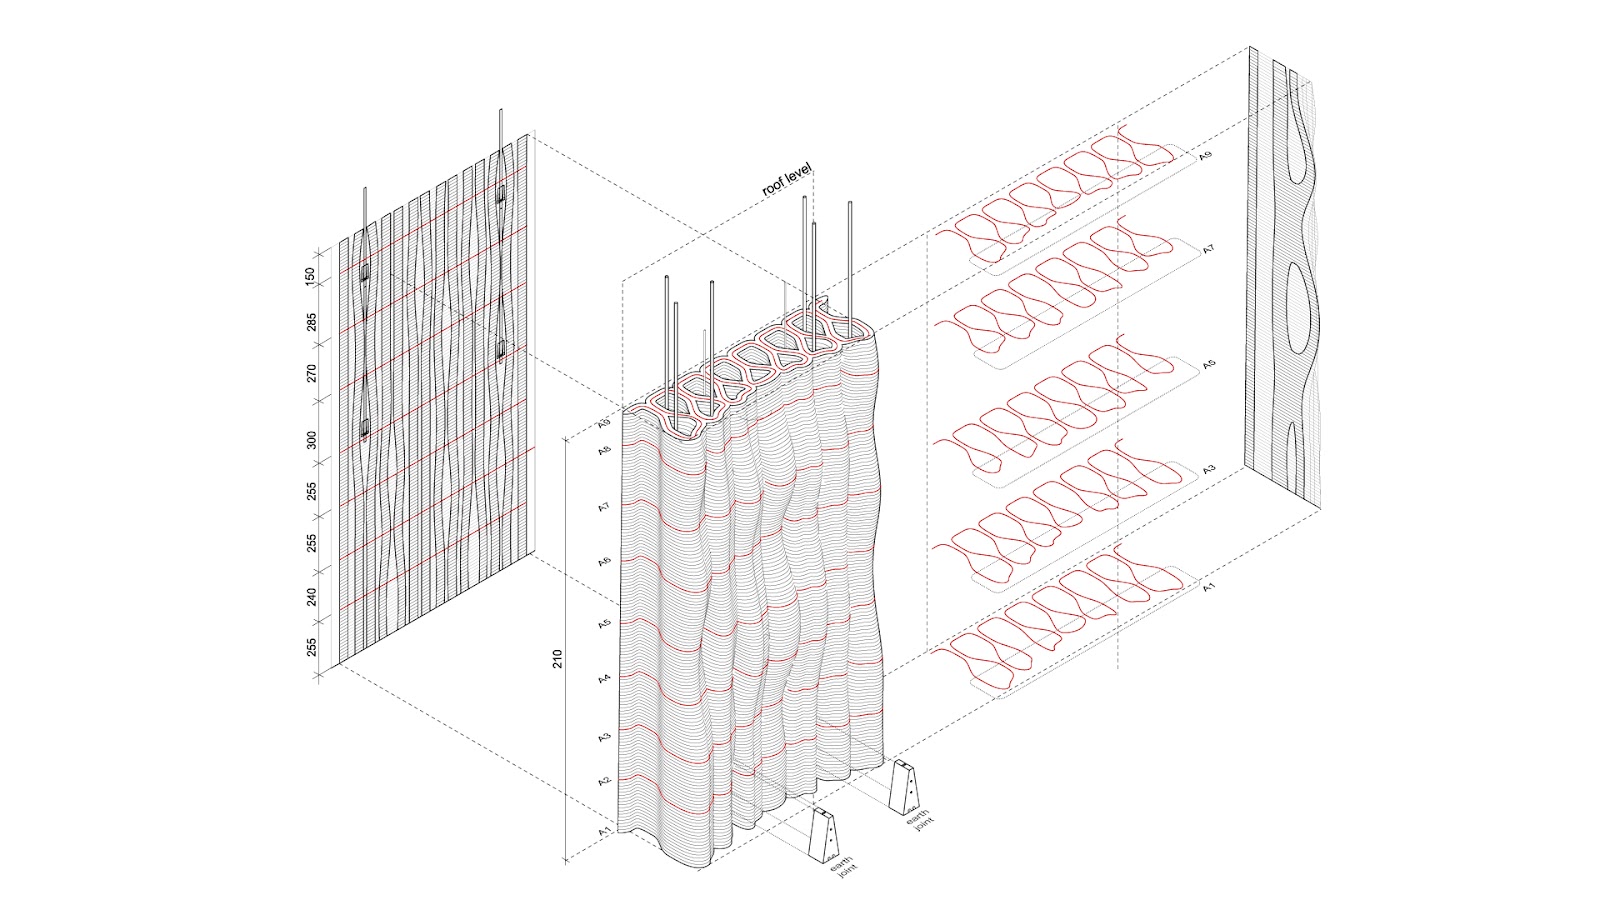
Project’s main parameters:
print width: 40mm
distance between tangents: 20mm
period width (axis to axis): 12 cm
wall depth at ground (axis to axis): 35 cm
wall height: 200cm
Learning Objectives
At course completion the student will:
- To design a 3d printed wall
- To model a 3d printed wall
- To define and introduce a performance characteristic in a 3d printed wall
- To introduce an exception within a 3d printed wall
- To learn how to 3d printed wall with the 6 axis robot