
When using Autodesk Revit for construction documentation and coordination, the ability to smoothly transfer geometry from McNeel’s Rhinoceros through the Rhino.Inside technology is a major breakthrough in the AEC industry and beyond. Prior to this technology Proving Ground developed Conveyor to aid in the transfer of complex geometry into Revit for documentation. Conveyor is still a good tool and runs on the Rhino.Inside API which is also available for C# developers to use as a basis for their own plugins or apps. This seminar, Digital Tools for Integrative Modeling has filled in knowledge gaps preparing us for the next level use of each software while facilitating interoperability. It has been possible to generate geometry and automate tedious or mundane tasks within Revit through the Dynamo visual programming interface for almost 10 years now. While the Dynamo ecosystem is always growing, the grasshopper community, around 20 years old, is vast with a menagerie of plugins. The power of intermingling Grasshopper with Revit is a paradigm shift for our industry.
The adaptive panel family is typically for the confident and sure footed Revit user, in my opinion. This class tossed some students into the deepend, where I witnessed most succeed in grasping a complicated opperation within a sometimes opaque software. The knowledge gained has opened our eyes and minds to a vast new opportunity to progress the AEC industry or even in adjacent career tracks. Within Architecture specifically, the Rhino.Inside technology allows teams to, nearly, seemlessly wisk between the documentation and coordination powers of Autodesk Revit and the NURBS (Non-Uniform Rational B-Splines) geometry engine within McNeel’s Rhinoceros. This reduction in process friction provides for more time designing and doing the work of achieving architecture while being able to produce repeatable processes and aid in iteration through simulation and computation.
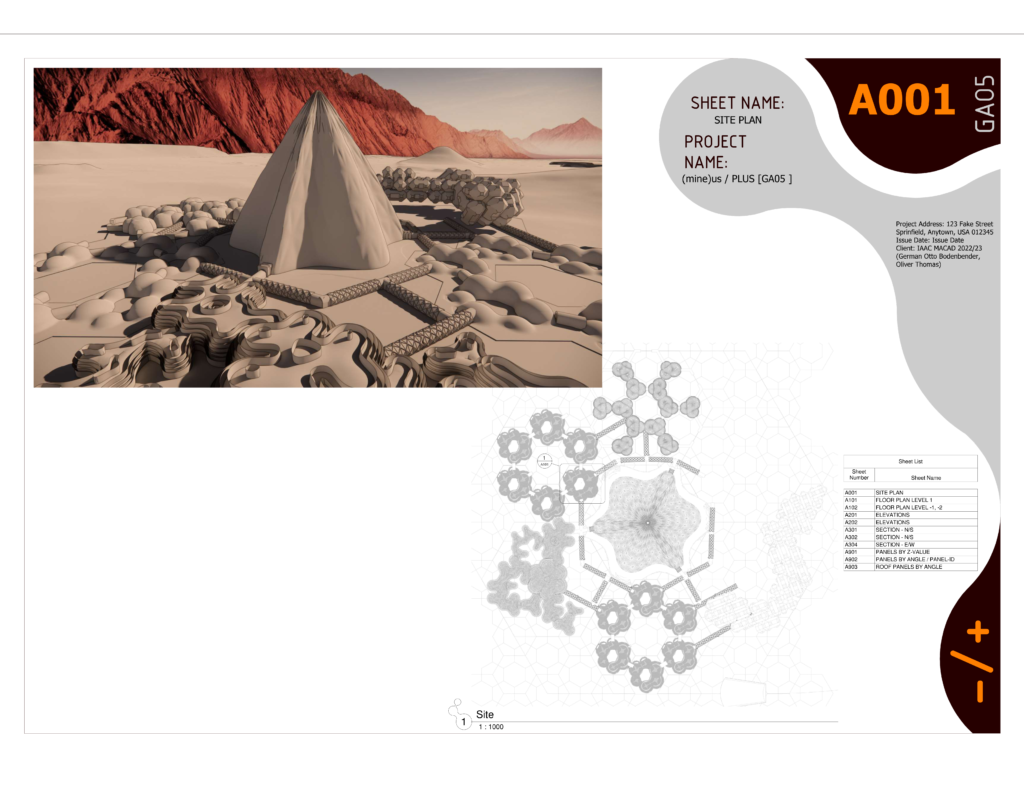
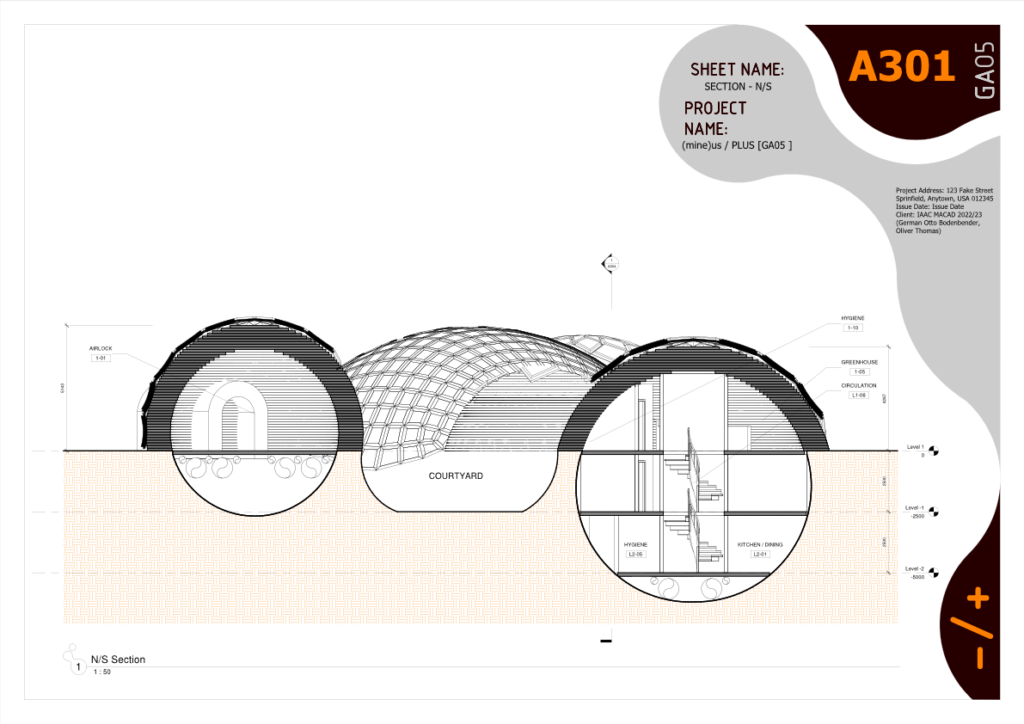
Our group, GA05 is the Accommodation program for the Mars Colony for this semester’s Studio seminar. From the start we wanted to perform a mix of digging and 3d printing, our teachers first questioned, then encouraged and questioned some more. Each week our research and design grew and developed. Our Mission Statement: A practical vision for future settlement built using local materials and establishing a benchmark for energy performance on Mars. This statement is based on the fact that the surface of Mars is an unforgiving place, where the temperature can be 15 degrees C at the ground surface and negative ten dregrees C at 2m above the ground. This disparity along with the stable underground temperature of -25 degrees C provides a greater potential for energy savings than a building entirely exposed to the elements where temperatures can fall to below negative one hundred and fourty degrees C.
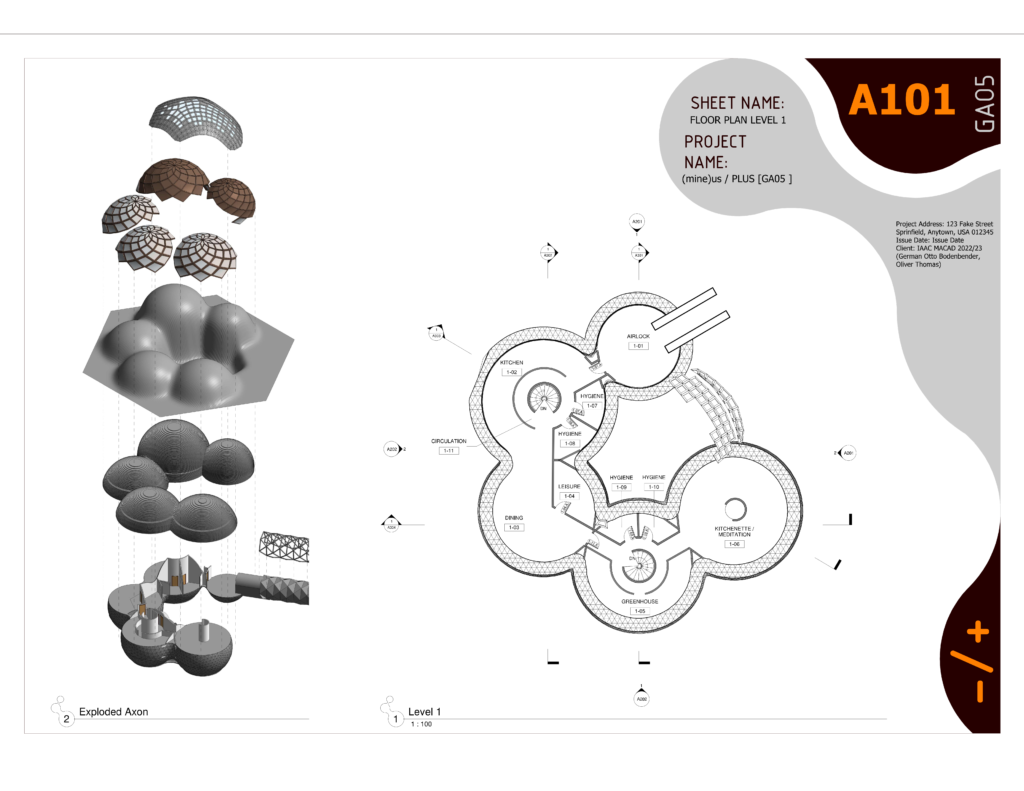
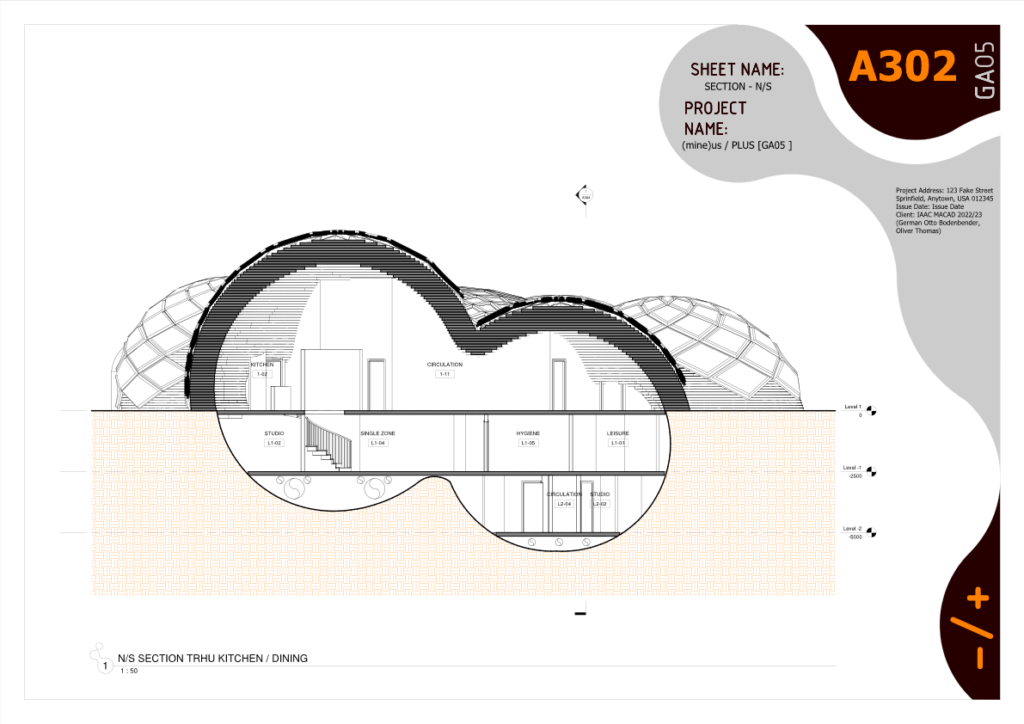
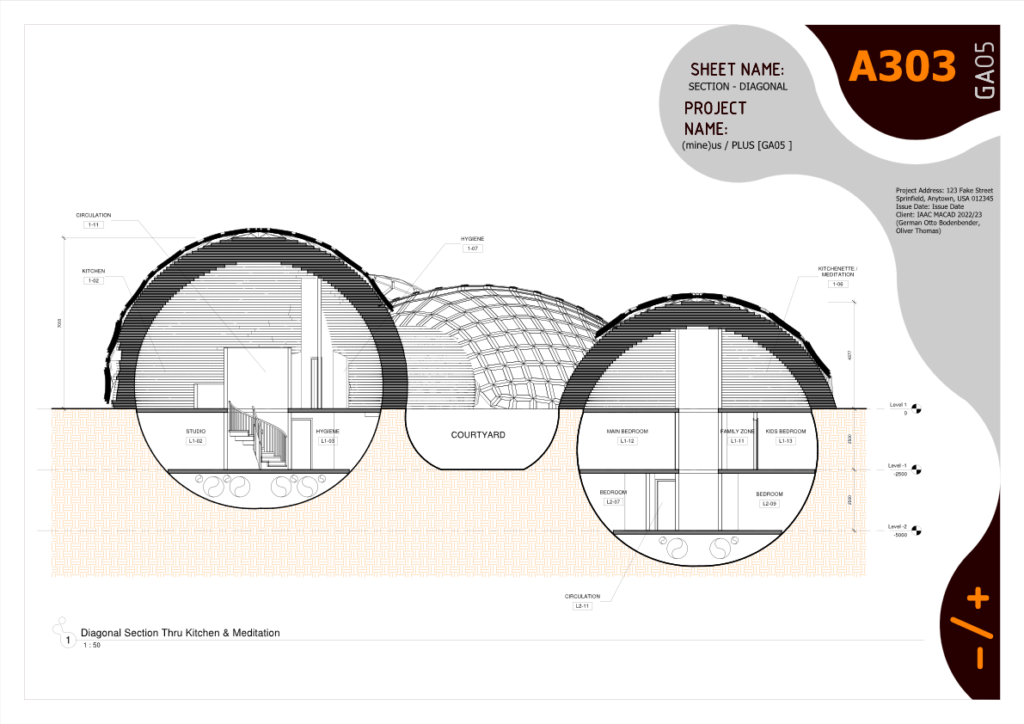
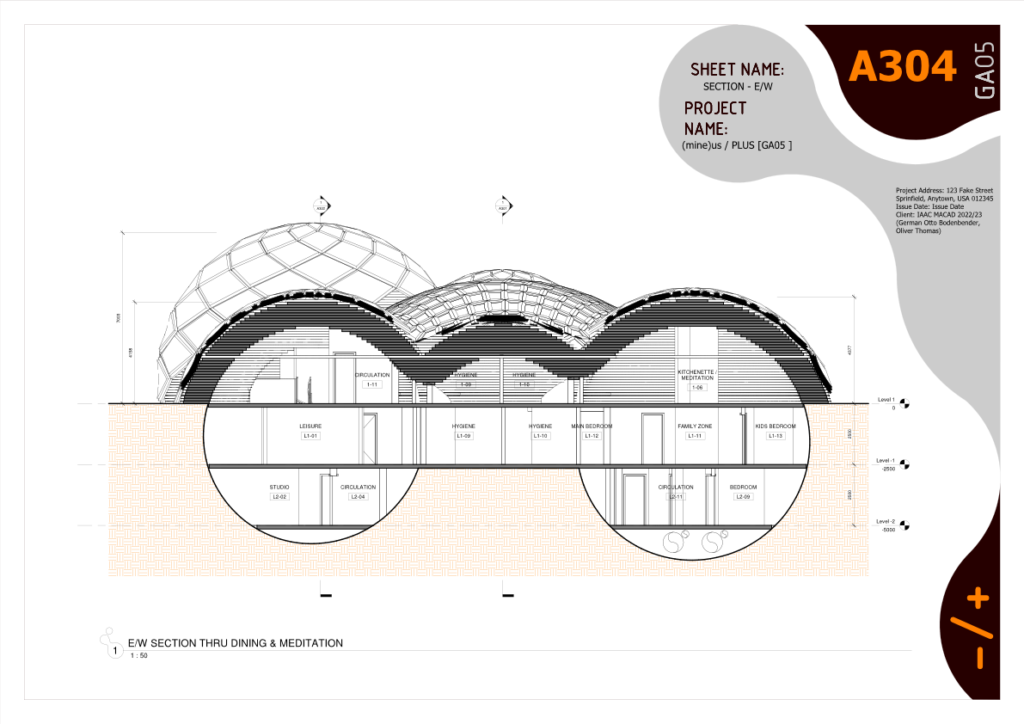
During our research we discovered the Hassel Mars project where reconfigurable swarm robots would adapt and change for different tasks, adding or subtracting devices or tools to gather Martian regolith from the area and deliver that to the combination to 3d print the shell structure. This along with other research guided us to a mining and 3d printing concept where some of the structure would be dug down into the crater’s floor with that material used to 3d print the above ground dome structures. Above the domes where additional pressed regolith panels, some with solar panels attached. Lastly, our program, Accommodation, designed connectors to link our various programs together into a cohesive whole community. These connectors would have there origami collapsible structure shipped to Mars withing the SpaceX Starship’s ~8m inside diameter cargo hold. This structure would be unfolded by the assembly robots with the in-situ pressed regolith panels snapped into the unfolded structure, also produced by our fleet of multi-functional robots.
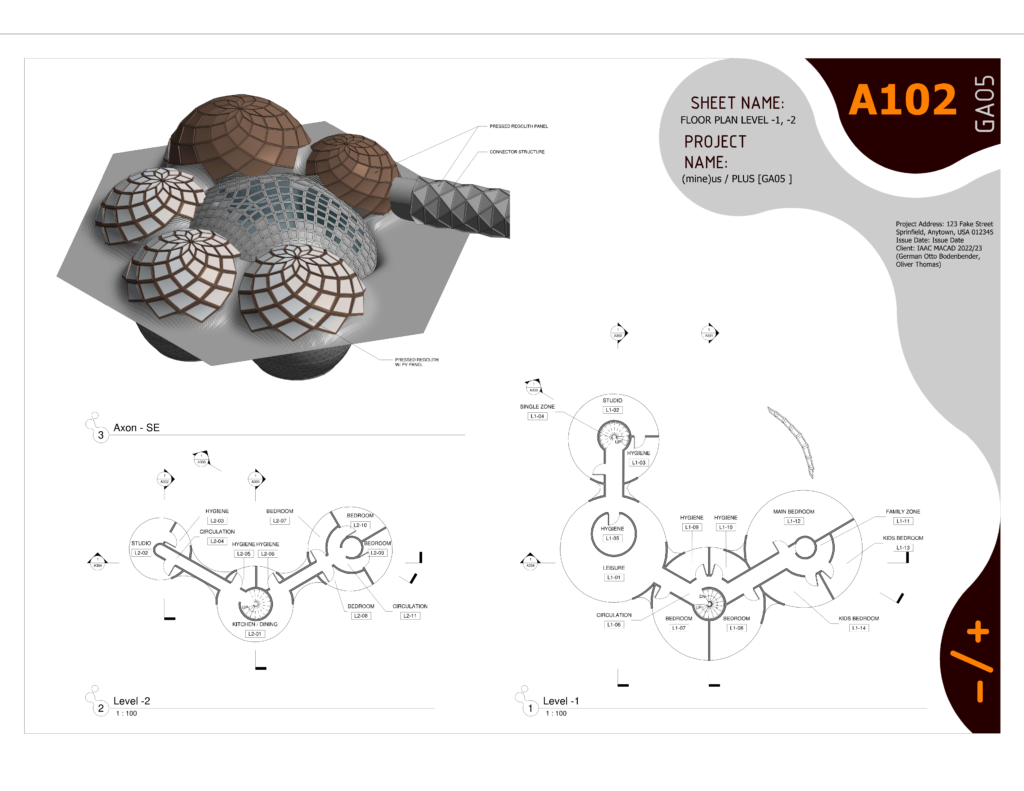
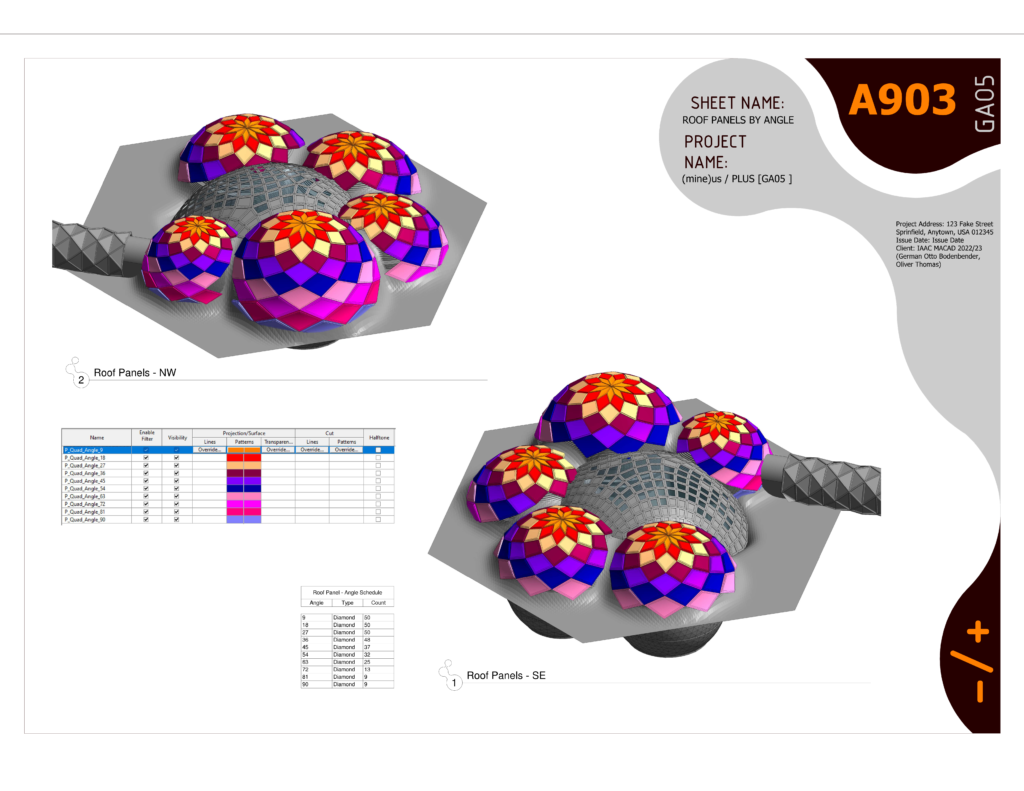
Once designed the truely exciting part began. Initially most of the geometry was transferred from Rhino to Revit through Speckle Streams and Branches. Check out our blog post from the Digital Tools for Collaborative Workflows here: [Enter URL}. The Speckle geometry did a pretty good job and Speckle connects to a lot of other and different design and engineering software. Through the use of Revit’s unique adaptive components and creative family category uses the project could be discritized and re-combined in native Revit geometry. The underground form remained a direct shape mesh, though a next step would be to devise a process to portion it out into families or another adaptive component. Inside, above ground, the roof panels and the central dome where all generated as adaptive panels and families. Floors were created from the curves where planes intersected the metaballs, then the walls and doors were generated from lines for the walls and points for placing the doors within the host walls. The doors were manually flipped in a few locations and the spiral stairs were manualy created. The 3d printed domes above ground where contours of both the inside and outside of an offset mesh split at the ground level. These contours were created into surfaces then deconstructed to access the groupings of curves for the generation of thin Revit floors which are a system family, not a loadable family. Above the 3D printed domes where offset spheres with diamond grids applied, these grids or cells were again groupings of curves that once deconstructed become verticies or points. With a data tree consisting of branches with the points needed to generate the adaptive panels, it was possible to populate the Revit model in a matter of minutes while also using the strength of the LAdybug Tools to perform sunlight analysis to determine which roof panels would be best for solar power generation and which central dome panels would be clear instead of opaque panels.
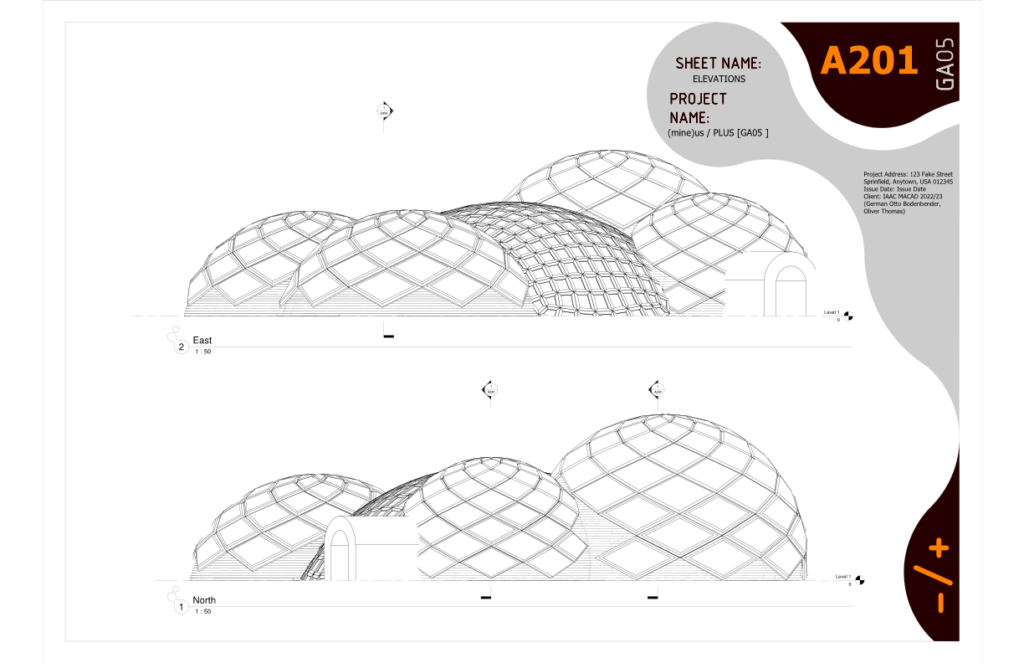
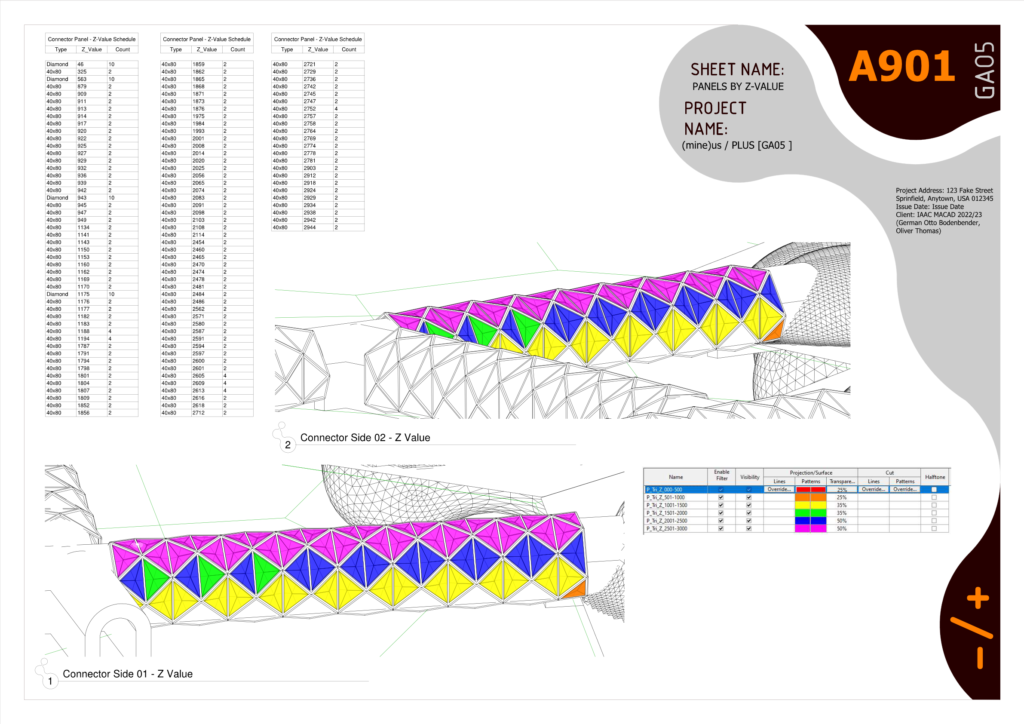
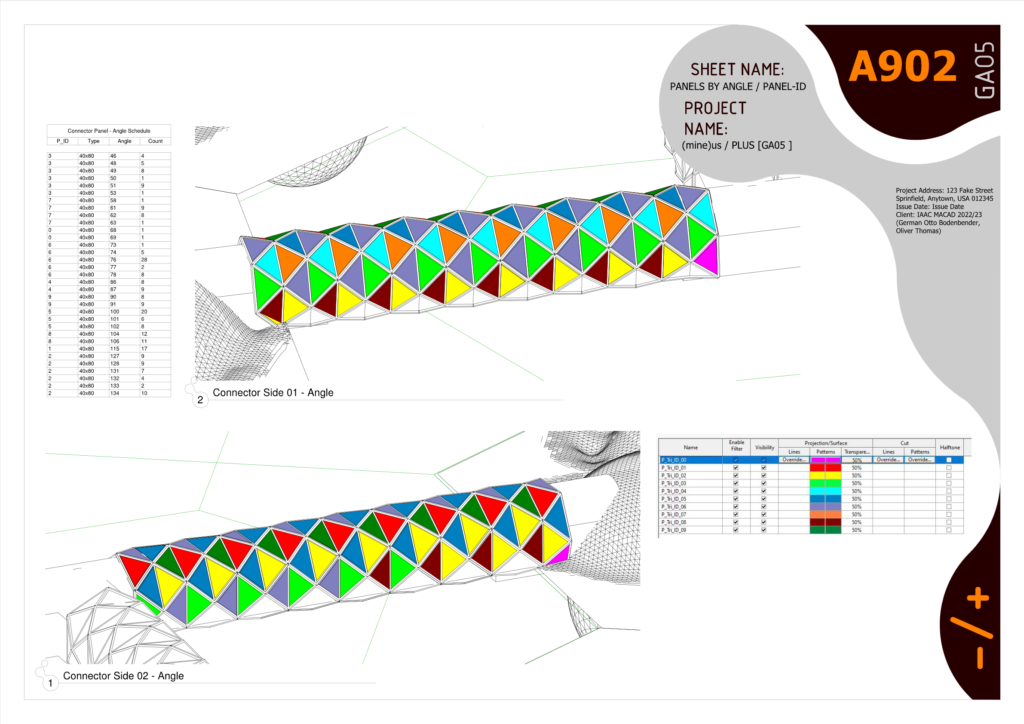
The introduction of shared parameters allowed data or attributes from the Rhino side to be very quickly transferred into parameter values within Revit. These parameters allowed Revit view filters to sort and graphically display information such as panel angle from the X or Z axis of the z value of the panel’s centroid. A next step here was to include the Average Annual Solar Radiation values to determine which panels made sense to mount the limited photo voltaic panels for solar energy production. This process was very clearly introduced and explained by our teachers. Although, if this was a student’s first interaction with Revit, I could see this instruction to be really in-depth and at the intermediate to advanced levels. That being said, many of the students really picked things up and produced impressive results with or without prior experience.
In conclusion, the power of Rhino.Inside.Revit is already revolutionizing the current paradigm of work in an architectural office. The other thing that could surpass it in importance will be AI in Architecture. We look forward to next semester when we will learn how to setup Machine Learning models and other AI in Architecture, to continue leading our field.
