
During the advanced digital tools class, we were introduced to the Rhinoceros plug-in Grasshopper. Grasshopper is a way to create visual scripts, a graphical way to program, resulting in an output in Rhino that can easily be changed. Grasshopper works using components and its capabilities can be expanded using different plug-ins.
The classes were divided in different subjects and at the end of each class we were given small assignments to practice and fully understand the newly learned components. Since I already had some previous Grasshopper knowledge, the first few sessions felt like repetition, making it harder to find inspiration to work on. As we progressed however, my interest in Grasshopper’s possibilities increased and I especially loved the exploration of exercises 4 and 5.
CLASS 01 _ REVOLUTION, ROTATION AND CURVE EVALUATION
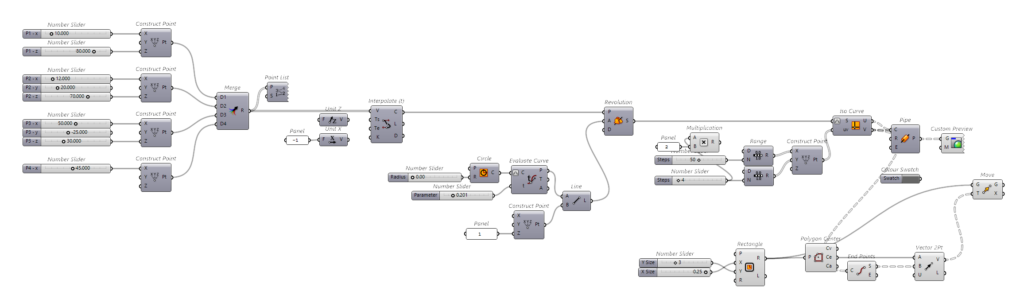
During the first class, we learned the basics on the definition of a curve, the evaluation of a point on this curve and the rotation of a curve around a certain axis create a surface from it (revolution).
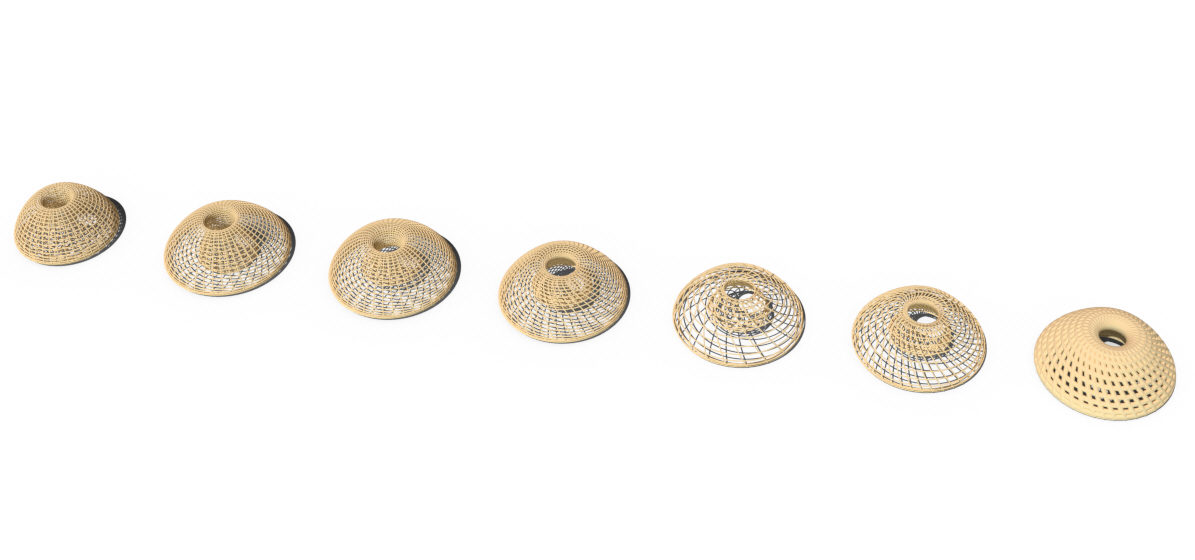
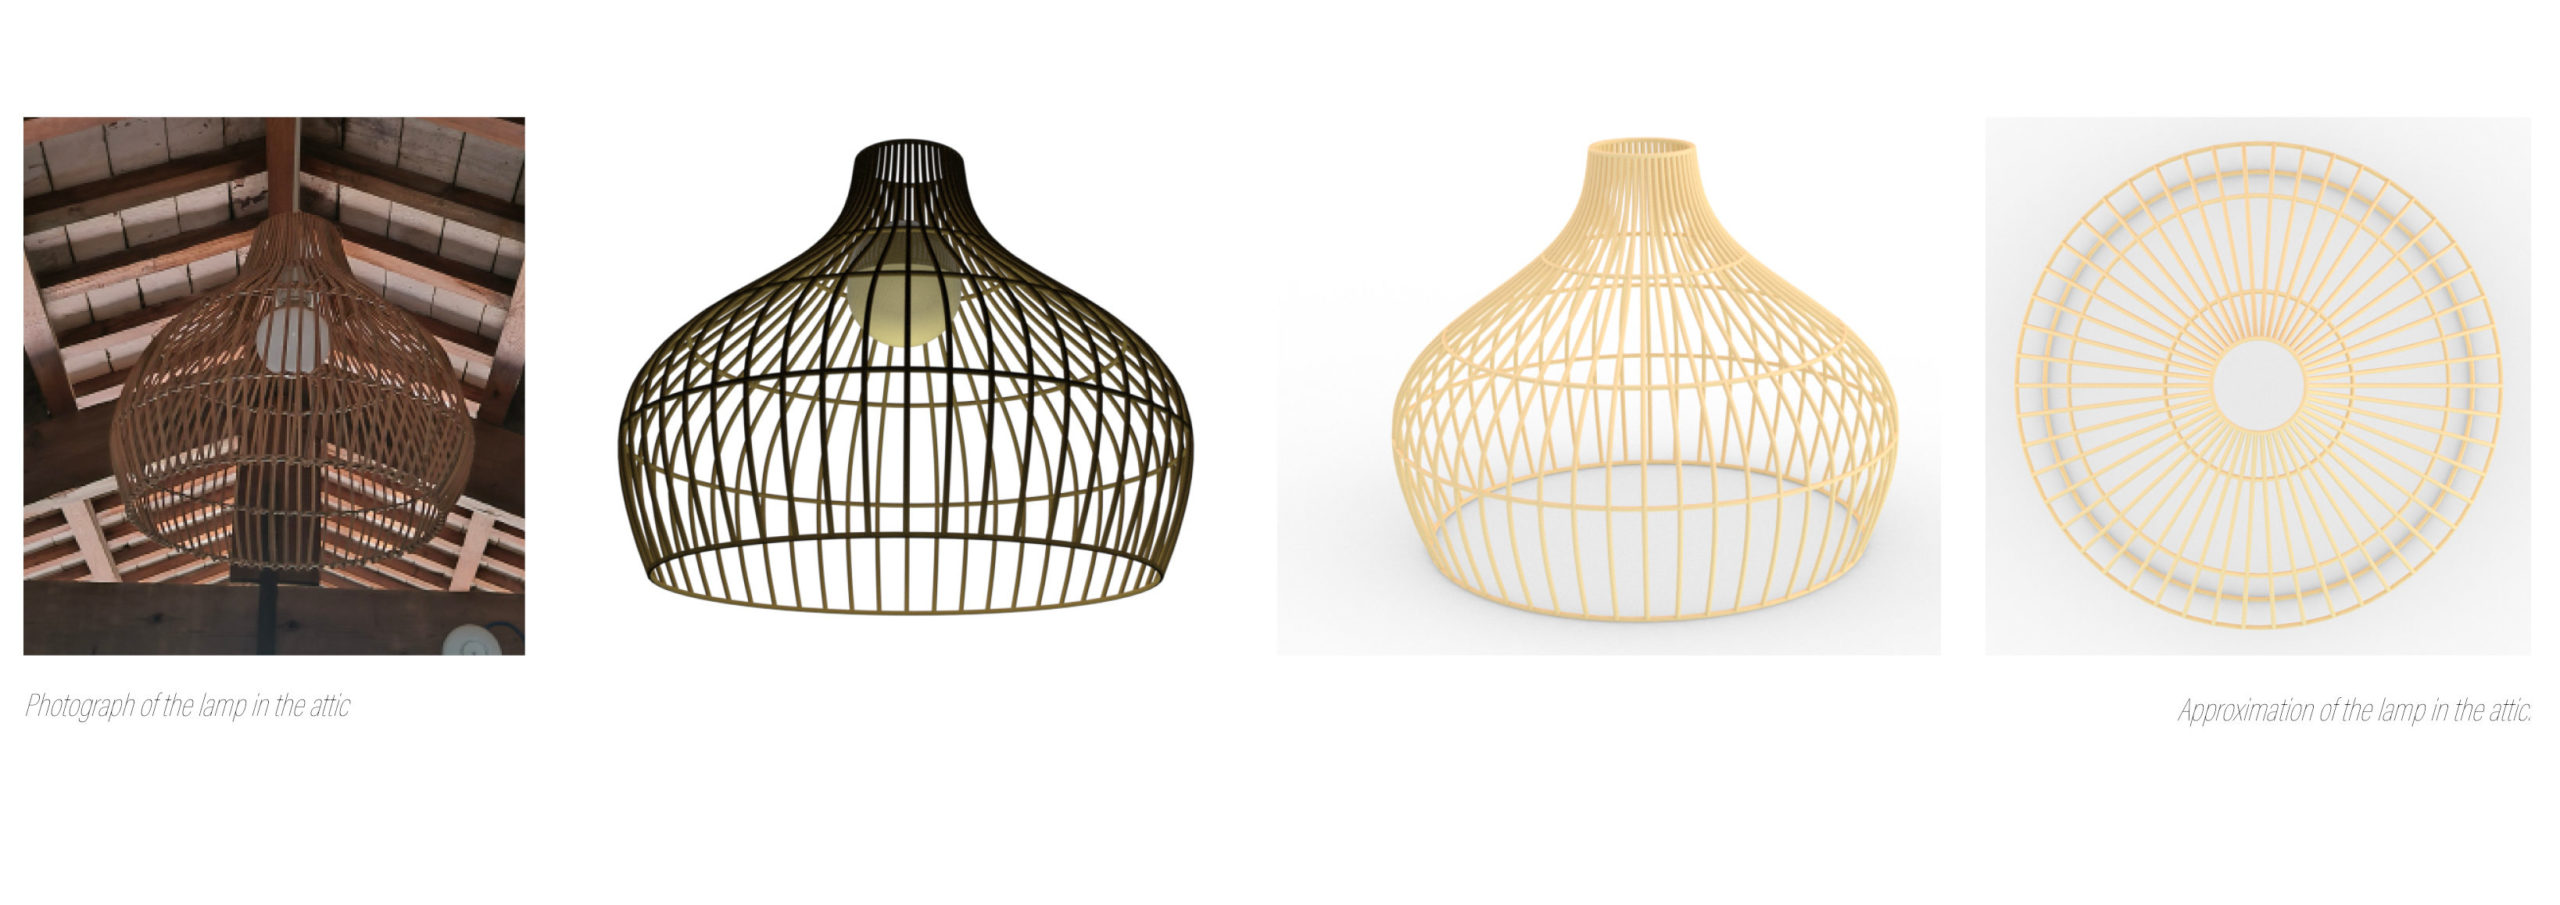
I reused these elements to create a script to approximate a lamp shade we have in the attic at Valldaura. By varying different elements such as the x, y and z-coordinates of the points, the number of iso-curves used and the diameter of the pipes, different variations can be created, up until obtaining a lamp shade that looks like the one in the attic.
CLASS 02 & 03 _ DATA MANAGEMENT
Lists, data matching and data management
The second and third class were both focused on data management. We learned to work with lists, how to arrange, organise and re-organise them, how to separate them or select an item or how different lists interact.
For the two exercises resulting from these sessions, I focused on creating different variations of one base model. Varying the different components and comparing the obtained shapes, allowed for an exploration of the influence of each component.
CLASS 04 & 05 _ LIST PATTERNS & DATA TREES
Differentiation, atractors, conditional statements and culling patterns
During the fourth class, we delved deeper in list manipulations, by separating lists according to certain patterns or conditions as well as evaluating the distance of elements in a list compared to a given point or curve.
During the fifth class, we expanded our knowledge on lists, by studying trees, or lists within lists. By understanding how these lists are composed, and more precisely how the different levels work and how they can be rearranged.
—
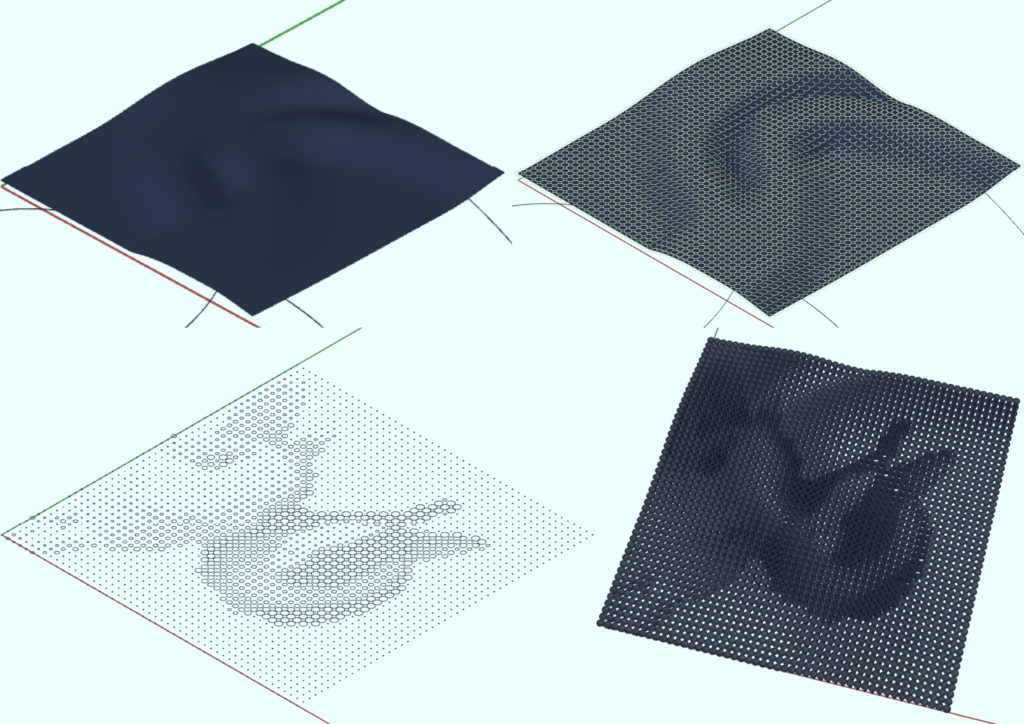
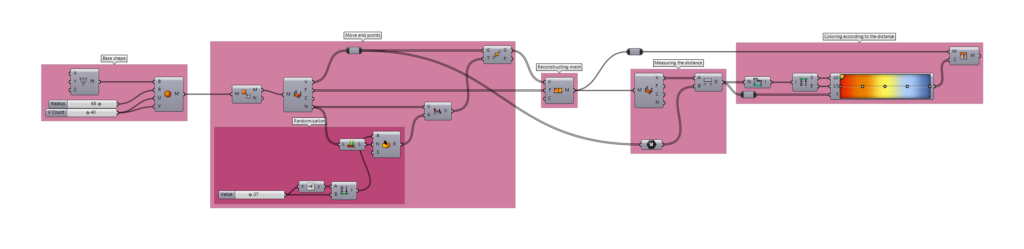
The knowledge gained in both classes was then combined in one exercise where I was inspired by a sculptural facade with chairman Mao’s face.
This structure is composed of 3 parts:
- A picture of Mao
- Some painted characters
- A 3D wind simulating wall
This wind inspired wall, can be created using atractor points, while the painted characters will be ignored.
Lastly, but most importantly, I want to replace his portrait by a picture of my sister’s rabbits, Canela and Stracciatella.
The script is composed of 3 main parts:
- Creation of the “wind surface” with attraction points
- Translation of the image into a shape with different opening widths
- Connecting both created surfaces
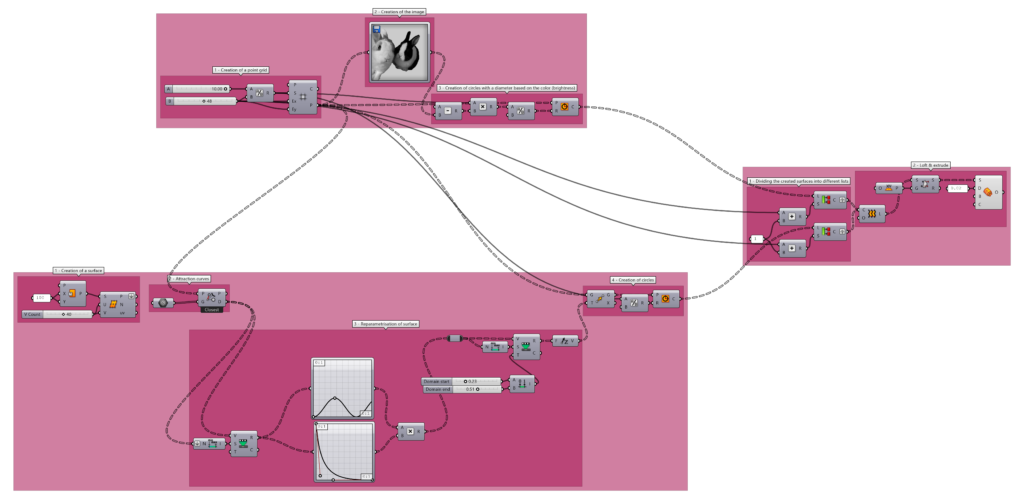
Pt1_WindSurface
- Creation of a grid of points
- Defining a curve and using the “ClosestPoints”
- Vary the z-position of the points according to their distance to the curve and reparametrise the surface following curves defined in Rhino7
- Creation of circles
Pt2_Stracci&Cani
- Re-using the same grid of points
- Insertion of the image
- Circle with opening depending on the brightness of the picture
Pt3_LoftingCircles
- Dividing the surfaces into different lists
- Lofting the circles using the OffsetSurface component from the Pufferfish plug-in (to create a solid)
—
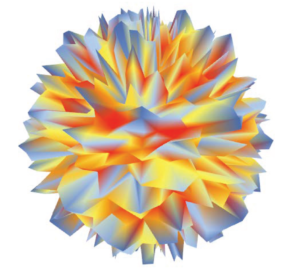
CLASS 06 _ MESHES
During the sixth class, we were introduced to meshes. We learned the difference between meshing surfaces and meshing breps, between meshes and breps. We learned about the different ways to subdivide meshes, through different components as well as by editing the level and smoothness of the subdivision. We also learned how to colour meshes according to different data inputs.
—
I based the exercise on a YouTube-tutorial from Studio Tama called “Deformation of Mesh”, available through https://www.youtube.com/watch?v=5kij-Lg4ae8.
The script consists of 4 main parts:
- Creation of a round mesh (ball)
- Moving random end points of the mesh and using these to create a new mesh
- Evaluate the distance from the end points of this mesh to the end points of the first mesh
- Colouring the mesh according to this distance
Pt1_MeshBall
- Defining the origin point of the Mesh
- Defining the radius
- Subdivide the mesh
Pt2_MovePoints
- Subdividing the mesh into triangles (just because to me triangles make more sense, but comparing the end results, there is not much difference)
- Identify the end points (vertices) and move them a random distance
- Recreate a new mesh from this surface
Pt3_EvaluateDistance
- Evaluating the distance from the first vertices to the moved vertices
Pt4_ColourMesh
- Construct a domain based on the distance values (to have them between 0 and 1)
- Distance as input in the Patch component
- Colour the mesh
—
Exploring these various properties of Grasshopper makes me wonder and look forward to all the things I could develop.
