Group 20
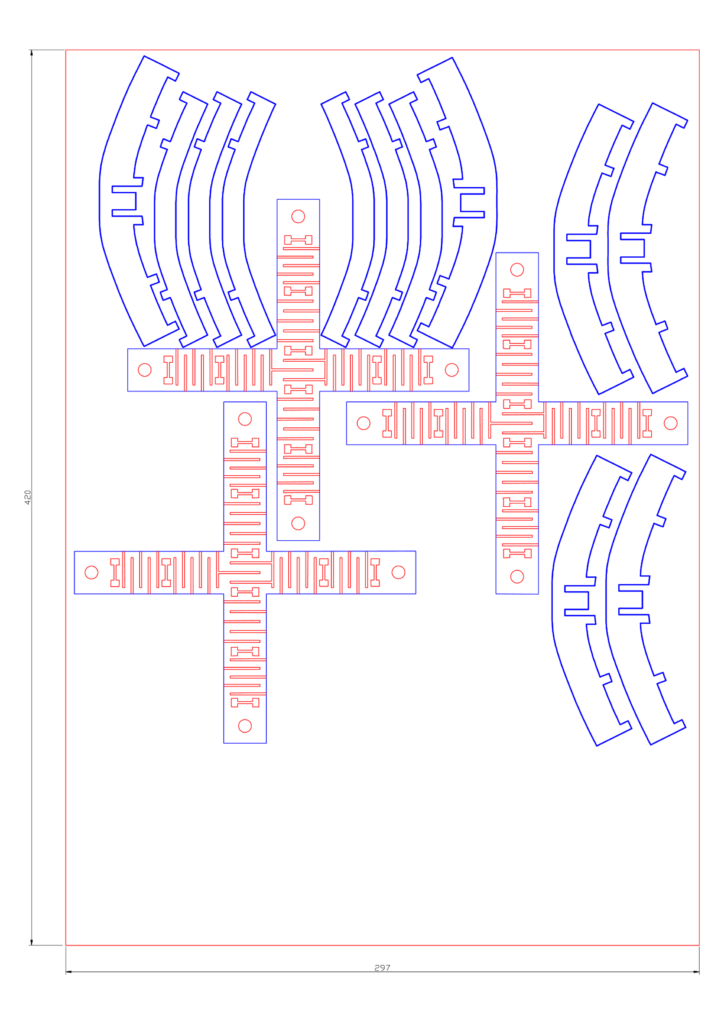
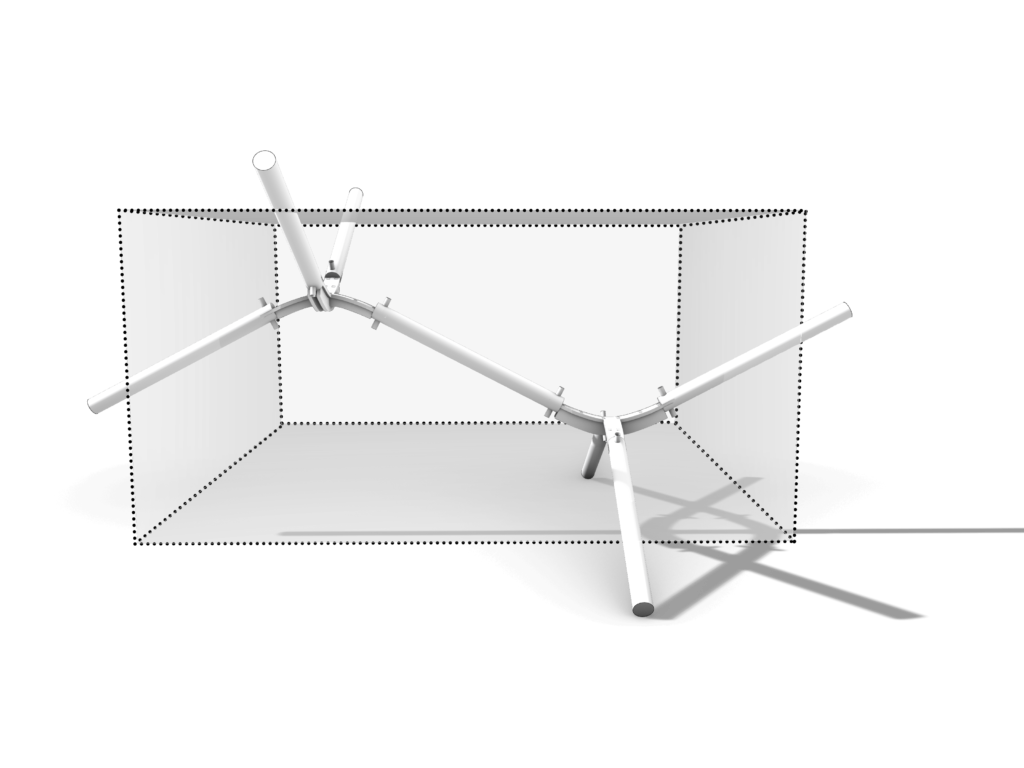
Timber Spatial Joint
Concept
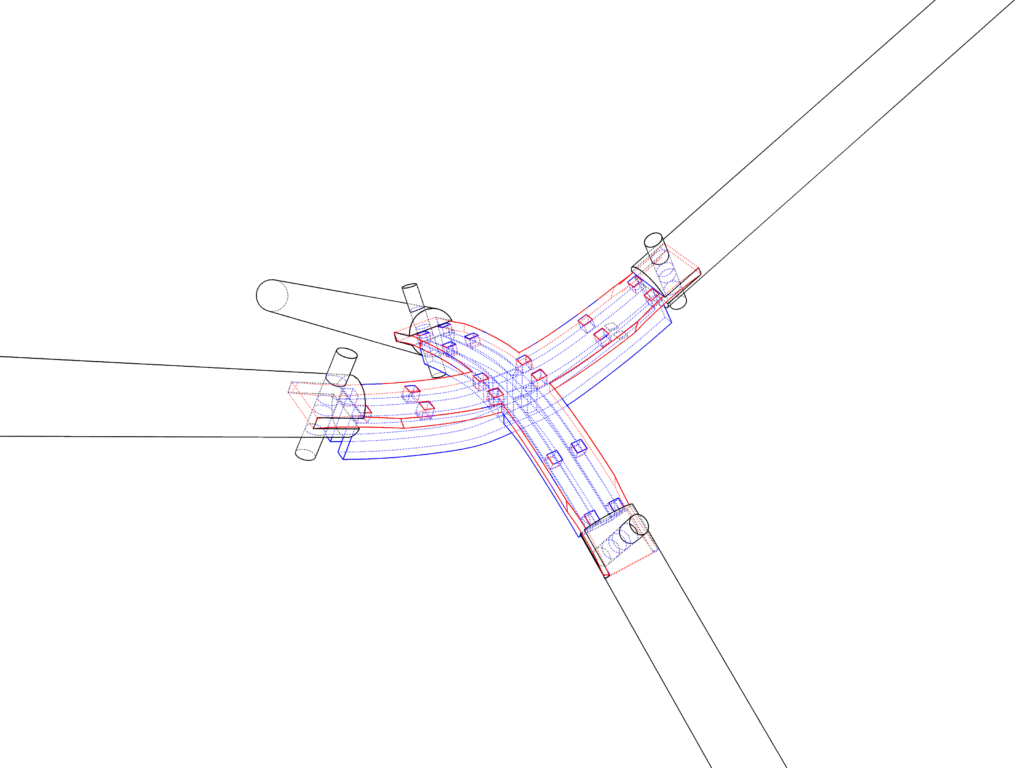
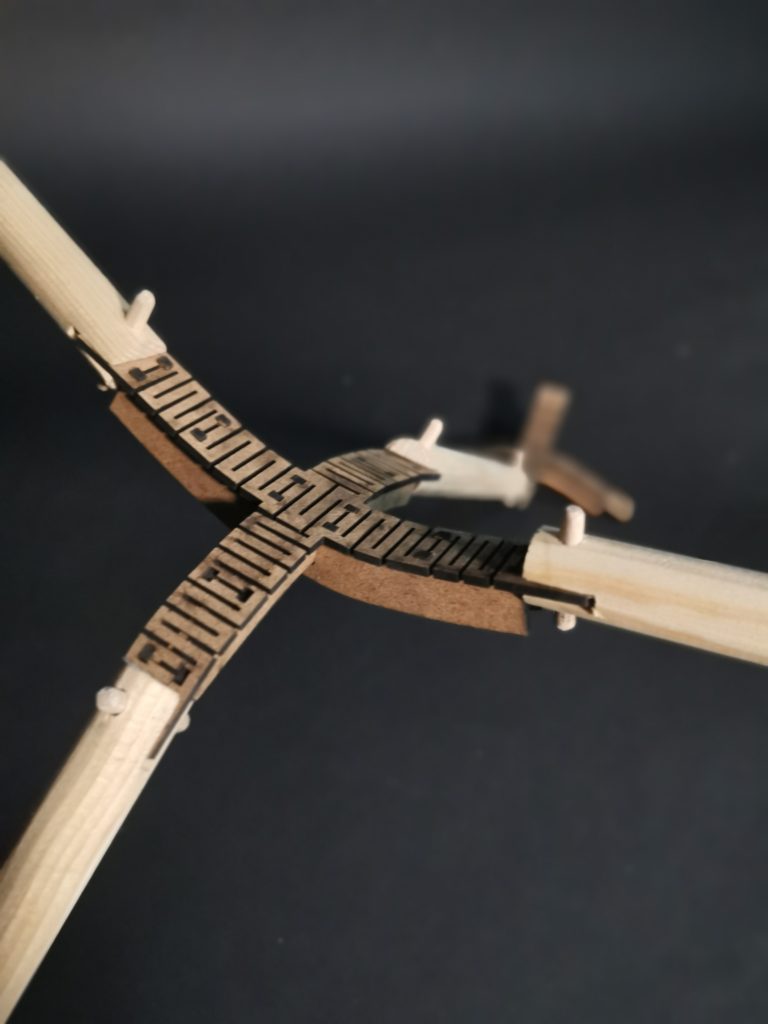
The aim of this timber spatial joint was to explore the bending technique applied to plywood or MDF using kerfing but also apply it in 2 directions instead of 1. The bent joint is then inserted into the circular wooden sticks and fixed in place using a wooden dowel.

Production Process
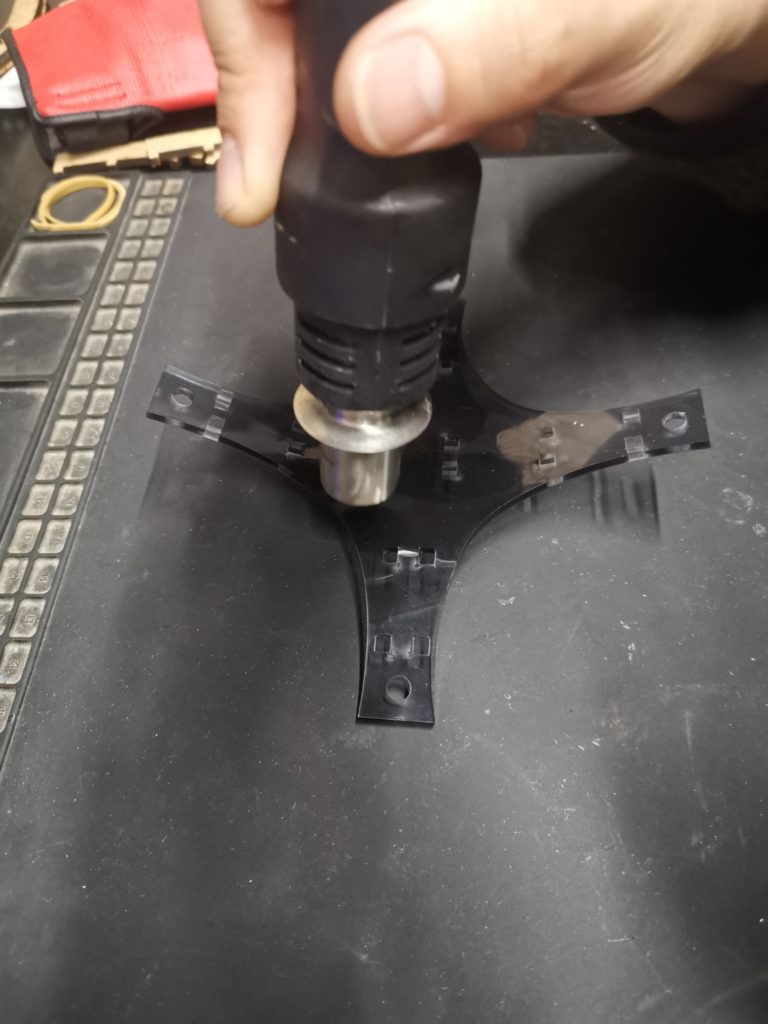
First Trial: Bending Acrylic with Heat
Challenges Faced:
- Difficult to bend the acrylic in Opposite directions as the center is affected by one of the directions.
- Difficult to align the grooves in the joint with the fingers on the bottom supports.
- Time-consuming
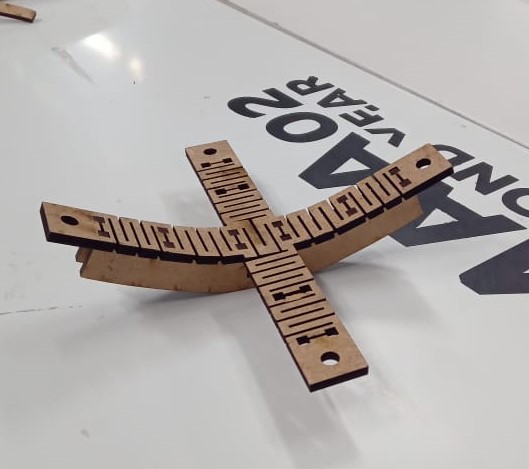
Second Trial: Bending MDF using Kerfing Technique
Challenges Mitigated:
- Easier to bend in both directions
- Grooves easily align with fingers
Spatial Network

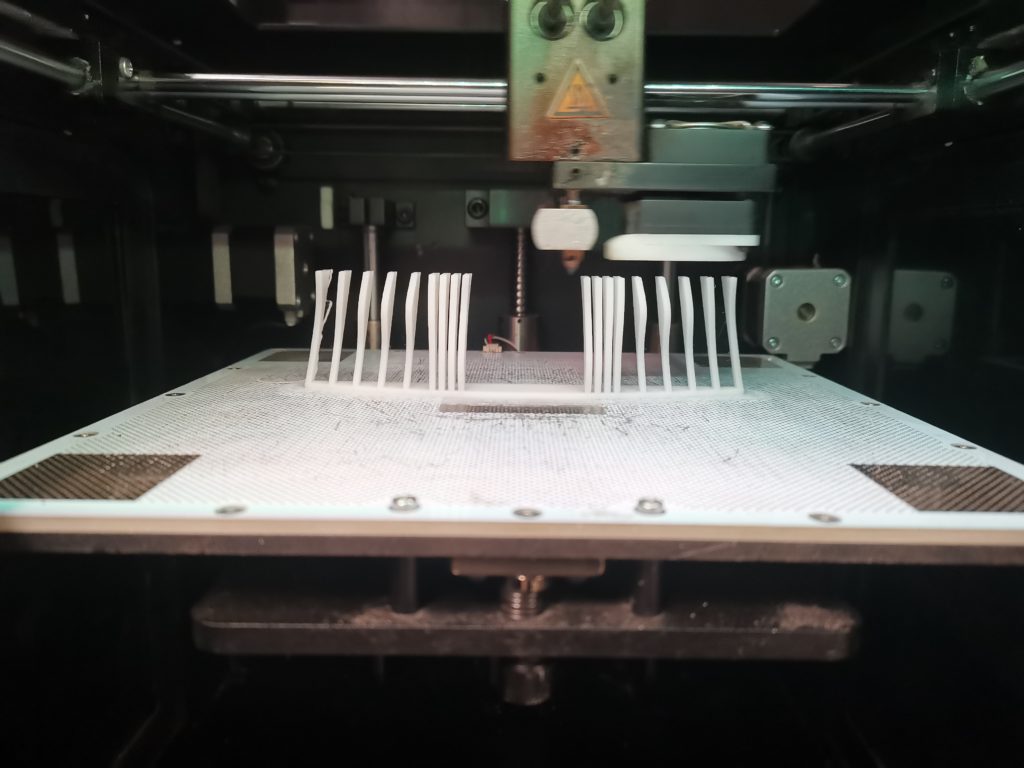
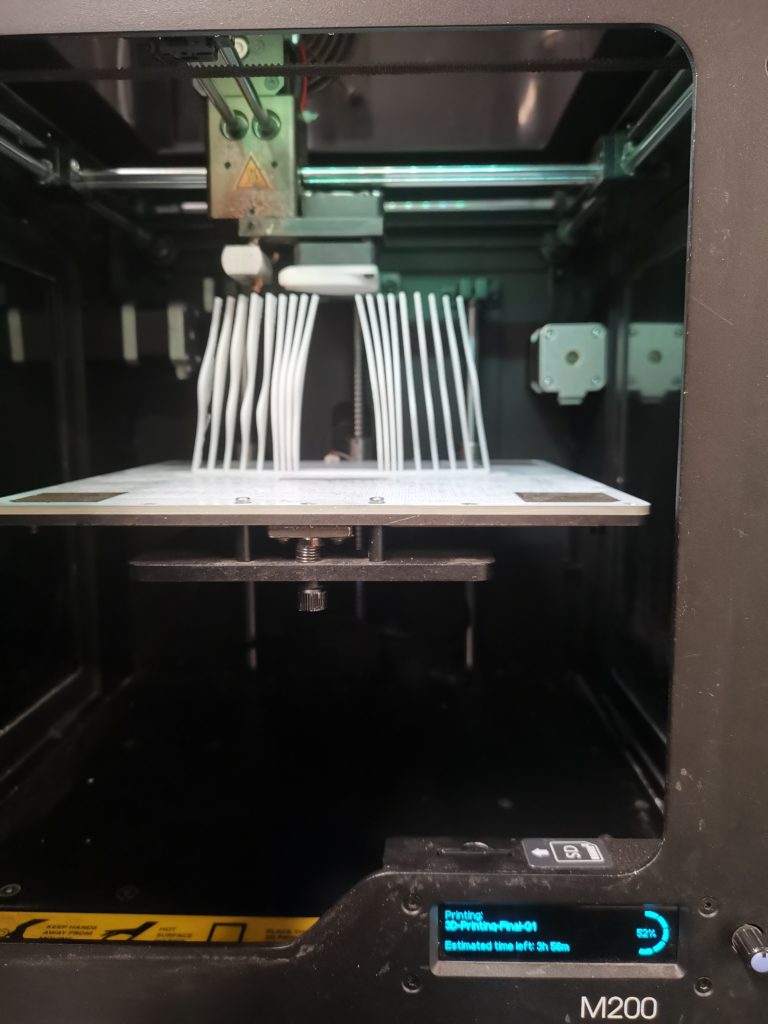
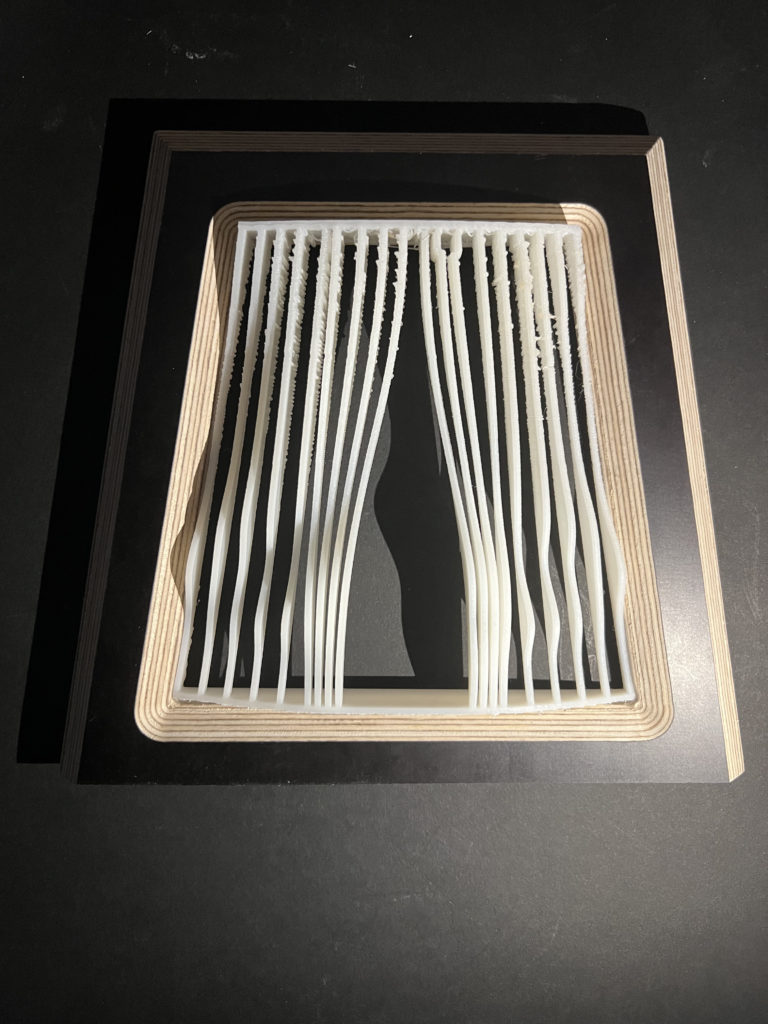
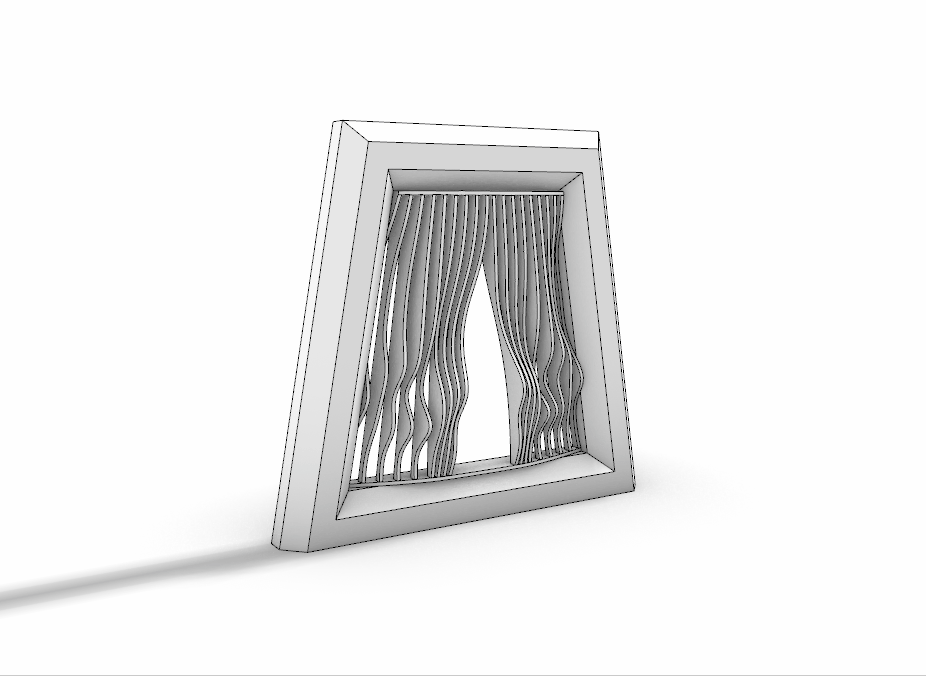
3D Printed Rigid Curtain

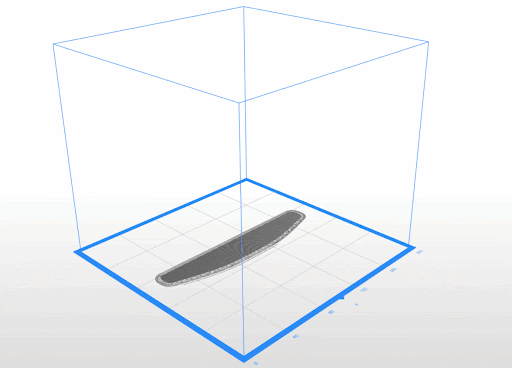
Printer: M200
Estimated Print Time: 8h 11 min
Material: Z-ABS 2
Nozzle Diameter: 0.4 mm
Layer Thickness: 0.29 mm
Infill Density: 20%
Surface Layers Top: 4
Surface Layers Bottom: 4
Raft Enabled: Yes

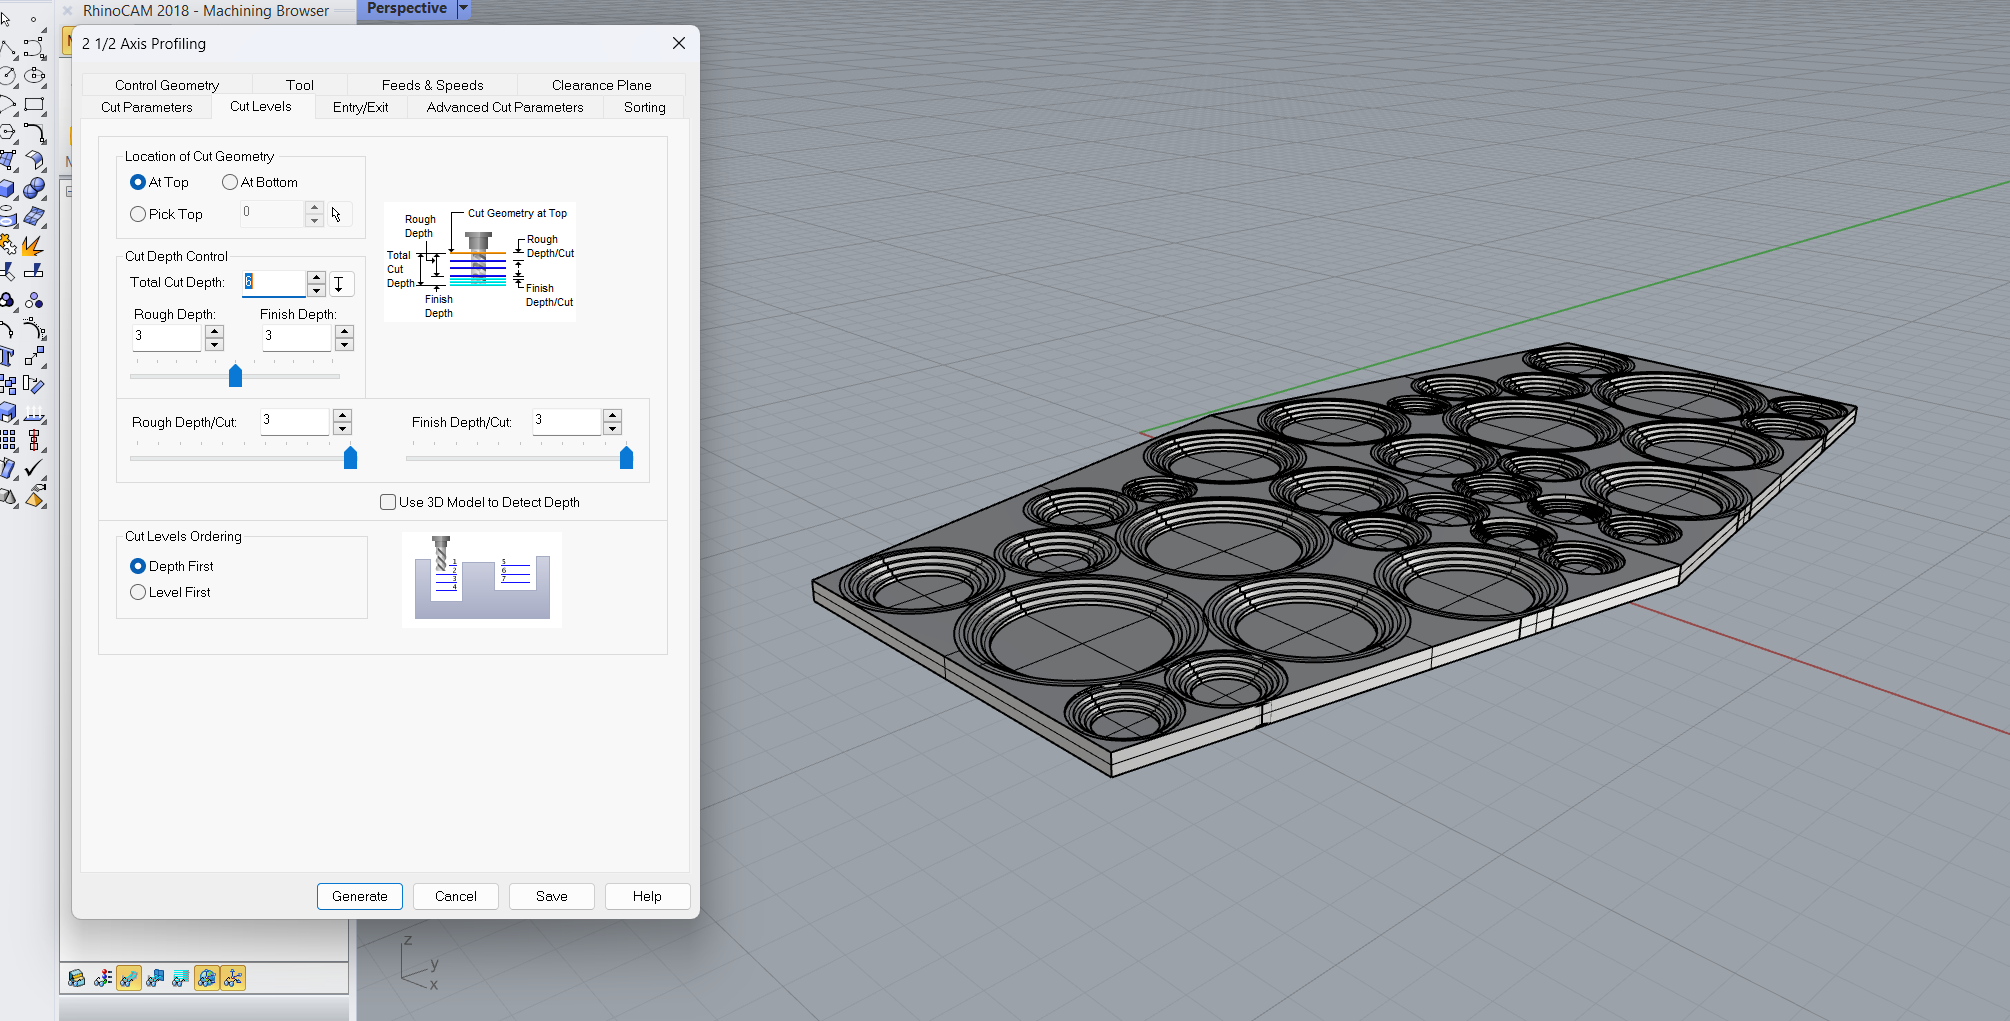
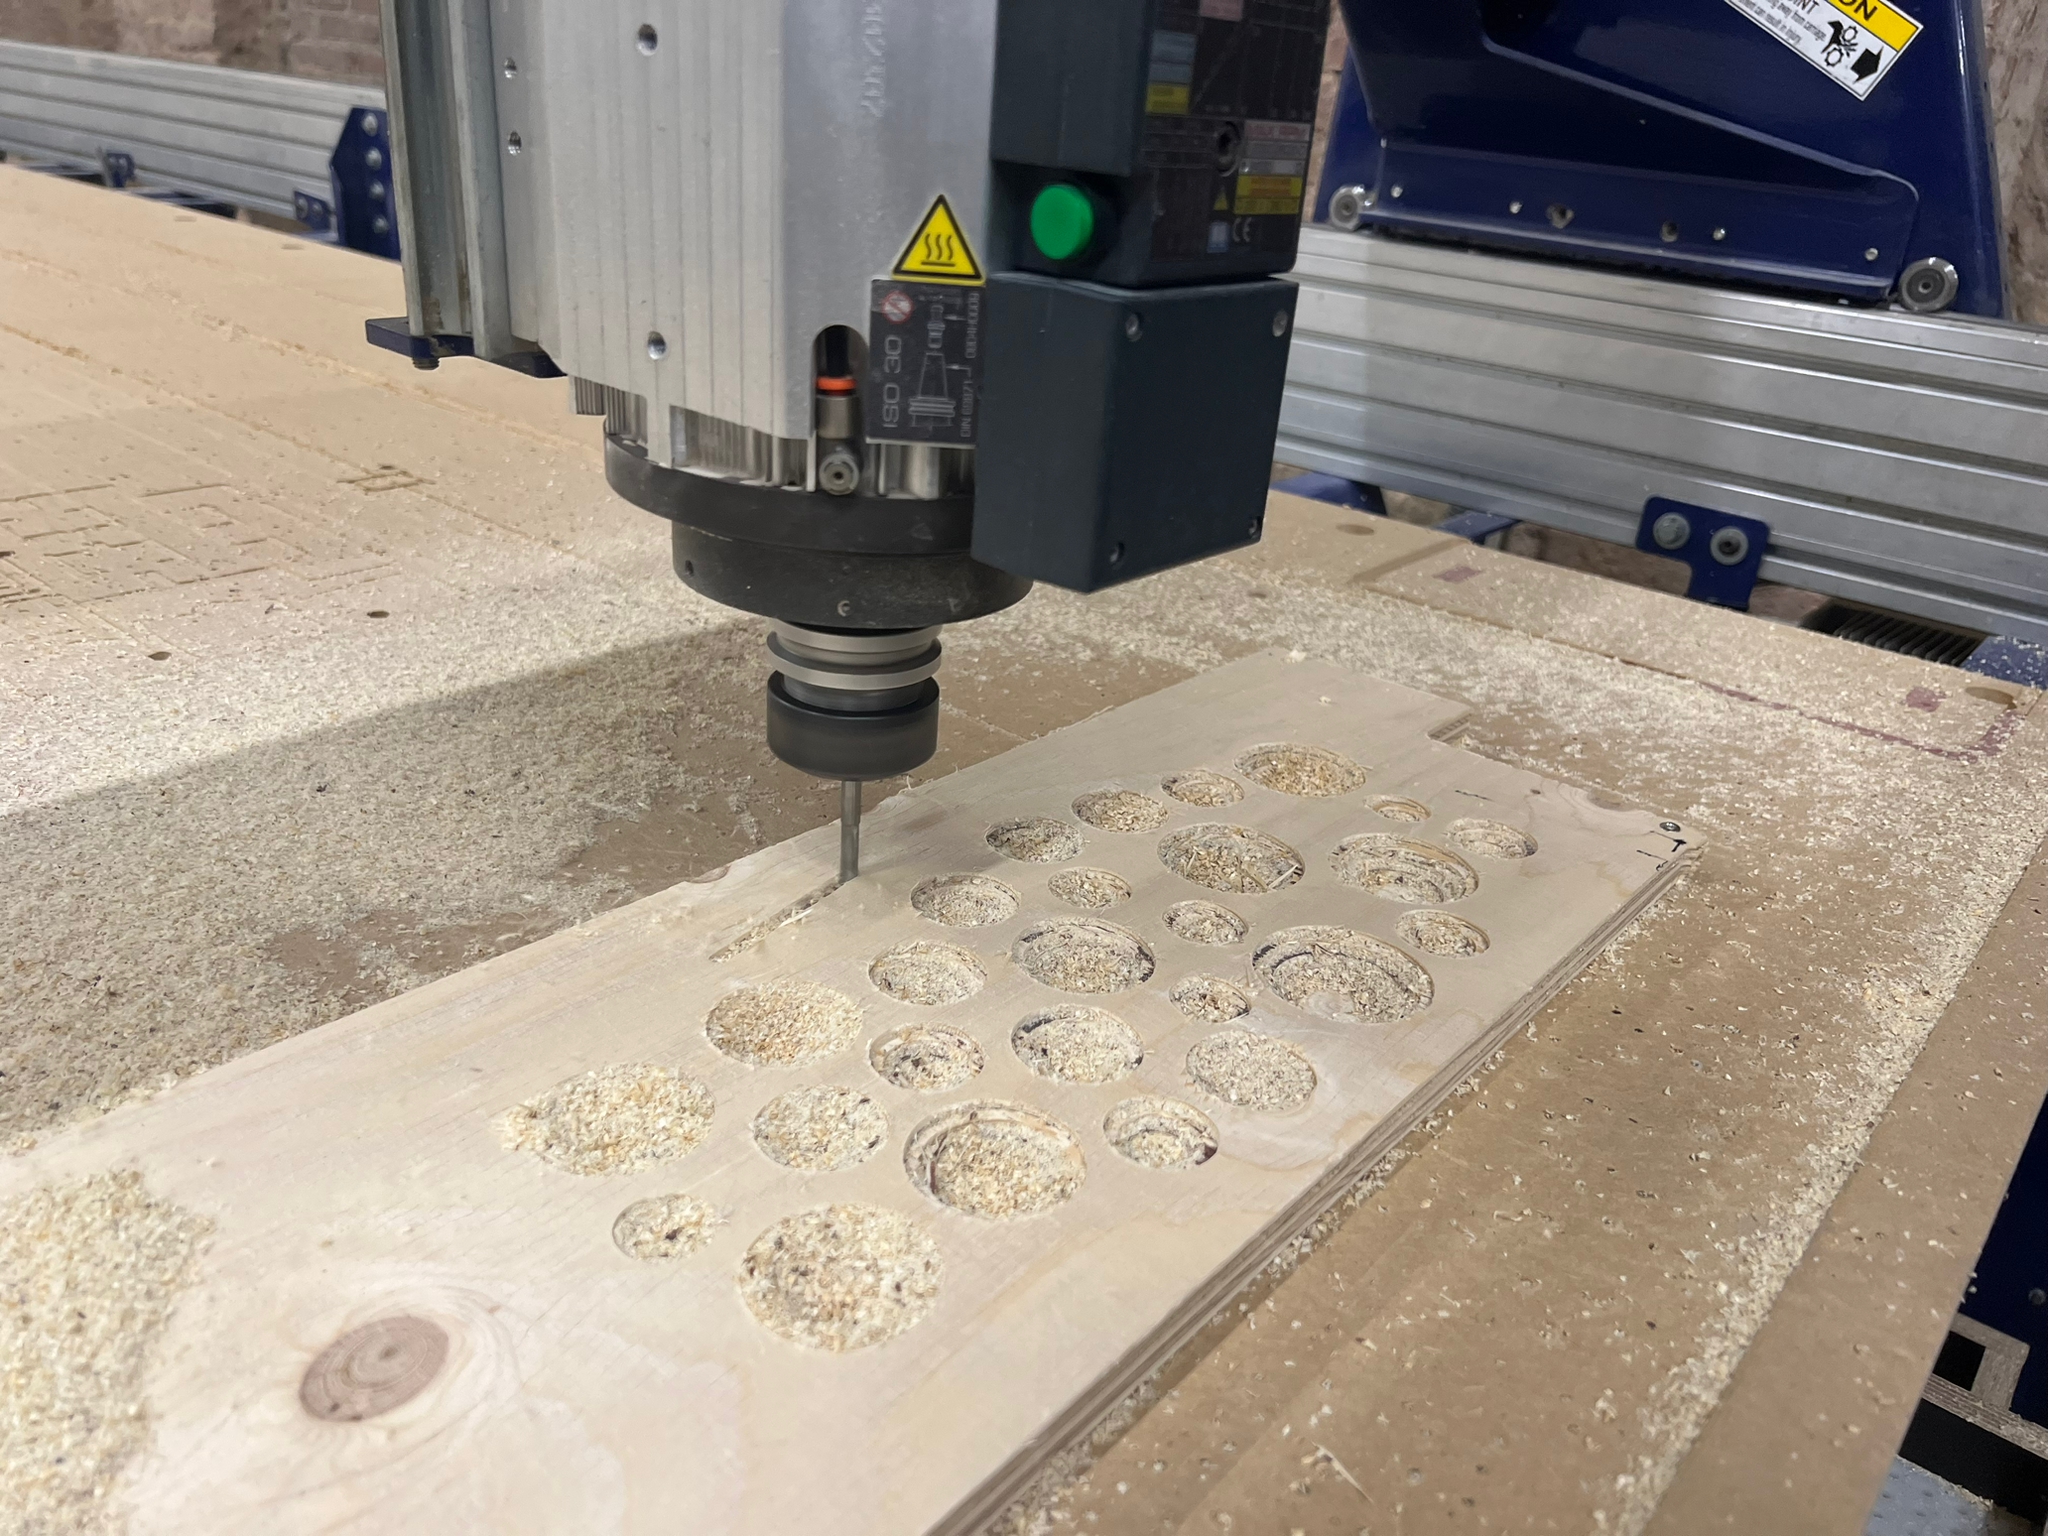
CNC MILLING
The CNC Milling machine produces high accuracy parts from Rhino or CAD with a high level of automation.
As a subtractive manufacturing technology, the CNC cuts away pieces from a block. This can create complex 3D forms in relatively quick timeframes.
For this exploration we are provided a hexagonal module of 360x180mm.
We developed a circular pattern structure that could have different heights, depths, and areas all through a grasshopper script. We imagined the script being tailored depending on weather and lighting needs for a facade.
Pocketing
Flat Mill
Flute: 2
Diameter: 6
Spindle Speed: 12000
Cut Direction: UpCut
Stepdown Control (dZ): -3mm
Stepover Control:-
Total mill time: 20 min.
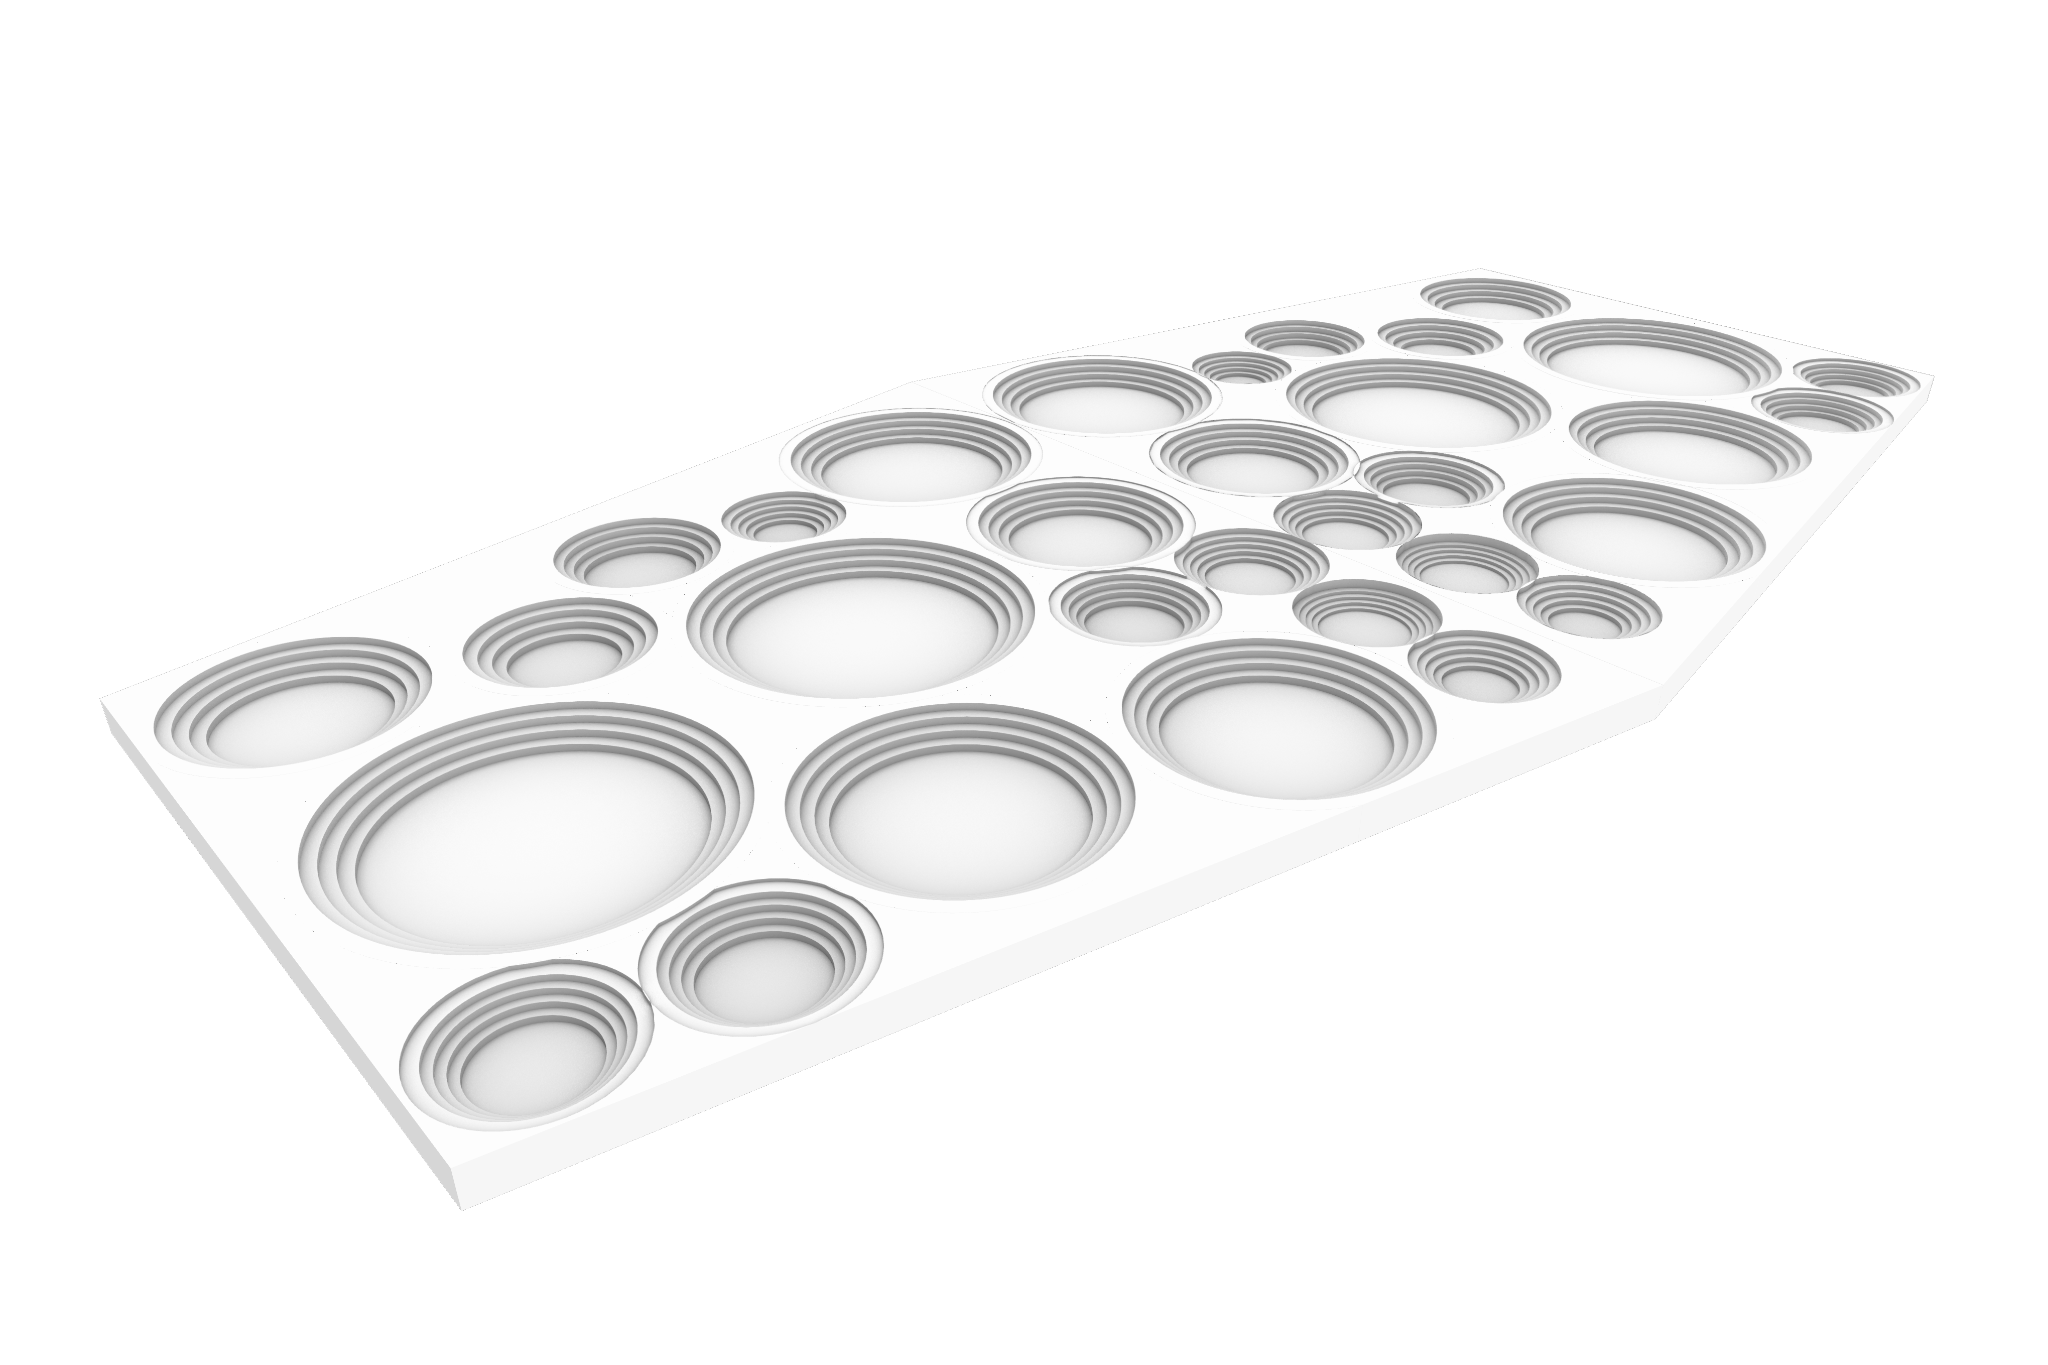
Material: 30mm Plywood
Machine: Shopbot
Post Processor: .sbp
Workpiece volume – 360x180x30mm