Contents
Introduction
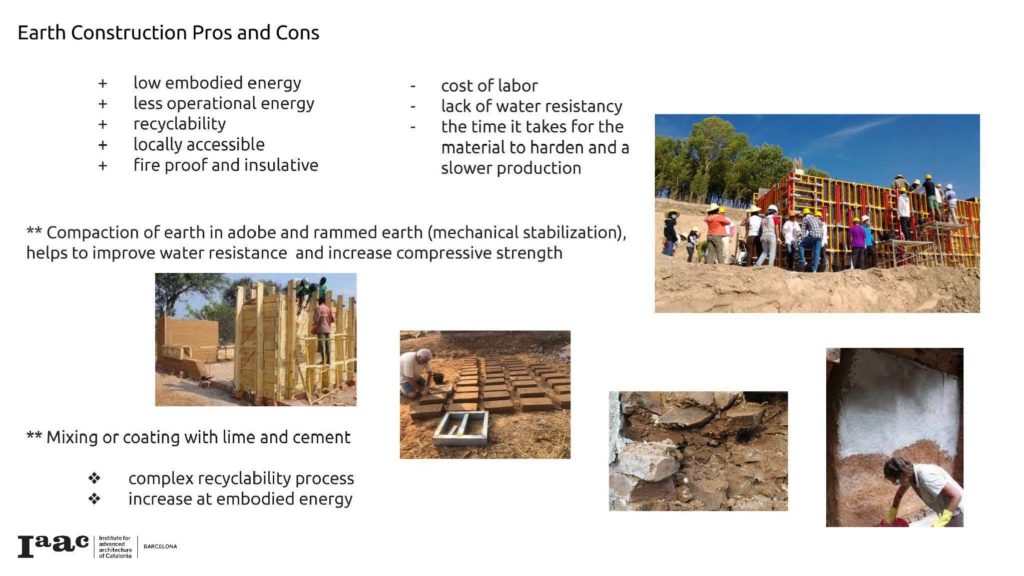
Optimizing 3D printing with earth through natural stabilization techniques
How to improve the earthen mixtures in order to optimize the 3D printing process ?
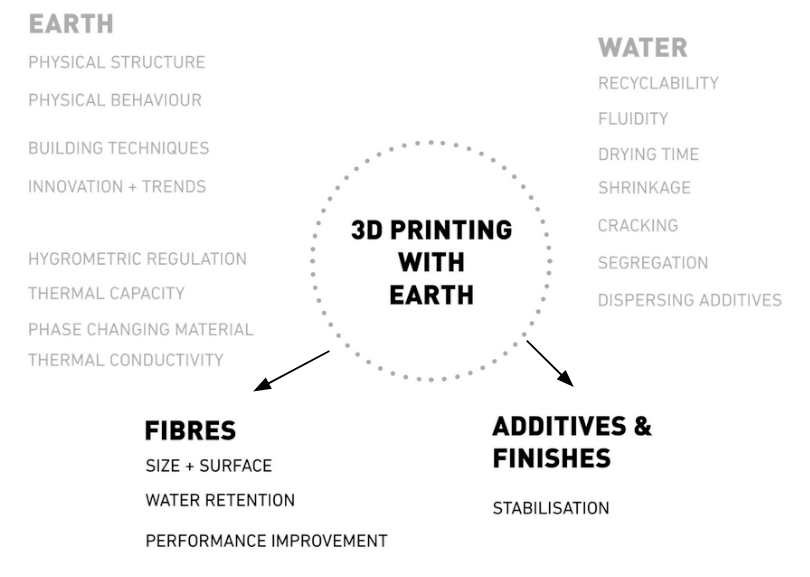
Research topic:
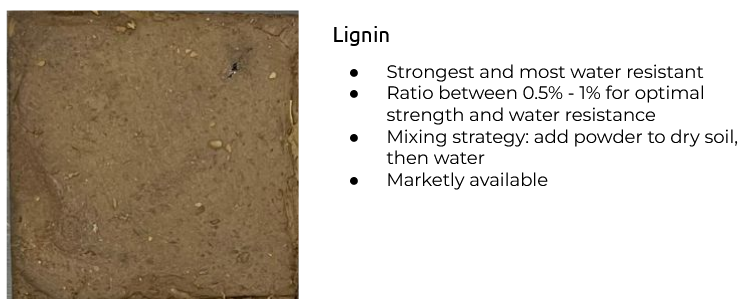
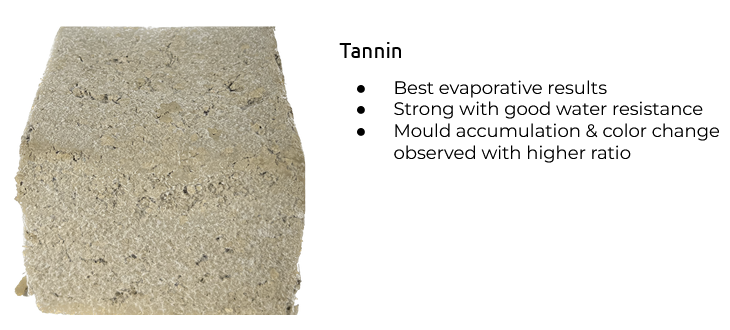
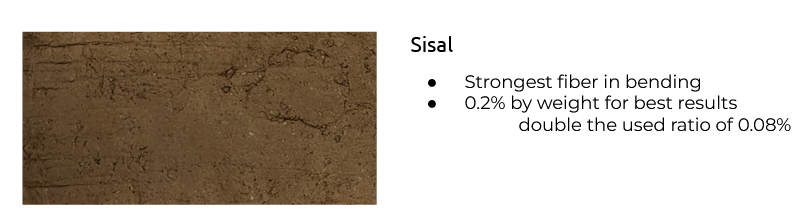
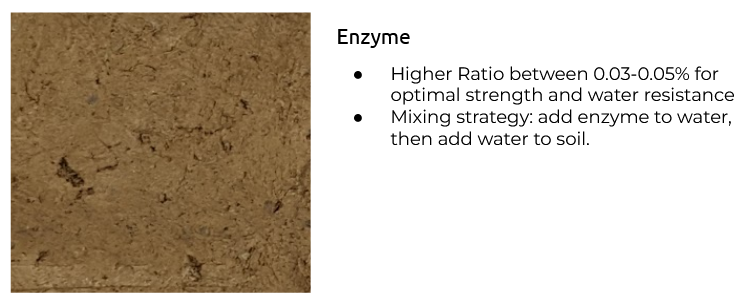
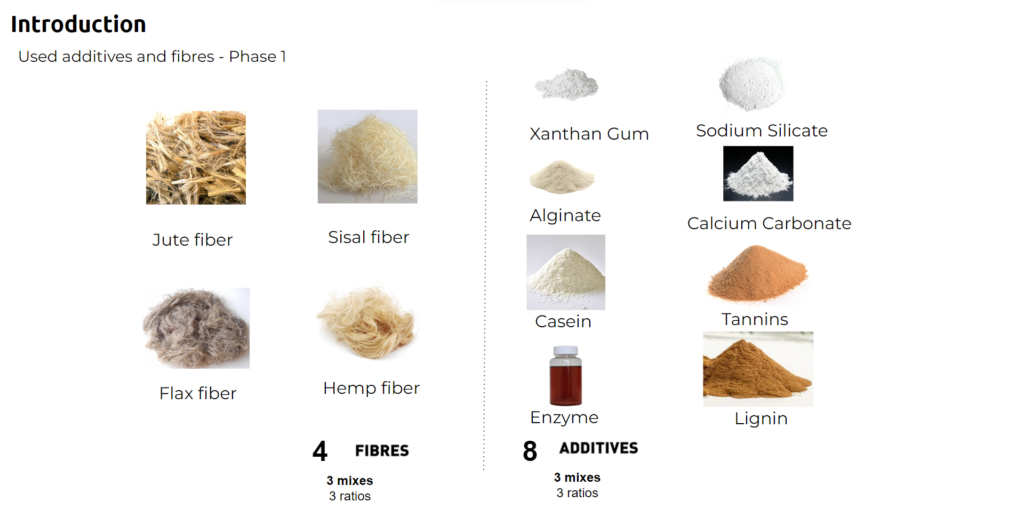
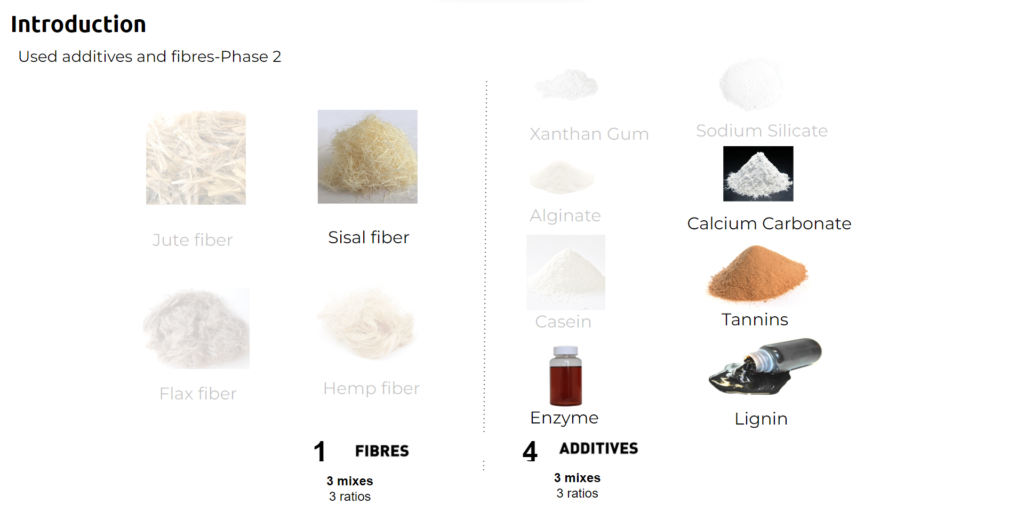
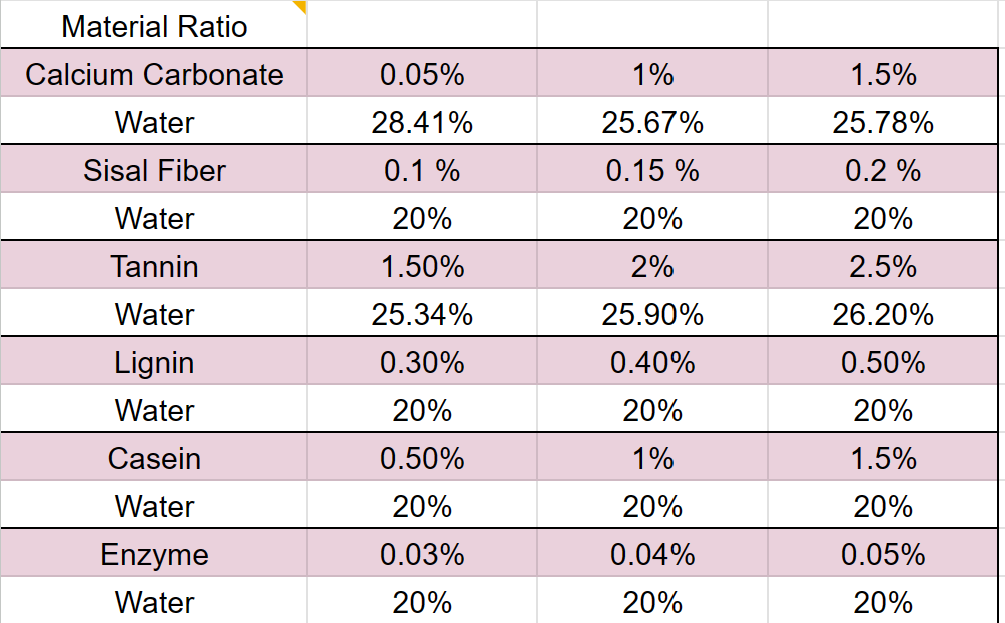
Used additives and fibers
– Background and Literature Review
In earth construction, understanding the fundamental states of earth material is crucial. There are four well-known states of earth material: Dry or solid state, Humid state, plastic state, and liquid state. Each state plays a role in defining the suitability of the material for various construction techniques.
- Dry State : with minimal water content earth material exhibits high stability, strength and load-bearing capacity.
- Humid State : with a slight increase in moisture, this state is particularly significant for construction processes that require a certain level of compactness and cohesion, without the fluidity of more water-rich mixtures.
- Plastic: earth material contains enough moisture to be moldable and easily manipulated while still maintaining enough structural integrity.
- Liquid: earth material is saturated with water and can be used for specific applications where pourable or fluid material is required.
With these material states, various earth construction techniques have been developed over the years,like Rammed Earth, Adobe bricks, extruded and Poured earth. Each fits to different material states and construction requirements.

Is 3D Printing Really a Solution?
The advantage of 3D printing technologies in architecture, especially with earth materials, change the way we approach building design and construction. 3D printing offers architects design freedom. It enables the creation of complex, organic shapes, moving beyond the limitations of conventional building methods. In contrast,it allows automation of a large part of the construction process, reducing labor costs and speeds up project timelines.
Experimentation framework
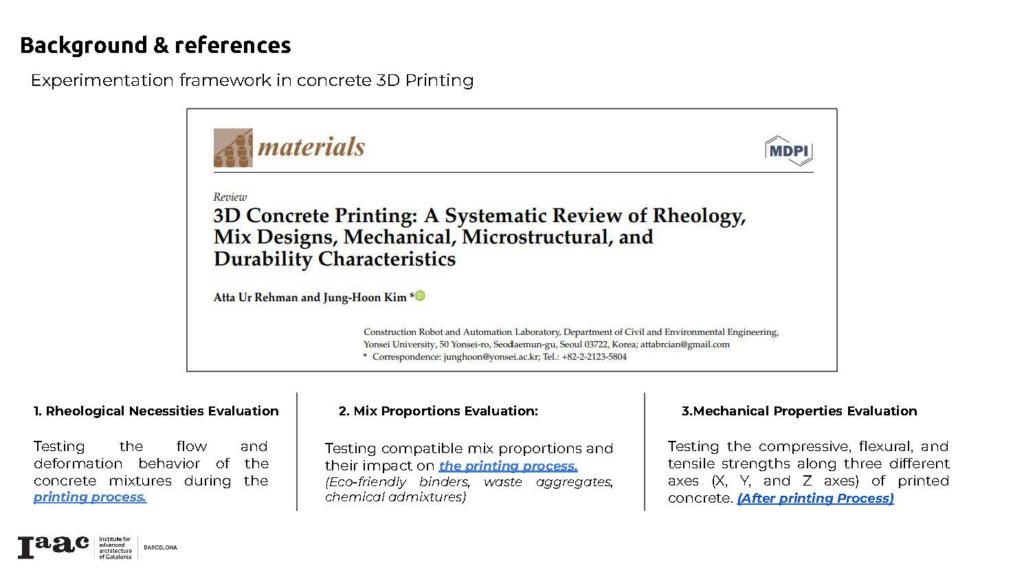
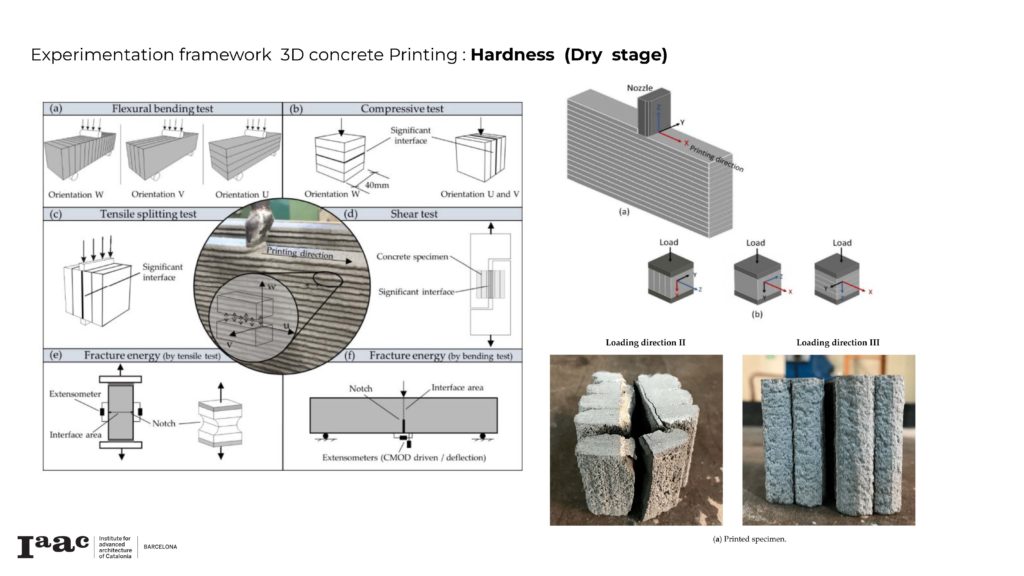
Experimentation framework in 3D printing earth materials presents a unique challenge due to the lack of direct research and studies in this area. To address this, we turn to concrete 3D printing, which offers valuable parallels and insights for experimentation framework.
Concrete 3D printing has developed an experimentation and testing framework, including aspects like material consistency, additives, printability, layer adhesion, and structural integrity.
By exploring these protocols, we can adapt and define a specific experimentation framework for 3D printing earth material.
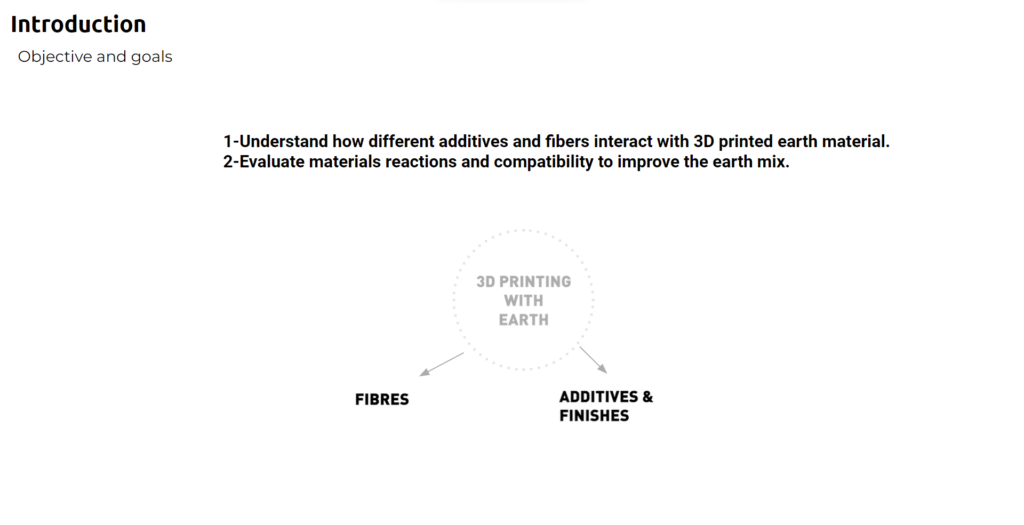
Research Methodology
For our material research, we tested different earth mix compositions to test their strength in three different aspects: their compressive capacity, tensile strength, and resistance to erosion by water.
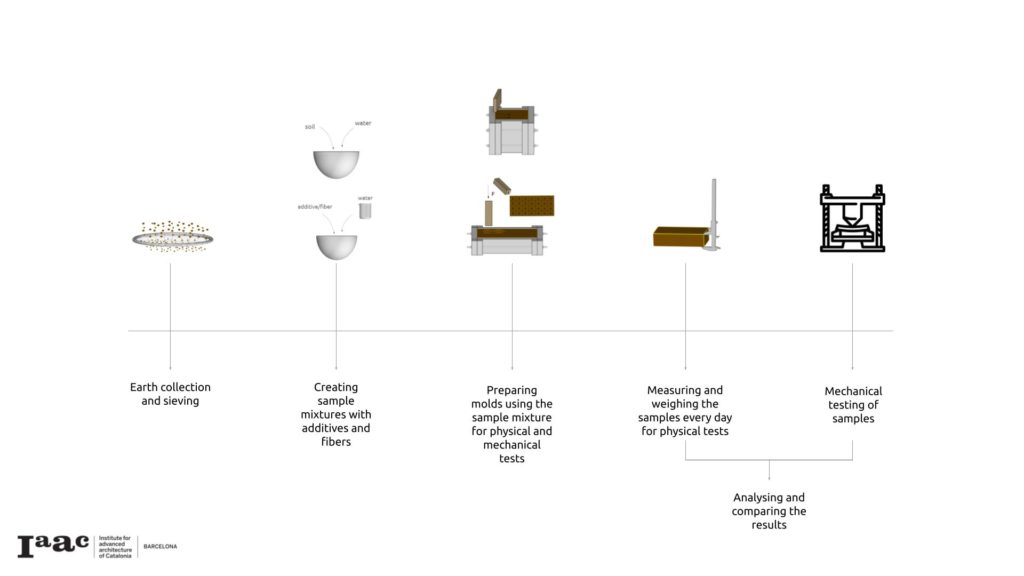
The steps of our investigation were:
- Extraction of the earth and sieving
- Preparing the mixes
- Molding
- Testing
- Analysis of the data collected
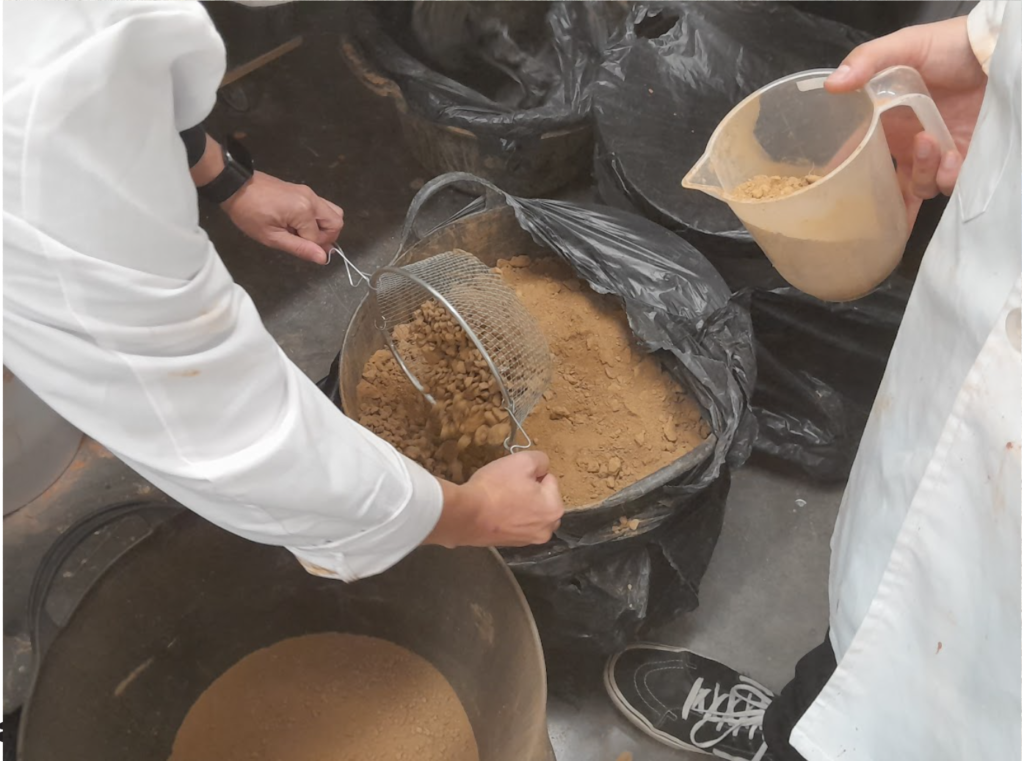
Extraction of the earth
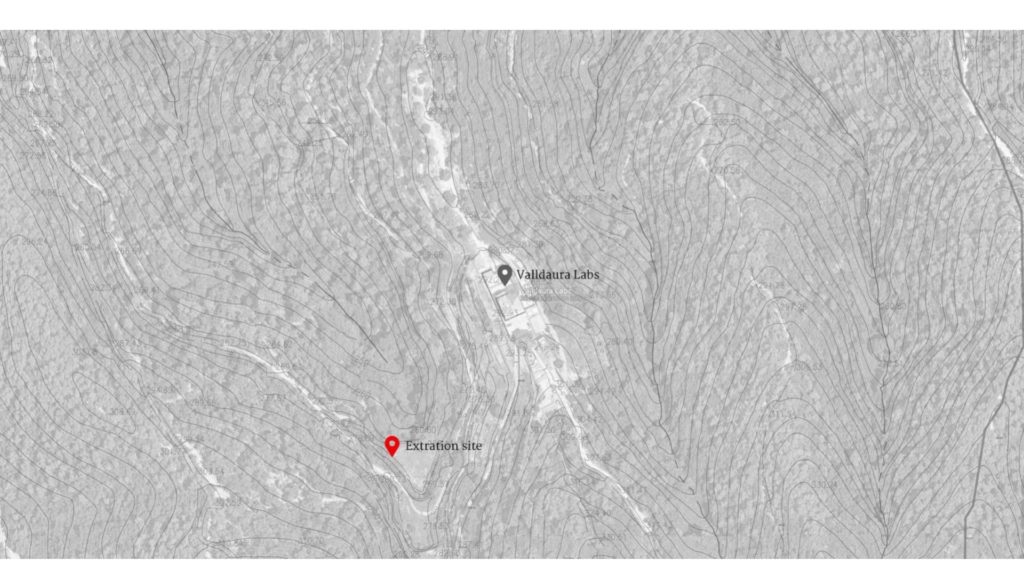
The earth is excavated at Valldaura, next to the location of the Winter 2024 prototype. For extracting the material, we needed to remove the first 20- 40 cm of surface material, since this layer of the earth has more organic material, which is very valuable for the forest and not useful for construction.
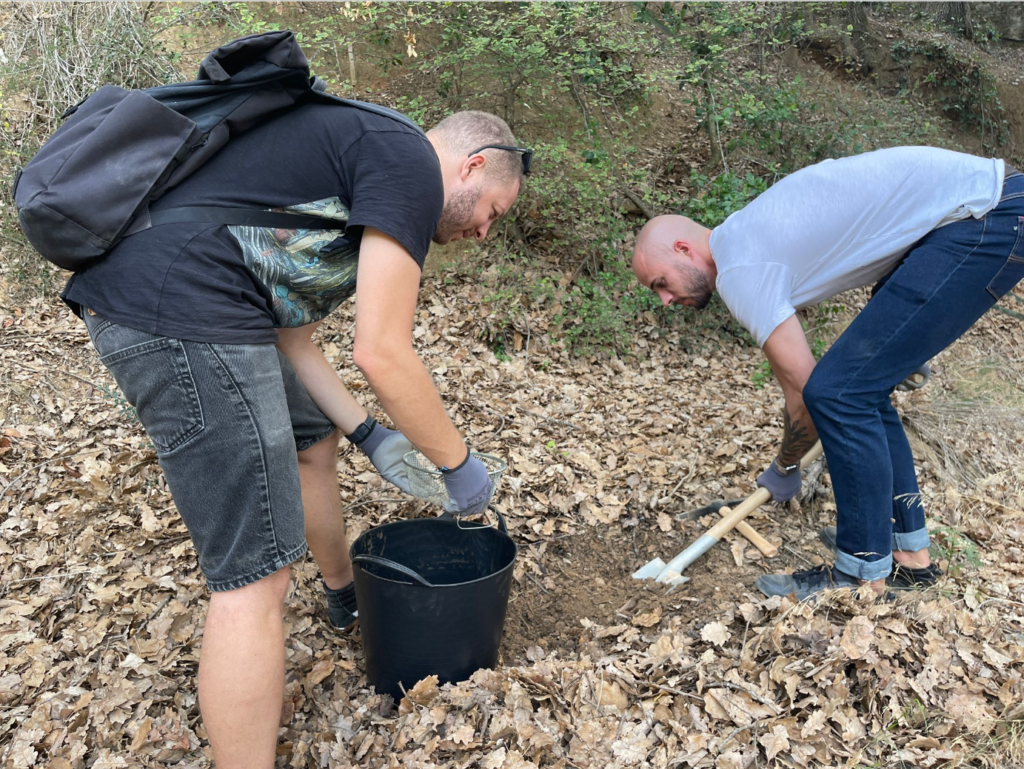
Enough material has to be retrieved to be able to make all the different mixes. Then at the laboratory, we sifted with a mesh of 5 mm.
Preparing the mixes
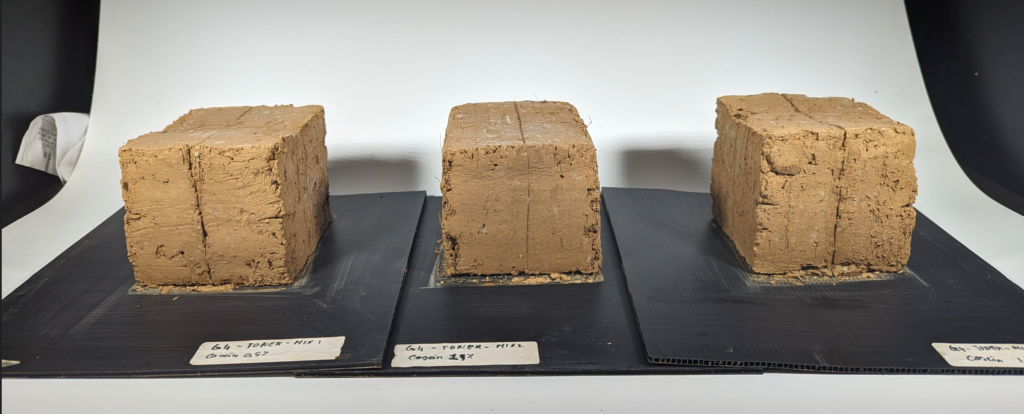
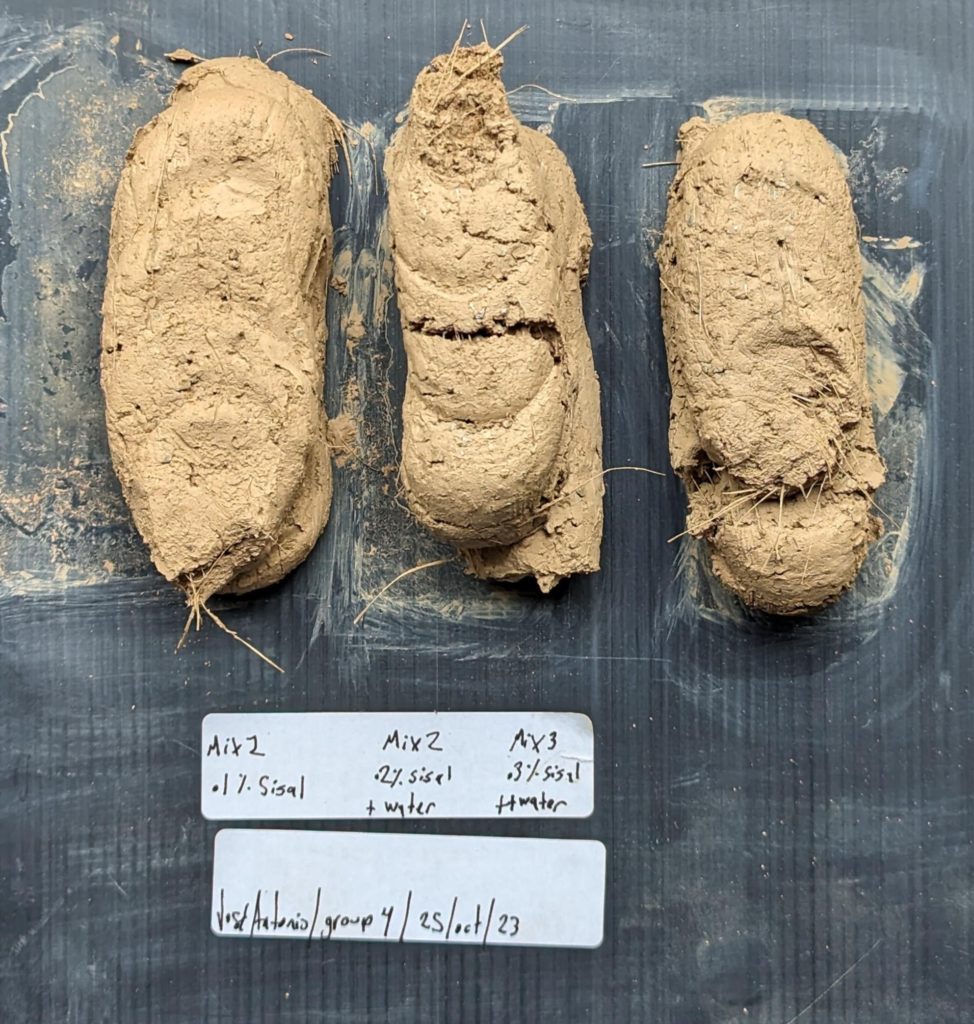
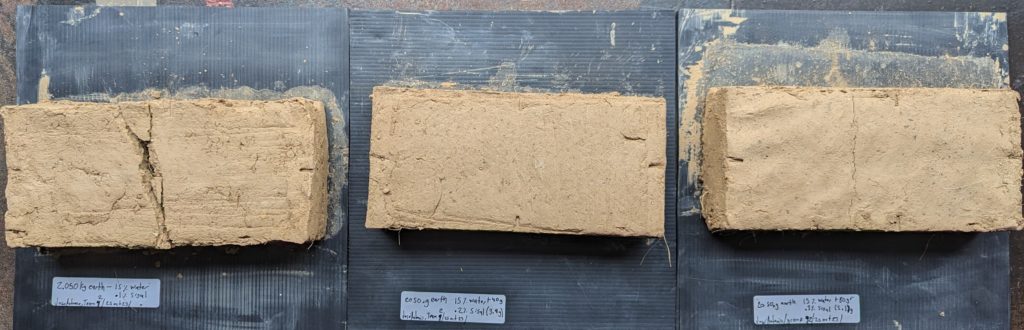
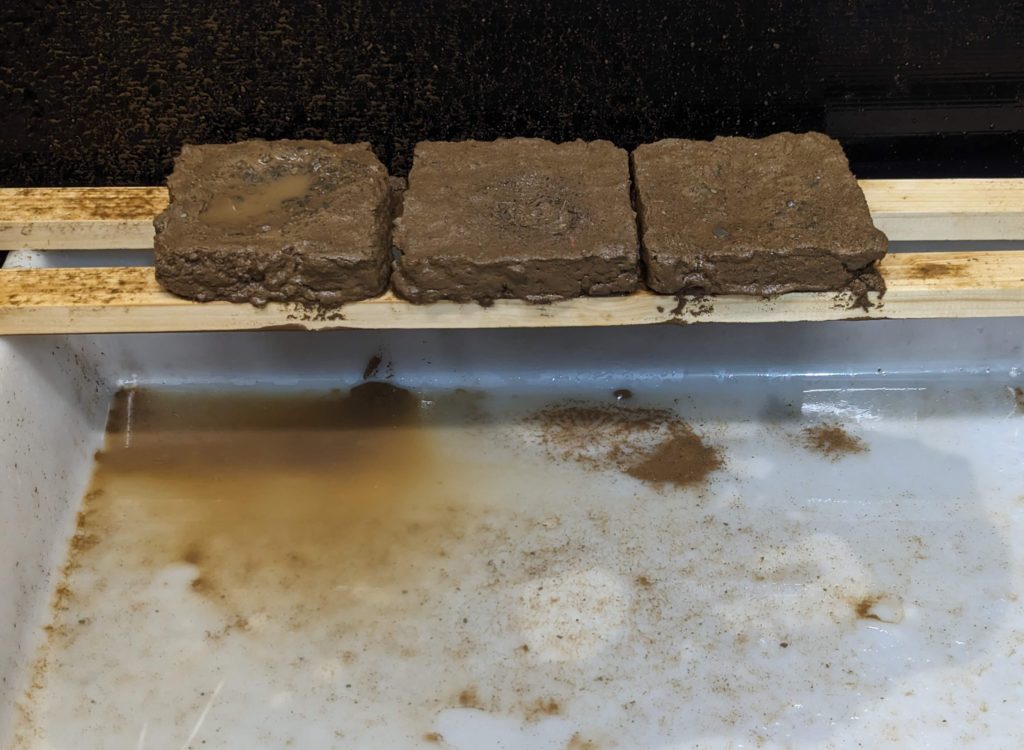
Once sifted, we can prepare different mixes by adding the fibers and aggregates selected for the experiment: calcium, carbonate, sisal fiber, tannin, lignin, casein, and enzyme, in the prescribed proportions. To make sure we have a common base of observation, we make sure to have the same quantity of water in all the mixes.
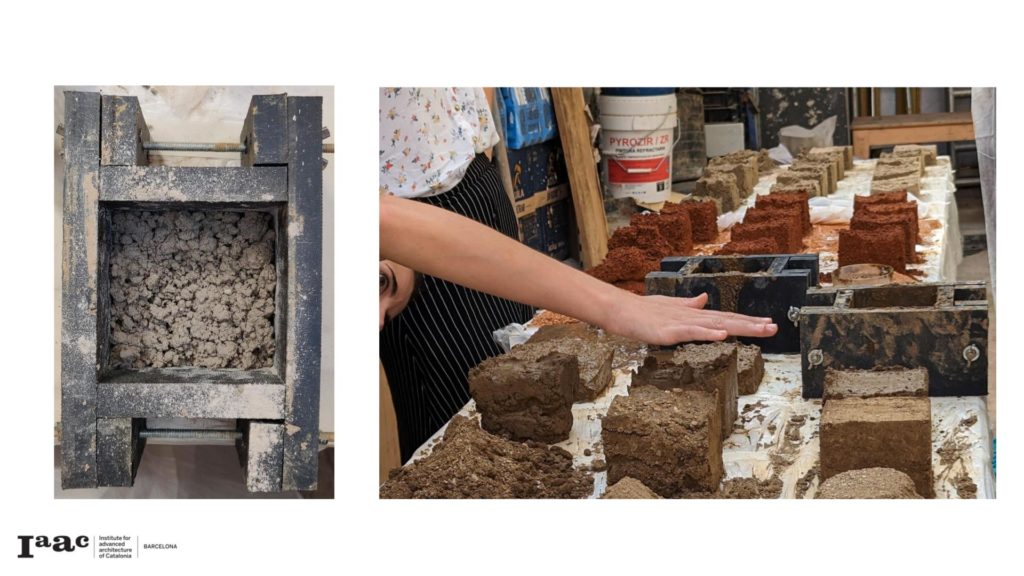
The goal at first is to have a material consistency – the result of the mix of earth and water – extrudable and printable, so that we can add more water if we see it is necessary, which can lead to adding more water than was first intended. The new mixes are then poured and rammed in different cubic molds of 100 x 100 x 100 mm for the compressive test and 200 x 150 x 100 mm for the tensile test. The molds provide a regular, controlled shape that we can use to compare the differences in material quality of our mixes.

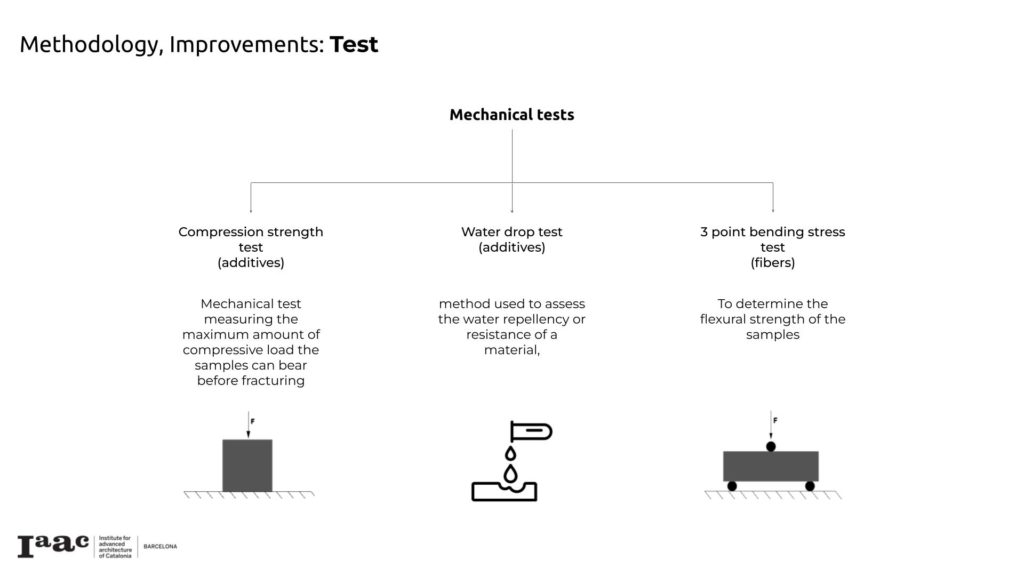
Test
Two categories of tests were done: a physical test (that measures the extrudability, the percentage of evaporated content, and the volumetric shrinkage of the mixes) and a mechanical test that measures the compressive and tensile strength and the resistance toward the water.
Physical Tests
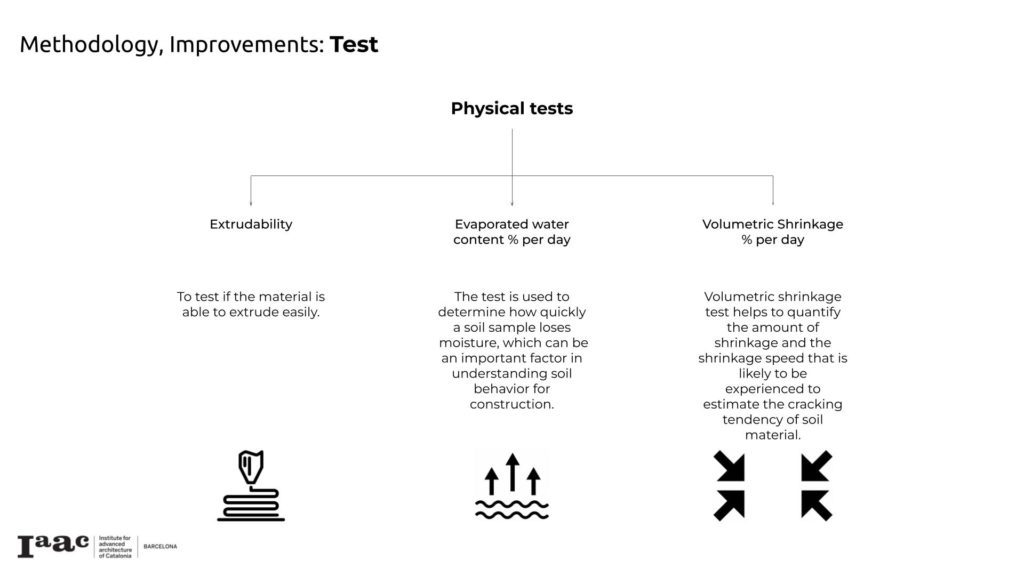
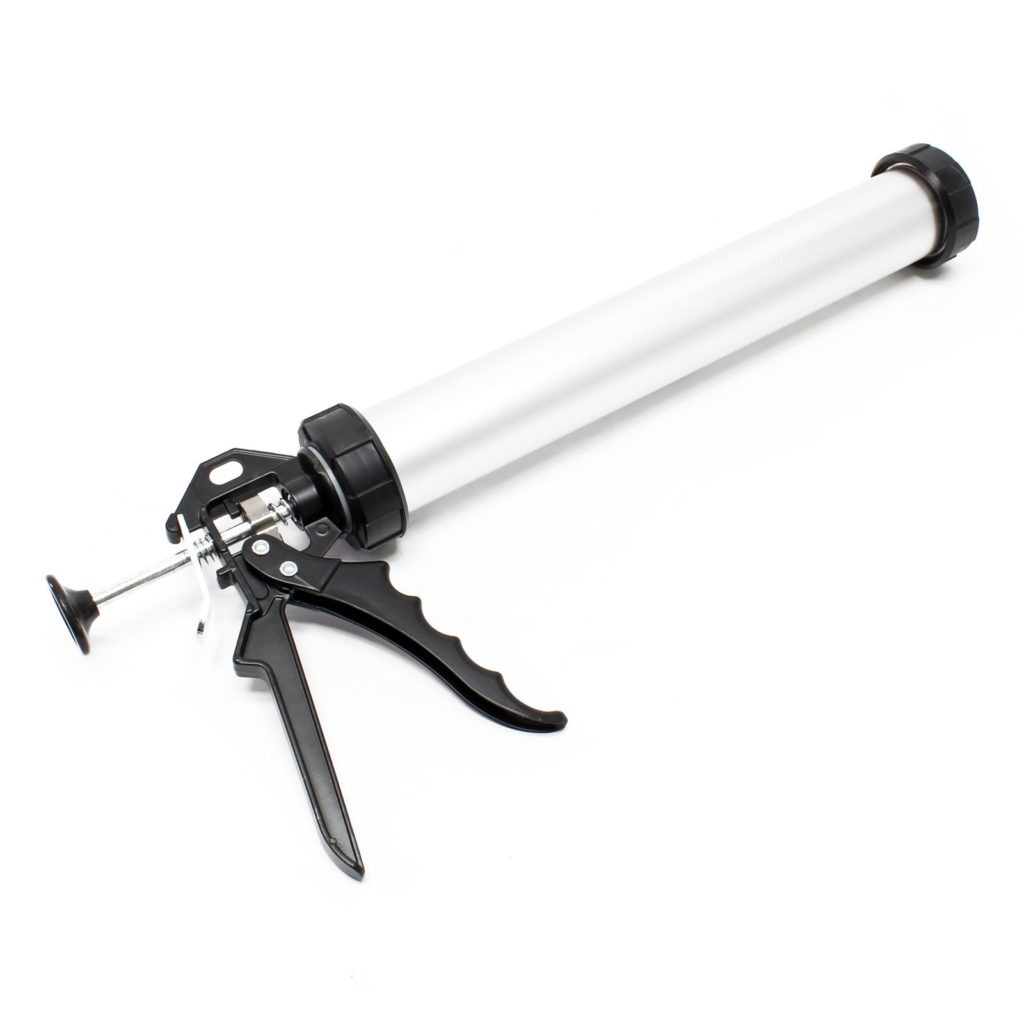
Extrudability test: Every mix, before being poured and rammed into a mold, was extruded in a cartridge gun with a nozzle to test how difficult it is to extrude material from that mix, ensuring that all the mixes can be used for 3d printing.
Evaporated water content and volumetric shrinkage test.
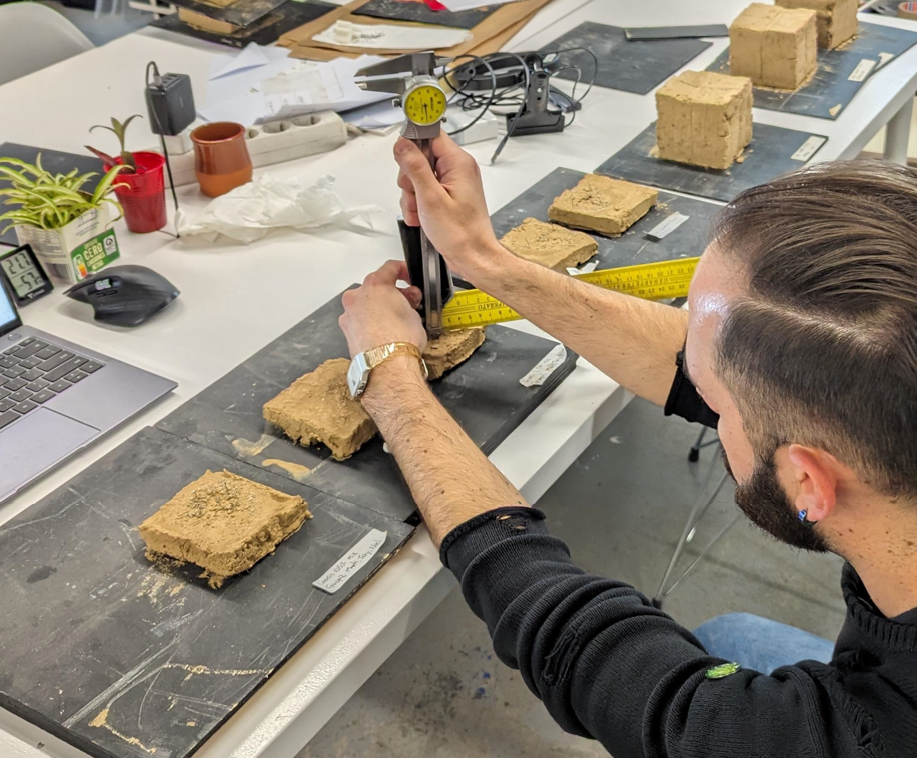
The evaporated water content and the volumetric shrinkage test are done by observing and measuring the mixes during the drying process. For the evaporated water content, we weighed the samples each day to record the progressive reduction of mass and compared it to the water content added to the mix. This difference tells us how much water is still inside the mix. The speed is crucial since more water content loss means more material can be printed in one day as it dries faster, but too fast and we can have cracks that may develop in fissures.
For the volumetric shrinkage, we measured the height, width, and depth of the mixes based on fixed points made right after the modeling and compared them to the initial measurement each day. Less shrinkage the better, the slower the better.
Both tests were expressed in percentages related to the initial condition.
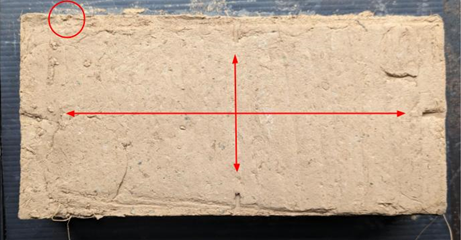
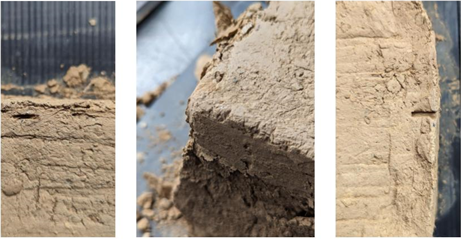
The image above shows a collection of photographs showing the marks made in the rectangular earth mixes to signal points of measurement.
Mechanical Tests
After two weeks of drying, we performed the mechanical test with dry cubes to simulate how well these mixes could perform in a 3d printed building.
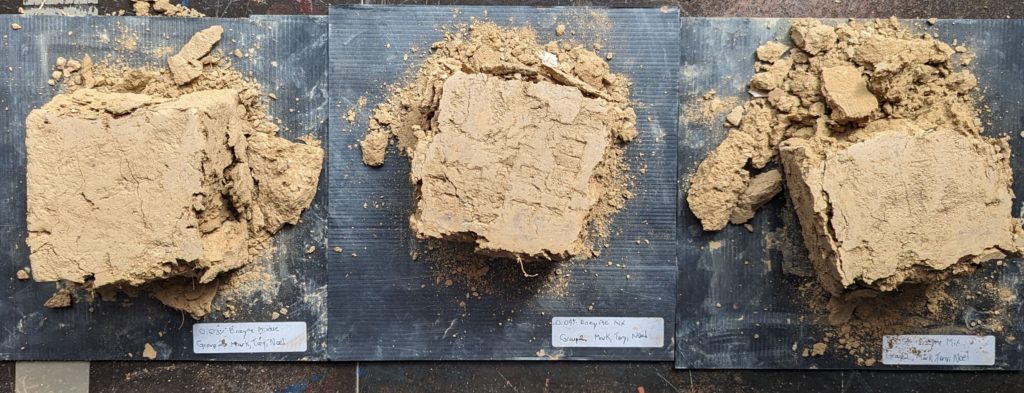
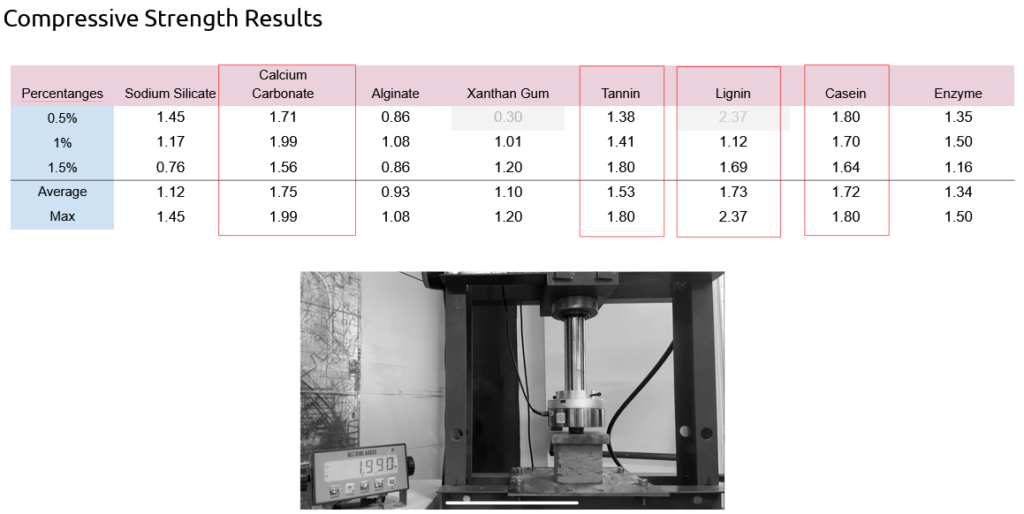
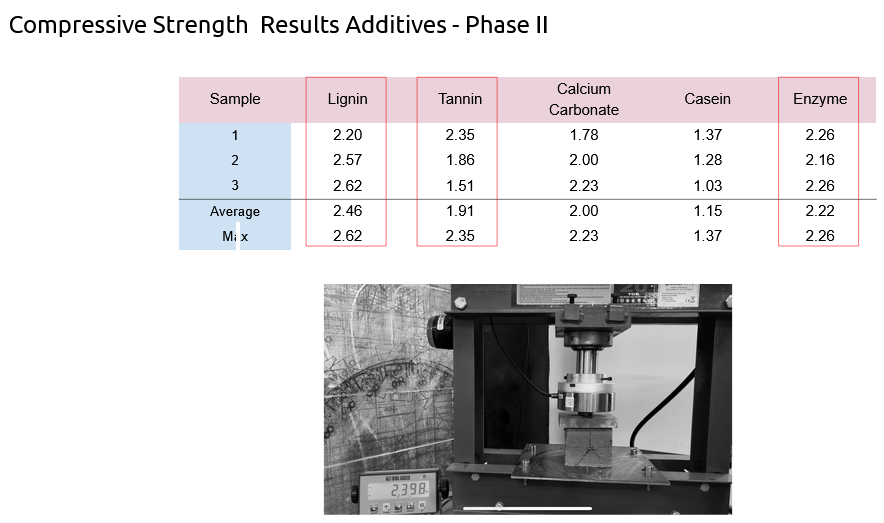
Compression Strength Test
The samples selected for this test were the ones with additives added, as we are looking to improve the capacity of compression for our earthen 3d printed mix.
The samples were placed into a press with a scale as the tests consisted of applying a constantly increasing force on the cubes until it breaks. The maximum force registered on the scale becomes the result of the test, as it is the one seen just before the sample fails and cracks. We use a mobile camera with the slow motion function to record a video
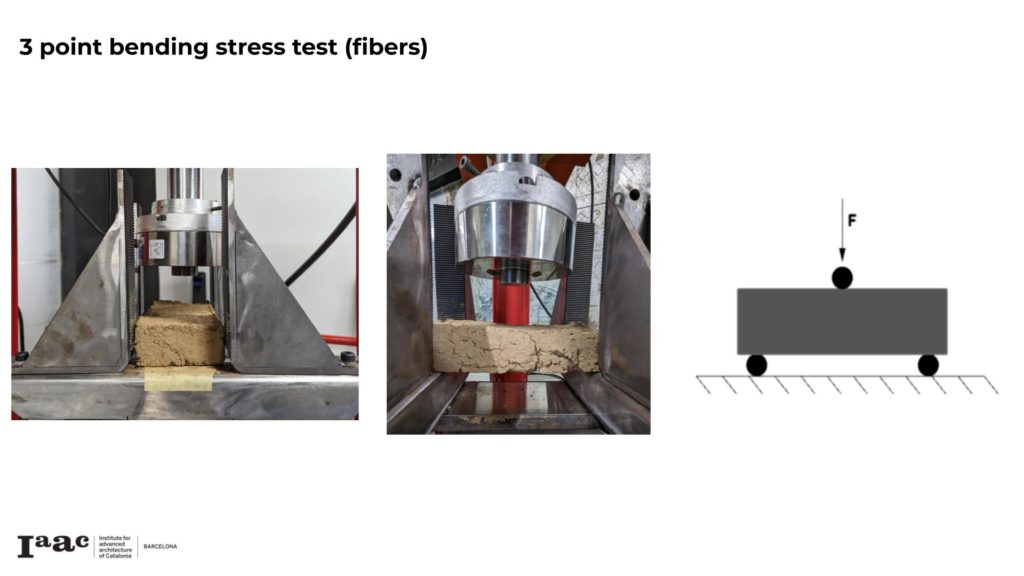
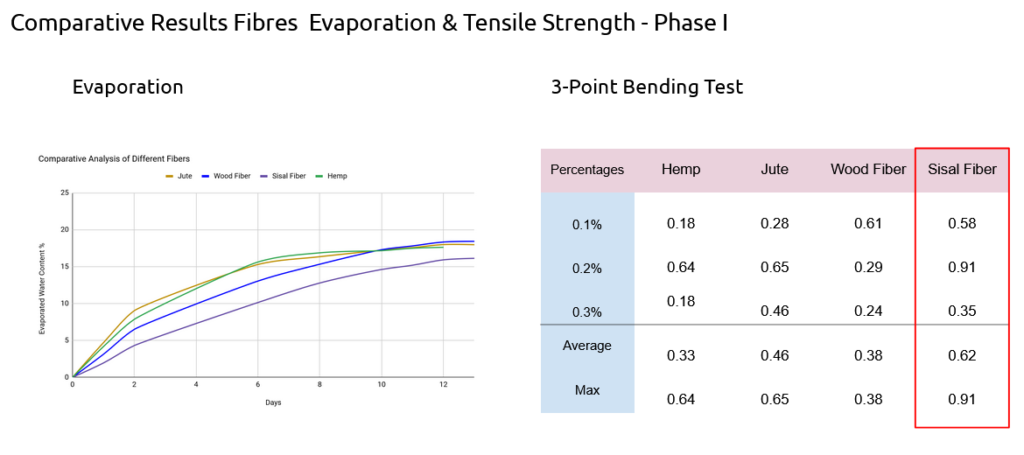
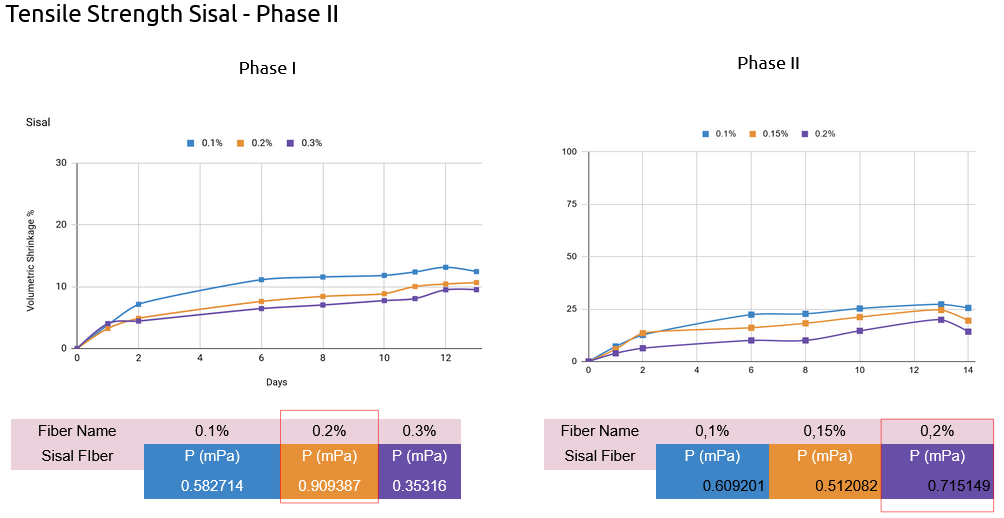
3-point bending stress test.
This test is very similar to the compression test, but with a different configuration that allows us to focus on tensile strength. We use our brick-shaped earth sample mixes with fibers in it, since we are looking into how well these fibers can improve this mechanical property.
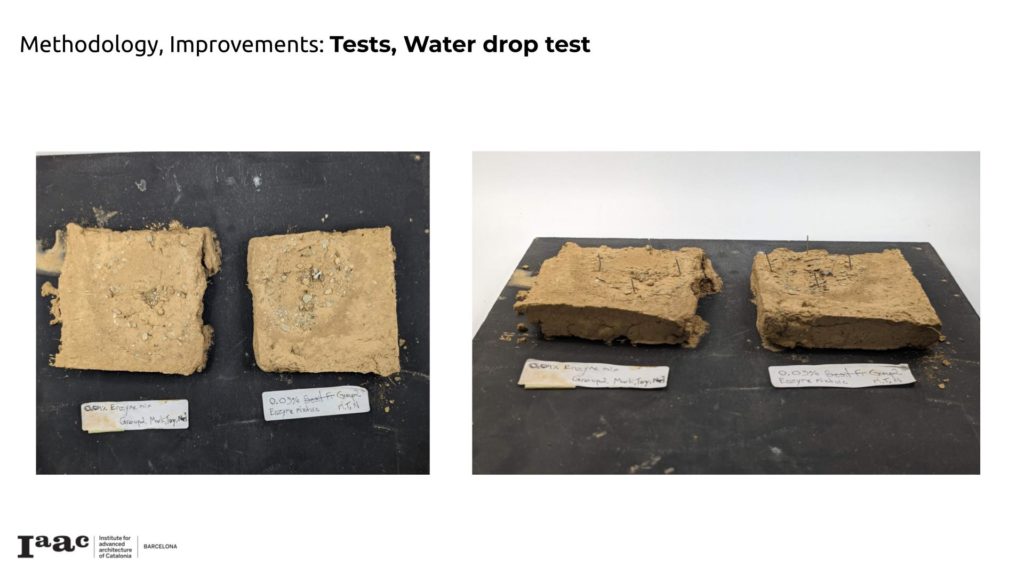
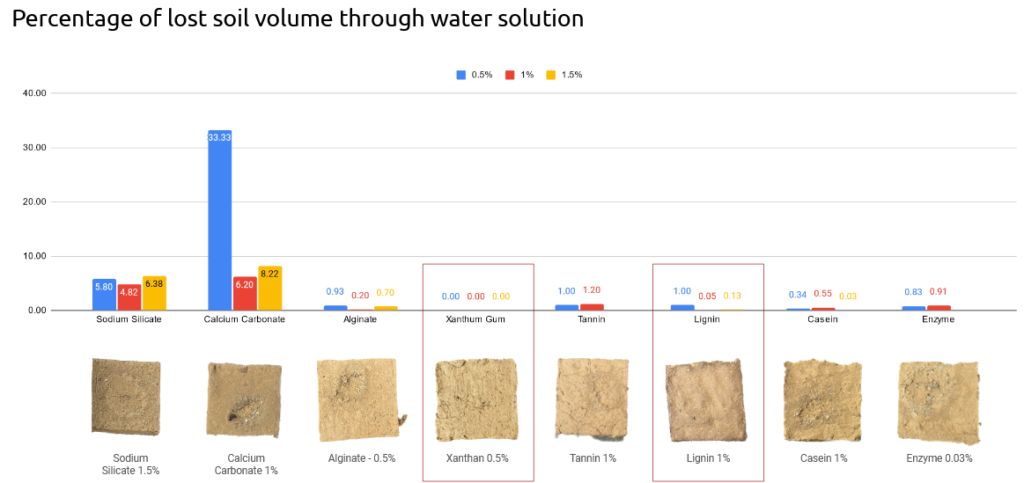
Water drop test
This test was performed on smaller bricks with the mixes being tested for additives. The test consists of letting water drop from 1 meter in height over the same spot in the middle of the samples for a limited period of 10 minutes. This method was used to assess the water repellency or resistance of a material.
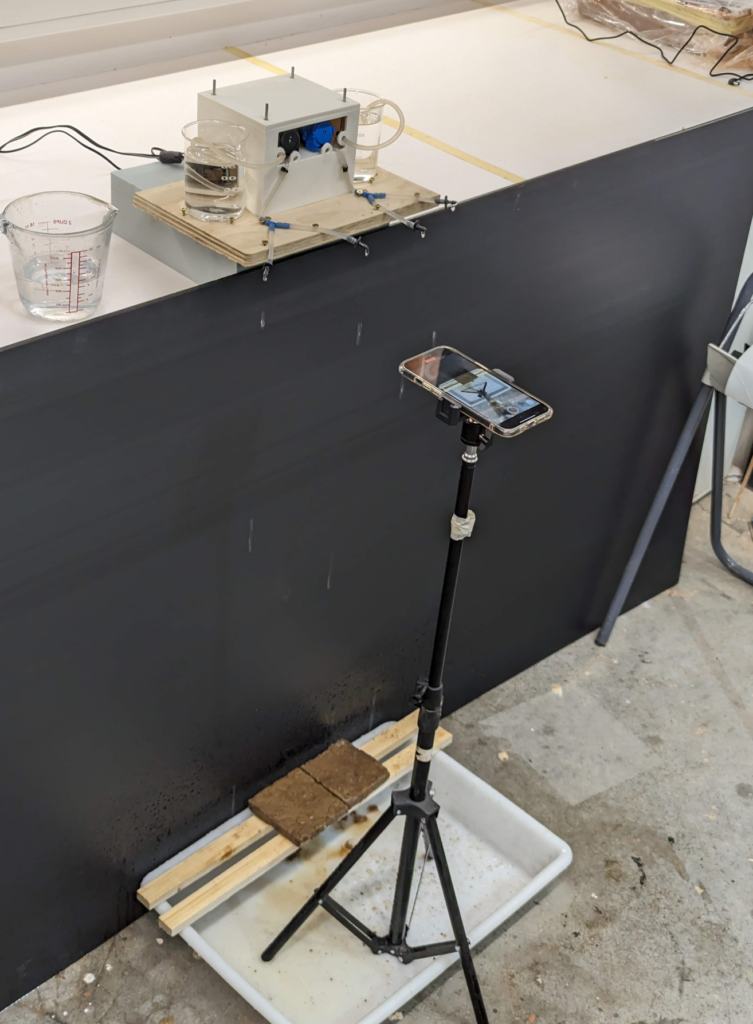
After the test, we measured the void that the water made in the tablet.
All these tests helped us to collect data that will be crucial for compare the different mixes and most of all the influence of the different additives in their behavior regarding the proportions added.
Results & Conclusion
Phase I – Results
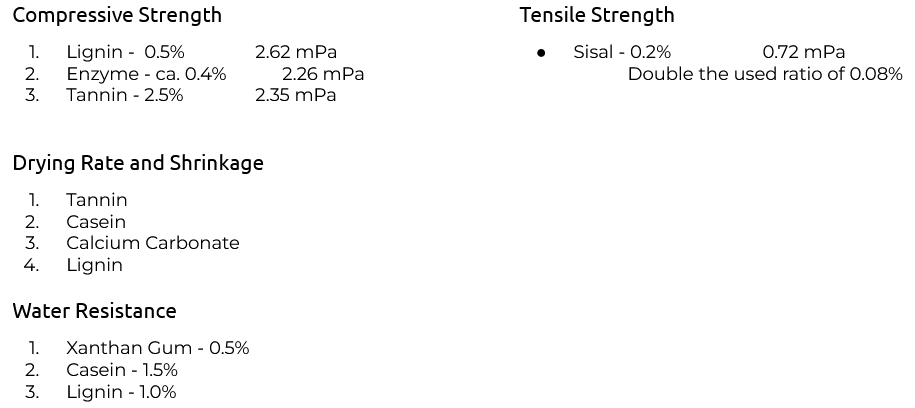
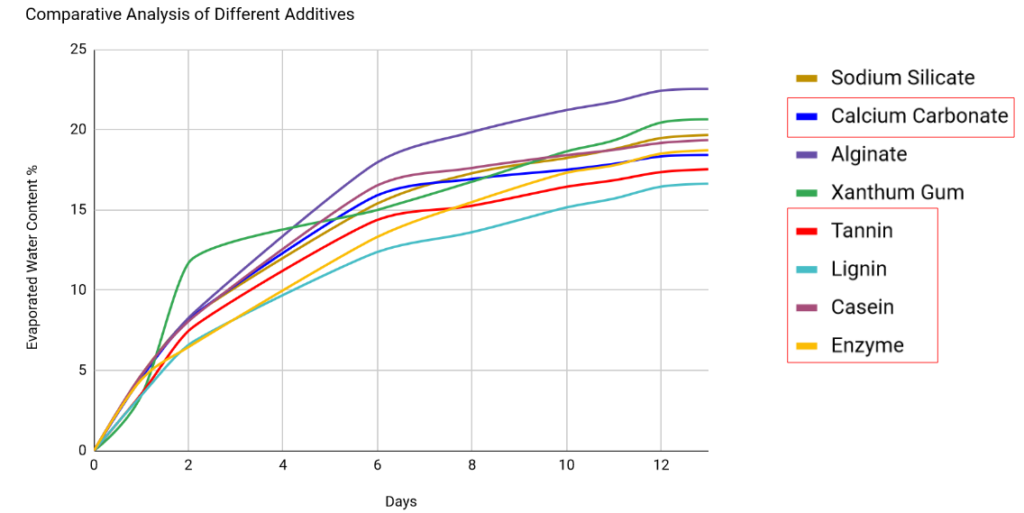
Additives – Evaporation, Water Retention & Compressive Strength Results
Fibre – Evaporation & Tensile Strength Results
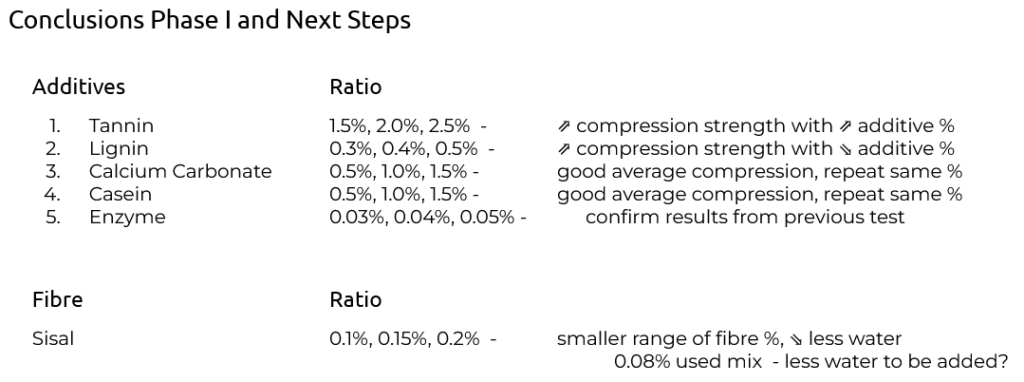
Phase I – Conclusions
Phase II – Results

Conclusions