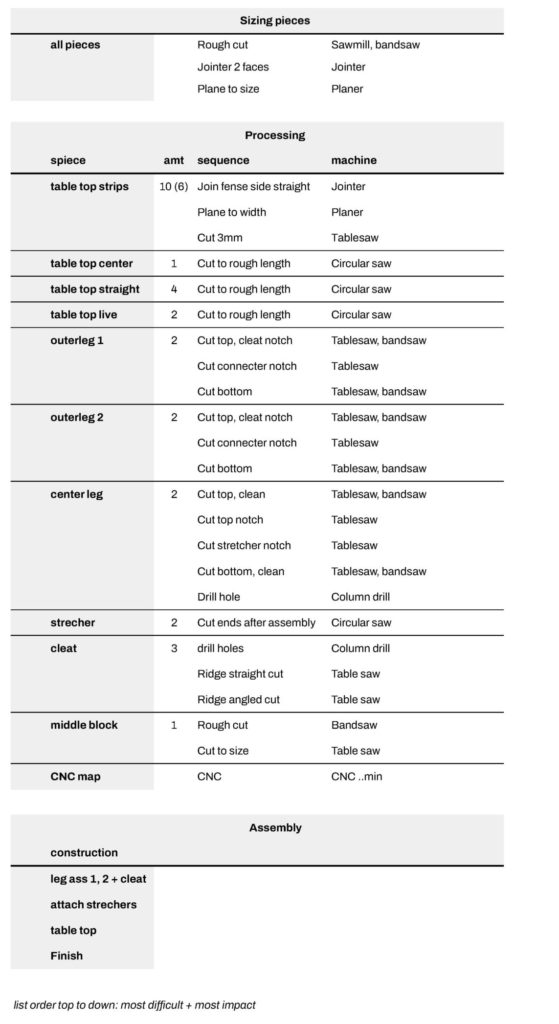
This post shows the different products that I produced and the fabrication methods and machines that were applied during the first semester, using the machines of the carpentry and the Green Fablab at Valldaura Labs.
Table saw jigs
The table saw jigs serve the purpose of making angled or elevated cuts on the table saw and to reproduce these precise cuts repetitively on the pieces of wood for a table. Initially quick, hand-built prototypes were made to test the type of jig whilst producing the first prototype pieces for the table structure. After proving that the jigs sufficed in making cuts to recreate the table plans, they were rebuilt with CNC-milled variants.


Prototype Collaborative design studio table

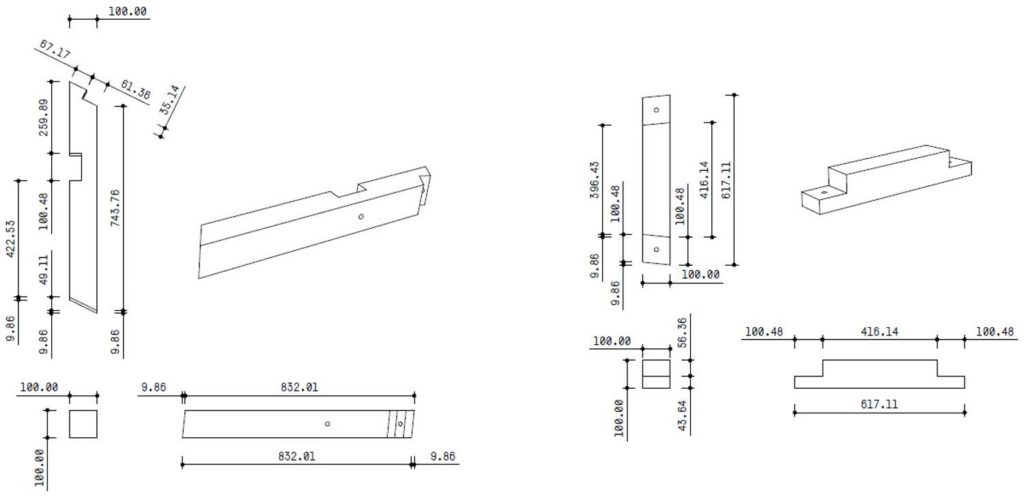


The process of making prototype parts provided valuable insights into information that was missing in the printed drawings. Furthermore, experience in the actual processing sequence of the wood gave good insights. Notes were written on the pieces of wood themselves and on the drawings.
Marking the pieces on all sides proved beneficial when working with angeled cuts to check the alignment of the wood at the saw. Also, giving the wood to be removed a hatch made sure the markings are clear when at work in the carpentry.
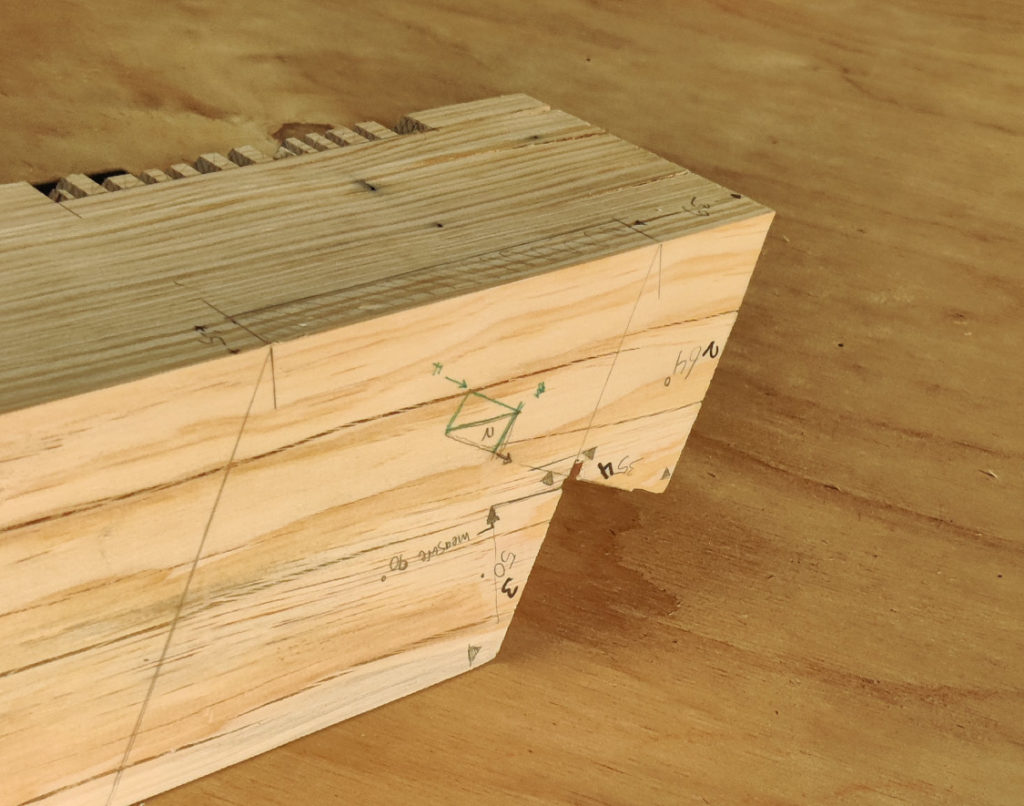


For the table leg connection piece, a notch needs to be made that runs at an angle through the center of the wood. A jig with supports was made to level the top of the cut parallel to the saw blade.


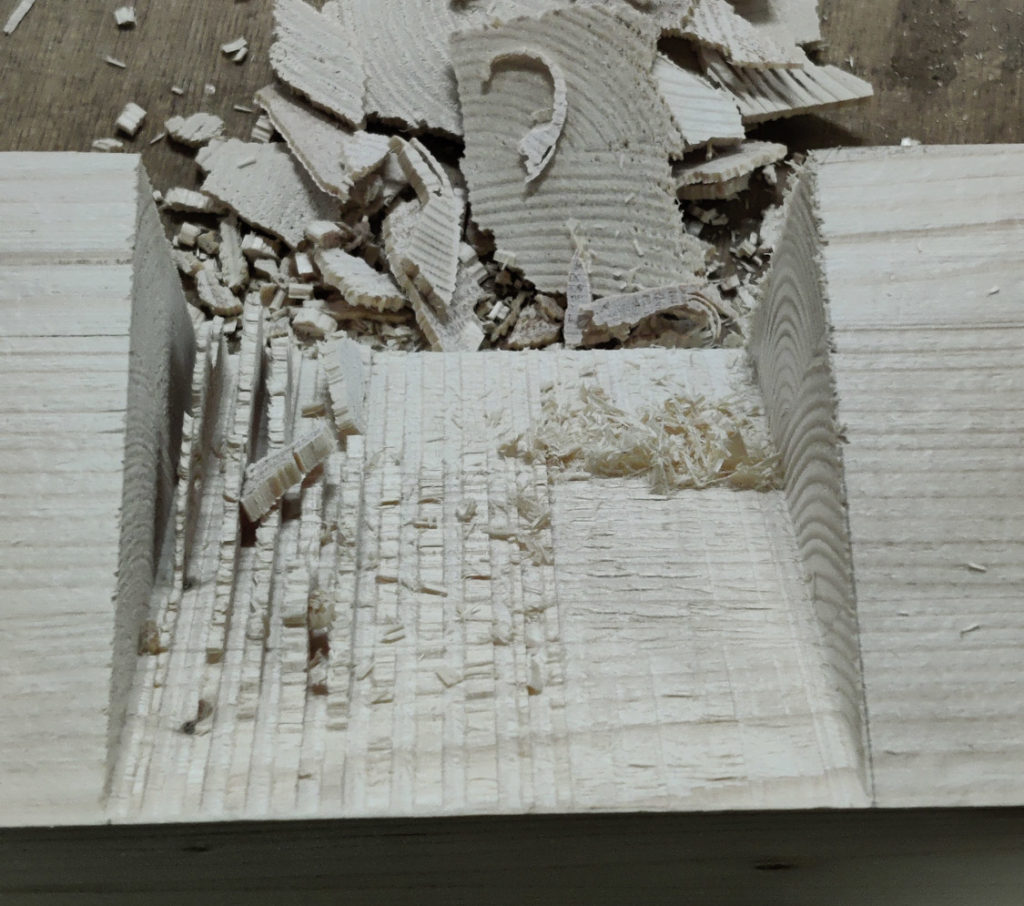
To clean the cut of the notch, the leftover wood is removed, and more wood is chilled until the final level is reached. Using a clamped piece of wood to help align the chisel resulted in a nice finish.


Milling
Roles needed to mil trunk logs
- Place and clamp log on mill track
- Remove log top layer
- Cut lamellas, reference from top
- Move clamps downwards
- Continue cutting lamellas
- Flip log, reference from bottom
Additionallylogs can be leveled to prevent loss of material on both sides if the trunk is very tapered. After cutting a log, there is a possibility to remove bark from the side and to cut the lamella plank in beams of less width.


Miscellaneous projects
Tracing template
In order to know which parts for the table can be cut out of the fired lamellas, I designed a template to trace the lamella with the digital cutlist. It is designed in Rhino and lazercut out of acrylic sheet.

Laundry basket
To order my room and store laundry, I made a little laundry basket from a wooden frame in which a cotton bag is hanging. The top and bottom squares were glued by putting masking tape on the mitred ends of the wood pieces. A little mistake I made was to not include a square object in the whole, so as to make sure the four corners are true . This became apparent when glueing the long vertical pieces to the top and bottom squares.


Shelving
The second week I made shelving in our room to store our clothing. The design of the shelves is simple to manufacture but pleasing to look at framework. The closet also includes two baskets for small items.