ABSTRACT
The digital fabrication studio introduced us to new techniques and ideas through relation between computer data and machine-oriented fabrication.
AIM
The aim of this course was to explore the design opportunities arising from three common digital fabrication process: 3D printing, CNC machine and Laser cutting. Each of us have designed their own idea and experimented on our model to explore different kinds of forms through trial and error.
01- 3D PRINTING
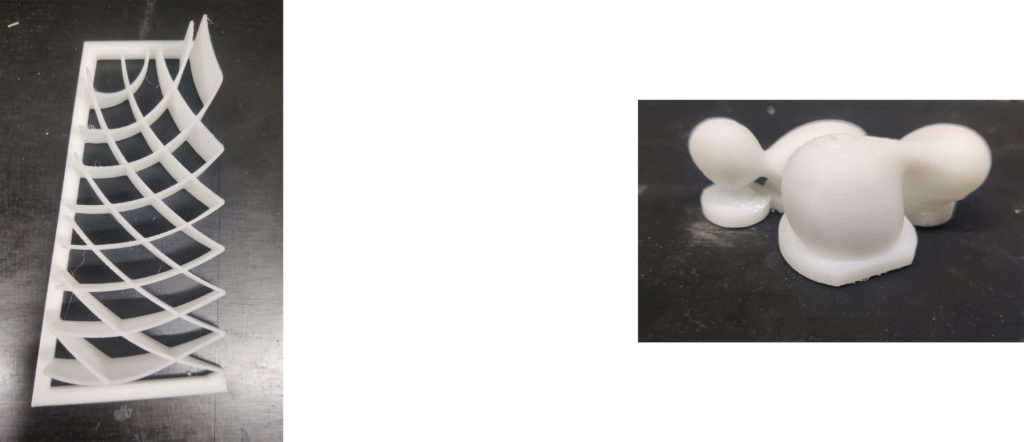
PARAMETERS:
Estimated print time: 11h 35m Fan speed: Auto
Printer: Zortrax M200 Plus Seam: Normal
Support type: Automatic Surface layers Top: 4
Support: 30° Raft Enabled: Yes
Material: Z-ABS Raft layers: 4
Nozzle diameter: 0.4 mm Raft Density: 60%
Layer: 0.29 mm Raft Print speed: 100%
Quality: Normal Infill: 20%
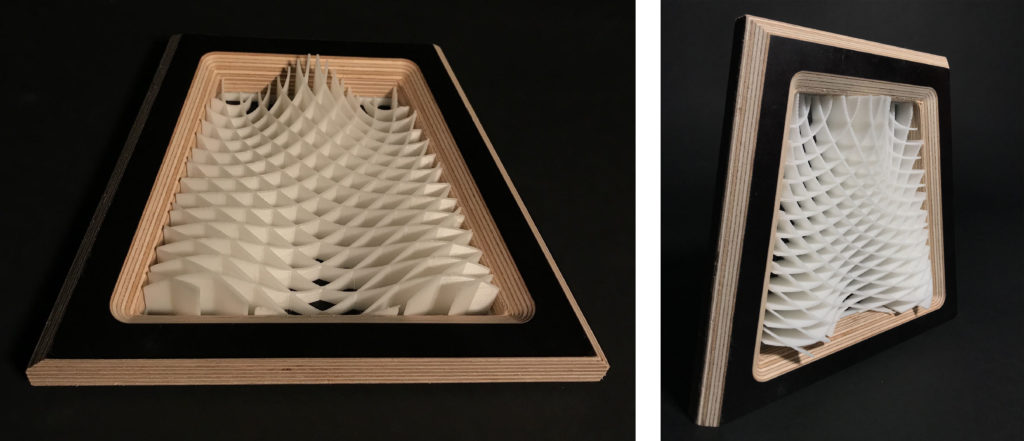
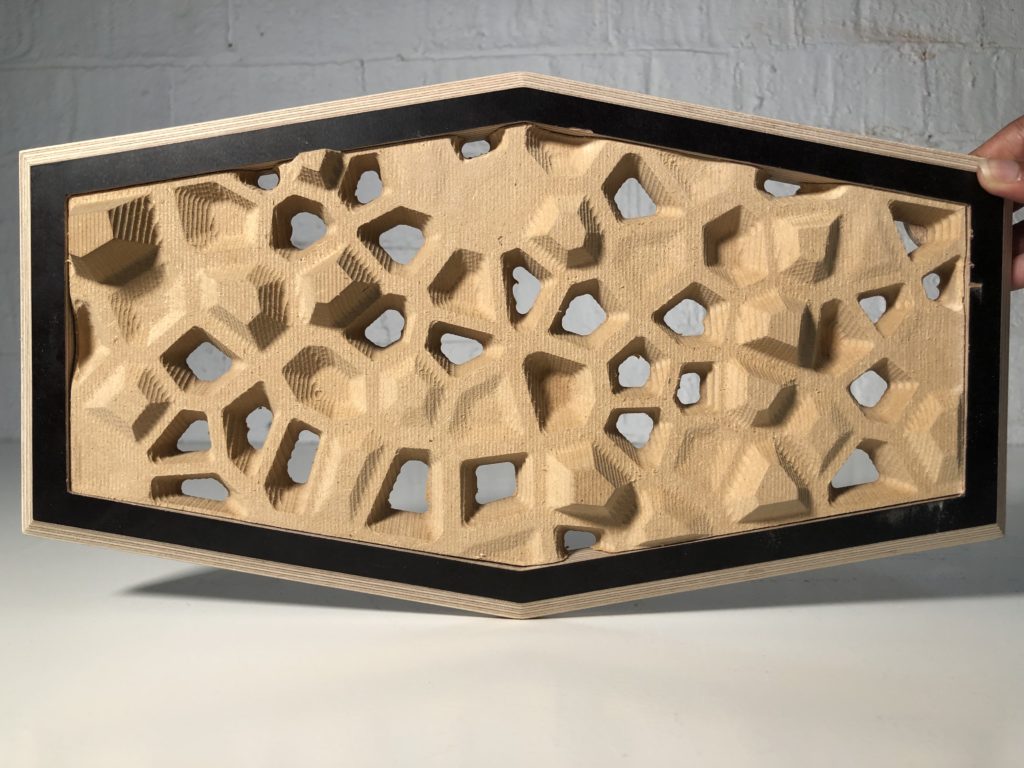
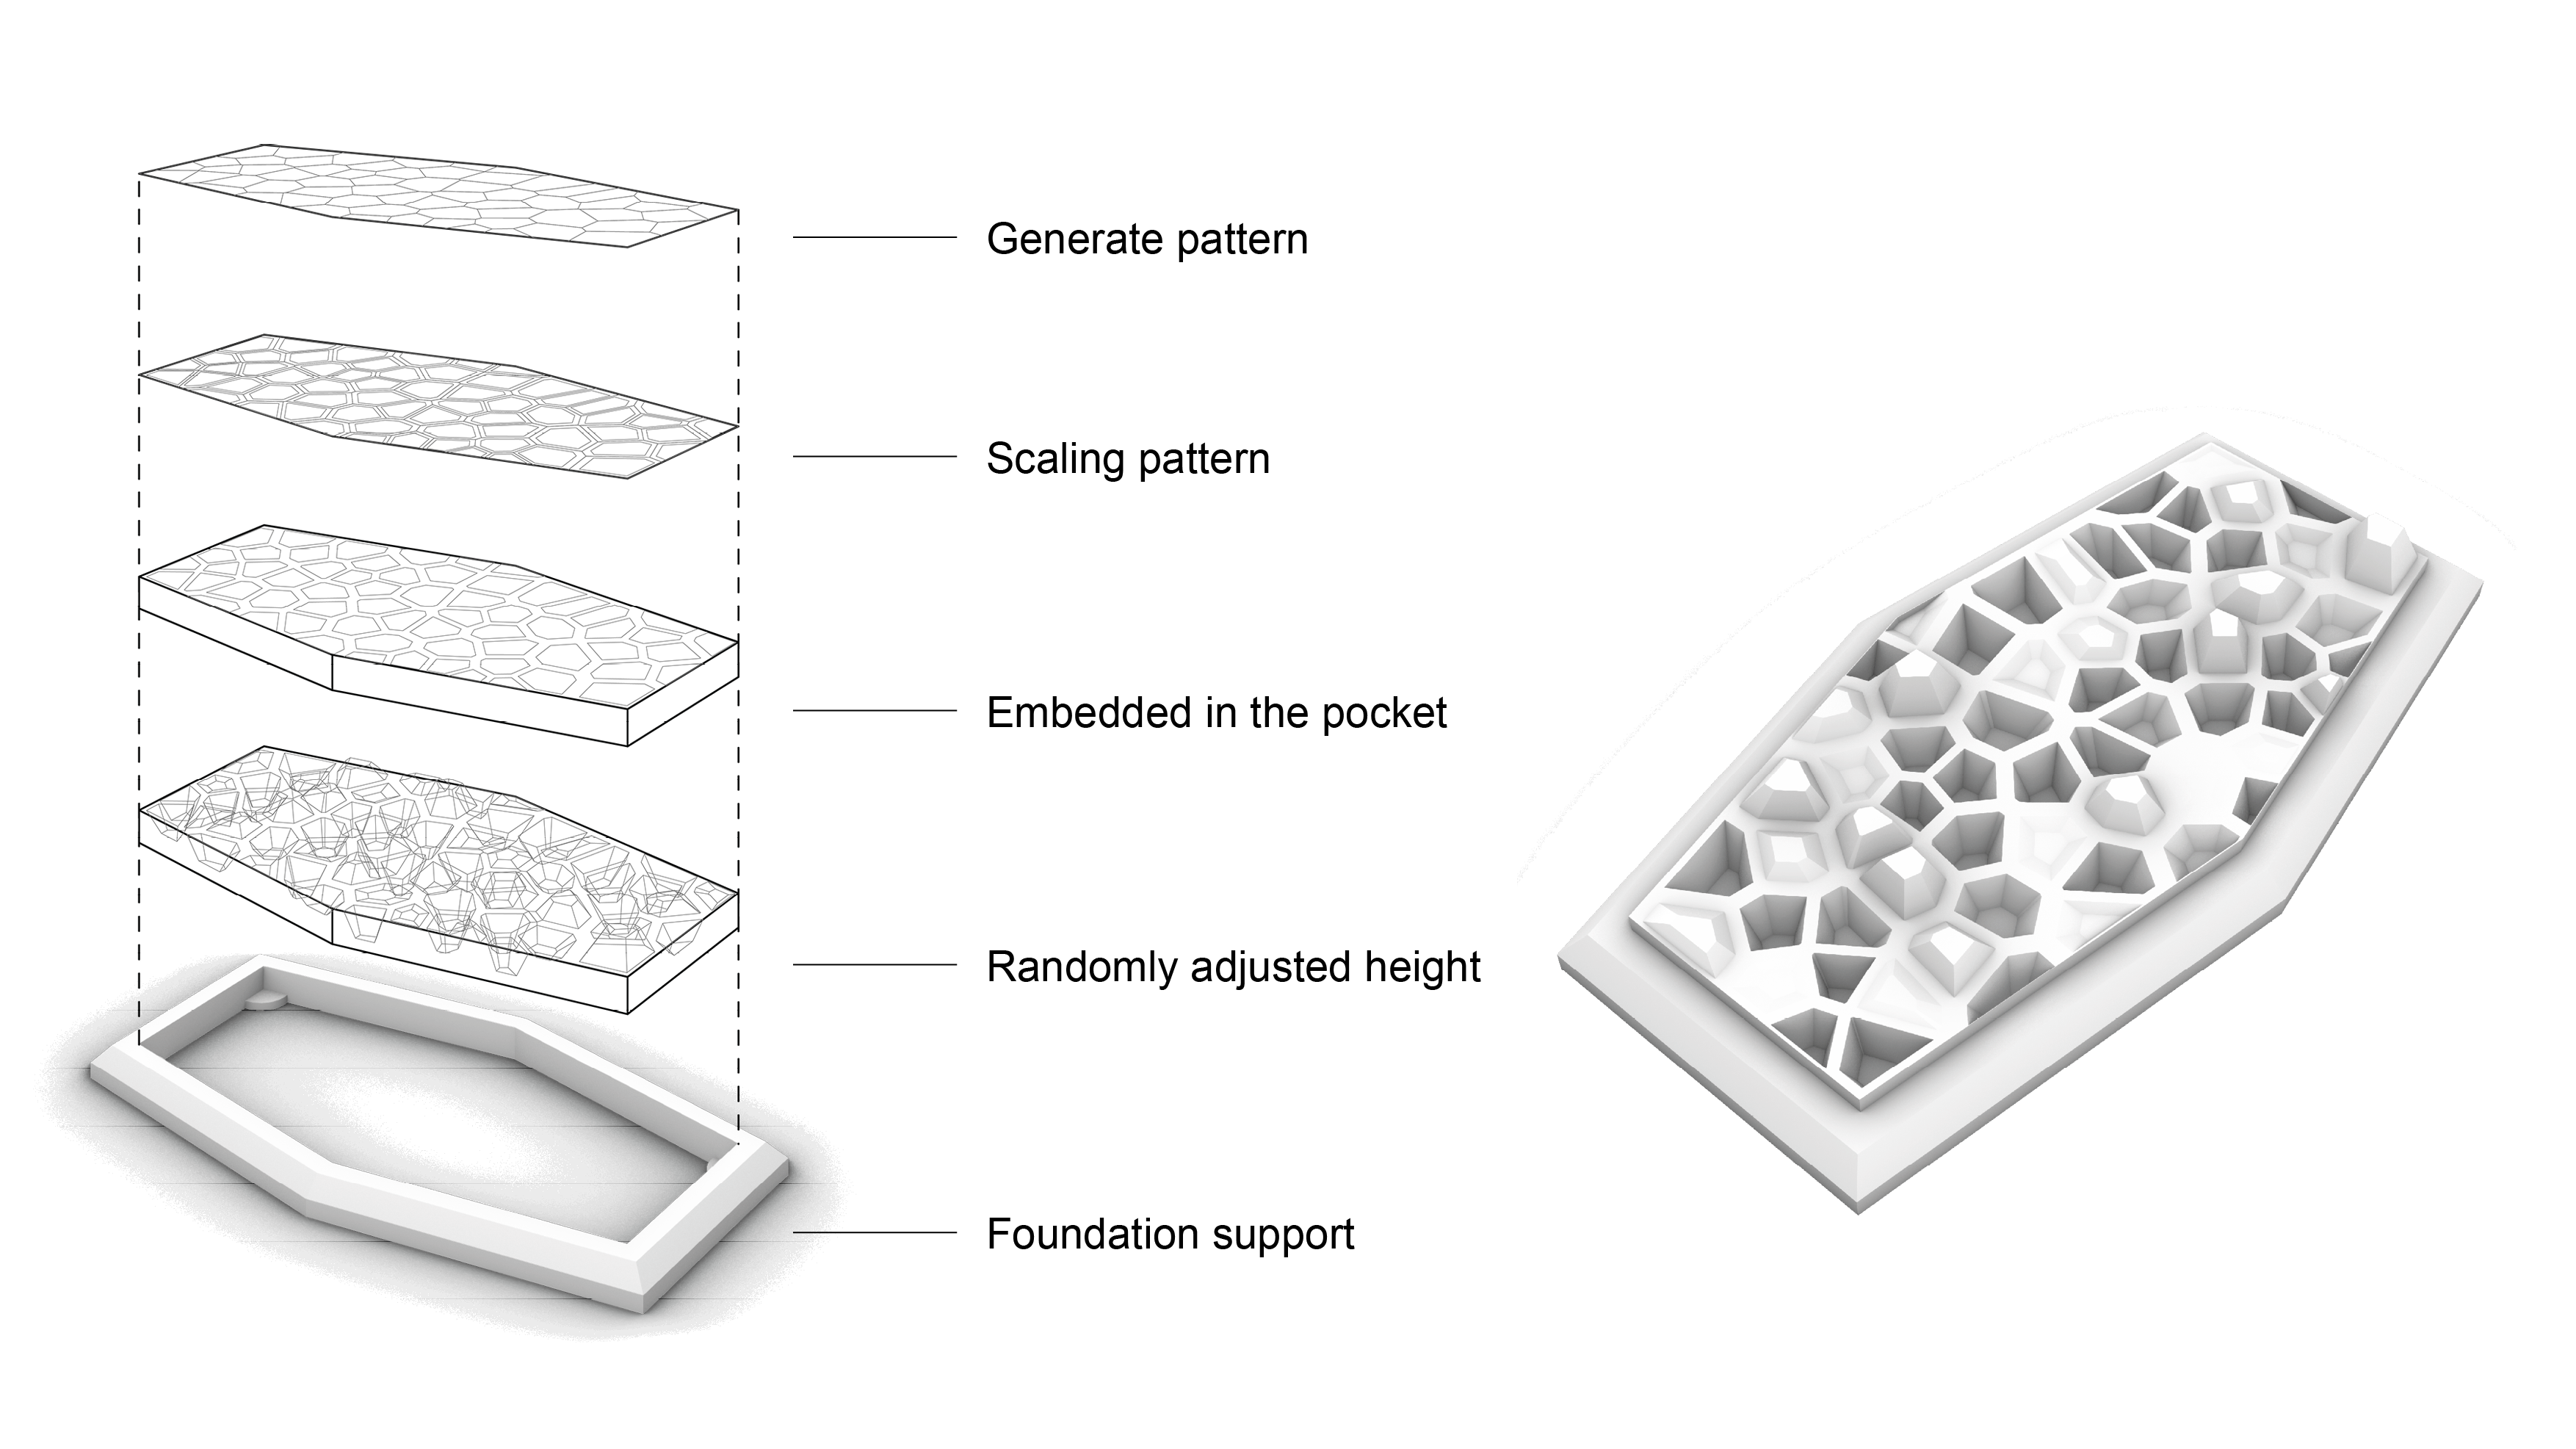
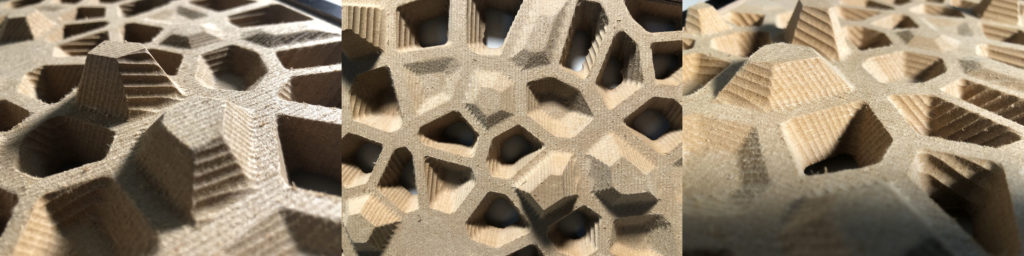
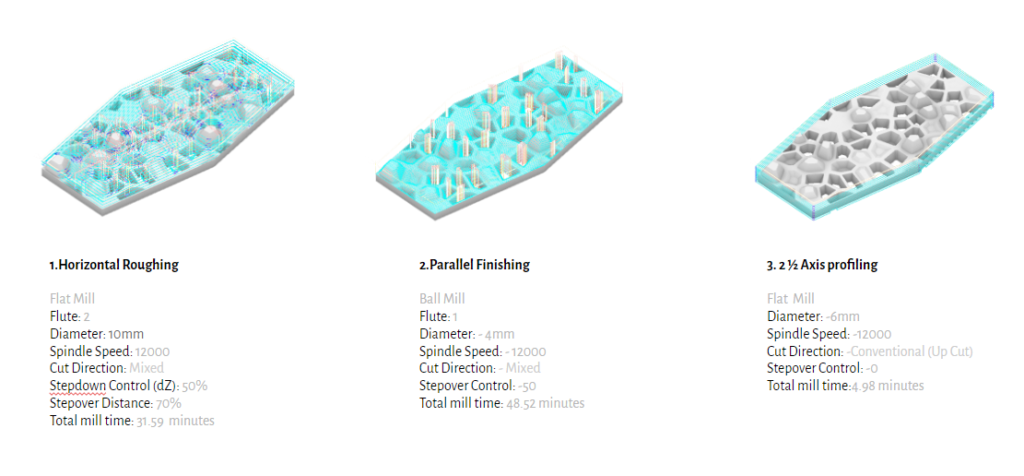
02- CNC MILLING
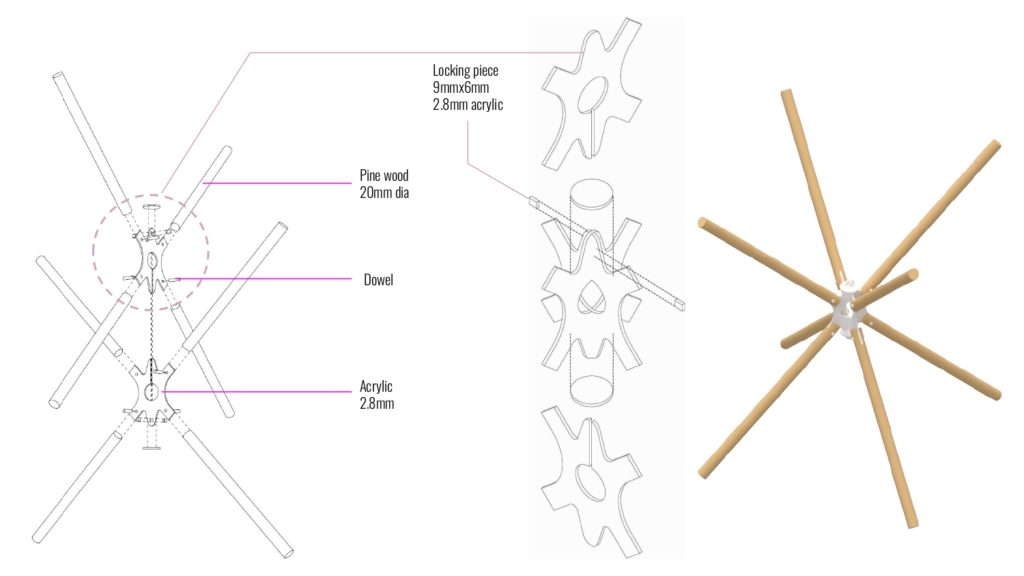
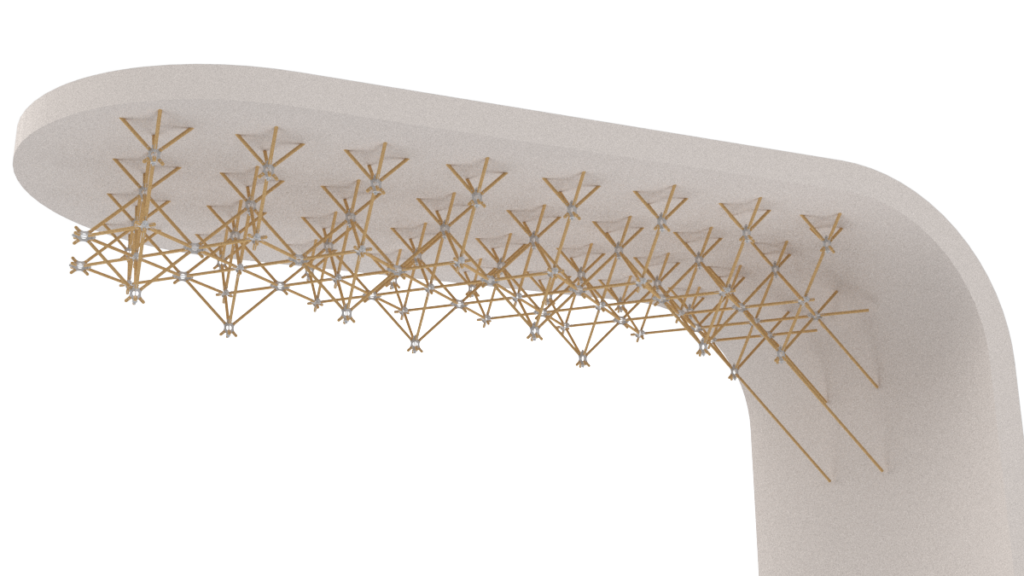
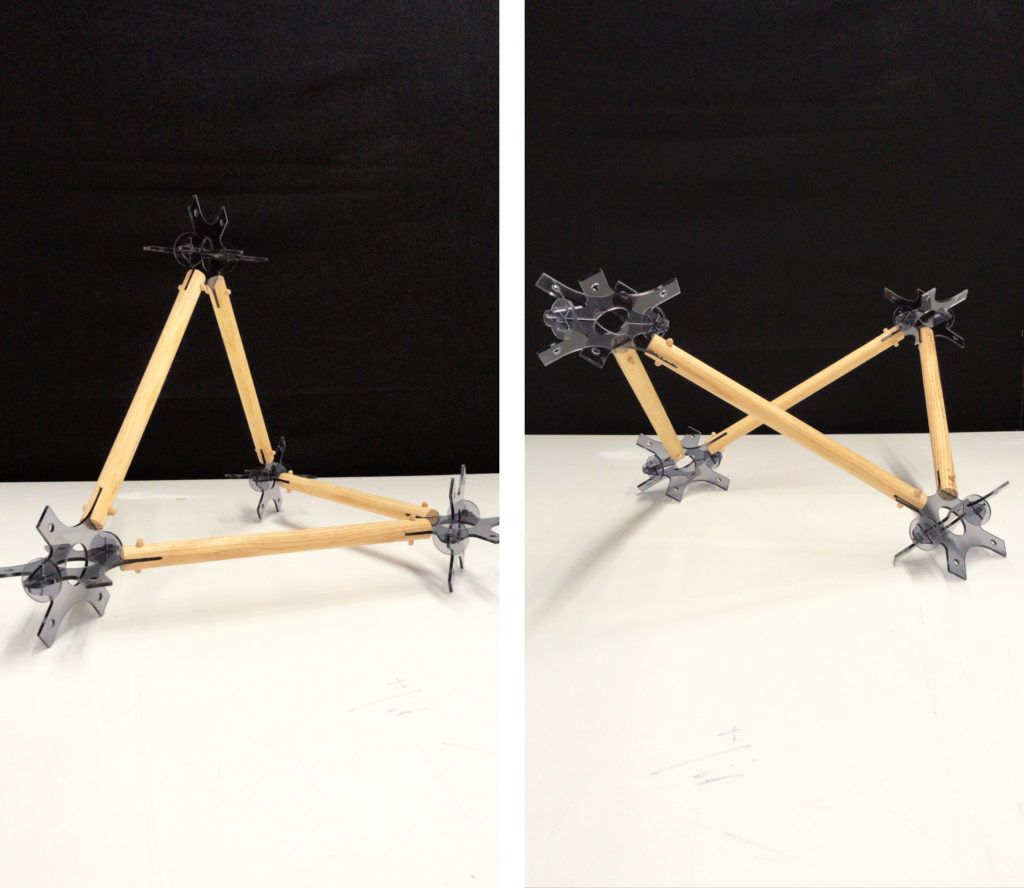
03- LASER CUTTING– INTERLOCKING
Model: Rhino 3D
Materials: 1.Black acrylic-2.8mm
2. Pine wood- 20mm dia.
3. Dowel (For locking)
Cut time: 17min
For this exercise we were given interlocking as our spatial joint. Each group were assigned different joinery technique.
The design uses interlocking system as a joinery part aligned in different directions which acts as a space frame structure.
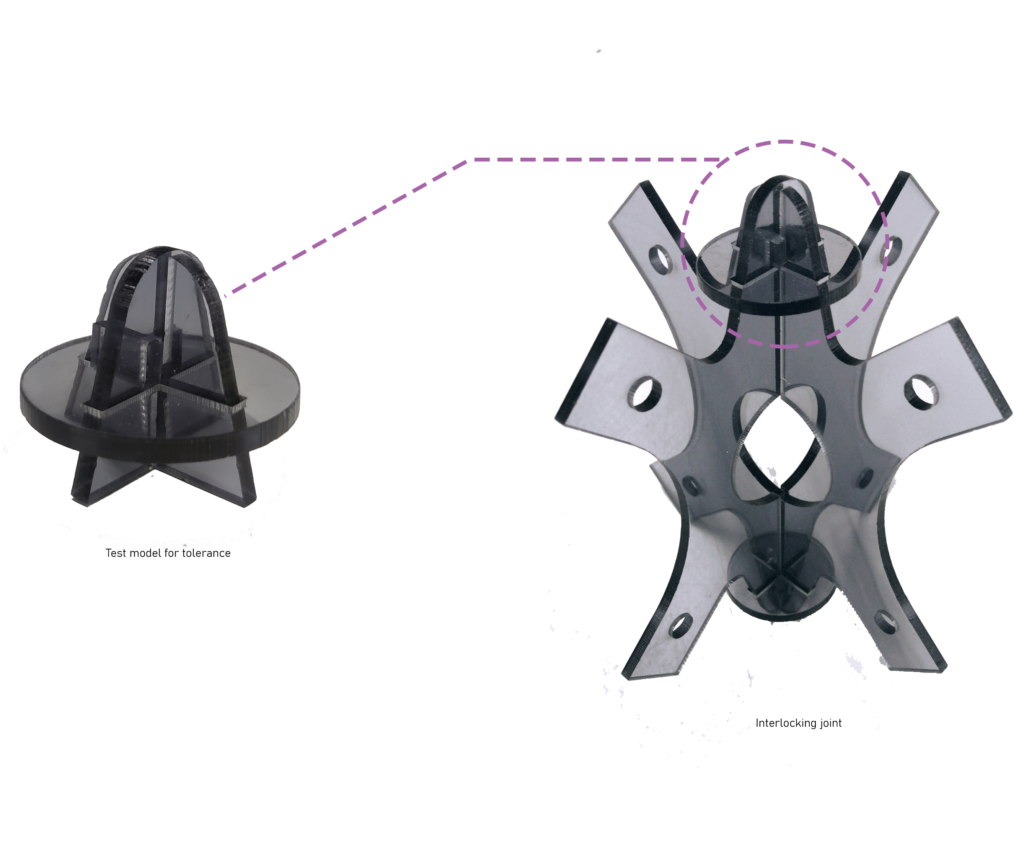
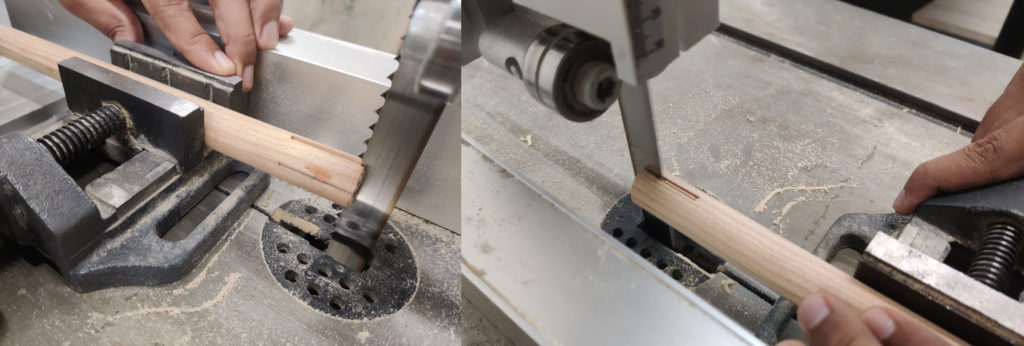
The final prototype was achieved through trial and error. Using acrylic as our interlocking material, the sticks had to be cut as per the thickness of the acrylic to fit and interlock it with the dowel.