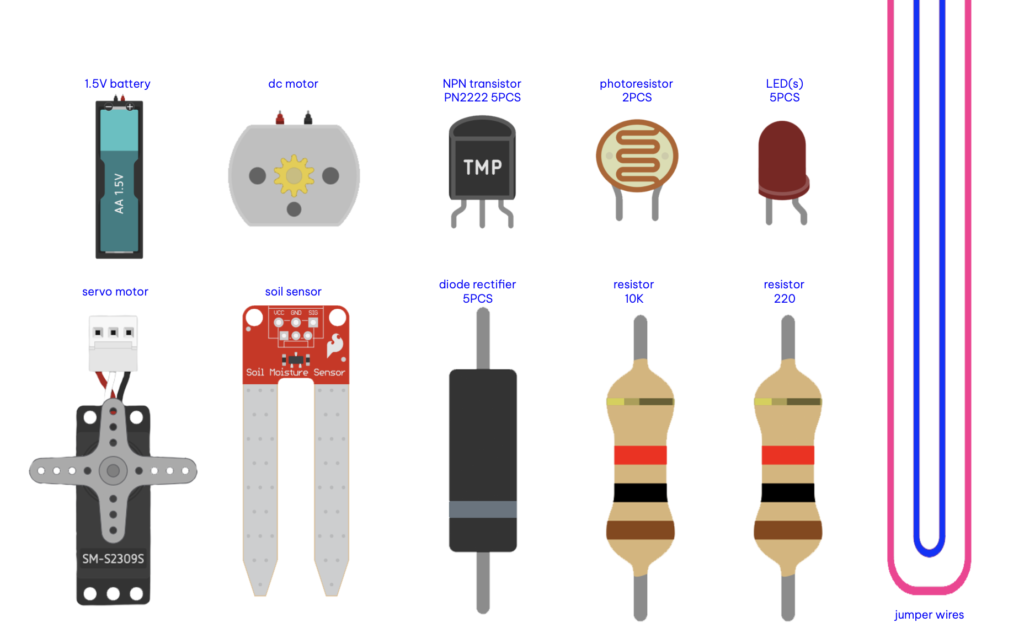
application of an automatic watering system which only activates under two conditions :
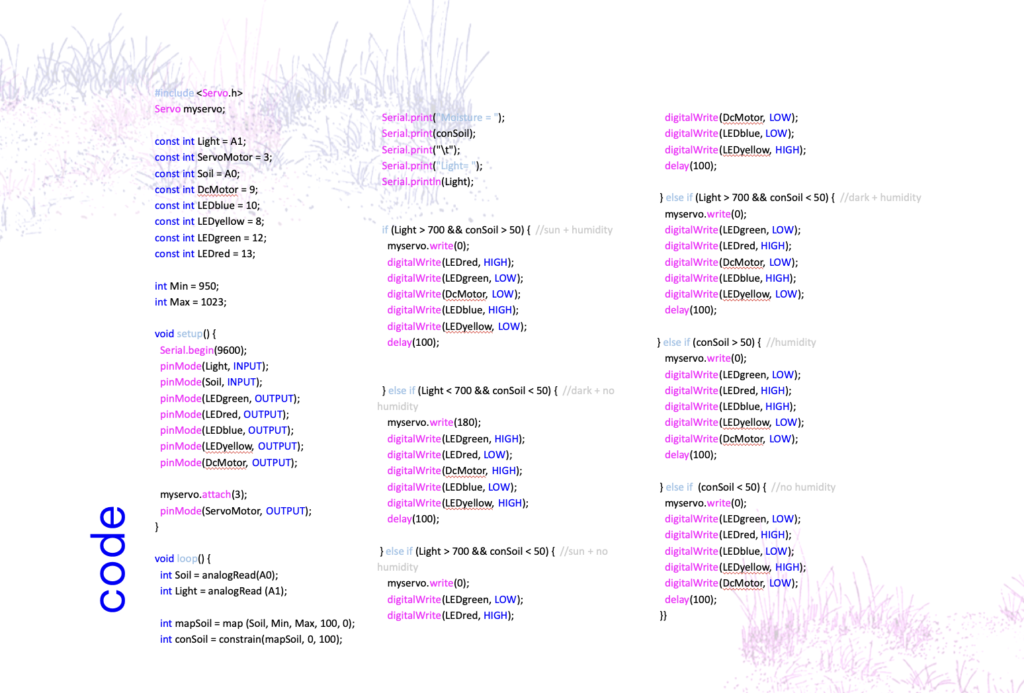
the soil moisture is dry, and the sun has set. this helps to avoid too much water evaporation, but also to avoid over-watering the soil.

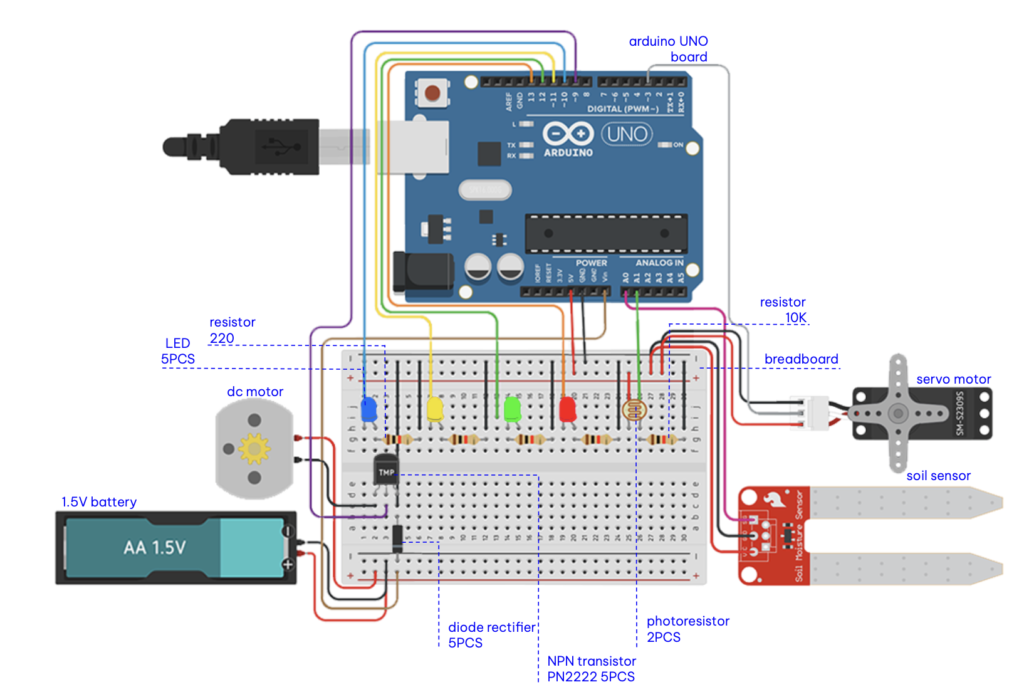
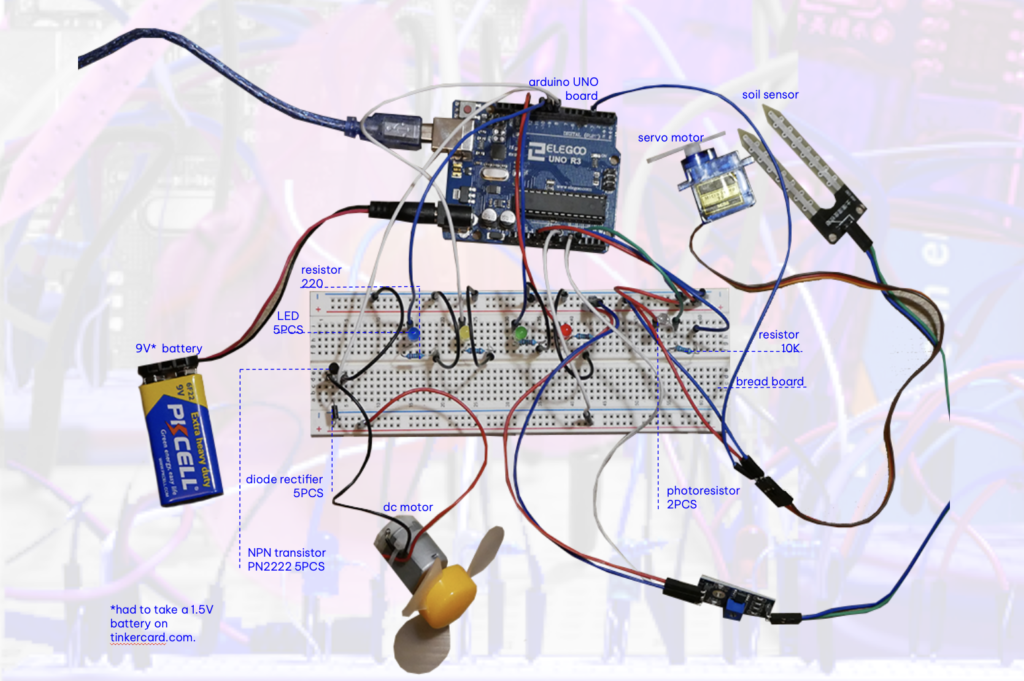
step 1 / setting up the soil sensor.
step 2 / setting up the servo motor.
step 3 / setting up the photoresistor.
step 4 / setting up the battery.
step 5 / setting up the dc motor.
step 6 / setting up the LEDs.
the green and red LEDs are there to tell the users when the automatic watering is working.
the yellow and blue LEDs are there to tell the users if the soil is humide (blue = wet, yellow = dry).
step 7 / connecting the negative and positive jumper wires from the breadboard to the arduino UNO board.


night watering system
for the automatic watering to work, the sun needs to be set and the soil to be dry. if this is achieve, the servo motor turn one, the dc motor turns, and the green light brights. the two LEDs yellow and blue helps the users for him to know the moisture of the soil.
next step
it could be possible to use a water collector as a first step. then the city water when the latter is empty. also, not all plants require the same amount of water. this is why we could use different water circuits with a solenoid valve in mind.

