
A Stapler Gun End Effector
Description
The project aims to deal with art in new different techniques that keeps up with the technology by getting the best of the robotic arm in a way to create staple art pieces that can achieve new ways of art depending on the robots. The main idea evolved around attaching a staple gun to the robotic arm and be able to control its shooting aims according to the expected state of art to achieve.
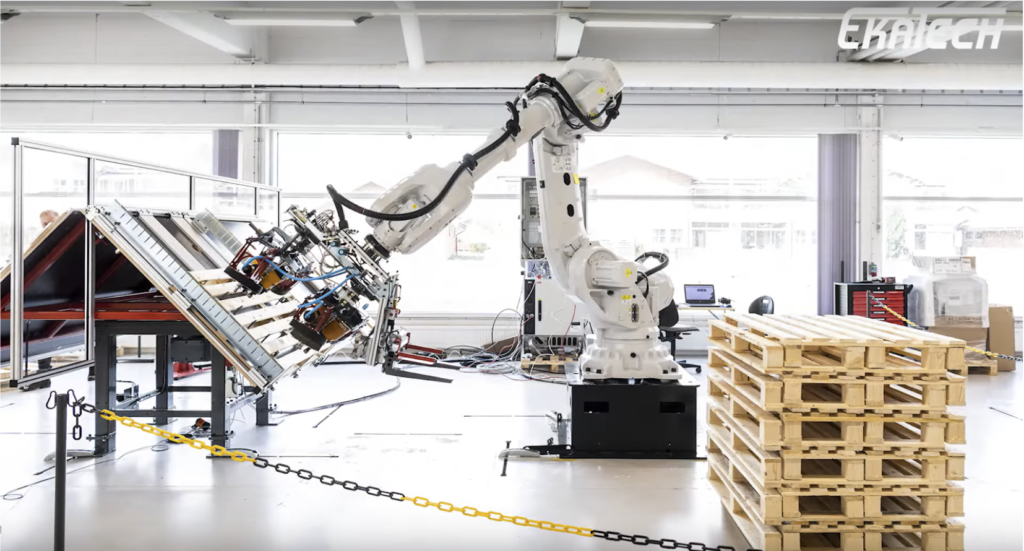
The idea was mainly inspired in a way to continue the work of EKATECH who managed to use the robotic arm for pallets assembly by developing a nail gun that has precise shooting locations to facilitate and fasten the assembly process
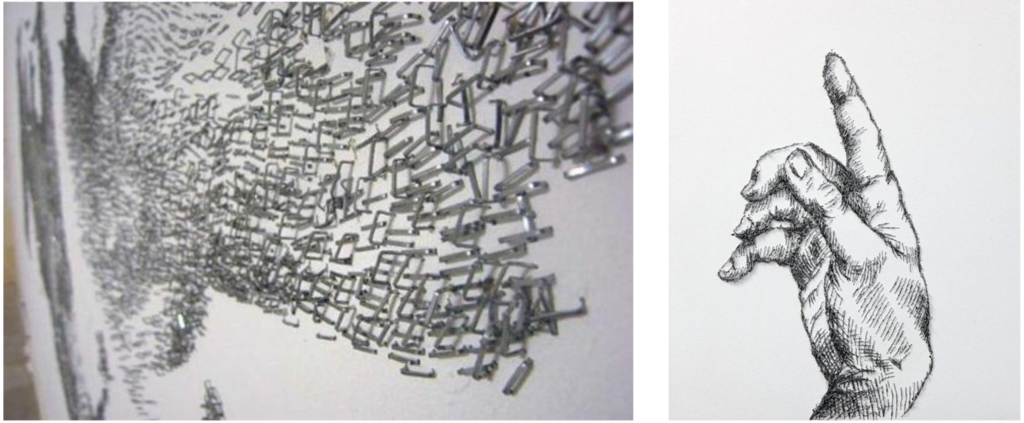
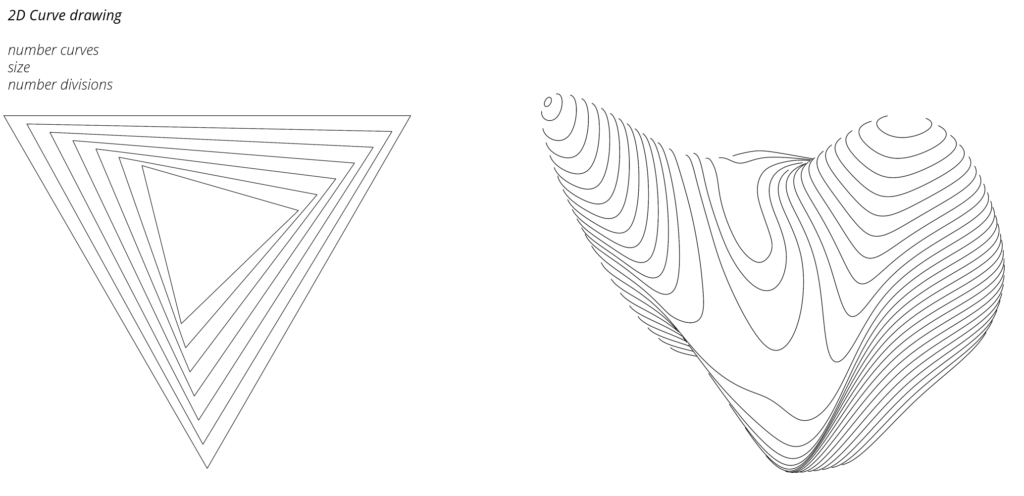
The expected art result would depend in its design technique on the combination of vector drawings and pointillism techniques by applying variations to the density of the staples, their orientation and the applies light and shadow on the products as some examples show in the picture below.
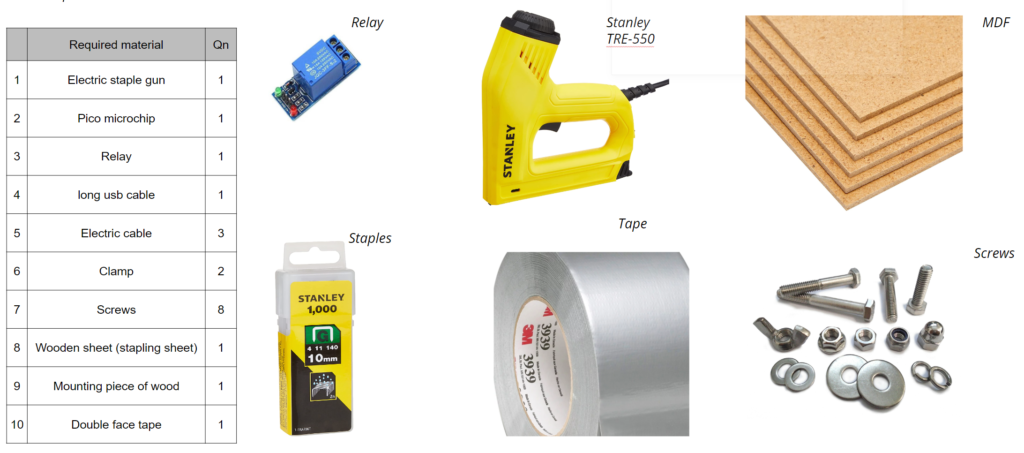
Bill of Materials
The idea behind the materials was to try to keep the idea as simple as possible to be able to have it as a DIY end effector that can be developed anywhere with the simplest tools and the least cost.
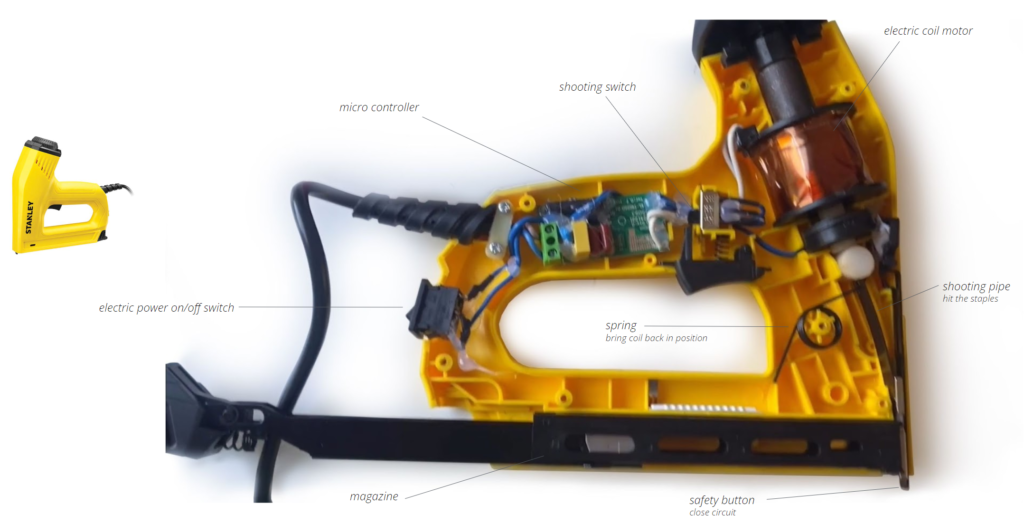
The Electronics
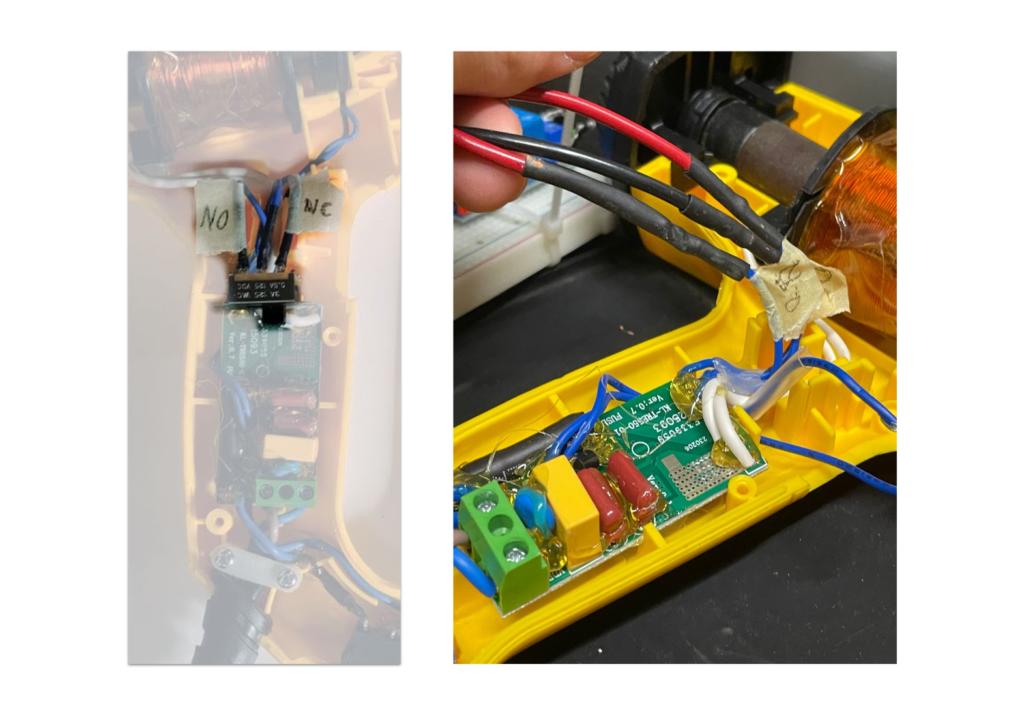
The electronic part of the project is focusing on hacking the stapler gun in order to have control on its shooting to be automated with the robotic movement to get the required results. This part was carried by removing the shooting button and connecting a relay that receives the on and off signal from the developed python code and transfer it to the gun to shoot at the assigned timing and location.
The Mechanics
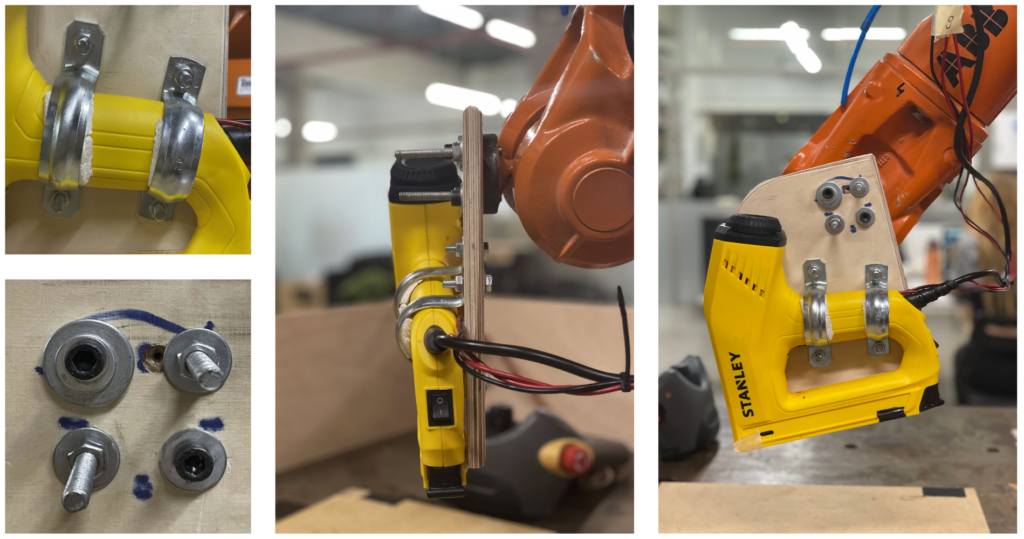
The mechanical part is oriented towards how to mount the stapler gun to the robotic arm. The idea was to attach the stapler gun to a wooden piece through clamps with foam between them to avoid the vibration and rebound of the gun after shooting. And then this piece of wood is attached to the flange of the robot as shown in the pictures.
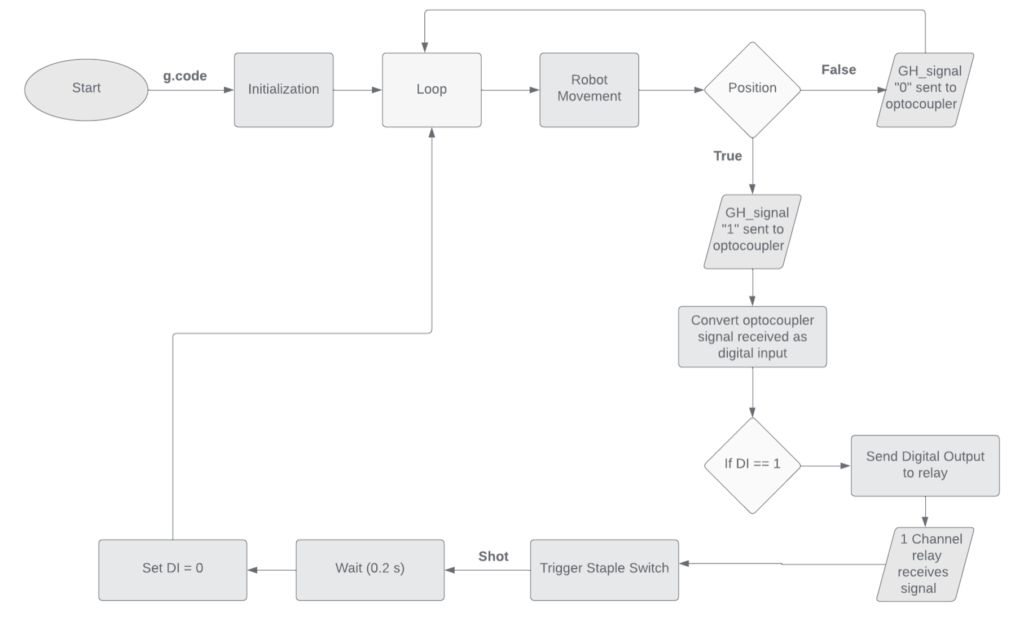
The Program Logic
The Robotic Logic

The Design
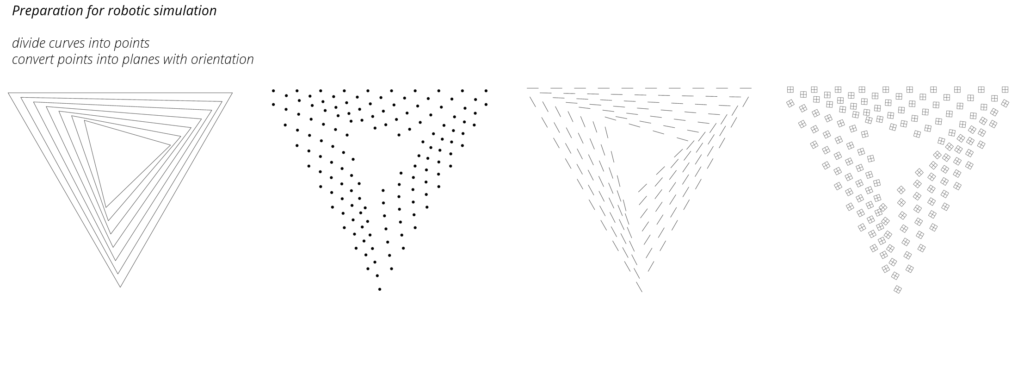
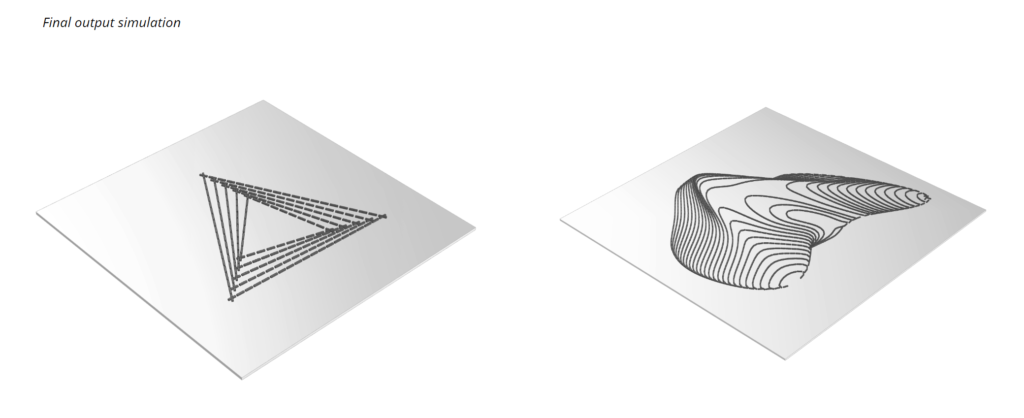
The Robotic Simulation
Testing Issues
On applying the logic of the robotic file their was some issues that faced the implication of the idea that are narrowed down to:
Electronic There was a time limitation for the relay to send a new signal to the stapler gun which needed to be respected in the timing between every shot.
Simulation Singularities in the robot movement that had to be avoided.
Robotic an issue with the end effector orientation after calibration which indicated the need to calibrate with more point on the end effector to have the right angle of approach to the surface.
Next Steps
Direct steps
- calibrate TCP in combination of end effector plane.
- know orientation of end effector.
- be able to approach targets in right orientation.
Future steps
- building own case with flange on top.
- robot is able to move more free without running in singularities.
- end effector is extension of z axis of flange.
- easier to approach targets in perfect angle.
