
Adaptive shading system
Concept
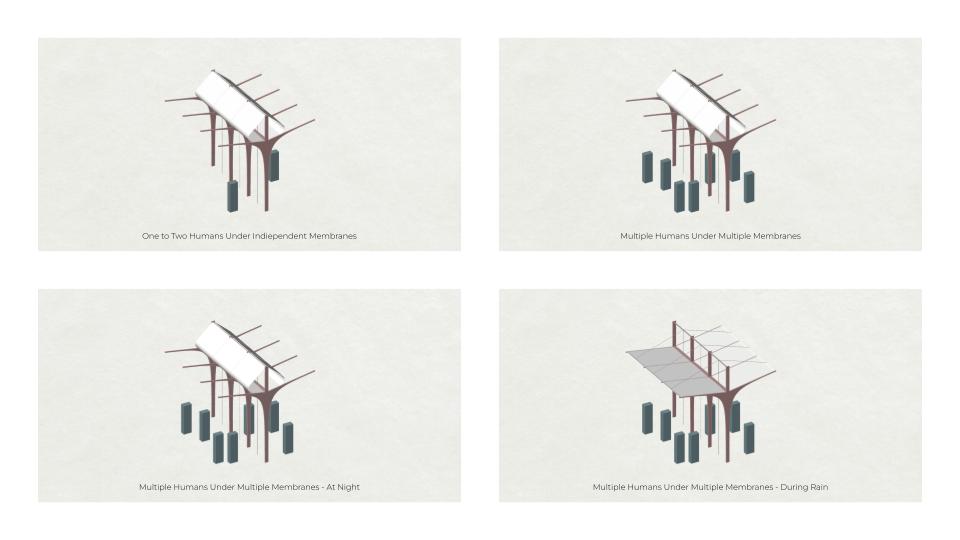
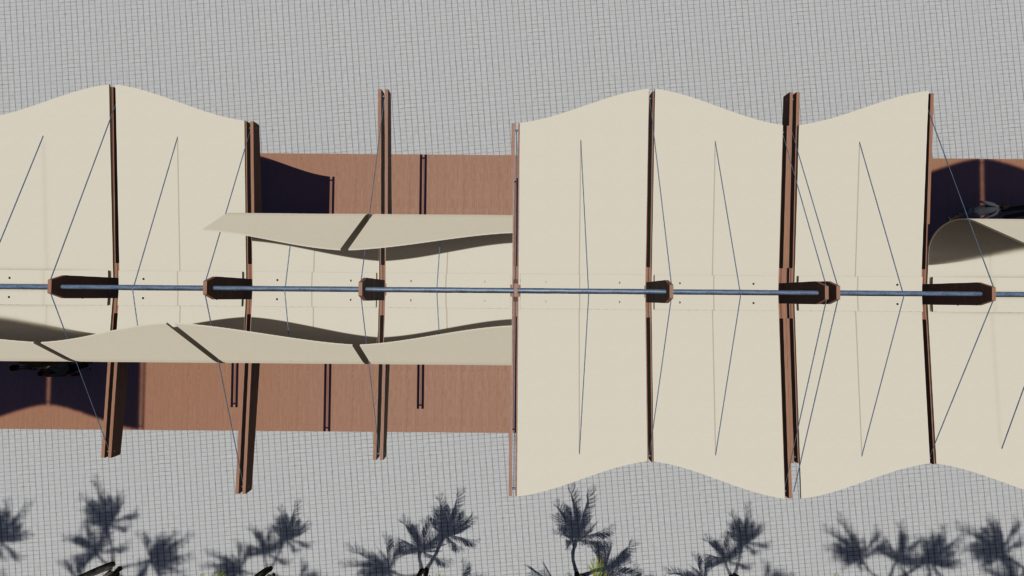
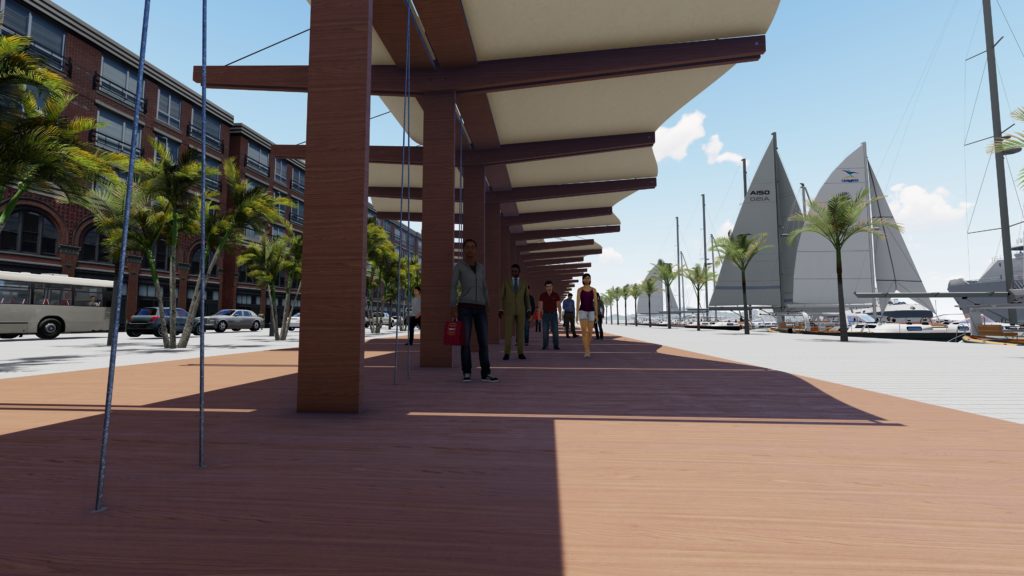
The project aims to create a shading installation that reacts to the pressure under it. The movement in the shade occurs when a person or a vehicle is under a module of the shade, triggering the opening of only that module.
Location
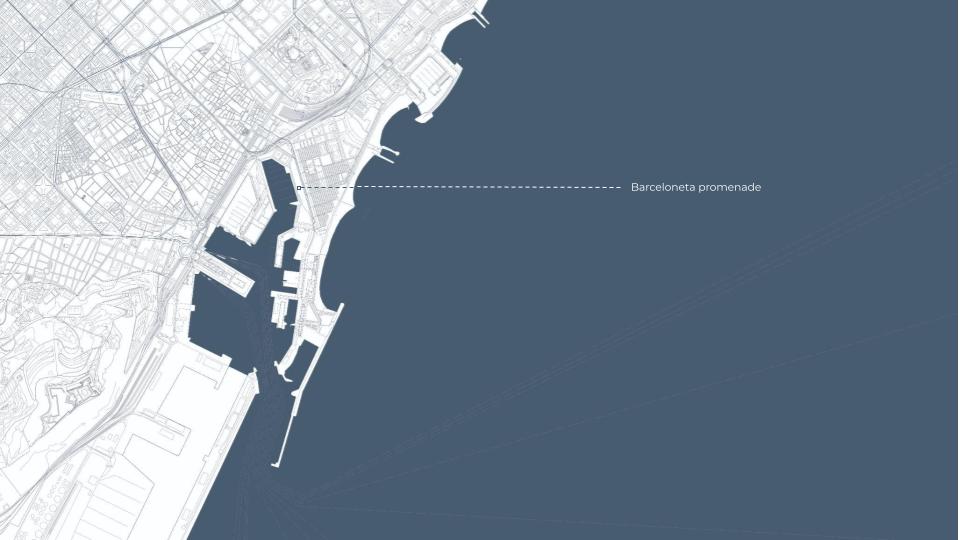
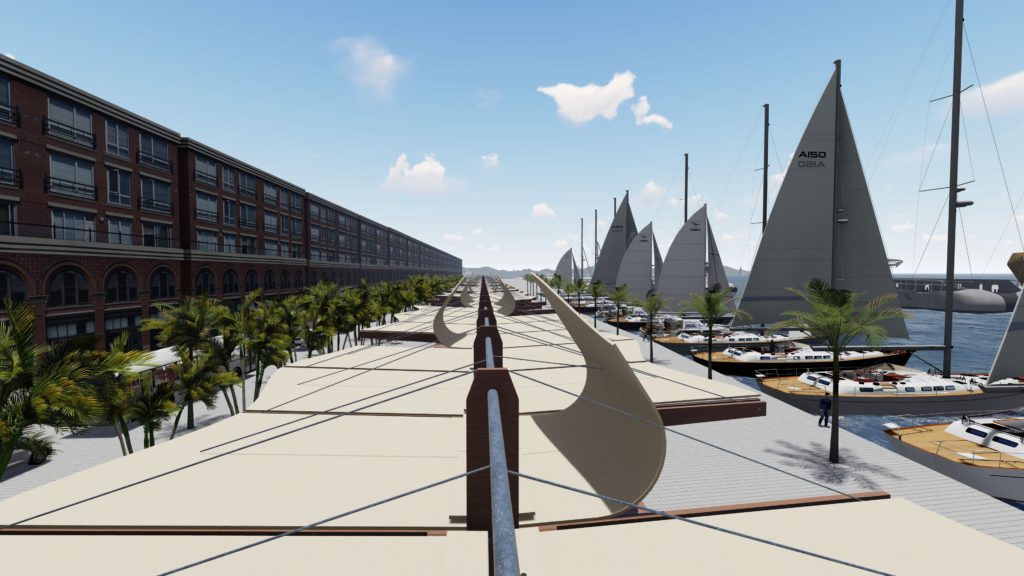
For the site for the installation we chose the Barceloneta port as it has a proper orientation. Moreover, the site is also hectic with a vast number of people passing through daily.

Case analysis
As the case analysis we looked into the Reef, an innovative art and architecture installation located in New York, created by artists Rob Ley and Joshua Stein. It offers a unique experience that explores the relationship between architecture, technology, and social behavior. Reef is a responsive membrane that interacts with its surroundings and shapes the public space.
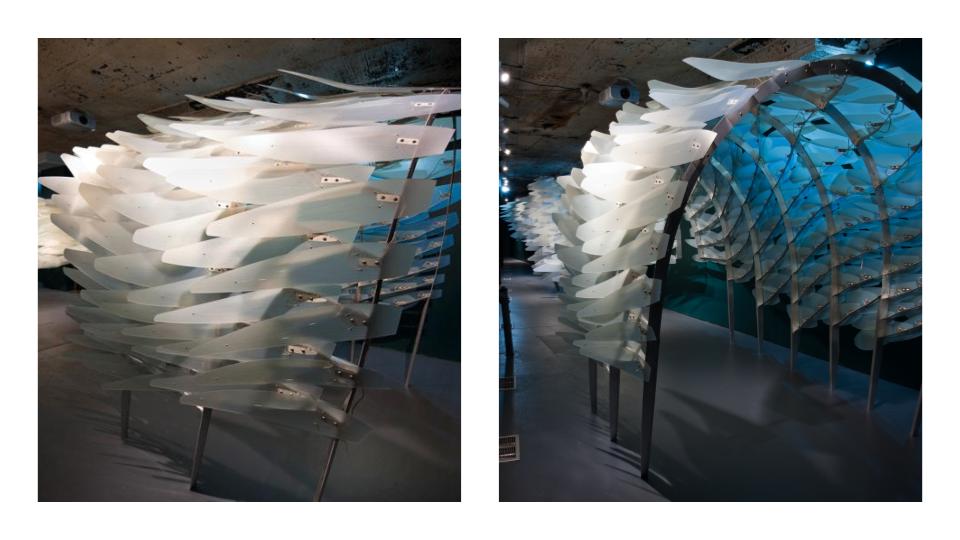
Design
UNFURL (verb) make or become spread out from a rolled or folded state
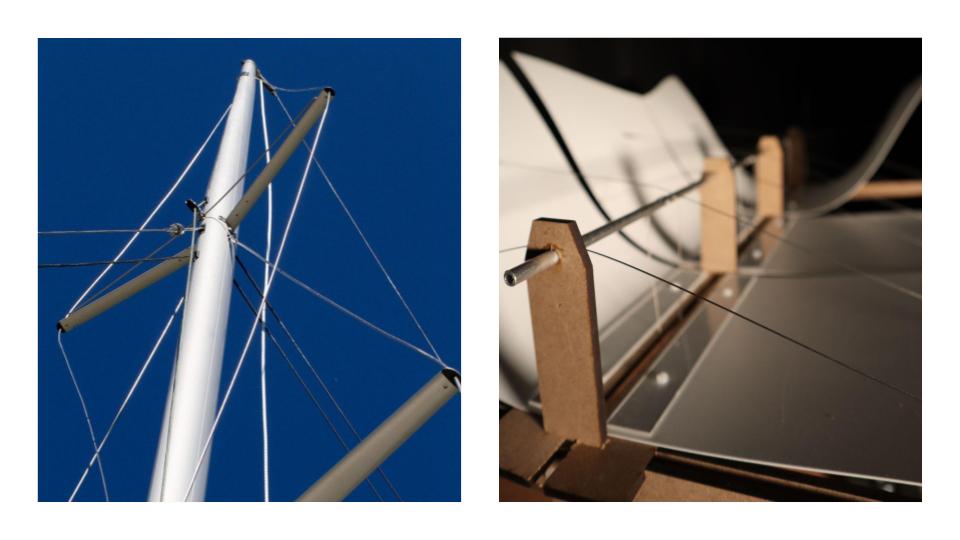
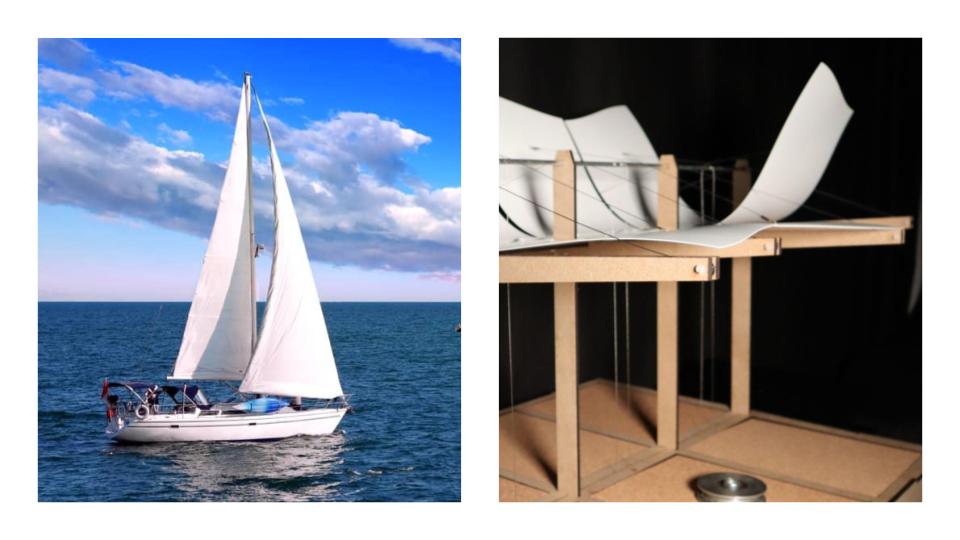
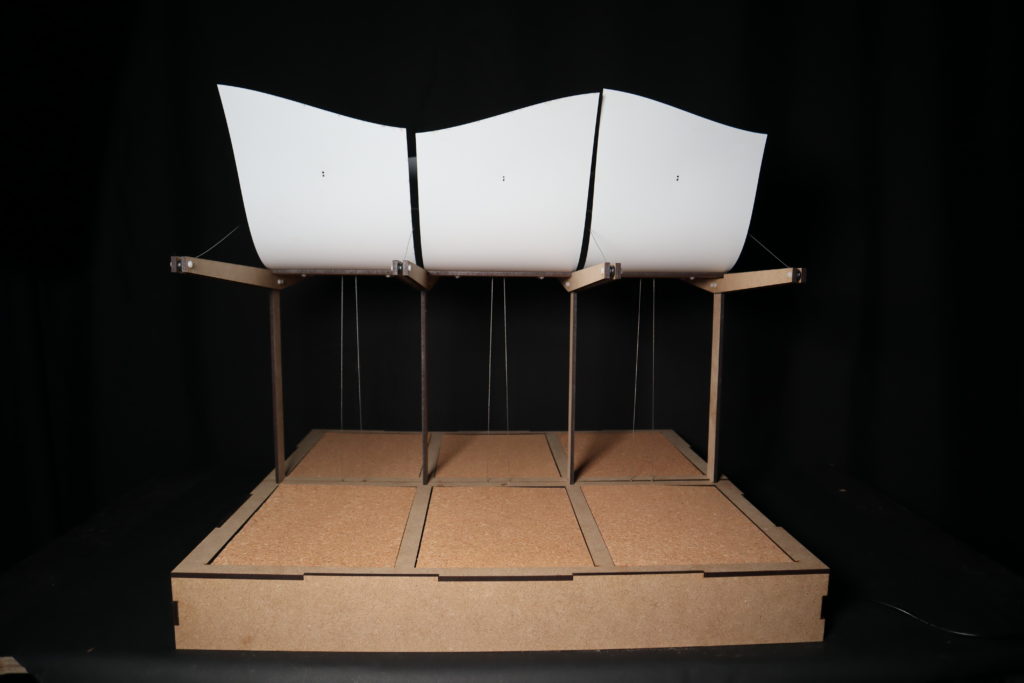
The design of the structure is inspired by the form and function of a sailboat, with each element of the structure drawing upon the features of a sailboat in unique ways.

The columns and beams connected by wire ropes are reminiscent of the sail mast, providing the primary vertical support for the structure. In the same way that a sailboat mast provides support for the sails, the columns and beams work together to create a stable base for the rest of the structure.
The membrane that covers the structure represents the sails of a sailboat, with its lightweight and flexible nature allowing it to move and adjust. T
The servos used to wind the wire ropes are designed to resemble the rope pulleys used on sailboats, with their simple yet effective design allowing for easy and efficient movement of the wires.
Overall, the design of the structure draws upon the elegance and efficiency of sailboat design, combining form and function to create a unique and functional architectural masterpiece.
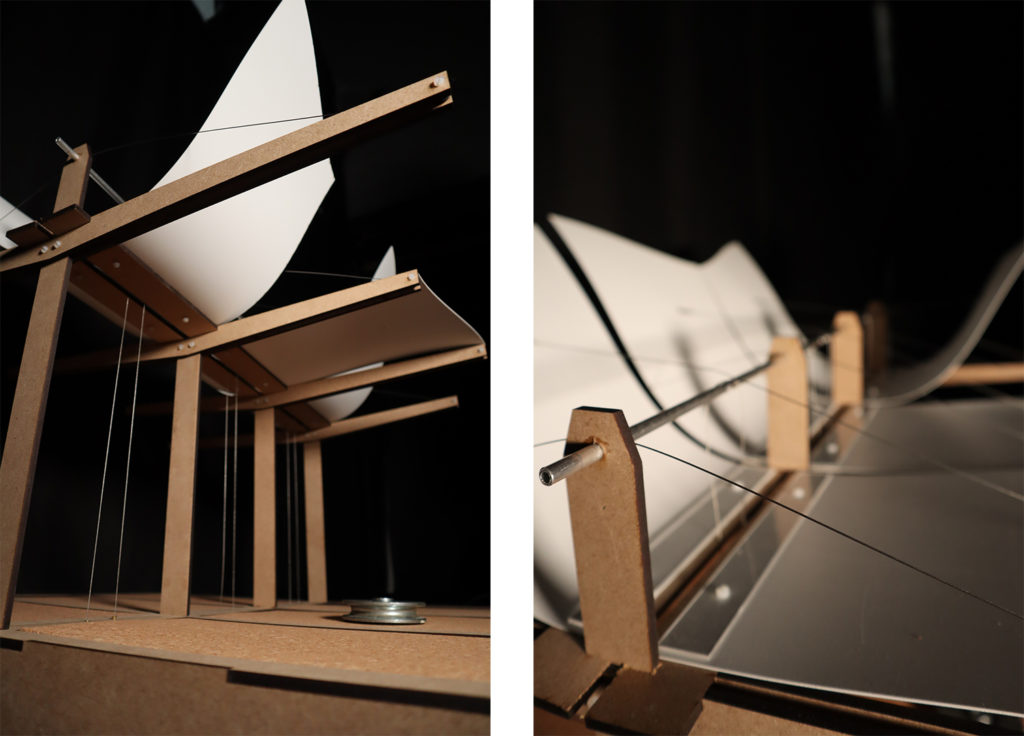
Proposed mechanism
The cables are connected to individual rollers housed underneath the installation. The rollers pull back and push forth the string to control the semi-rigid membrane. The system uses a presence detection mechanism to identify when a user is present underneath the shade. Once a user is detected, the tension cable is released, allowing the shade to unfold and provide a coverage.
Assembly and BOM
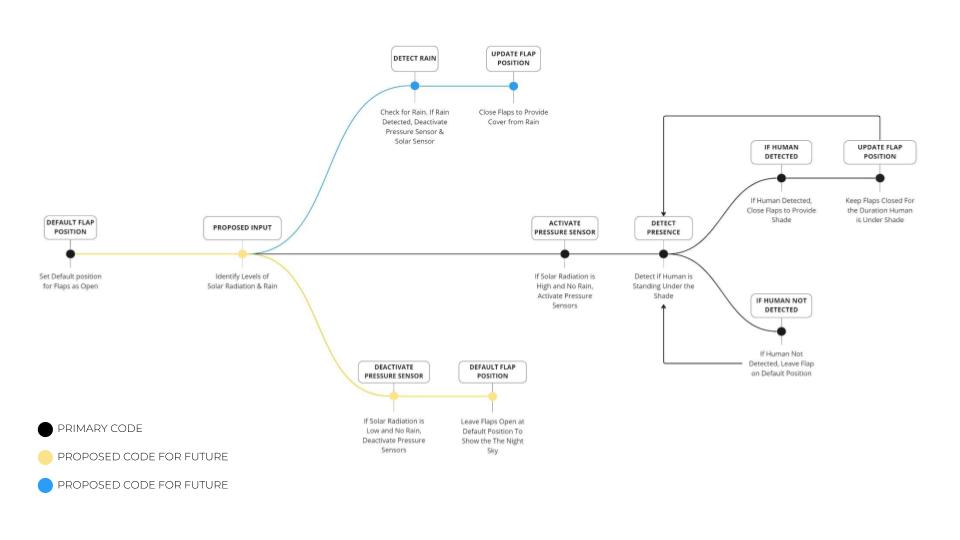
The assembly and program start with defining six Servo objects, one for each servo motor. It then defines analog input pins for six pressure sensors and threshold values for each sensor. In the setup function, the code attaches the six servo objects to their corresponding PWM pins.
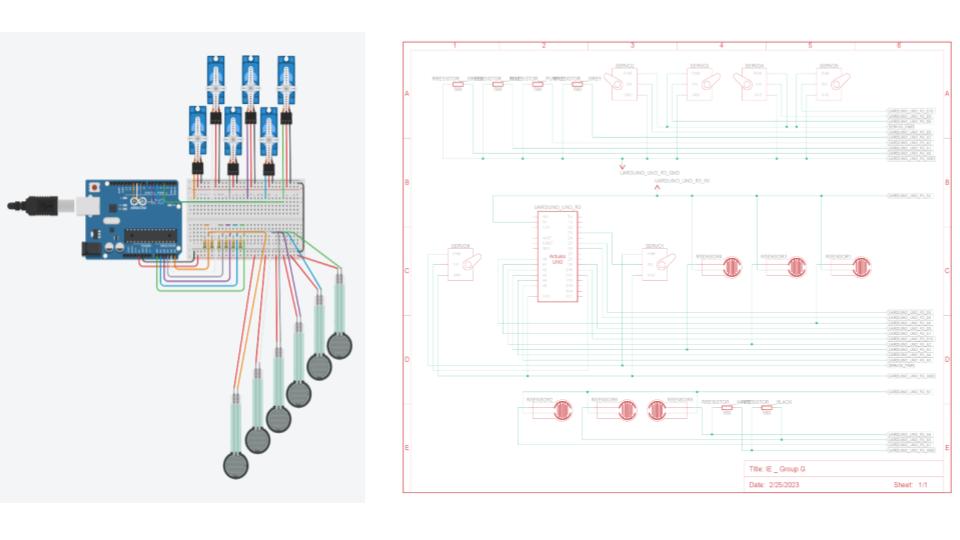
The loop function repeatedly reads the sensor values from the six analog input pins using analogRead() function. If any sensor value is below the defined threshold value, the corresponding servo is set to a position of 0 degrees, otherwise, the servo is set to a position of 180 degrees.
Following is a list of all components
- 01 * Arduino Uno R3
- 06 * 580 ohm Resistor
- 06 * Positional Micro Servo
- 06 * Force Resistive Sensor
- 01 * Compact Breadboard
- 36 * Jumper Cables
Arduino code
include
// Define servo objects
Servo servo1;
Servo servo2;
Servo servo3;
Servo servo4;
Servo servo5;
Servo servo6;
// Define analog input pins for pressure sensors
int sensor1Pin = A5;
int sensor2Pin = A4;
int sensor3Pin = A3;
int sensor4Pin = A2;
int sensor5Pin = A1;
int sensor6Pin = A0;
// Define threshold values for each sensor
int sensor_Threshold = 500;
// Define servo positions
int servo_Position = 0;
void setup() {
//Serial_Monitor
Serial.begin(9600);
// Attach servos to pins
servo1.attach(3);
servo2.attach(5);
servo3.attach(6);
servo4.attach(9);
servo5.attach(10);
servo6.attach(11);
}
void loop() {
// Read sensor values
int sensor1Value = analogRead(sensor1Pin);
int sensor2Value = analogRead(sensor2Pin);
int sensor3Value = analogRead(sensor3Pin);
int sensor4Value = analogRead(sensor4Pin);
int sensor5Value = analogRead(sensor5Pin);
int sensor6Value = analogRead(sensor6Pin);
// If sensor values are below threshold, set servo position to 0
if (sensor1Value > sensor_Threshold) {
servo1.write(180);
}
else {
servo1.write(servo_Position);
}
if (sensor2Value > sensor_Threshold) {
servo2.write(180);
}
else {
servo2.write(servo_Position);
}
if (sensor3Value > sensor_Threshold) {
servo3.write(180);
}
else {
servo3.write(servo_Position);
}
if (sensor4Value > sensor_Threshold) {
servo4.write(180);
}
else {
servo4.write(servo_Position);
}
if (sensor5Value > sensor_Threshold) {
servo5.write(180);
}
else {
servo5.write(servo_Position);
}
if (sensor6Value > sensor_Threshold) {
servo6.write(180);
}
else {
servo6.write(servo_Position);
}
// Add a delay to reduce the load on the Arduino board
delay(100);
//Serial Write
Serial.println(“Sensor1 Pressure = “);
Serial.print(sensor1Value);
Serial.println(“Sensor2 Pressure = “);
Serial.print(sensor2Value);
Serial.println(“Sensor3 Pressure = “);
Serial.print(sensor3Value);
Serial.println(“Sensor4 Pressure = “);
Serial.print(sensor4Value);
Serial.println(“Sensor5 Pressure = “);
Serial.print(sensor5Value);
Serial.println(“Sensor6 Pressure = “);
Serial.print(sensor6Value);
}
Prototype
Fabrication supplies
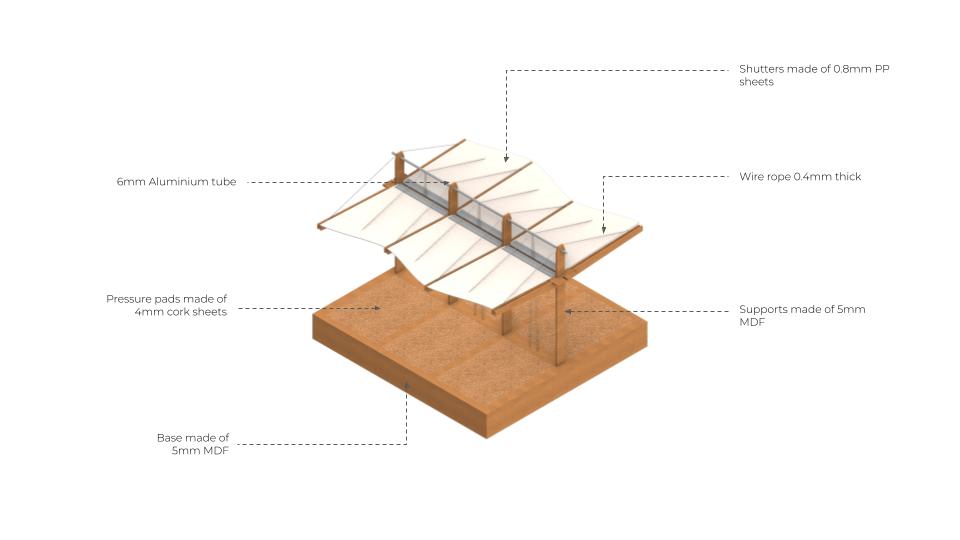
Material proposal
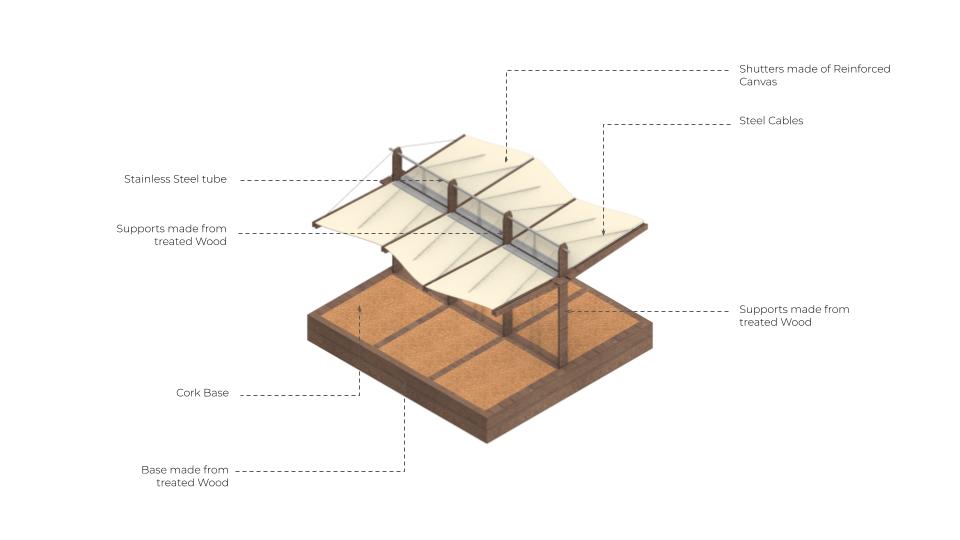
Prospective adaptations


Video
