Responsive shelter for changing environmental conditions.
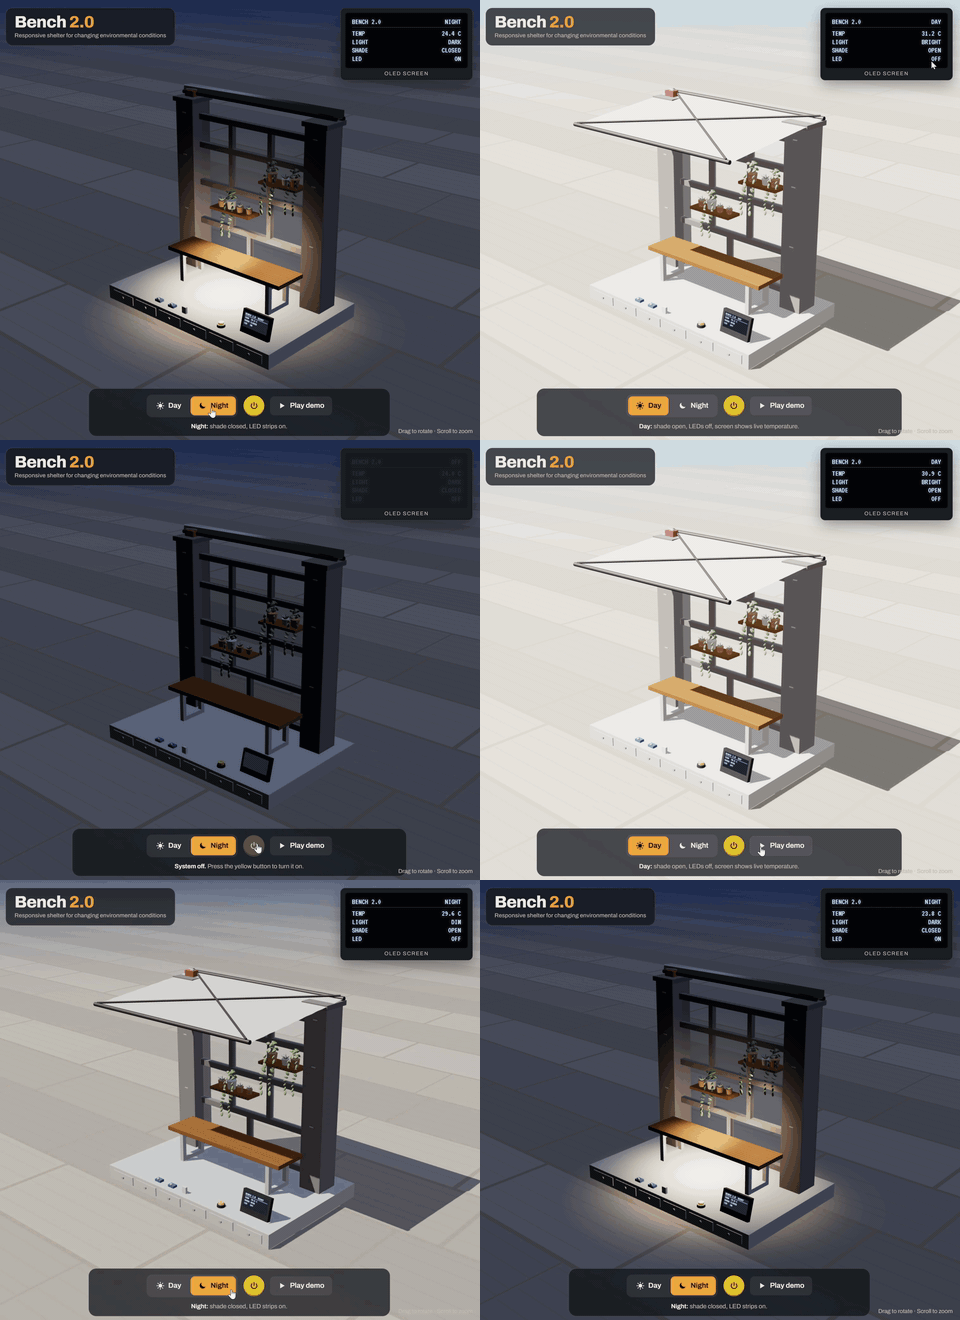
Public benches are designed as static objects, yet the conditions around them change constantly. In warm cities, an uncovered bench is almost unusable during the hottest hours of the day, while at night the same bench is often dark and uninviting. Bench 2.0 explores how public furniture can respond to these changes. A motorised canopy and integrated lighting combine seating, shelter, and interaction in one compact structure that adapts from day to night.
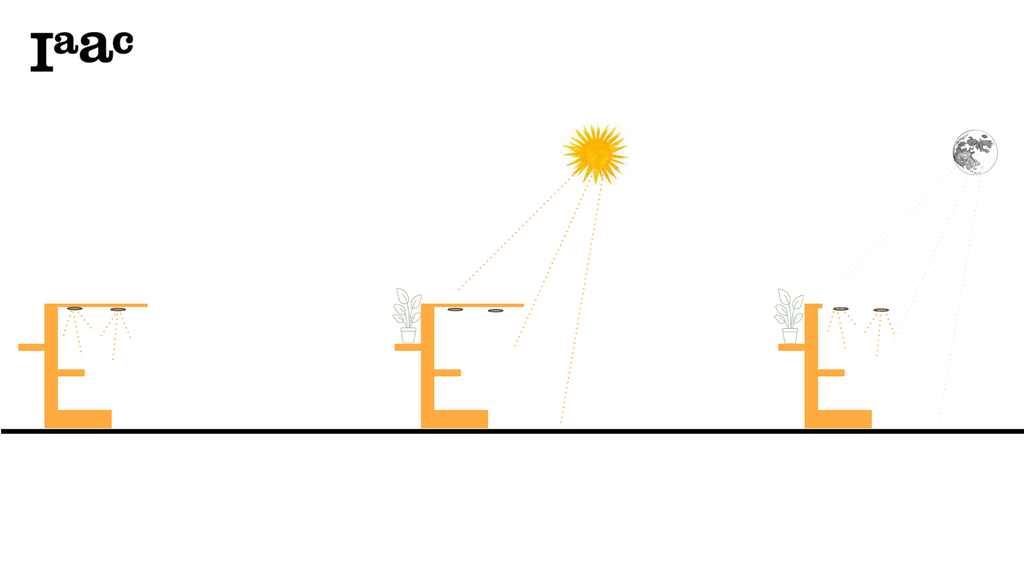
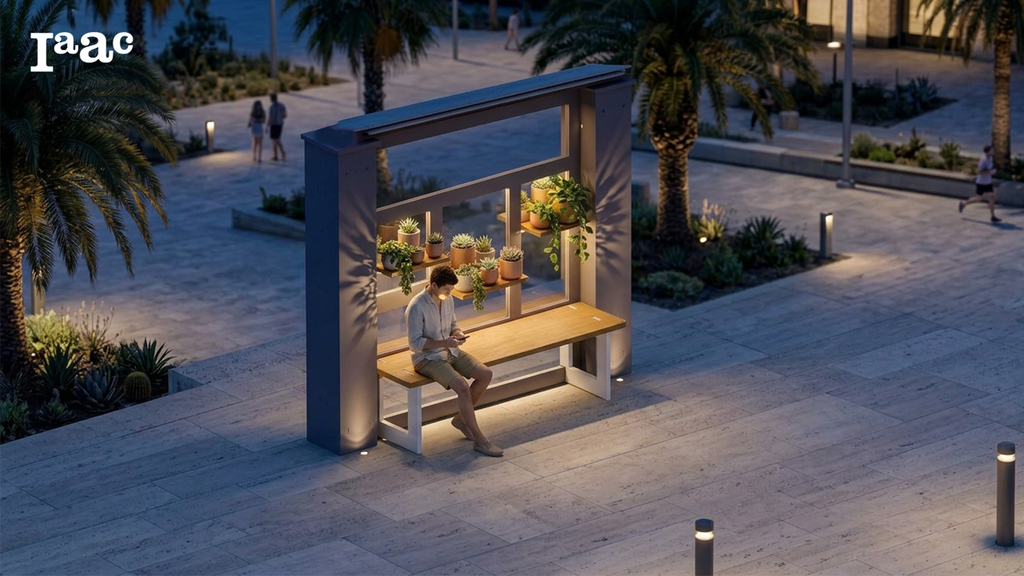
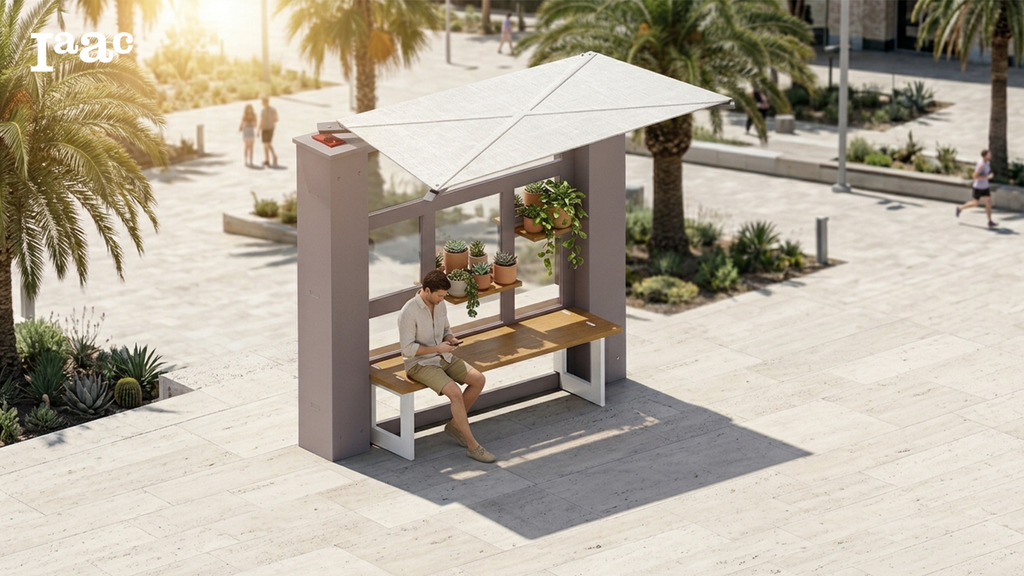
During the day, when sunlight and heat increase, the canopy opens to shade the user. As darkness falls, the canopy closes and LED lights glow under the planted shelves, turning the bench into a small, lit landmark in the street. A screen displays the live temperature and system status, and a button switches the system on or off.
Structure Analysis
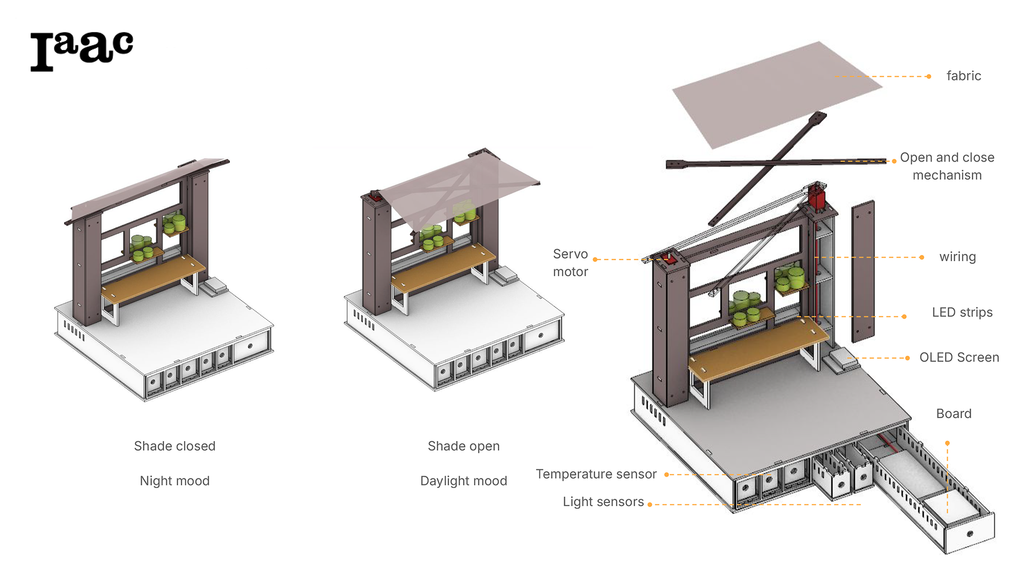
The design went through three iterations, from a complex two-sided bench with a full shelving grid to a simpler single-sided wall, and finally to a compact structure with two columns, a framed back panel with planted shelves, and a timber seat. A crossed open-and-close mechanism, driven by two servo motors, unfolds the canopy. All the electronics are hidden inside the columns and a base with drawers that holds the board, sensors, and wiring.
Circuit Design
The system is controlled by an Arduino board and was first built and tested in Wokwi. Two light sensors, a temperature sensor, and a push button act as inputs. The outputs are two servo motors, two LED strips, and an OLED screen. The code runs in a continuous loop: when the system is on, it reads light and temperature. If they pass the set threshold, the servos open the canopy. When the light drops, the canopy closes and the LED strips turn on, while the screen updates the temperature, shade, and light status.
Arduino Code
#include “DHT.h” // Install Grove_Temperature_And_Humidity_Sensor library
#include <U8x8lib.h> // screen
#include <Servo.h> // motors
#include <Wire.h> // I2C
#include <Adafruit_NeoPixel.h>
// ———- PINS
#define LIGHT_SUN_PIN A2 // sensor facing the sun
#define LIGHT_DARK_PIN A6 // sensor for darkness (shelf light)
// DHT20: usa I2C, no el pin D3
DHT dht(DHT20);
// #define TEMP_PIN 2 // temperature sensor
#define BUTTON_PIN 4 // on/off button
#define LED_PIN 7 // shelf LED
#define SERVO1_PIN 6 // shading motor 1
#define SERVO2_PIN 3 // shading motor 2
#define NUM_LEDS 10
Adafruit_NeoPixel strip(NUM_LEDS, LED_PIN, NEO_GRB + NEO_KHZ800);
#define LED2_PIN A0 // second strip
#define NUM_LEDS2 10 // LEDs on the second strip
Adafruit_NeoPixel strip2(NUM_LEDS2, LED2_PIN, NEO_GRB + NEO_KHZ800);
// ———- LIGHT CALIBRATION (from Serial Monitor)
#define SUN_MIN 20 // sun sensor COVERED
#define SUN_MAX 800 // sun sensor with FLASHLIGHT
#define DARK_MIN 20 // dark sensor COVERED
#define DARK_MAX 800 // dark sensor with FLASHLIGHT
// ———- LIMITS
#define SUN_LIMIT 70 // above 70% = too sunny
#define DARK_LIMIT 70 // below 30% = dark
#define TEMP_LIMIT 30 // above this °C = too hot
// ———- SERVO ANGLES
#define SHADE1_OPEN 50 // servo 1 clockwise
#define SHADE1_CLOSED 0
#define SHADE2_OPEN 0 // servo 2 anti-clockwise
#define SHADE2_CLOSED 50
U8X8_SSD1315_128X64_NONAME_HW_I2C u8x8(U8X8_PIN_NONE);
Servo servo1;
Servo servo2;
bool systemOn = true; // remembers if the system is on
bool lastButton = LOW; // remembers the button from the last loop
bool isClosed = 1;
void setup() {
Serial.begin(115200);
Wire.begin();
pinMode(LIGHT_SUN_PIN, INPUT);
pinMode(LIGHT_DARK_PIN, INPUT);
//pinMode(TEMP_PIN, INPUT);
pinMode(BUTTON_PIN, INPUT);
strip.begin();
strip.show(); // start with all LEDs off
strip2.begin();
strip2.show();
servo1.attach(SERVO1_PIN);
servo2.attach(SERVO2_PIN);
u8x8.setBusClock(100000);
u8x8.begin();
u8x8.setFlipMode(1);
u8x8.setFont(u8x8_font_chroma48medium8_r);
u8x8.drawString(0, 0, “Shading”);
dht.begin();
delay(1000);
}
void loop() {
// 1. BUTTON: each press switches ON <-> OFF
bool button = digitalRead(BUTTON_PIN);
if (button == HIGH && lastButton == LOW) {
systemOn = !systemOn;
delay(50);
}
lastButton = button;
// 2. If OFF: everything off, skip the rest
if (!systemOn) {
strip.clear();
strip.show();
strip2.clear();
strip2.show();
// servo1.write(SHADE1_CLOSED);
// servo2.write(SHADE2_CLOSED);
u8x8.drawString(0, 2, “SYSTEM: OFF “);
u8x8.drawString(0, 4, ” “);
u8x8.drawString(0, 6, ” “);
delay(50);
return;
}
// 3. READ SENSORS
int sunRaw = analogRead(LIGHT_SUN_PIN);
int darkRaw = analogRead(LIGHT_DARK_PIN);
float temp = dht.readTemperature();
float humi = dht.readHumidity();
//int tempRaw = analogRead(TEMP_PIN);
//float temp = tempRaw * 500.0 / 1024.0;
// 4. REMAP light sensors to 0-100 %
int sun = constrain(map(sunRaw, SUN_MIN, SUN_MAX, 0, 100), 0, 100);
int dark = constrain(map(darkRaw, DARK_MIN, DARK_MAX, 0, 100), 0, 100);
// 5. SHELF LIGHT: brighter as it gets darker
int level = 0;
if (dark < DARK_LIMIT) {
level = map(dark, DARK_LIMIT, 0, 40, 150); // 40 = visible minimum
}
uint32_t warm = strip.Color(level, level * 0.6, level * 0.25); // warm white
strip.fill(warm);
strip.show();
strip2.fill(warm); // same colour on strip 2
strip2.show();
u8x8.drawString(0, 6, level > 0 ? “LIGHT: ON ” : “LIGHT: OFF “);
// 6. SHADING: open if sunny
if (sun > SUN_LIMIT && isClosed == 1) {
for (int i = 0; i <= SHADE1_OPEN; i++) {
servo1.write(i);
int ii = map(i, 0, SHADE1_OPEN, SHADE1_OPEN, 0);
servo2.write(ii);
delay(100);
}
u8x8.drawString(0, 4, “SHADE: OPEN “);
isClosed = 0;
Serial.println(“open”);
} else if (sun < SUN_LIMIT && isClosed == 0) {
for (int i = SHADE1_OPEN; i >= 0; i–) {
servo1.write(i);
int ii = map(i, 0, SHADE1_OPEN, SHADE1_OPEN, 0);
servo2.write(ii);
delay(100);
}
u8x8.drawString(0, 4, “SHADE: CLOSED “);
isClosed = 1;
Serial.println(“closed”);
}
// 7. SCREEN: temperature
u8x8.setCursor(0, 2);
u8x8.print(“TEMP: “);
u8x8.print(temp, 1);
u8x8.print(” C “);
// 8. SERIAL: see readings to calibrate
Serial.print(“sunRaw:”);
Serial.print(sunRaw);
Serial.print(“,”);
Serial.print(“darkRaw:”);
Serial.print(darkRaw);
Serial.print(“,”);
Serial.print(“sun%:”);
Serial.print(sun);
Serial.print(“,”);
Serial.print(“dark%:”);
Serial.print(dark);
Serial.print(“,”);
Serial.print(“temp:”);
Serial.println(temp);
delay(100);
}
Bill of Materials (BOM)
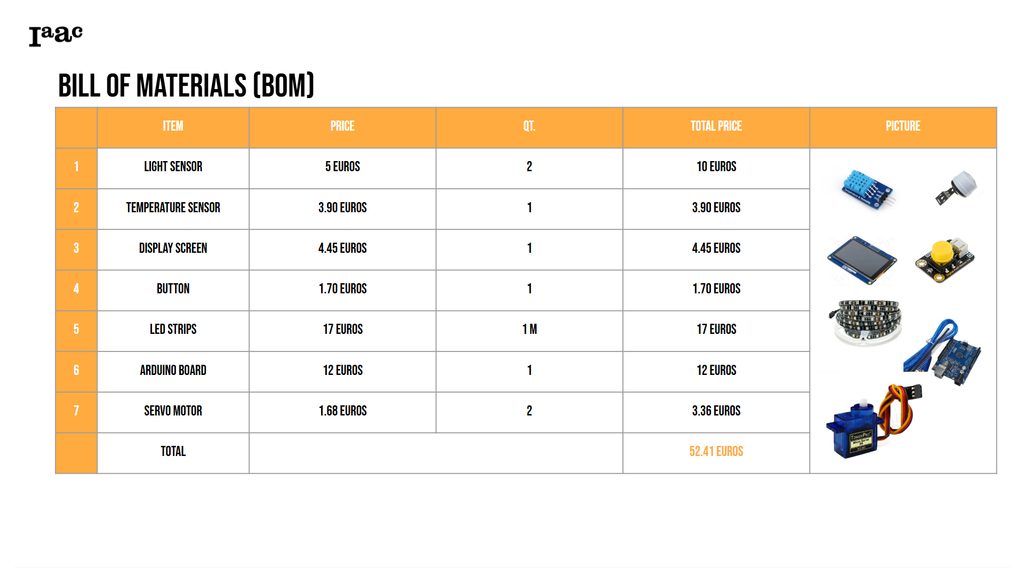
The prototype uses low-cost, widely available components, with a total cost of €64.41.
Simulation
Prototype Model
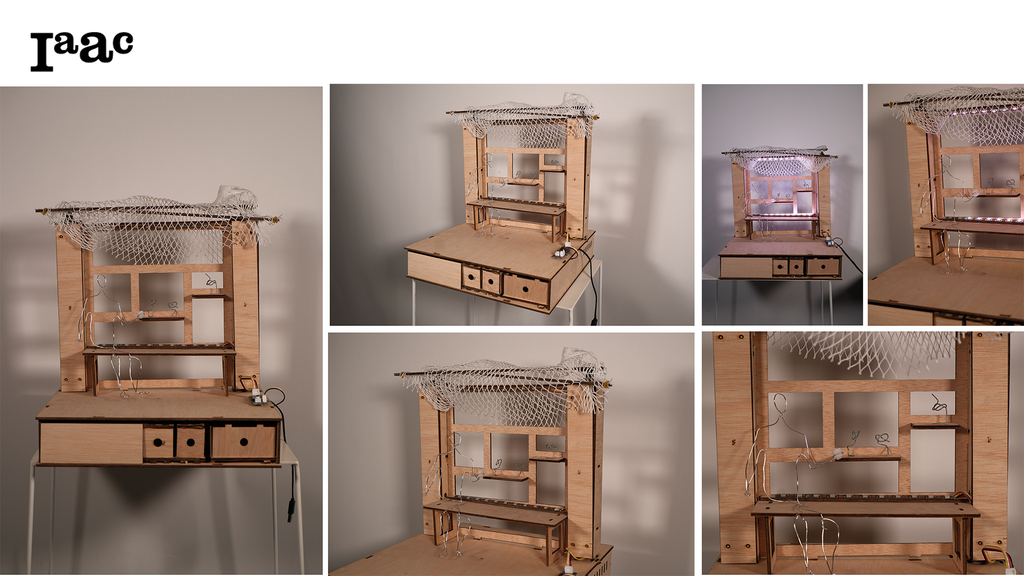
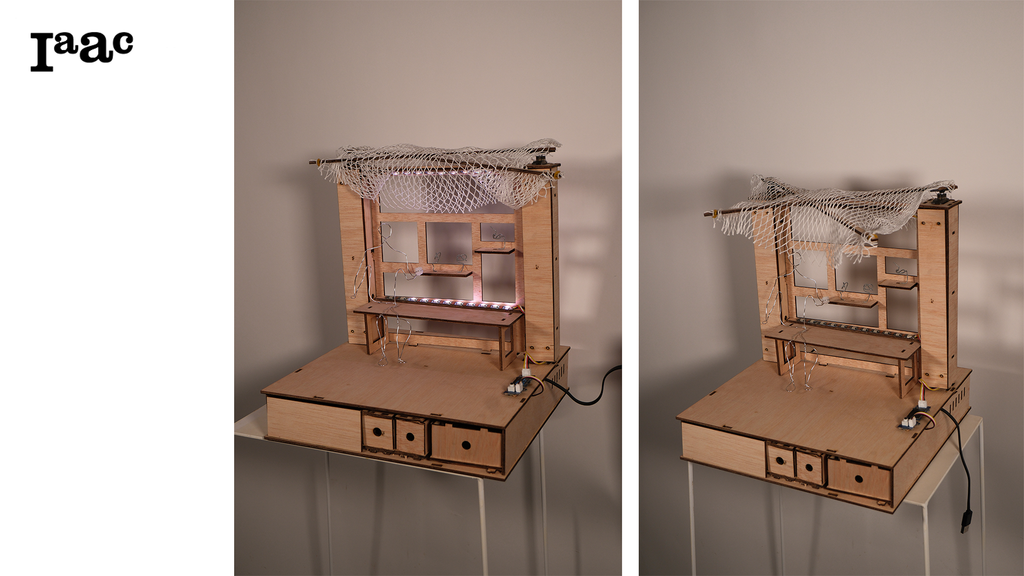
The physical prototype was built at model scale in laser-cut plywood, with a net canopy stretched across the crossed arms of the mechanism. The drawers in the base keep the board and wiring accessible for testing, while the sensors and screen stay at the front of the model where users can interact with them.
Video
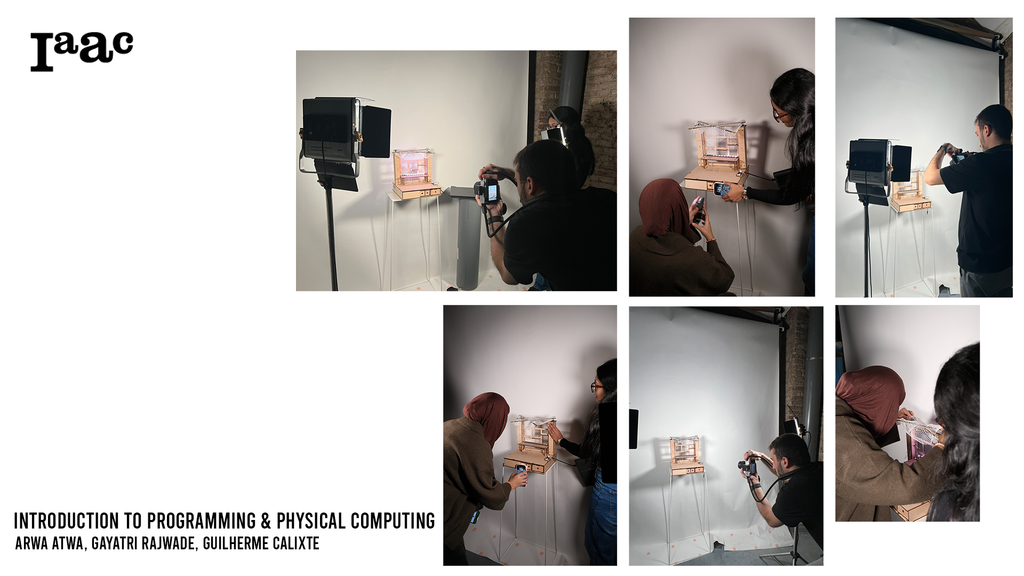
The video shows the full concept, the technical system, and the prototype responding to light and darkness in real time.
Render
The renders place Bench 2.0 in an urban promenade. At night, the canopy is closed and the lighting creates a safe, welcoming place to sit. During the day, the open canopy casts a cool shaded area over the seat.
Future Development
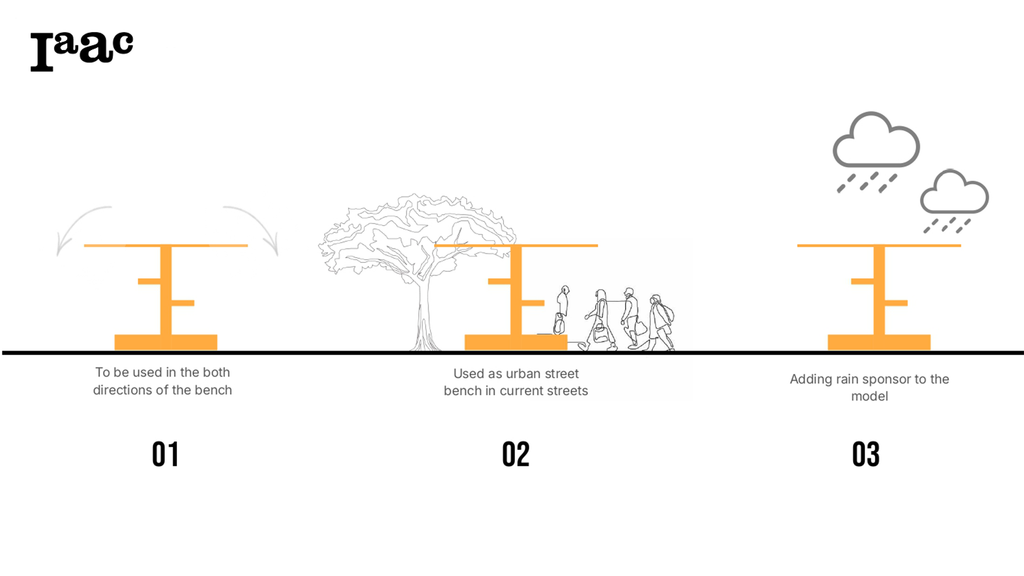
Next, we want to develop a canopy that can open towards both sides of the bench, test the design as a street bench in existing urban spaces, and add a rain sensor so the canopy can also protect users from rain.