THE PROCESS OF PROTOTYPING planning
Fabricating chairs for the Collaborative Design Studio project 2023-24 was a journey consisting of diverse ideas, input, and glitches that led to multiple learning outcomes. We spent the first few weeks designing digital models to narrow down to a design language, that guided us throughout the process. We then explored the laser cutter to test smaller scale prototypes at 1:5, to help us visualize form and function, and convey our ideas to our faculty and peers better. As we proceeded to prototype at a larger 1:1 scale, we also collected some wood working skills which proved to be essential as we proceeded further into the final stages of the project. We have employed the CNC machine, bend saw, table saw and chop saw, at various points to produce our chairs.
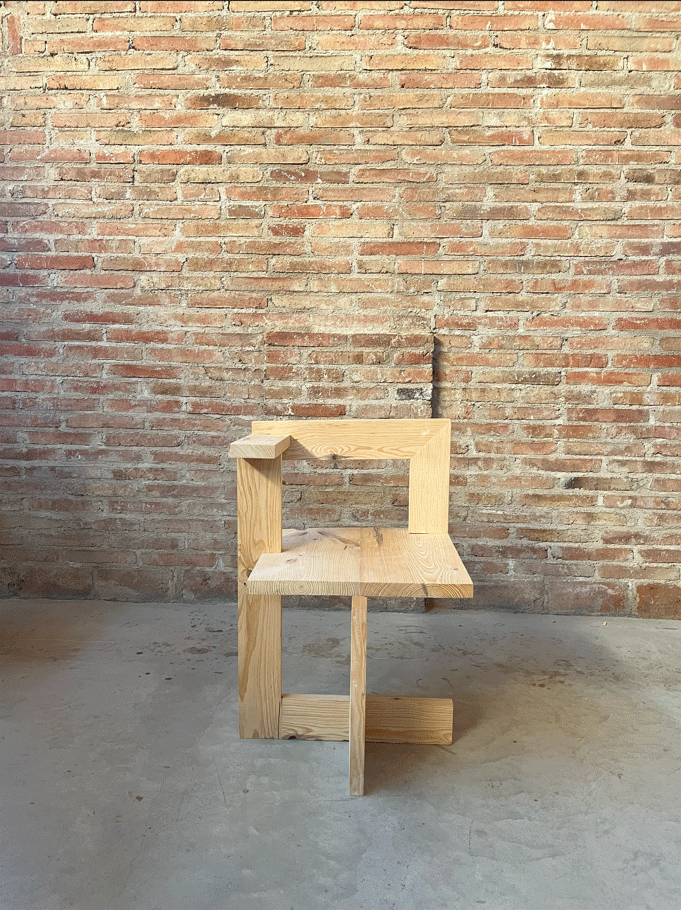
Once the digital models were completed, we prepared laser cutter files with appropriate layers for engraving and cutting as per the thickness of modeling material used. Lock and Key joinery were tested since an early stage to determine location and number of joints required for a stable chair. Multiple iterations were modeled and tested at this stage to streamline the design through the third dimension, away from the digital space.
To avoid unnecessary material wastage, we started prototyping the planned joints at a 1:1 scale to visualise the functionalities of the lock and key and its tolerances. After a series of tests being either too wide or too tight, we narrowed down to an ideal tolerance which we could then apply to our chairs at a life-size scale.
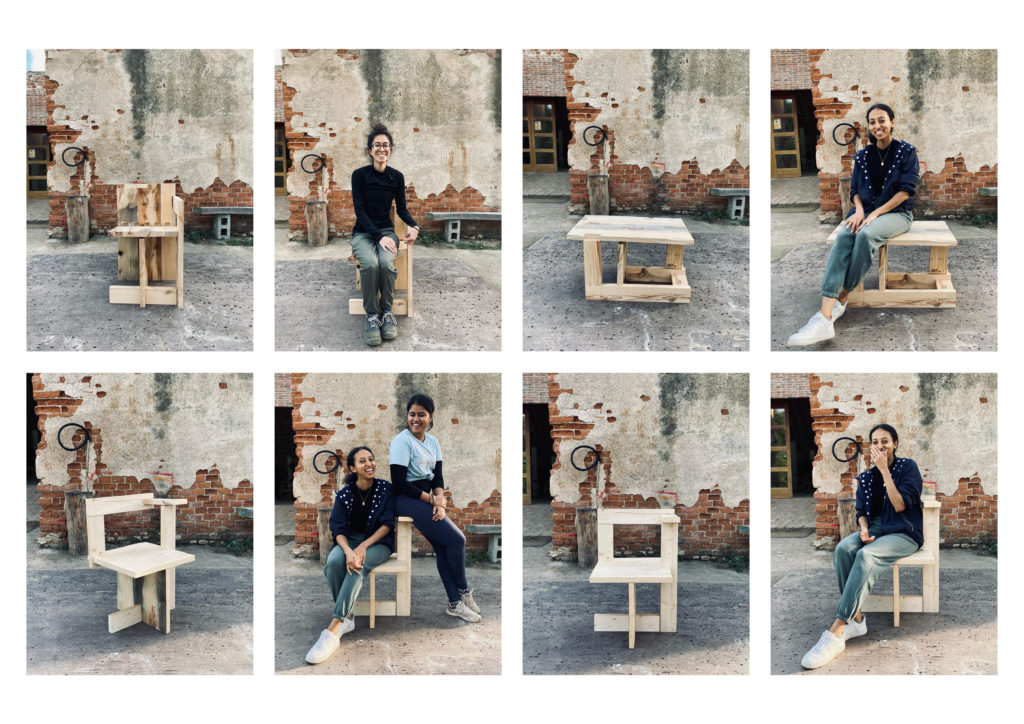
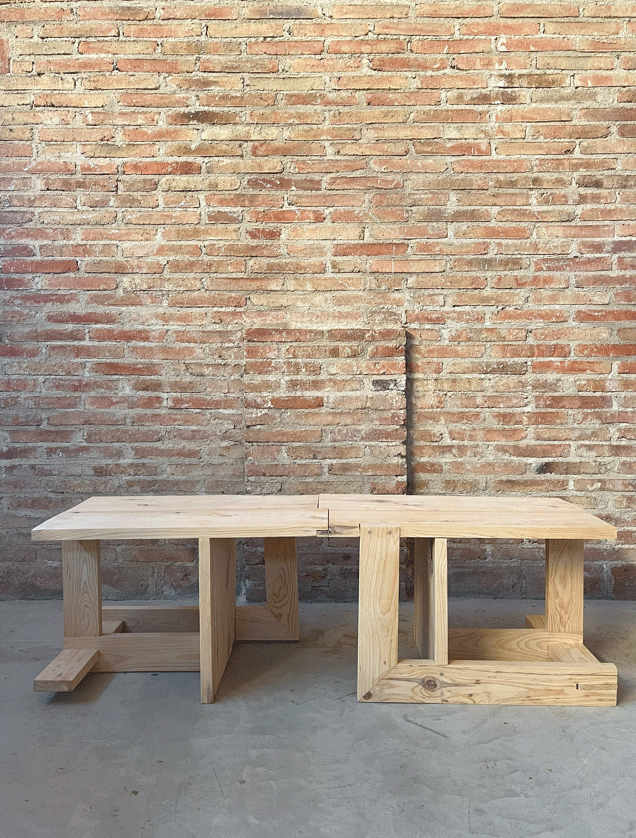
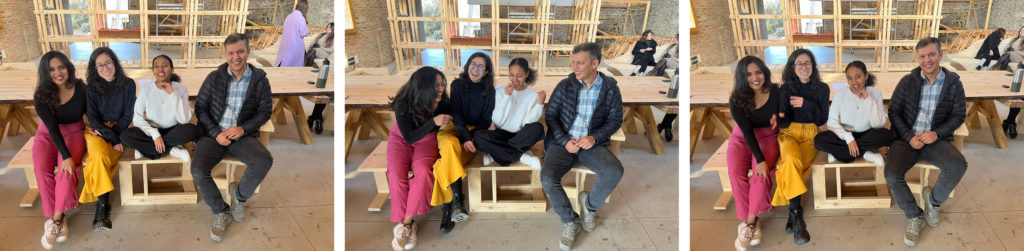
The first set of timber prototypes we created came with a multitude of learning. Since most of our group was experiencing wood working for the first time, it was challenging as the first step was to familiarize ourselves with the machinery and tools involved with the process. Our FabLab lead Bruno Ganem Cuotinho, guided us throughout the initial steps and ensured that it was a smooth procedure. Once the prototyping was complete, having the life-size model to visualize, helped us make major decisions that we wanted to improvise for added comfort, aesthetics and general ergonomics.
PROCESSING TIMBER execution
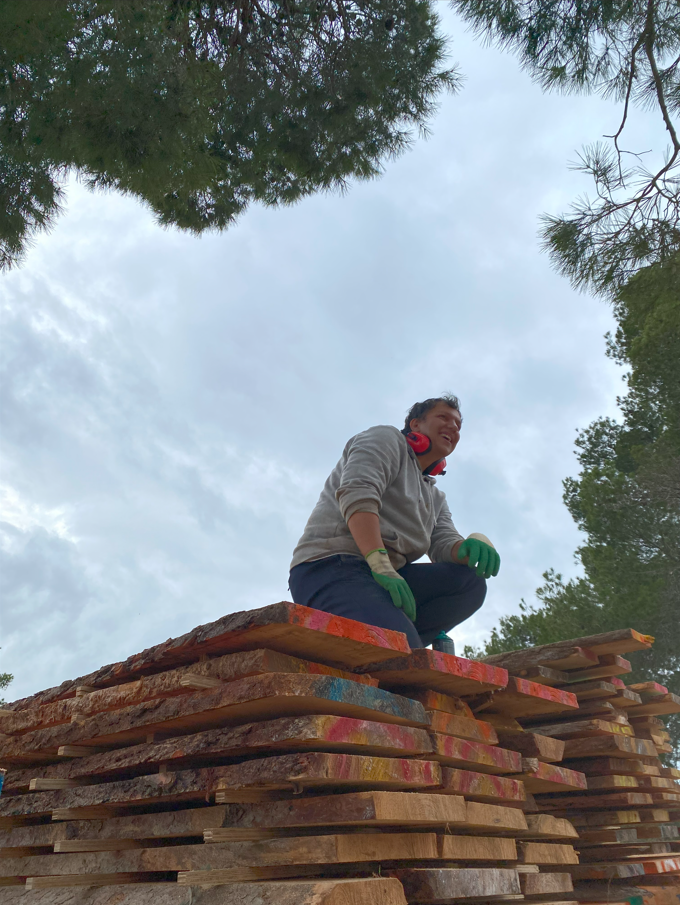
On beginning the fabrication process, we selected pine trunks that we would be able to use without much wastage. Having a prepared area schedule of planks required to produce 16 chairs helped to refer and have an approximation before starting the milling process.
The selected pine trunks are first given a rinse to remove any dust, dirt or small stones that may interfere with the milling process. Once the trunk is hoisted over the miller, the desired thickness is set on the machine. The chairs were designed to have a thickness of 3cm in all parts. The machine was thus set to 4cm to have a leeway for shrinkage during the drying process. The trunks are then milled into planks and collected.
The freshly milled planks are piled over each other with separators in between each layer to avoid adhesion from weight compression or resin.
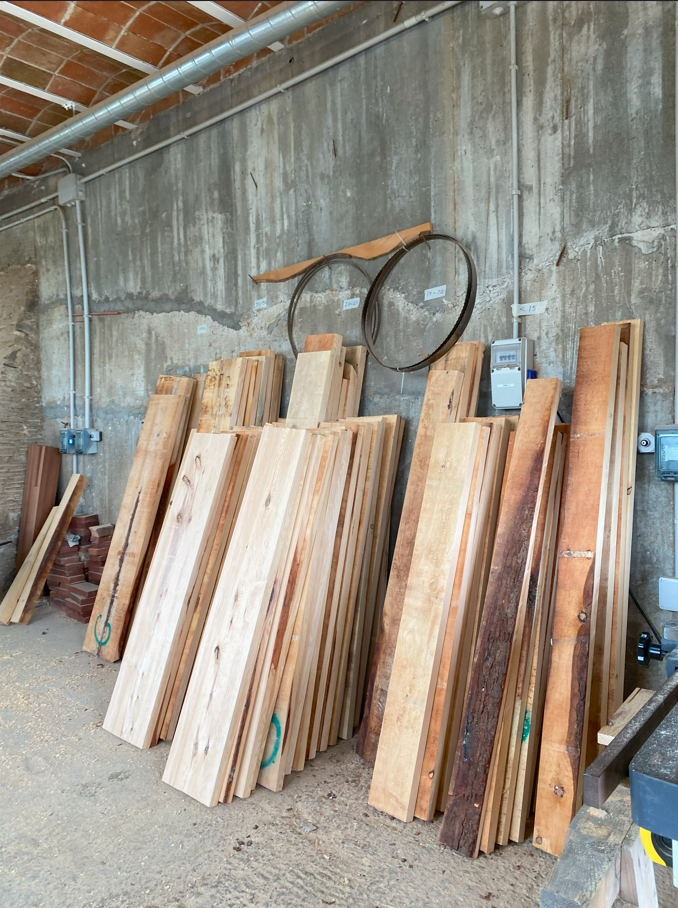
Our group collected a total of 33 planks that could then be used for fabrication. The planks are then sorted based on groups and then sent to the kiln for drying.
FABRICATING 8X2 CHAIRS execution
We received the planks after 10 days at a stage of 50% moisture. This is to prevent cracks that are generally formed when timber is fully dried with a short duration, caused due to the core being in compression and the shell in tension for extended periods of time. The planks were then sorted and fully prepared for use in the carpentry workshop.
The planks were first sliced into three parts lengthwise. This allowed us to avoid wastage with plank width as multiple planks had considerable width differences at either ends. This also allowed for easier management of the pieces while handling it around the machines. The bark was then sliced off using the table saw, after which the jointer was used to achieve one flat plane. This was then a guide as we planed the planks using the planer.
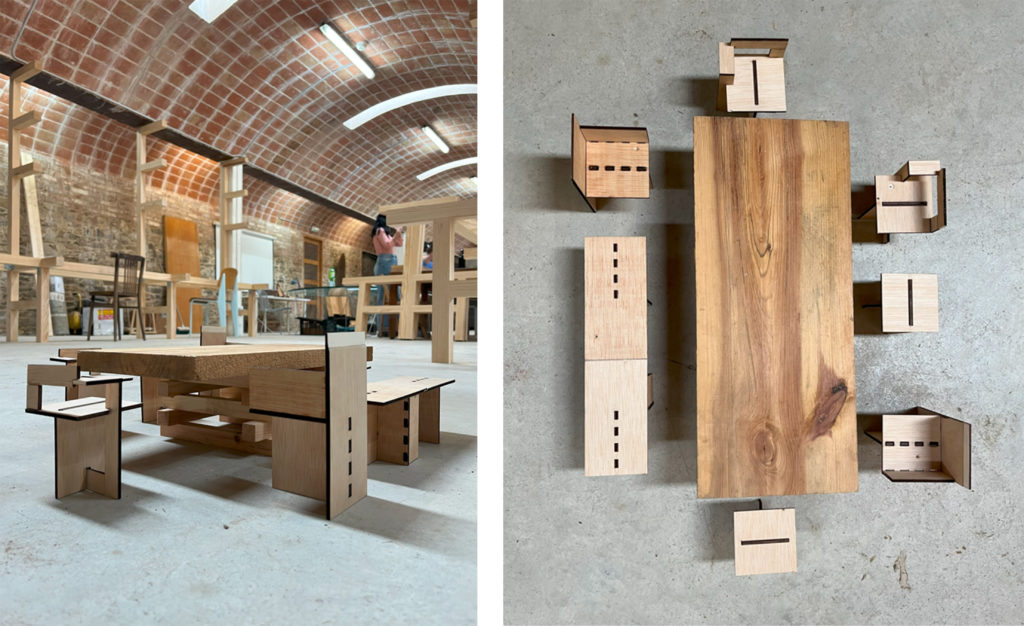
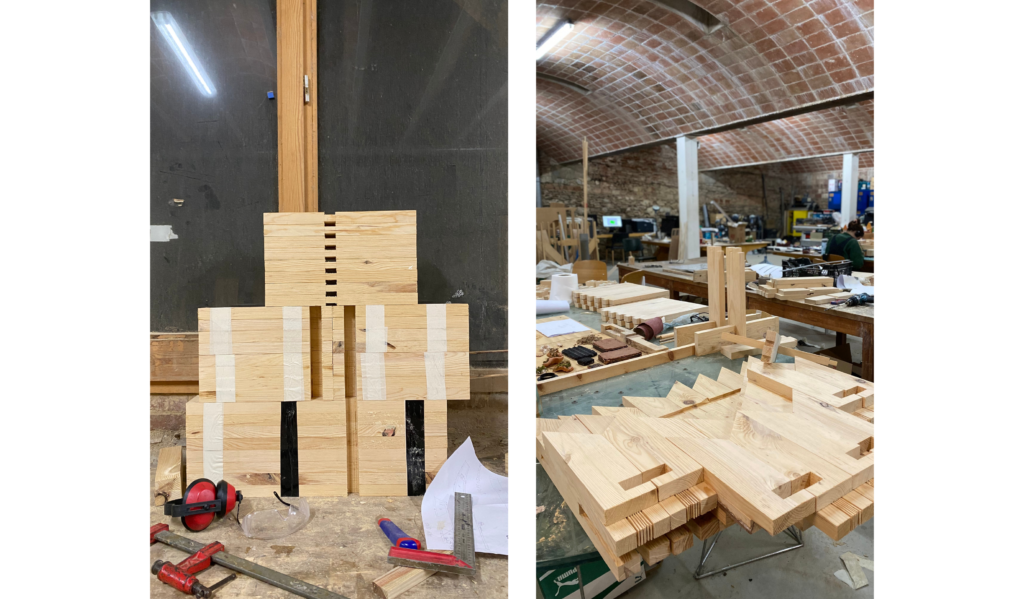
Once all pieces were prepared, we took an approximate measure and modeled the pieces digitally to keep track of which pieces can be glued together for achieving a wider width greater than 450cm for the seats and backs of the chairs.
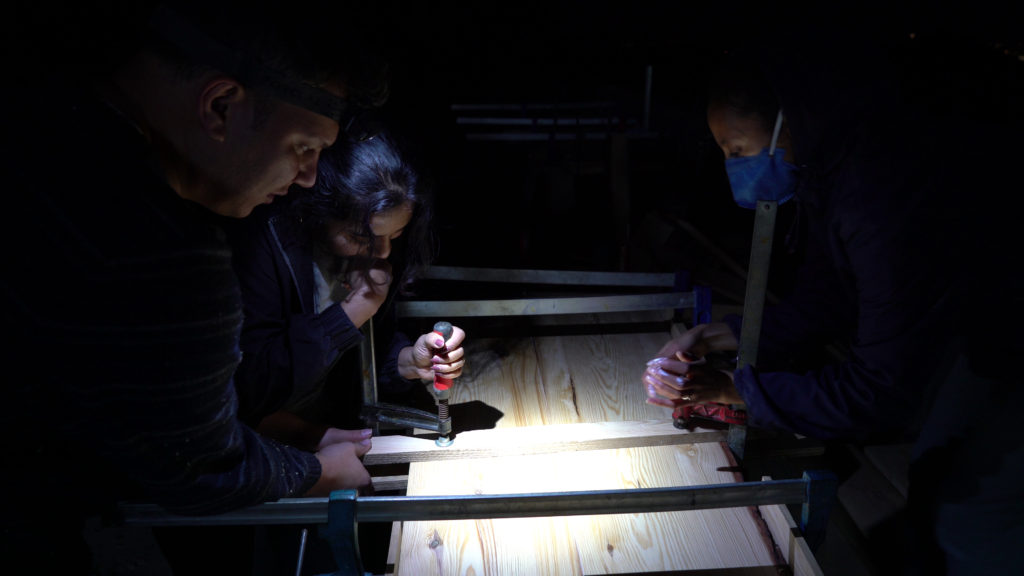
The gluing process was strategically planned such that the planks would have a minimum of 6 hours of drying before being released for use on the CNC. We simultaneously glued wood in 3 batches a day to complete as per schedule. Once a thin layer of glue is applied on the plank, it is clamped together and levelled using smaller wood blocks to hold shape without damaging the plank surface.
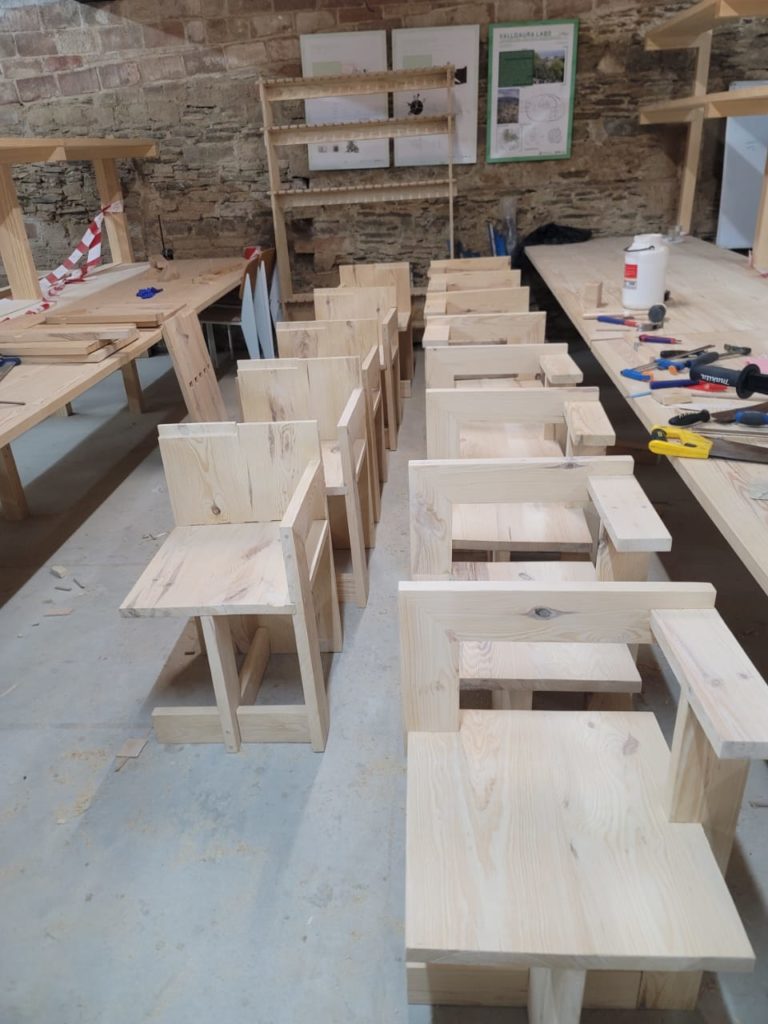
The planks are then processed as per the design. Chair backrests and seats are cut using the CNC. Joinery details are pocketed as per the initial prototype tolerances. Smaller pieces that require sharp corners are cut using the bend saw and table saw for precision.
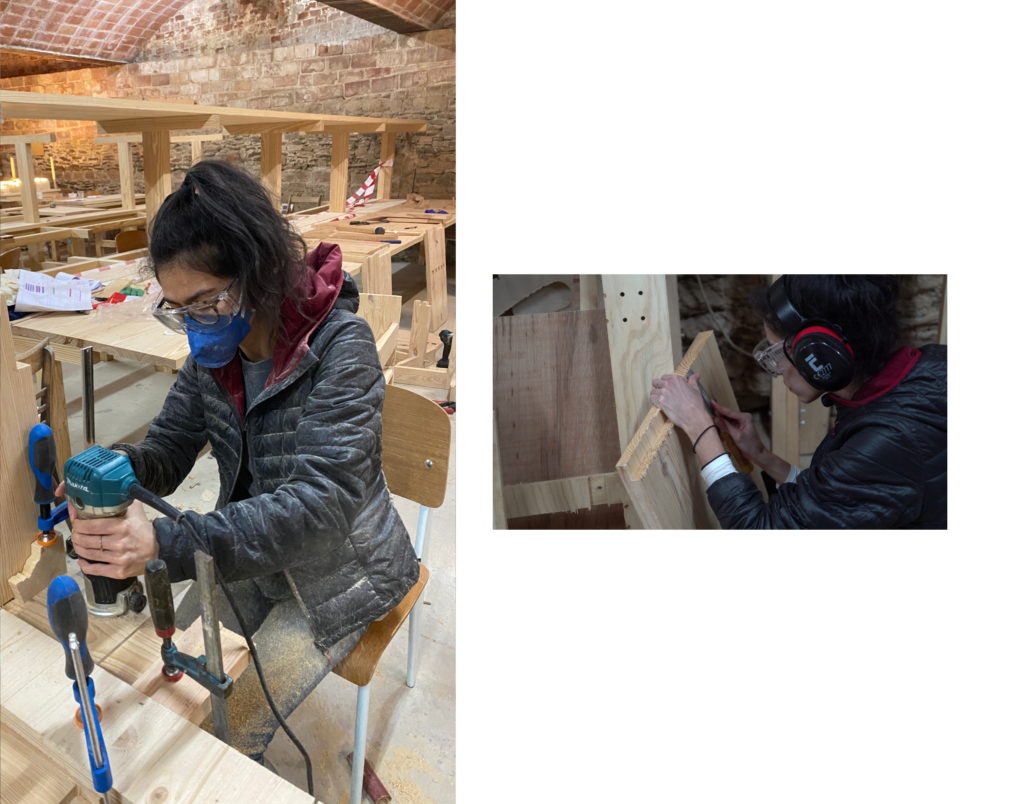
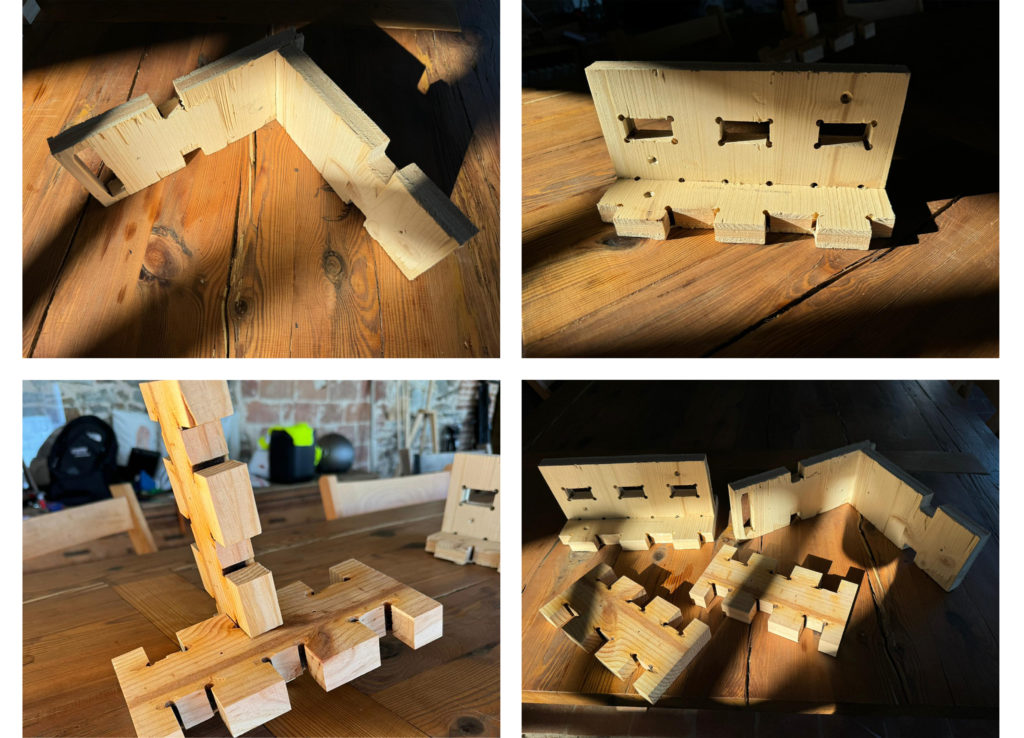
Surfaces such as the joinery for bench chairs that have pocketing details on either side were manually created using the handheld CNC router.

The cut pieces are then chiseled to achieve smoother, sharper corners for the joints to slide in seamlessly.
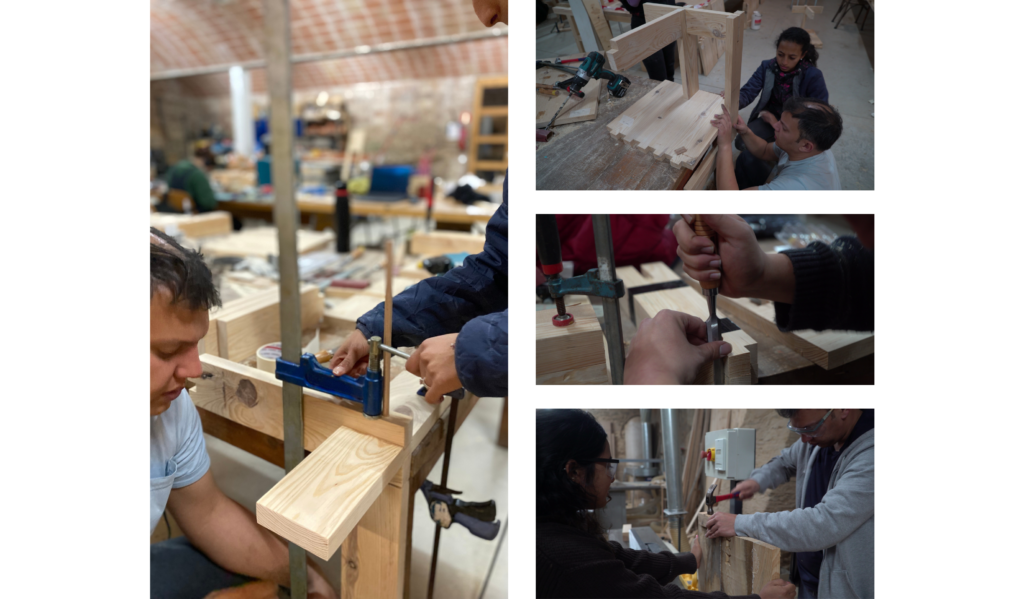
The prepared pieces are organized and grouped with its respective chair parts. the parts are then clamped before drilling and doweling into place.
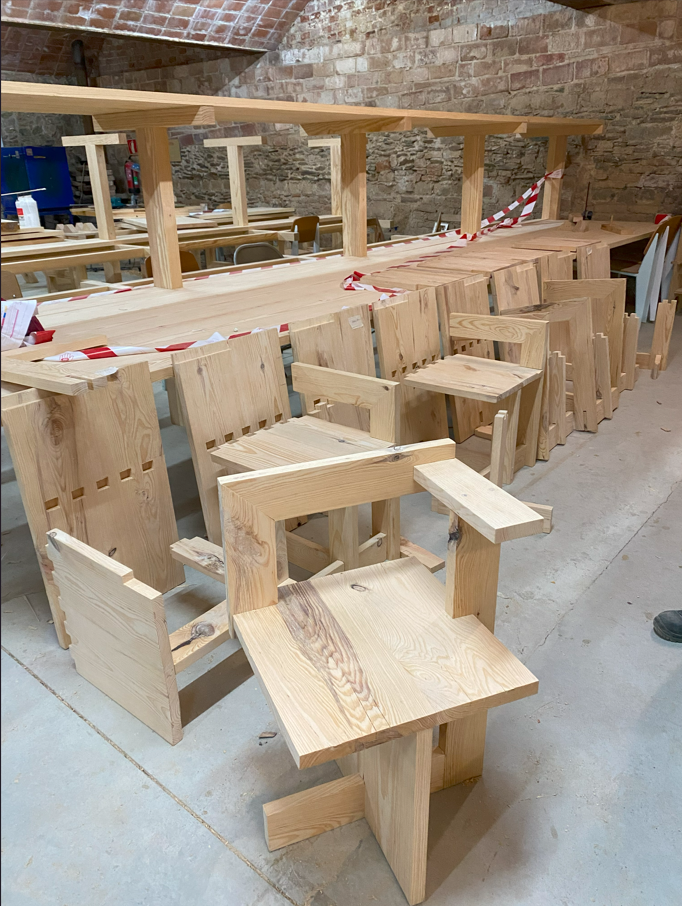
The last 3 months of learning fabrication and understanding the tools and machines involved in carpentry was a rewarding ride of undulations where every failure taught us a lesson. Although having to learn every step from scratch seemed like a challenge at first, it was a lot more enjoyable to do it collectively with an enthusiastic team.