
The introductory Digital Fabrication course proposed a three-week program of how to use three manufacturing methods- 3D printing, laser cutting, and CNC milling in order to understand the correlation between computer data and machine based fabrications. The intensive course dealt with research and study of each of the 3 techniques and led to detailed explorations of design prototypes with a comprehensive understanding of the materials and software associated with each machine.
CNC MILLING
Superimposition
ABSTRACT
Each group was given a hexagonal frame (360x180mm) as a base for the milled portion, both of which would constitute the final geometry. The aim of the exercise was to understand the parameters by which different materials respond to CNC milling and which bit was most appropriate for different configurations. Each group was given a total of 2 hours of production time in order to complete their panel.
SAMPLE PROTOTYPE:
A square piece of foam (100x100x80mm) was given to each group to experiment on, so as to understand the tolerance parameters and how CNC milling excavates the material. Before concluding on the final submission, we wanted to understand the basics of CNC milling. Therefore for the sample we decided to test for a more organic pattern so as to observe the tolerances for curvatures at various depths.

FINAL DESIGN
CONCEPT:


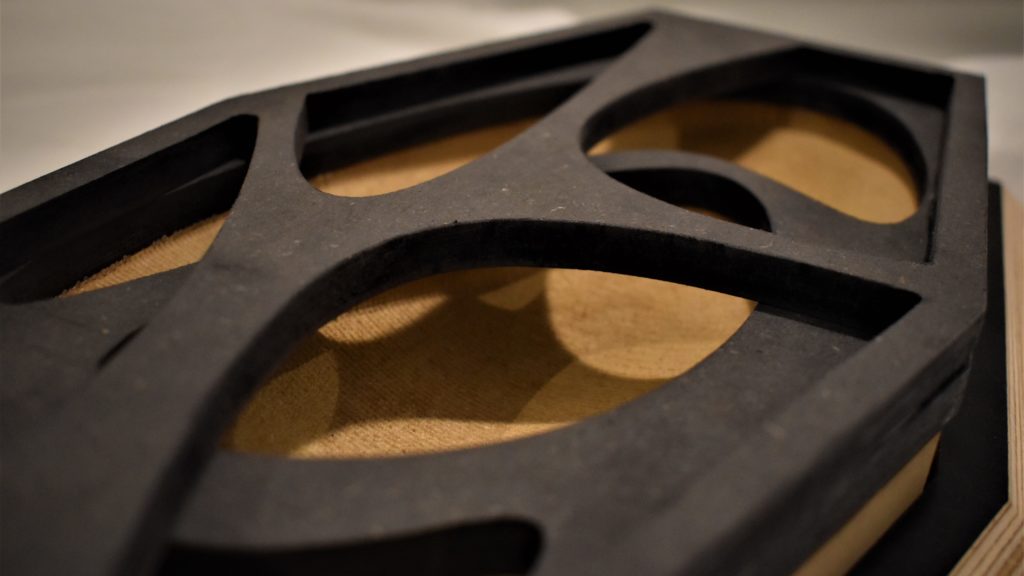
The overall form was inspired by Spider webs. Overlapping multiple webs at different levels to create a depth of field while creating a captivating playful intervention between light and shadows, thereby generating penumbral pockets within the fabrications of three different layers.
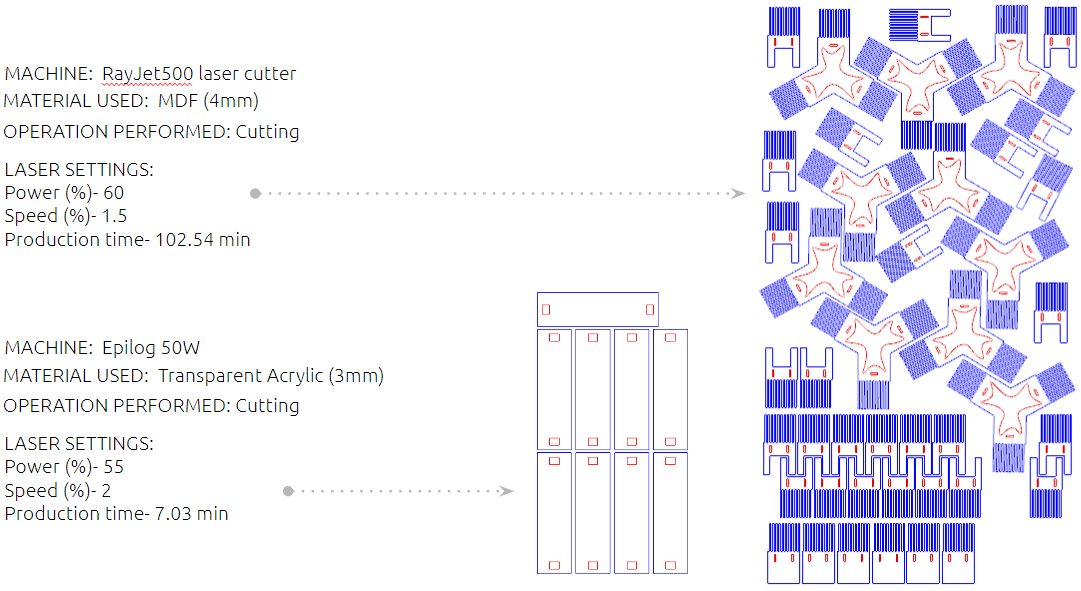
FABRICATION PARAMATERS:

Total time taken for the fabrication of all 3 layers= 54.57 minutes
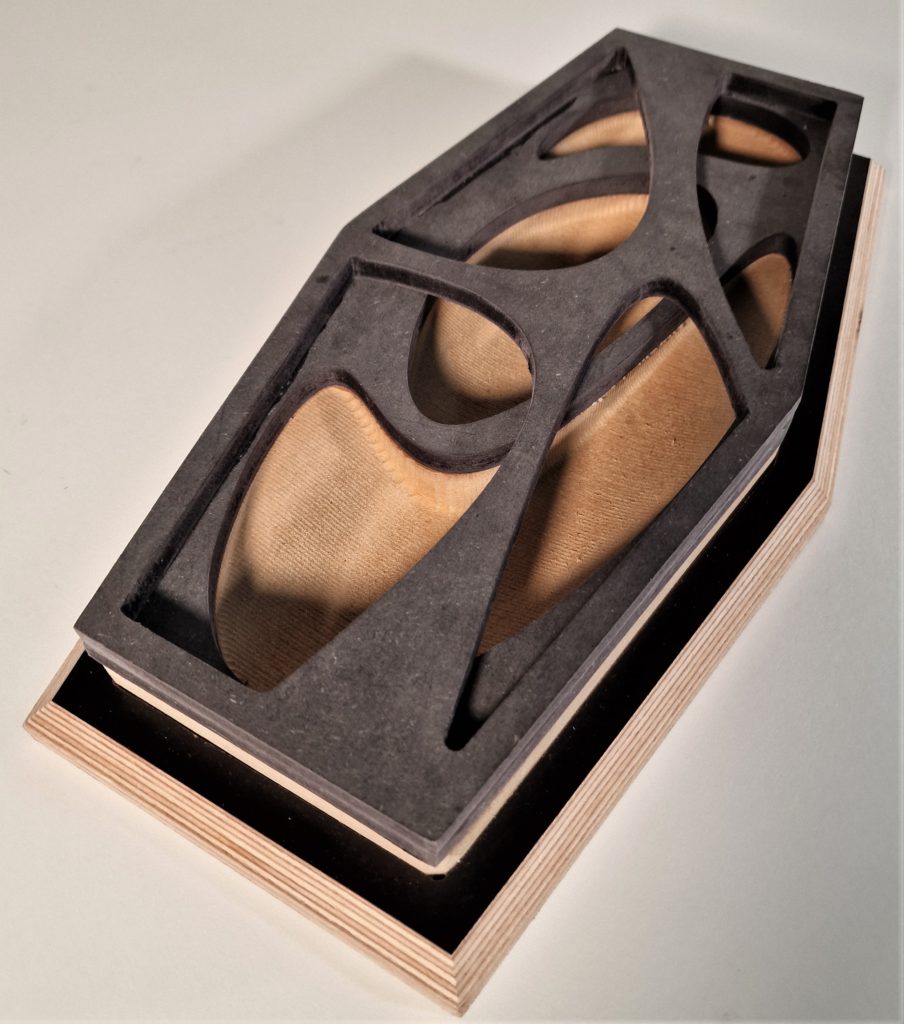
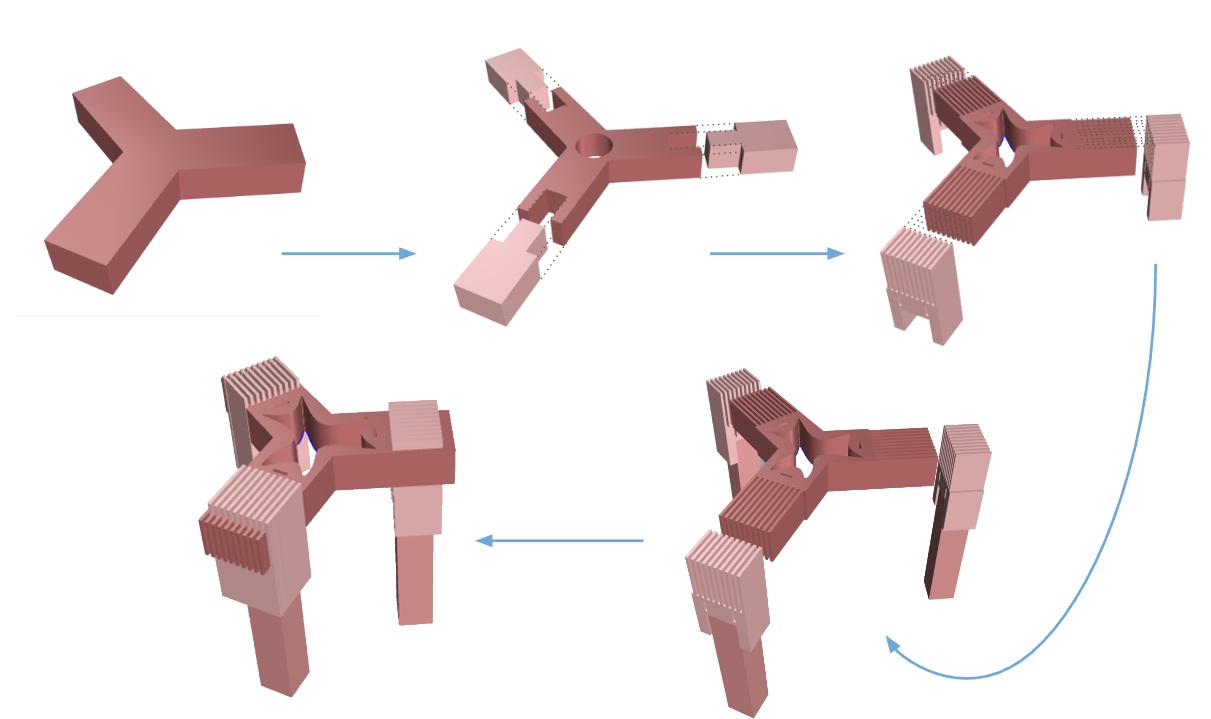
ASSEMBLY

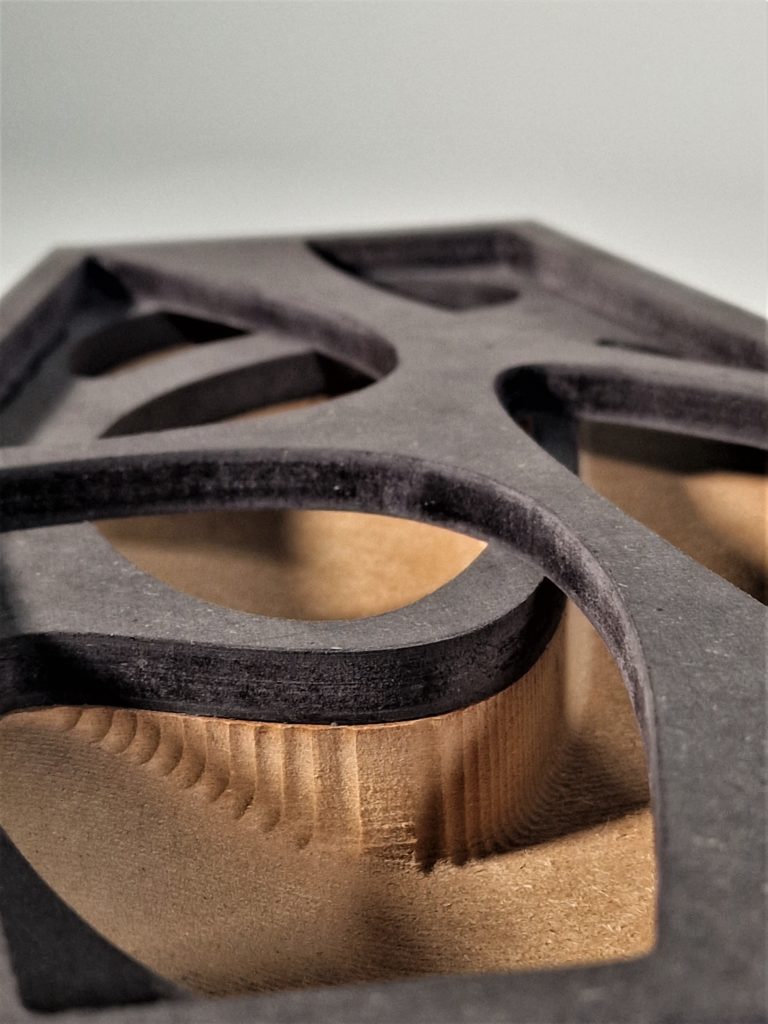
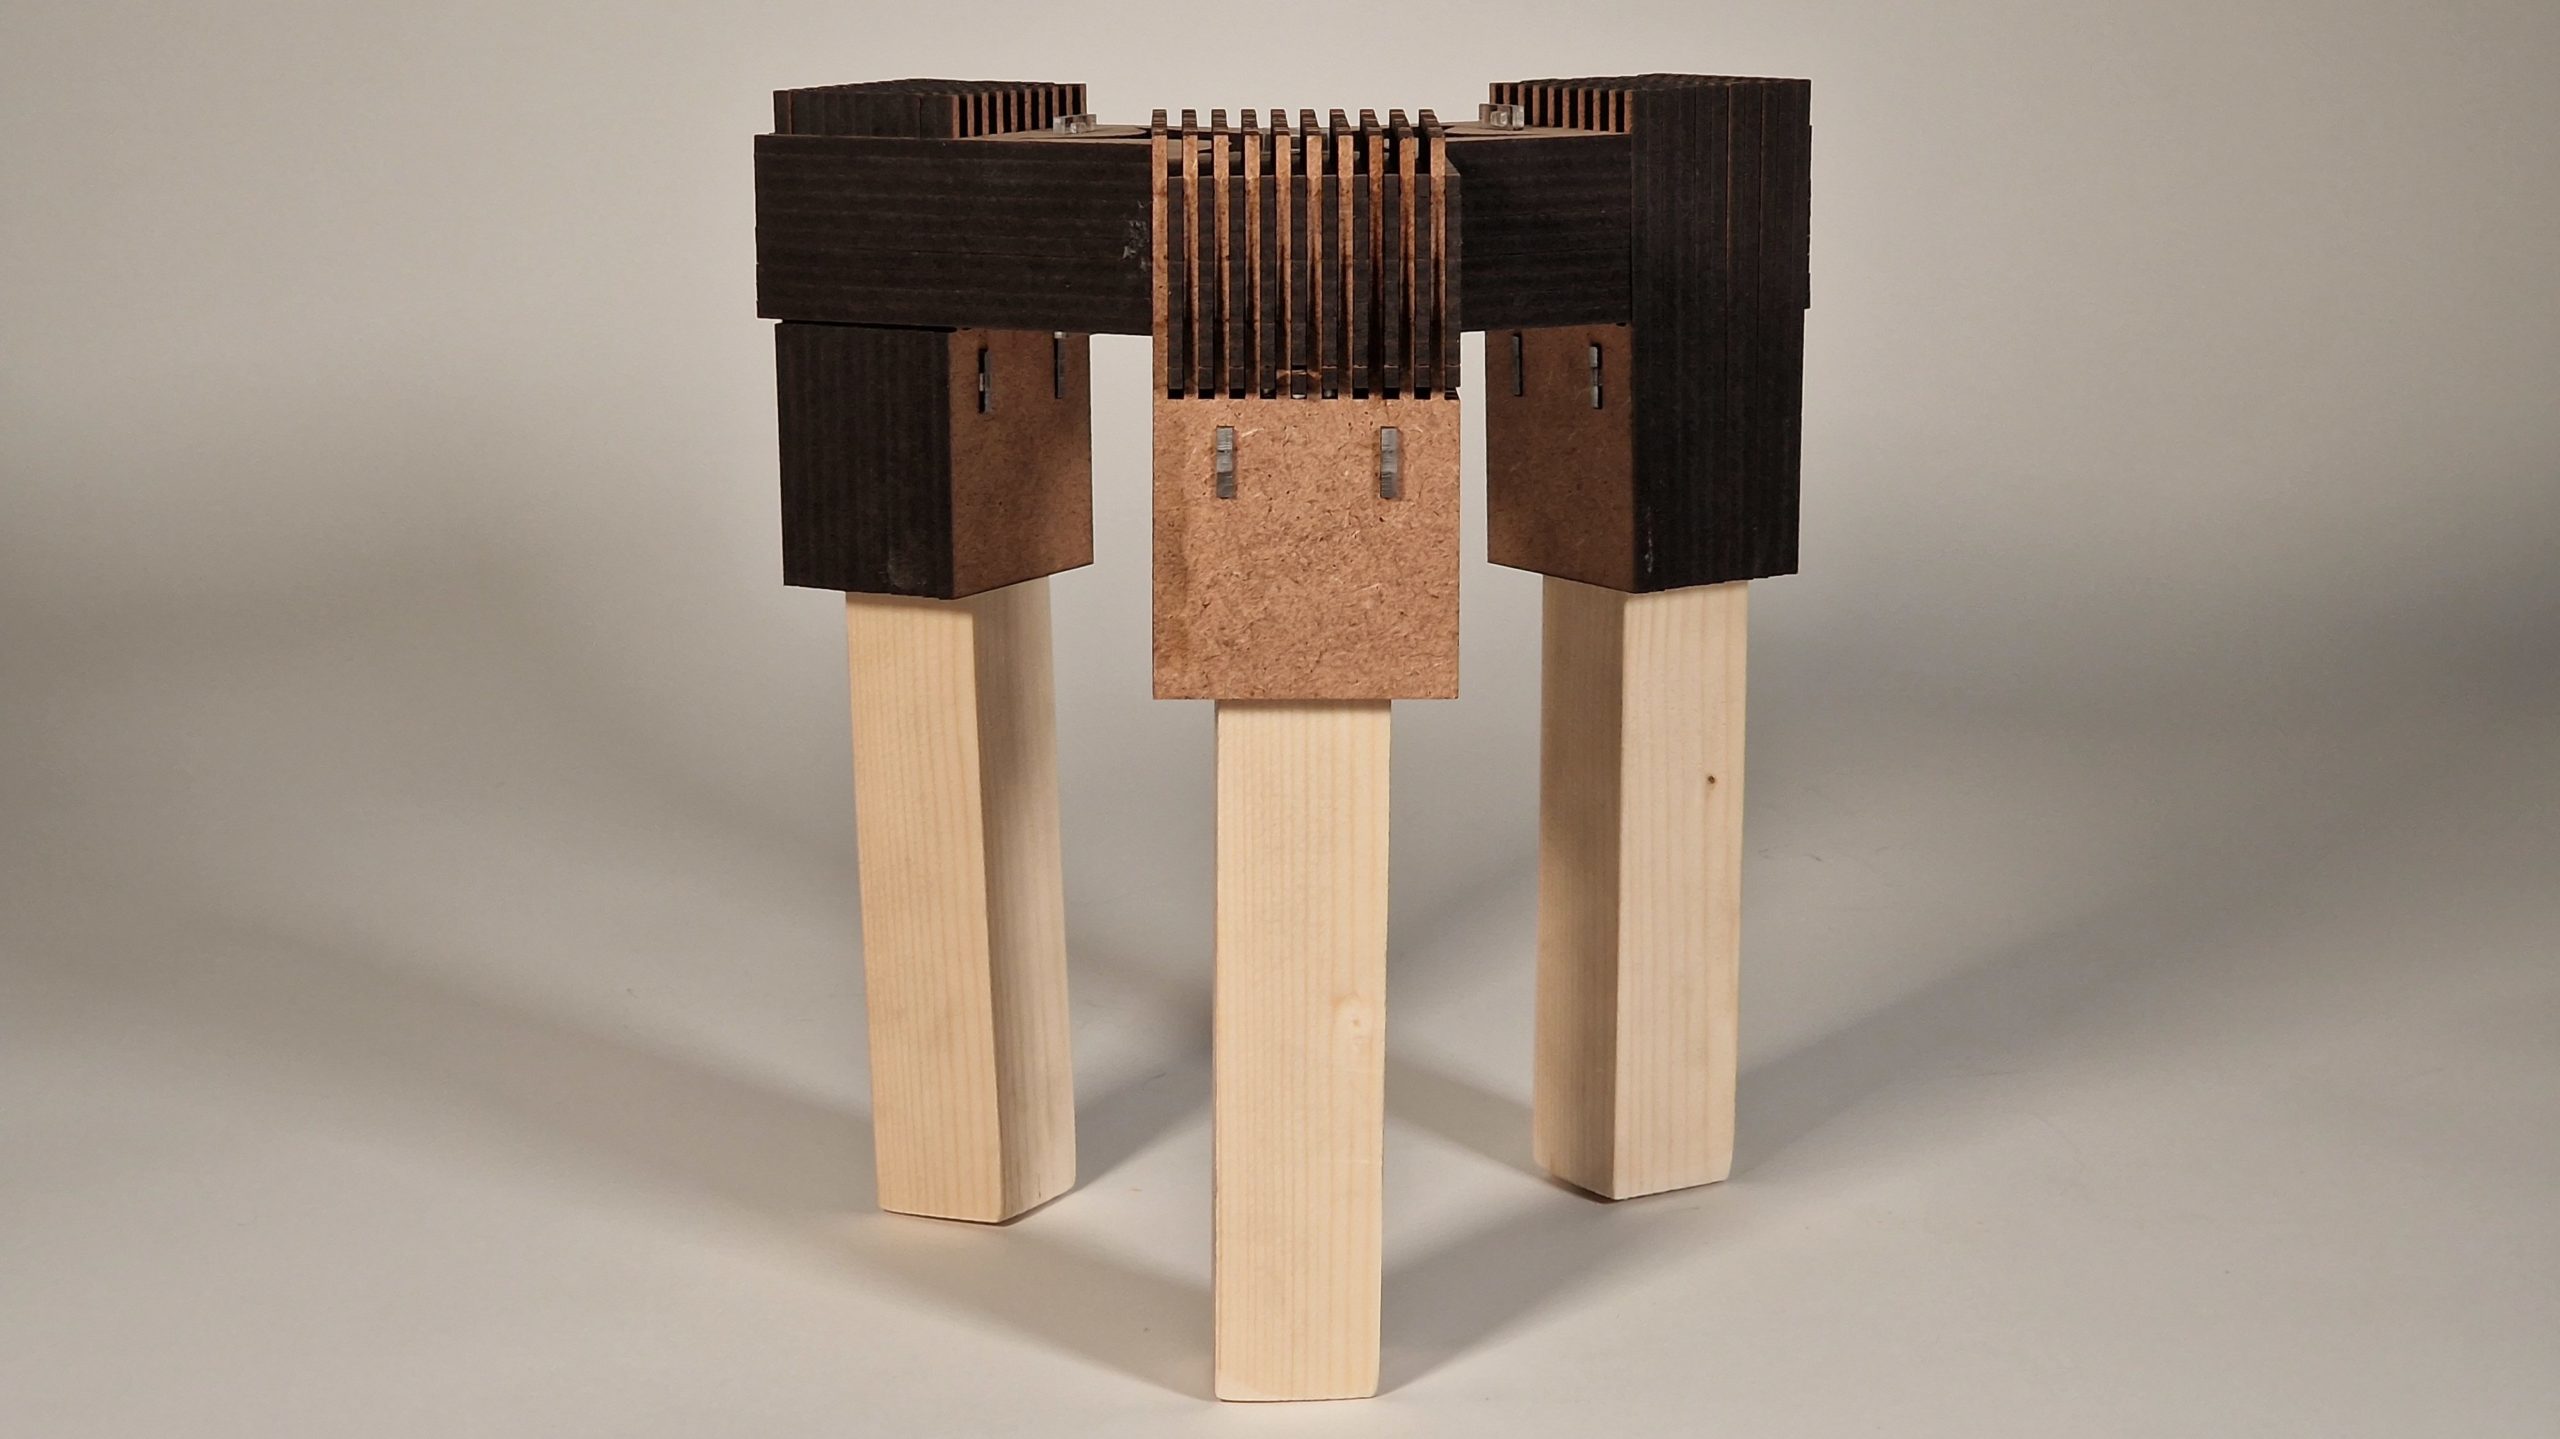
FINAL IMAGES
LASER CUTTING
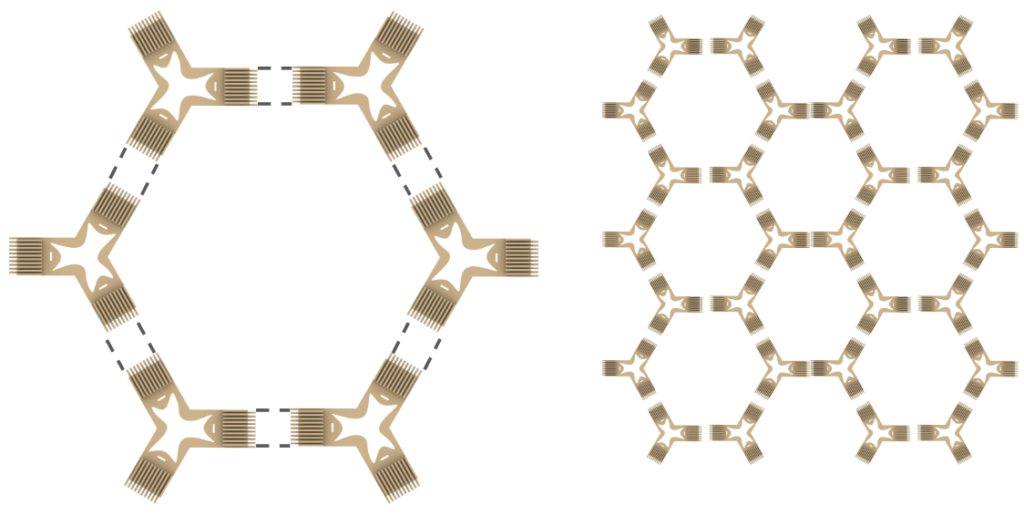
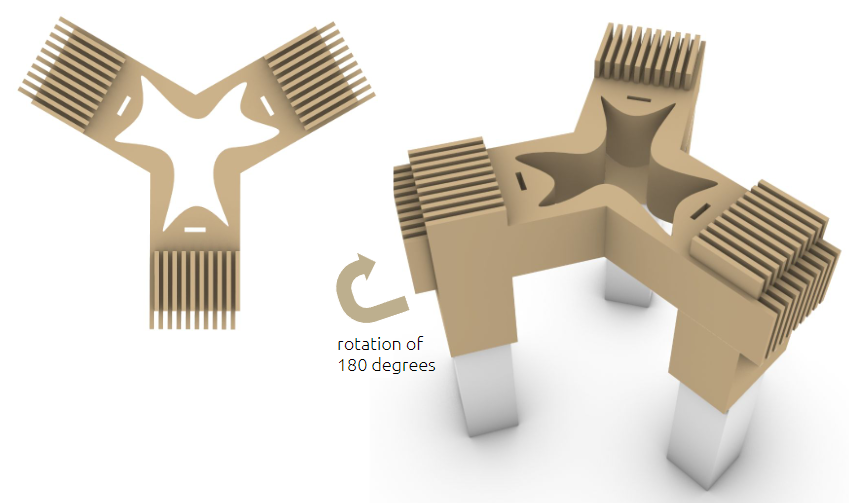
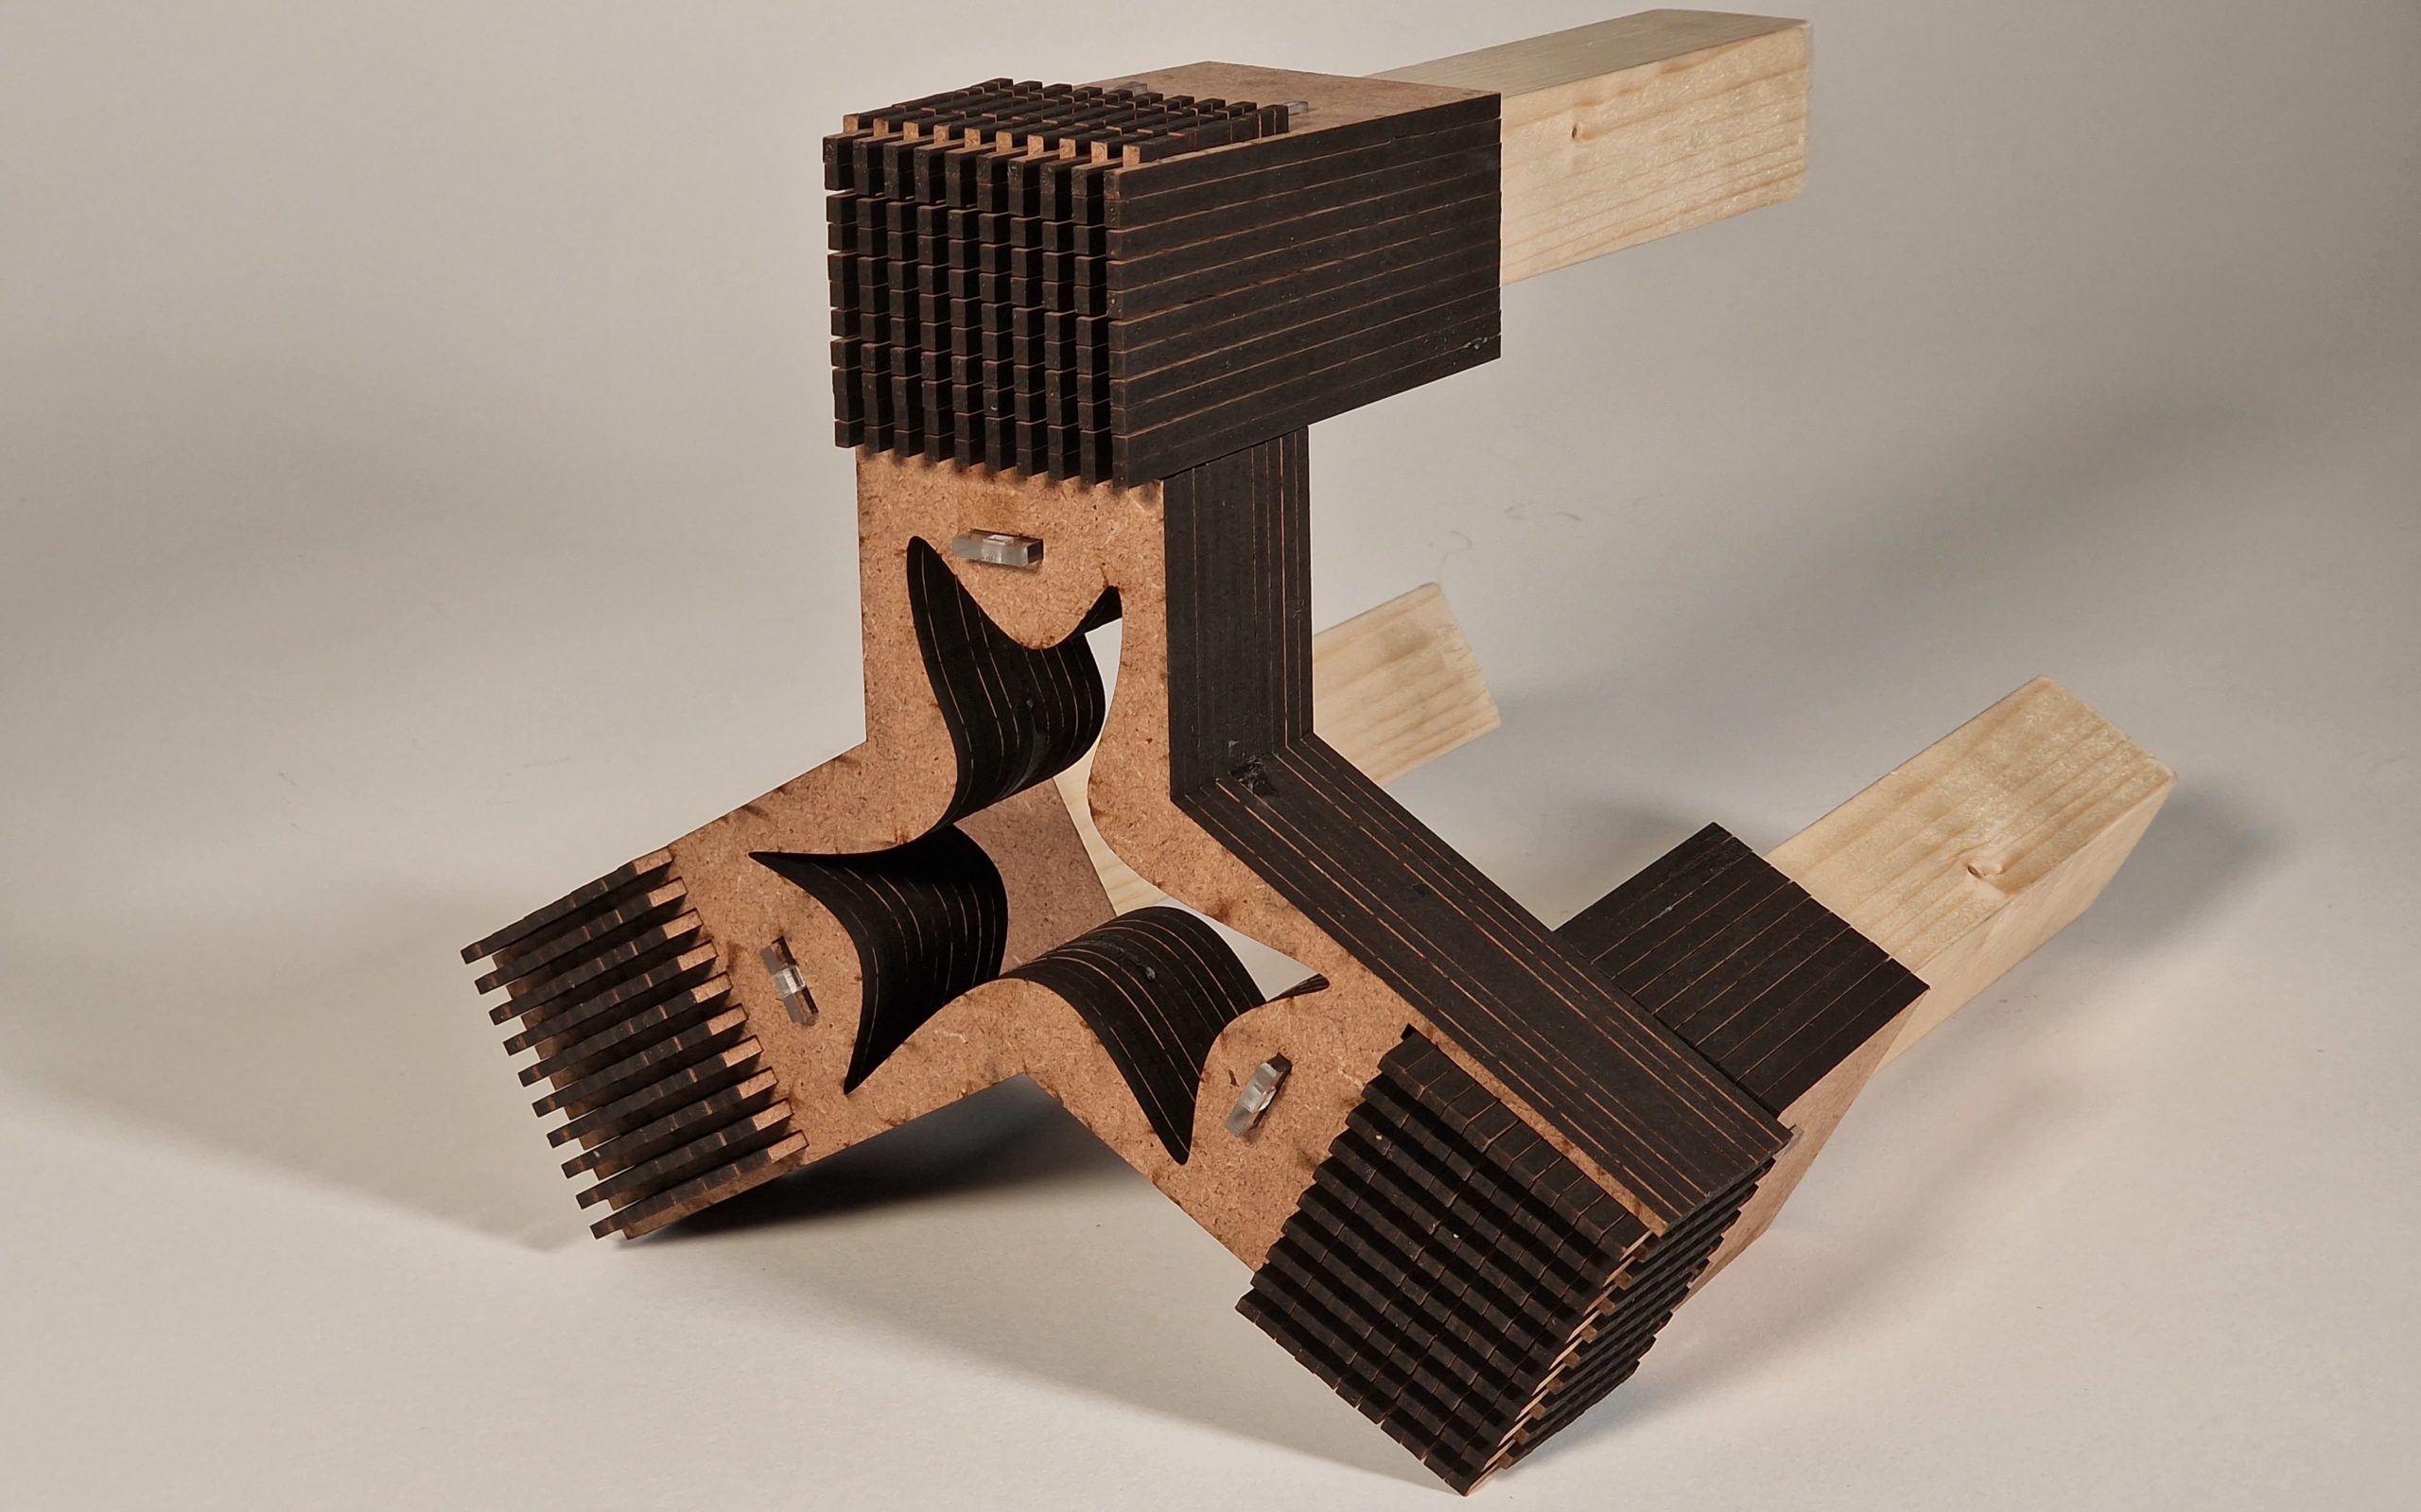
HEXA-MITOSIS
Creating prototypes of interlocked sliced geometries to create tight joints that can be multiplied in a hexagonal pattern
3D PRINTING
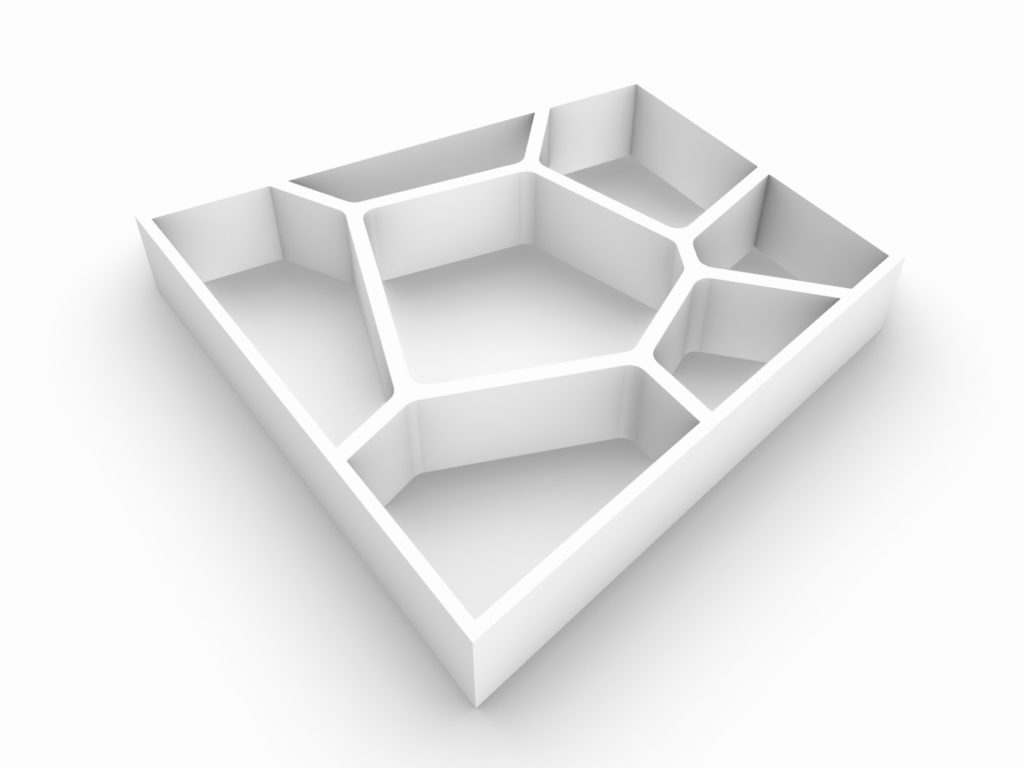
VORONOIFICATION
The exercise aimed to understand and explore the parameters of 3D printing while designing a 1:1 scale (given) façade. In terms of technical parameters, to be aware of the opportunities and limitations offered by 3D printing while knowing and recognizing the scope of future collaborations with different fabrication techniques (i.e. CNC milling, laser cutting) for the efficient and quality outcome of our design.
DESIGN DEVELOPMENT:
A Voronoi pattern provides clues to nature’s tendency to favour efficiency. Each cell in a Voronoi pattern has a seed point. The lines between cells are always halfway between neighbouring seeds, which is why the pattern provides structural stability.

CONCEPT
The design of the façade was developed in modular form to cast fascinating indoor shadows considering the sun’s angle at different times of the day. In order to achieve that, we tried to manipulate the outlines after extruding the Voronoi pattern and by offsetting them, we get inclined lines with a certain depth to cast our desired intriguing shadows inside.
TECHNICAL PARAMETERS:
- Machine specifications: Zortrax M200 Plus
- Material type: Z-ABS 2
- Layer thickness: 0.29 mm
- Support Type, angles and specifications: Automatic, 20%
- Infill type, percentage, & pattern: Normal, 10%
- Seam: Normal
- Mesh errors and fixes: No errors
- Total print time: 7 hours 48 minutes
- Total material quantity: 106g
- Layer height: 25mm

FINAL IMAGES:


