
Our Collective Design Goals
As designers, we see this project as an opportunity to create a play environment that is genuinely functional, inclusive, and meaningful for children, while deepening our own understanding of how design can support play, curiosity, and well-being. We aim to learn basic design, fabrication and installation with wood as a material. Furthermore, intend to allow our creativity to guide our outcomes. We want a nature-centered approach that is grounded in natural materials, interactivity, and experimentation. We intend our piece to be culturally-relevant and reflect Catalan virtues. We seek to grow as designers by embracing play as a tool for learning, collaboration, and discovery.
The Client
Col•legi Mare de Déu dels Àngels
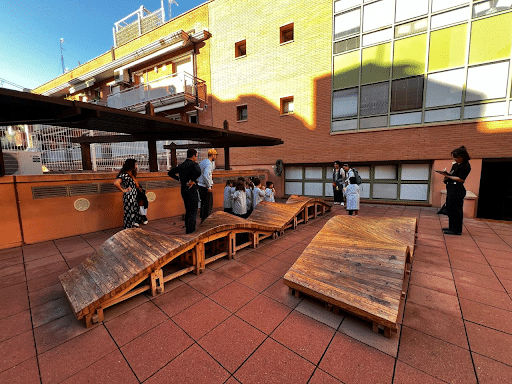
Col·legi Mare de Déu dels Àngels in Barcelona’s La Sagrera is a long-standing private school that serves learners from infancy through secondary and batxillerat. Founded in 1898, the institution emphasizes a warm, inclusive environment where children are encouraged to develop holistically through play and curiosity-driven activities.
The school relies exclusively on internal courtyards for outdoor play. This context creates a need for carefully designed installations that transform the courtyards into stimulating, playful, and meaningful environments that support learning.
We were asked to design a new play structure for the Kindergarten area that meets the needs of the students and responds to these spatial constraints.
Client Needs
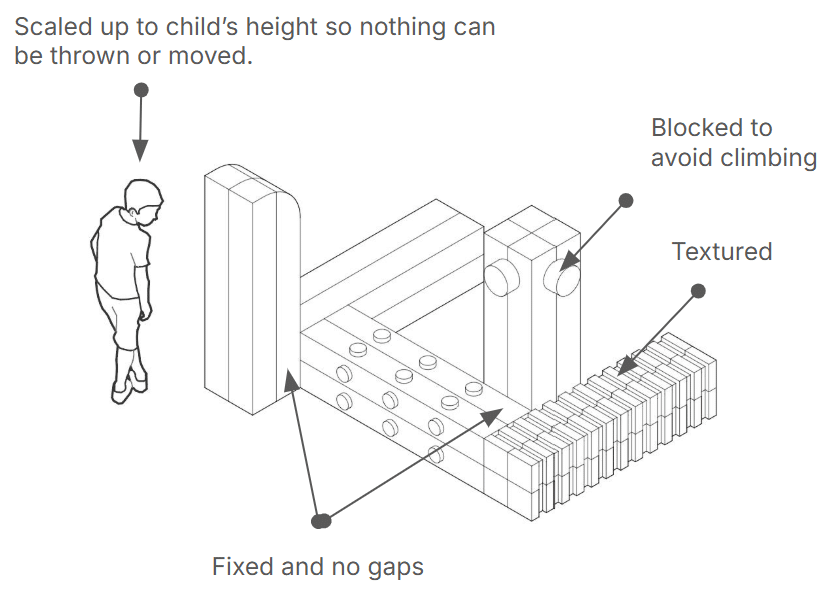
The Kindergarten Terrace requires a play installation that prioritizes safety and long-term durability above all else. The design must be space-efficient and seamlessly integrated with the existing courtyard structure, while thoughtfully activating underused side areas of the play space. To ensure safe daily use by young children, the installation should be fully fixed in place, with no movable elements or gaps between wooden components. All design decisions are guided by the need to create a robust, low-maintenance, and secure environment that supports active play within a compact school setting.
Goals and Interests of Development
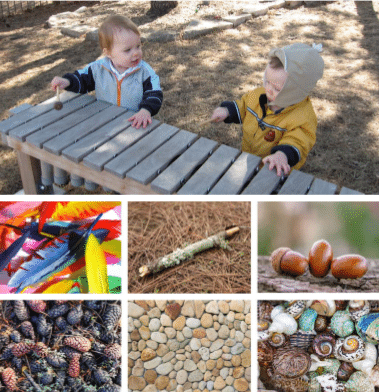
We intended our design to create a play environment that balances collective and individual experiences, where children can gather, retreat, and explore at their own pace. We wanted it to emphasize close contact with natural materials, inviting children to engage through sound and varied textures that stimulate the senses. We aimed to encourage open-ended interaction, the installation supports creativity and invention, allowing children to imagine, experiment, and play in their own ways.
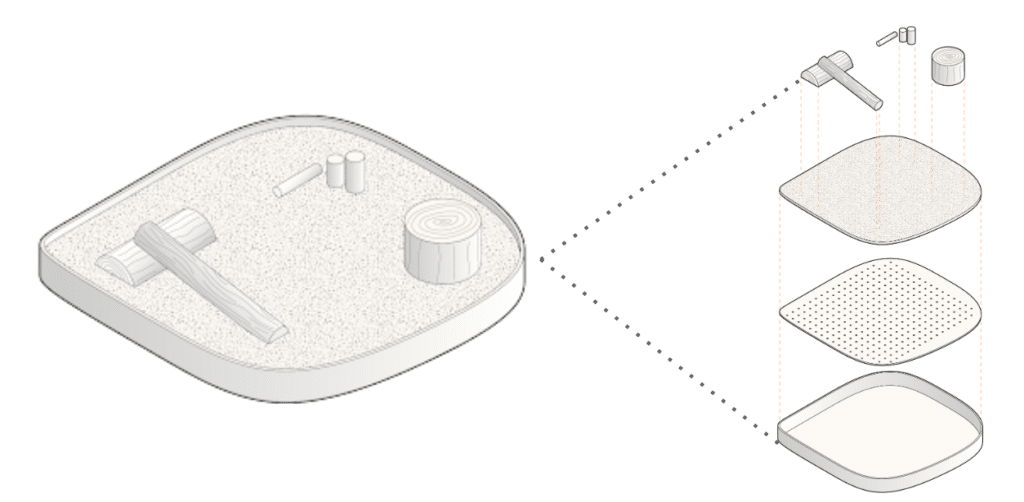
Participatory Game
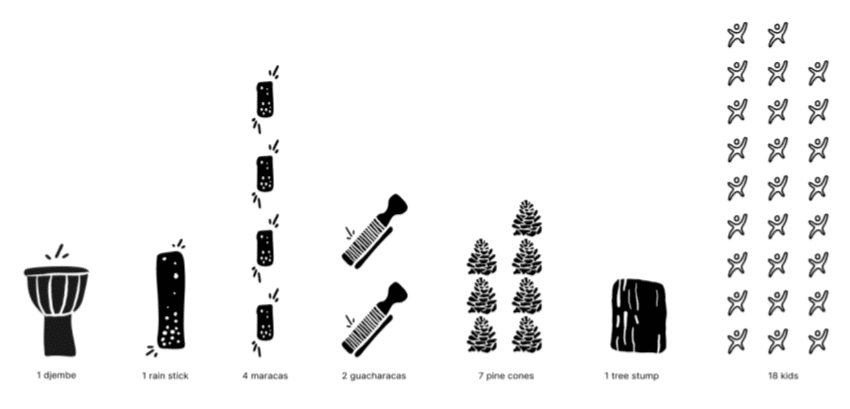
To our target users’ receptivity to our design aspirations, we designed a participatory game that involves playing with wooden instruments, textures and natural elements found in the forest of Collserola.
Materials and Participants
Key Learnings
Design Recommendations and Limitations
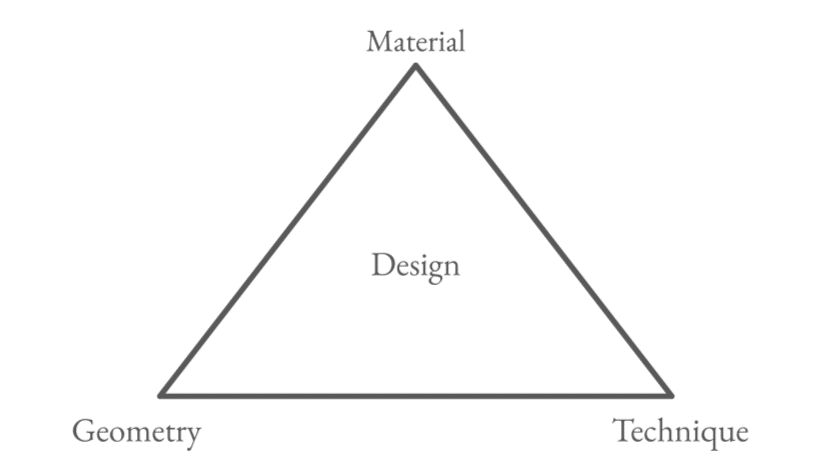
Design Considerations
For a robust, long-lasting installation outcome, we not only focused on the geometry of our design but also on the material (Chestnut logs – not planks) and the fabrication technique that we will use.
Material Considerations
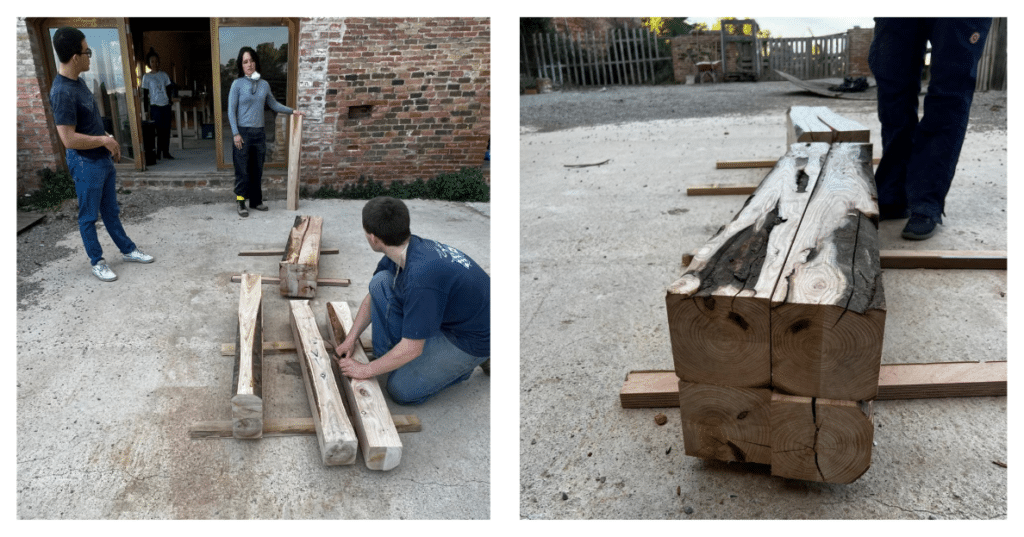
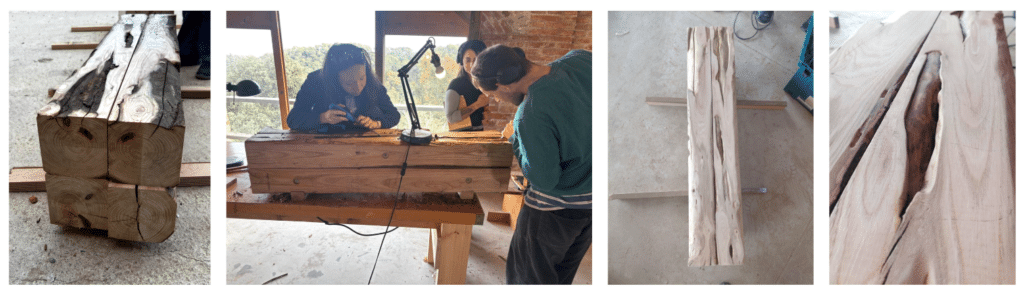
We had 10 pieces of semi-processed Chestnut logs available, cut into 14 x 14 x 210 cm. We used 8 of them for our final pieces, while the 2 remaining pieces were used for testing and prototypes.
We planed and cut them into length but didn’t do any further processing (i.e. cut into planks) since they are wet and are more prone to warping as they dry over time. Thick logs perform better than thin planks in terms warping. We want to make sure that our design is robust, durable and can withstand that the test of time.
Priorities and Constraints
Design Concept and Iterations
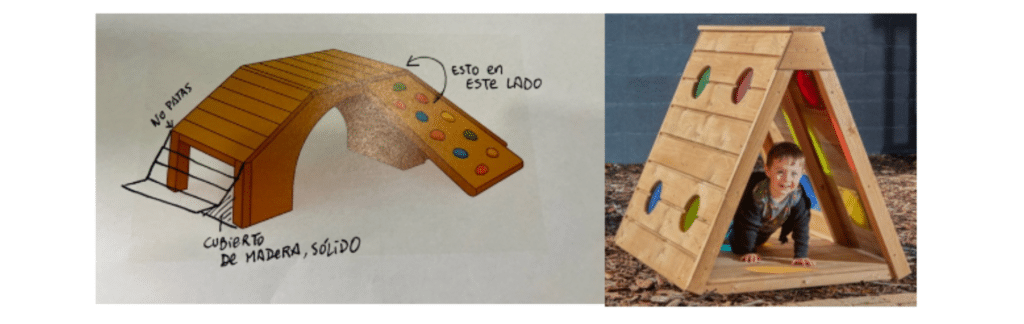
Iteration 1: Toys with Platform
Based on participatory game:
- Musical and textured
- Can be stacked together
- Handheld pieces
Feedback: Toys can be thrown to each other and to the babies on the lower terrace. Too many kids (~150) play in that terrace.
Feedback: Water drainage problem. No visible drains on the rooftop.
Feedback: Heights are too dangerous for children 3-6 years old.
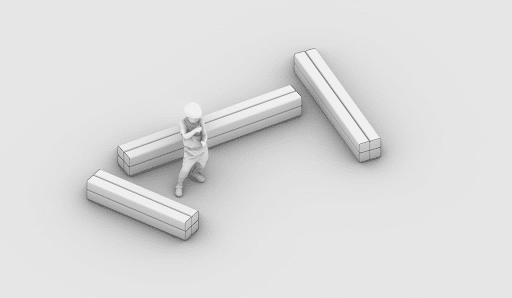
Iteration 2: Scale Up
Feedback: Still unsatisfactory to the client in terms of safety.
Why it doesn’t work:
- Made of planks which are more vulnerable to warping than whole logs
- Has heights where kids could climb and fall over
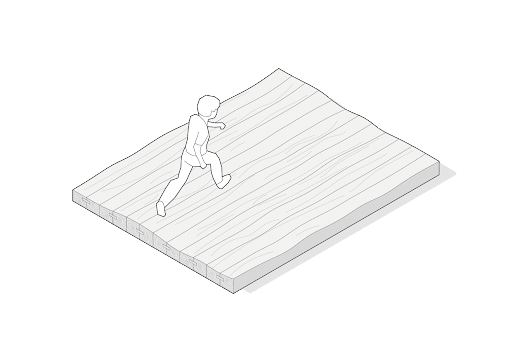
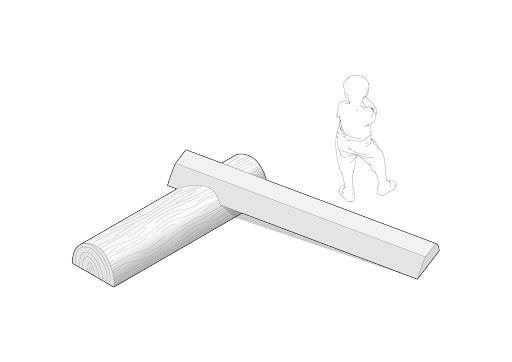
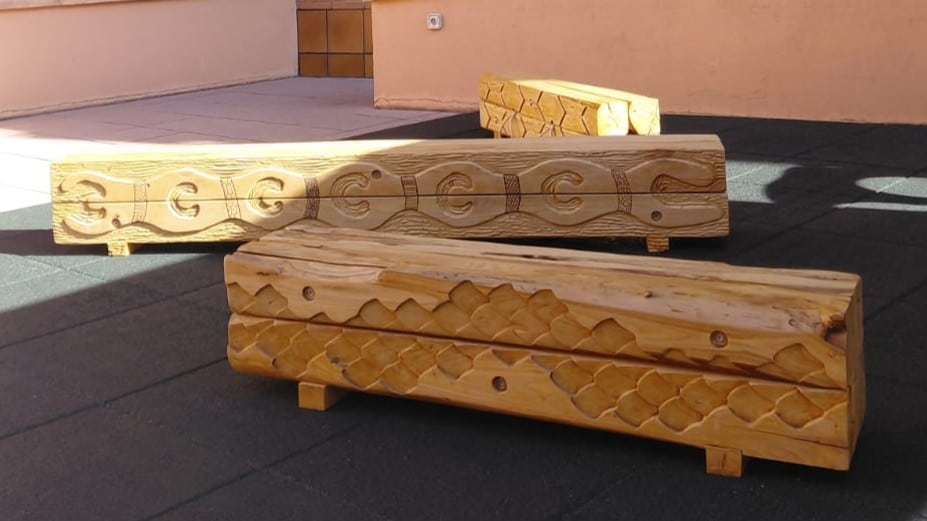
Iteration 3: Fallen Totems
Instead of vertical monuments, our design features horizontal, fallen totem-like elements. By resting on the ground, the structures:
- Reduce fall risk
- Invite climbing, touching, and crawling
- Allow children to engage with “architecture” at their own scale
Design Features
Sensory Engagement
- Touch: Varied textures (smooth, rough, ribbed, grooved)
- Sound: Hollow sections, tapping surfaces, bells
- Sight: Natural wood, carved visuals of the Catalan narratives
- Movement: Crawling, stepping, leaning, and balancing
Cultural Inspiration
Rooted in Catalan Narratives and Cultural Identity
- El Castell, the UNESCO-recognized human towers that symbolize unity, trust, and collective strength.
- The legend of El Timbaler del Bruc, where sound and landscape became tools of courage and resistance in the mountains of Montserrat.
- The Legend of Sant Jordi, whose defeat of the dragon gave rise to a rose, symbolizing bravery, honor, and love.
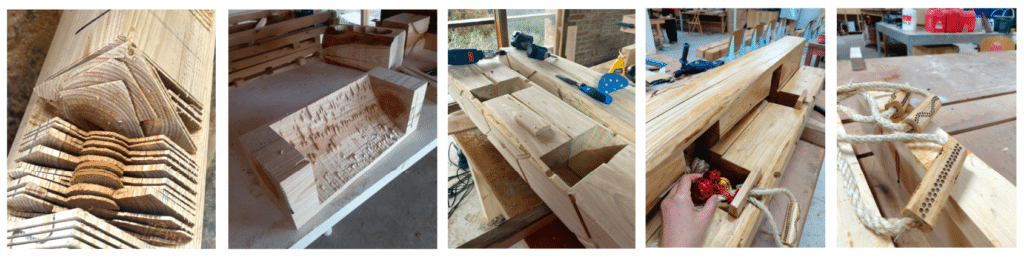
Details for Construction
Construction Prototype
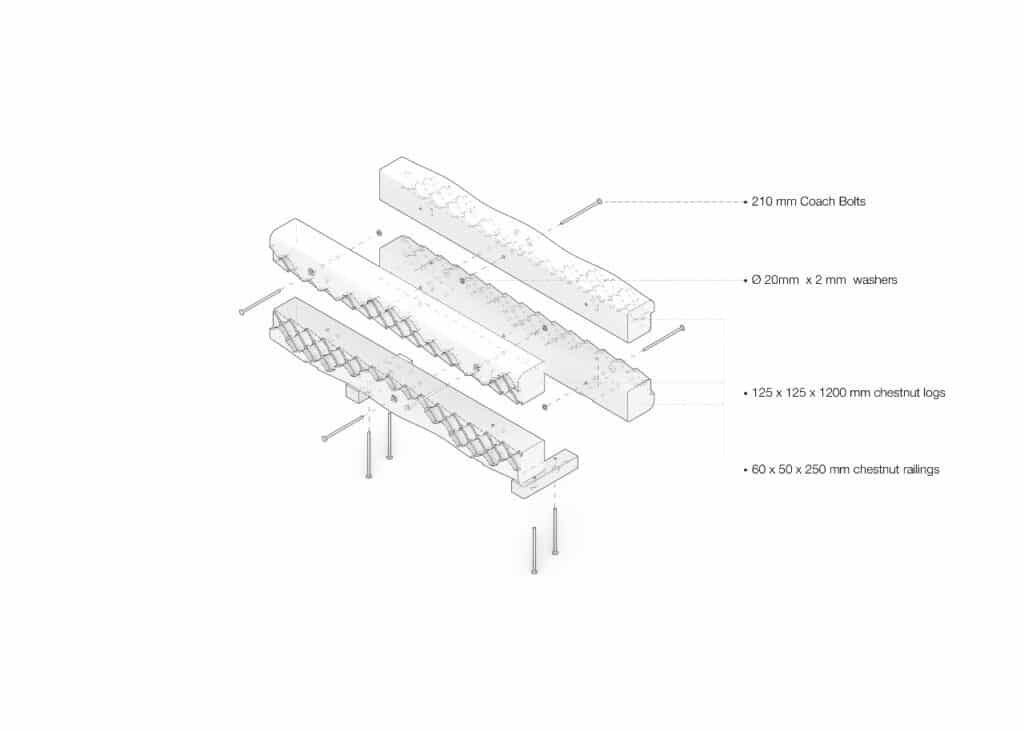
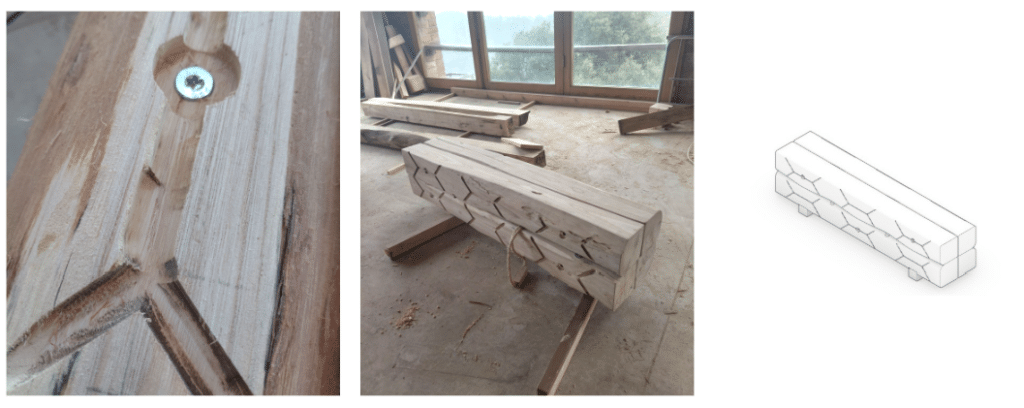
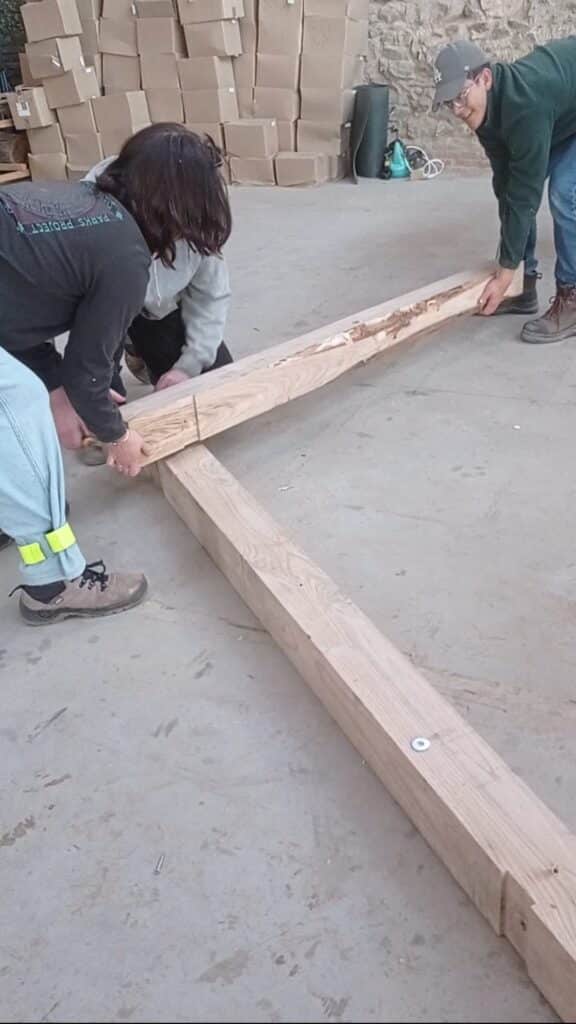
We joined together four (4) 25cm long Chestnut logs with rebated slots at the bottom for the “feet” to elevate from the ground. Each log was planed to 13×13 cm in width and height. Joining 4 of them meant we had 26×26 cm of material to work with. We vertically drilled 22 cm long couch bolts from each side of each “feet”. And used 18 cm long couch bolts for the horizontal connections.
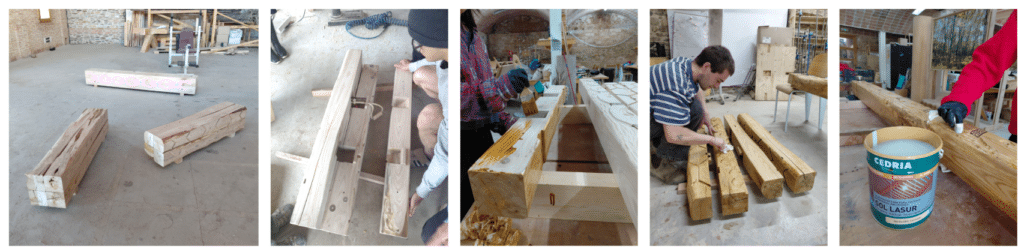
Processing, Cutting and Layout Planning
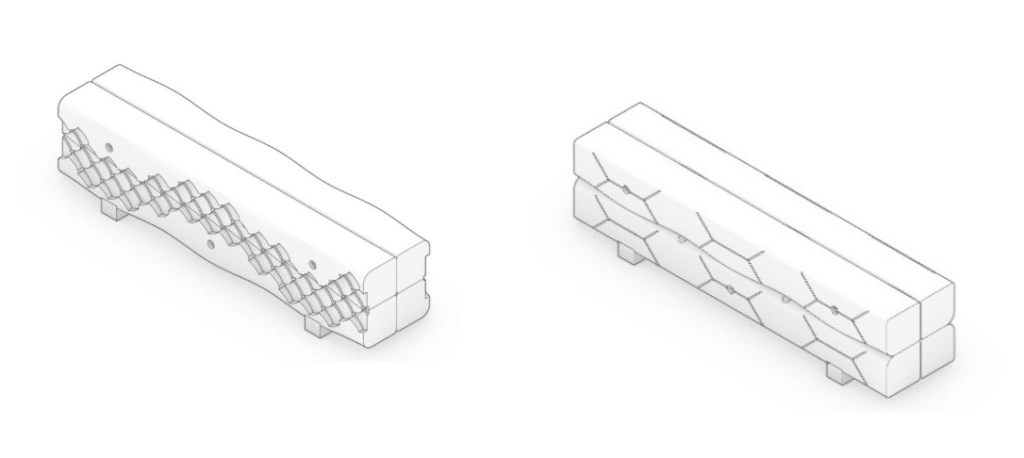
Each of our installation piece is made of 4 Chestnut logs screwed together to create surface area for our textures and mass that kids cannot move.
We had eight (8) logs that are 14x14x250 cm in width, height and length, respectively. We planed them into 13×13 cm and then cut them into:
- 4 – 200 cm length for the El Castell
- 8 – 120 cm length for the dragon of Sant Jordi and El Timbaler del Bruc.
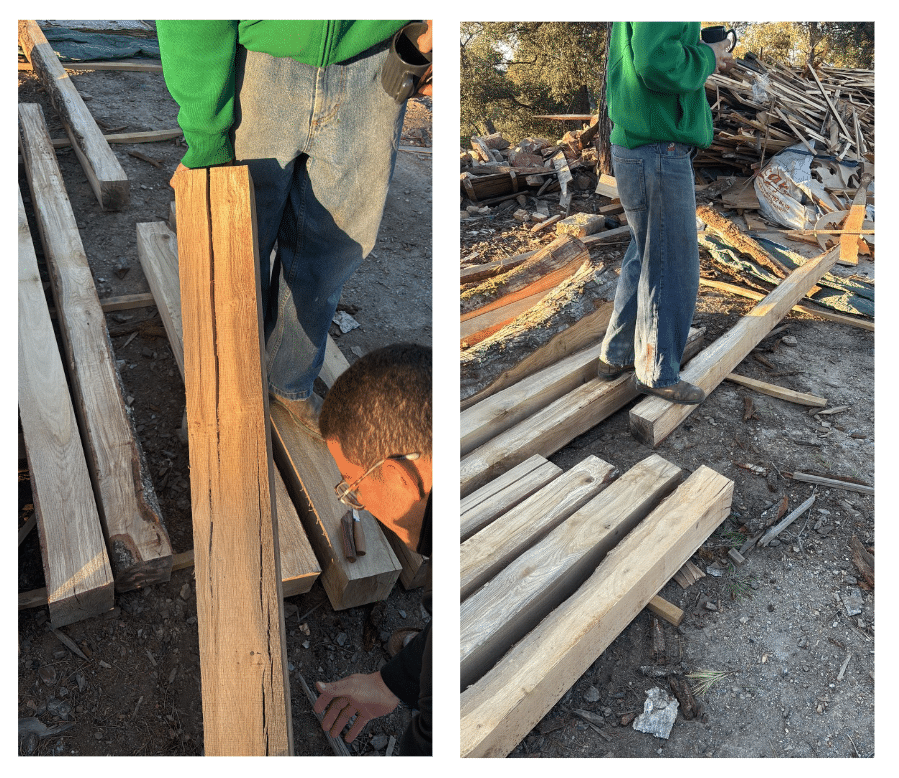
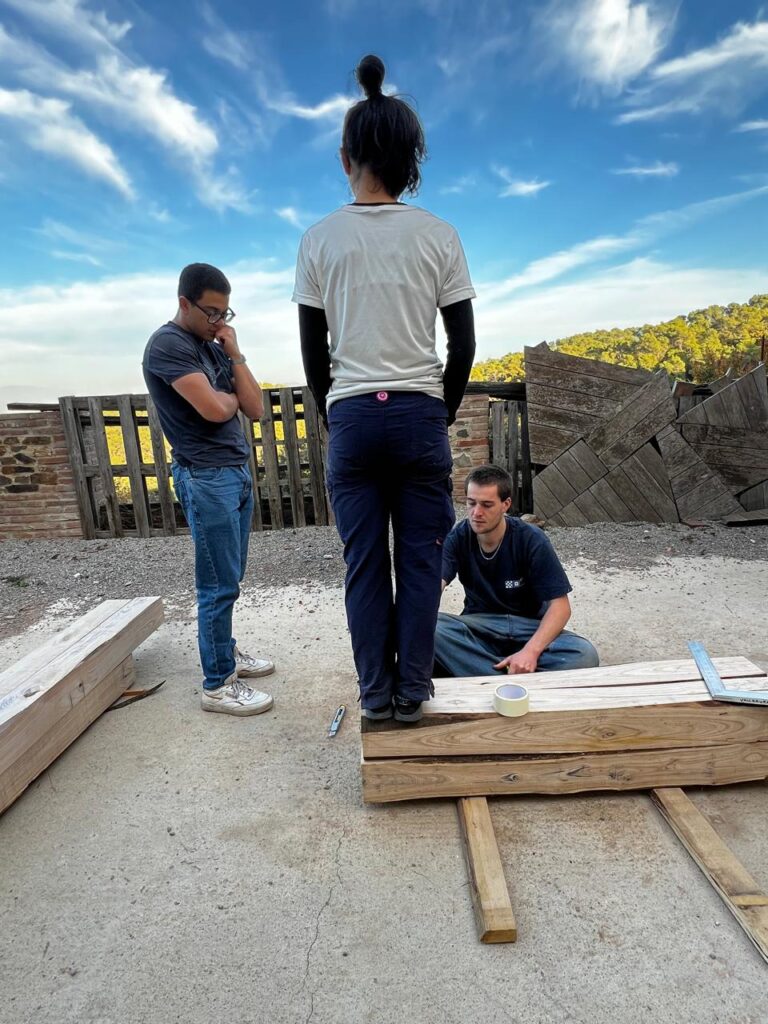
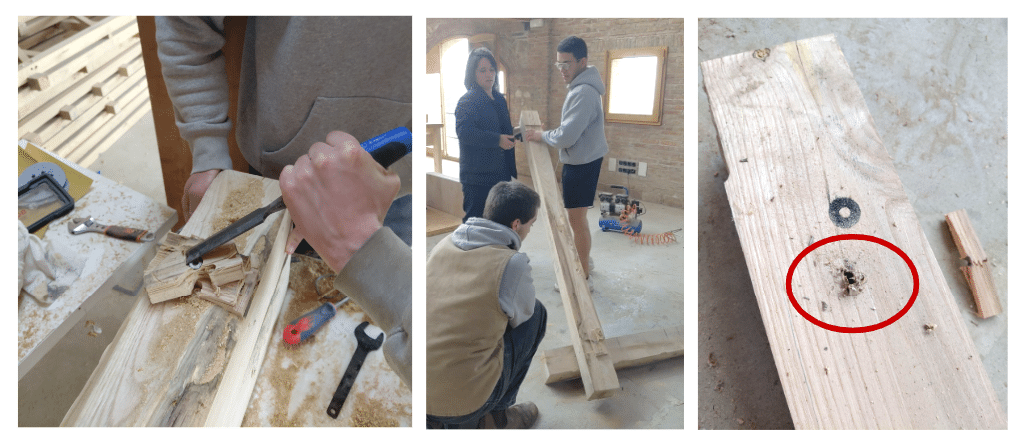
A lot of flipping and turning of logs were done to arrive at the final configuration that we were happy with. We decided on which logs go on top, bottom, left and right based on the logs’ natural aesthetics and edge characteristics. We also considered the position of the existing cracks on the logs as water can seep through them and not drain out if positioned improperly, causing accelerated decay and warping.
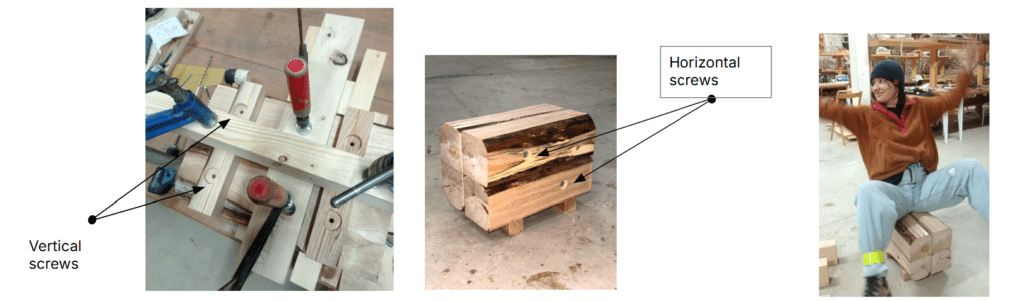
We also took time to decide on the positions of the screw and the “feet”. In the process, we considered that:
- Horizontal screws are visible and could interfere with the textures.
- Horizontal and vertical screws cannot intersect.
- The position of the “feet” determines the position of vertical screws.
We also tested the position of the “feet” to ensure that the logs won’t tip over or turn when kids put their full weight or jump up and down on its edges. We used the table saw to create the rebated slots were the “feet” would be inserted snugly.
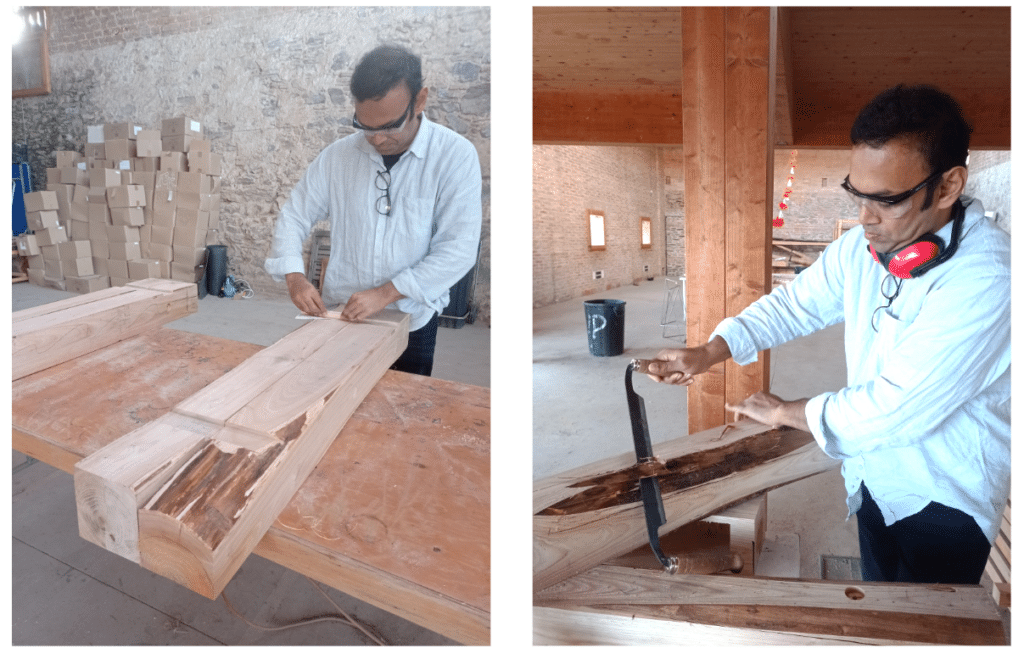
The logs were then debarked and sanded before joining them together to create the design and textures.
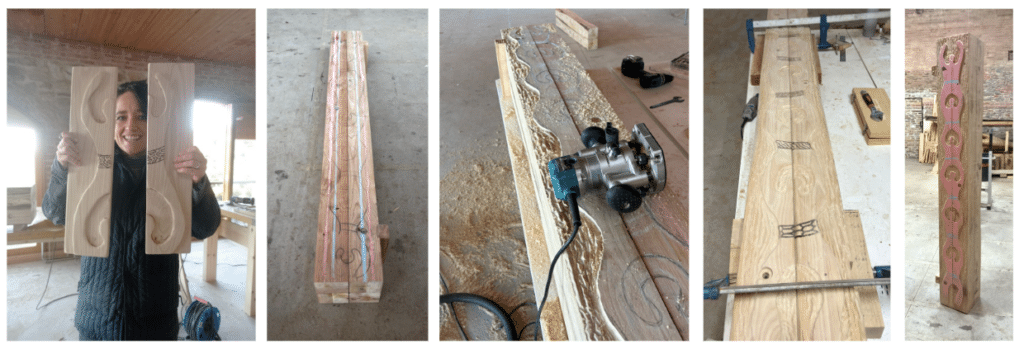
Texturing and Detailing
Texture Prototypes
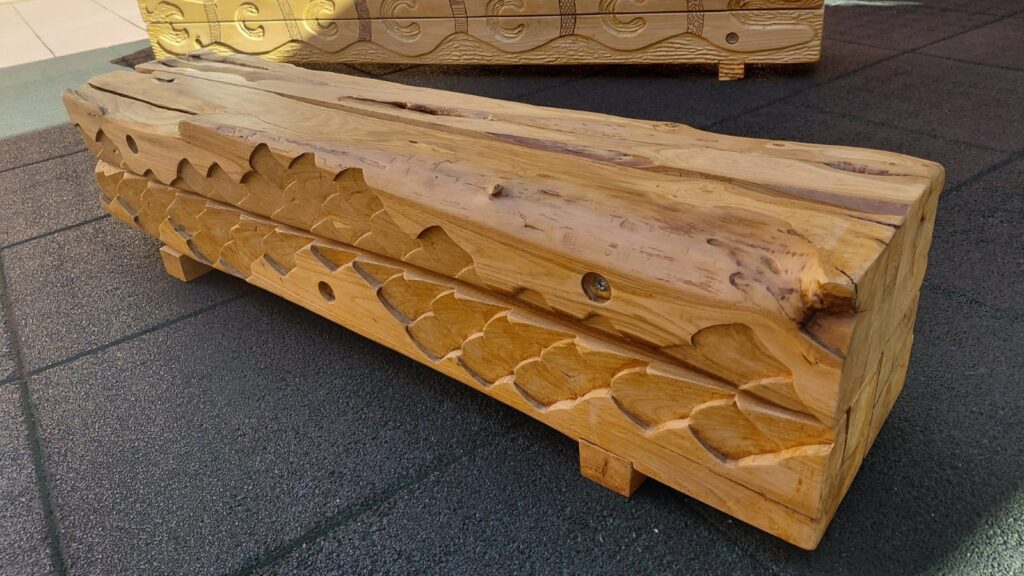
The Legend of Sant Jordi
The “ugliest”, most cracked logs were chosen for the dragon’s back. We decided to preserve the natural imperfections (design) of the wood.
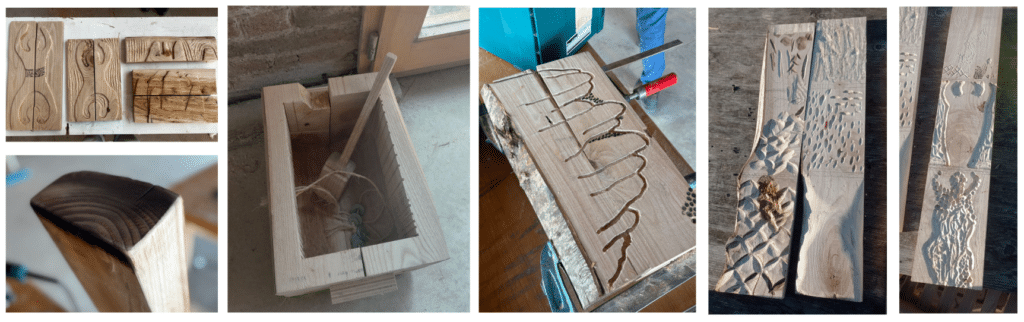
We first tried to create the scales of the dragon of the Legend of Sant Jordi using digital fabrication techniques, i.e. the CNC machine. Figure 22 shows the iterations of the digital dragon scale design. Due to the size of the scales relative to the CNC’s smallest available drill bit (6mm), and the limits of step size—digital fabrication was not pursued. We made the scales bigger on our next iteration using a 3D printed jig.
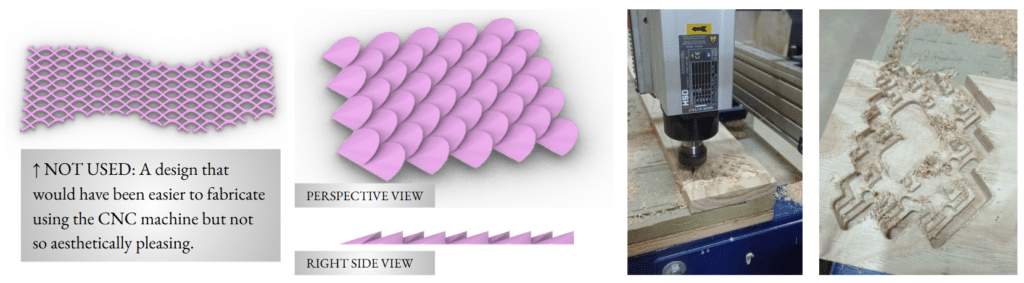
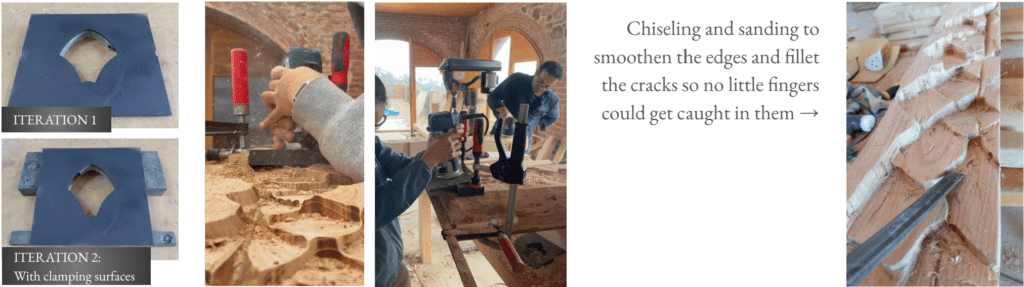
From the digital model, a single dragon scale was isolated for 3D printing. Considering how a router works, we 3D-printed a jig and used that to carve each dragon scale, with the added control of where and how we want the texture to be.
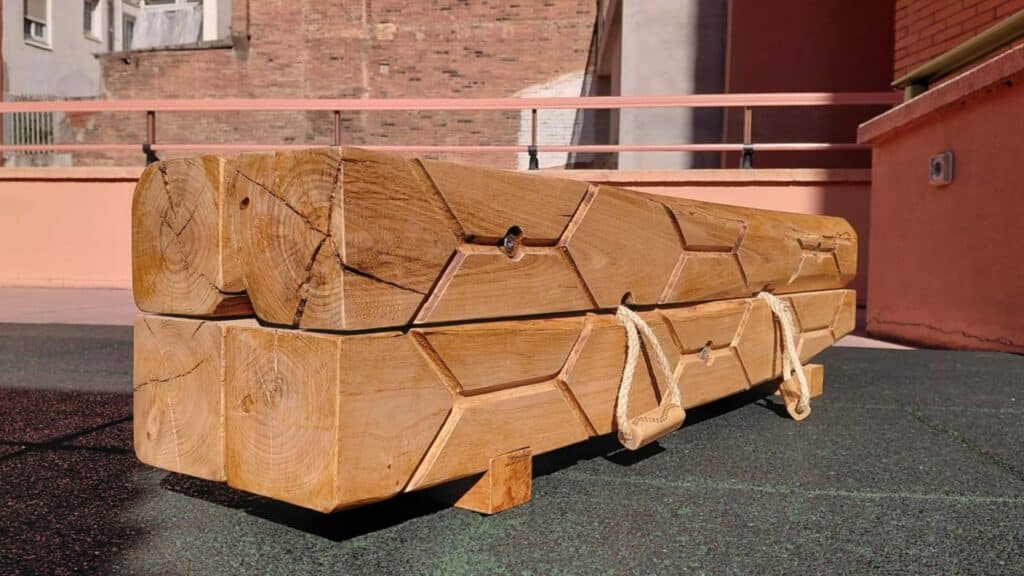
El Timbaler del Bruc
To balance the complexity of the dragon and the Castell, a simple pattern of drum ropes was created using a router. The ropes are meant to allude to the side patterns of a drum.
Inspite of multiple prototypes, we decided not to use the Montserrat pattern because it felt too explicit for the fallen totem concept.
Using the chop saw, we hollowed out the inside of the logs to create a drum. We then added bells with textured handles for more sound and playful interaction.
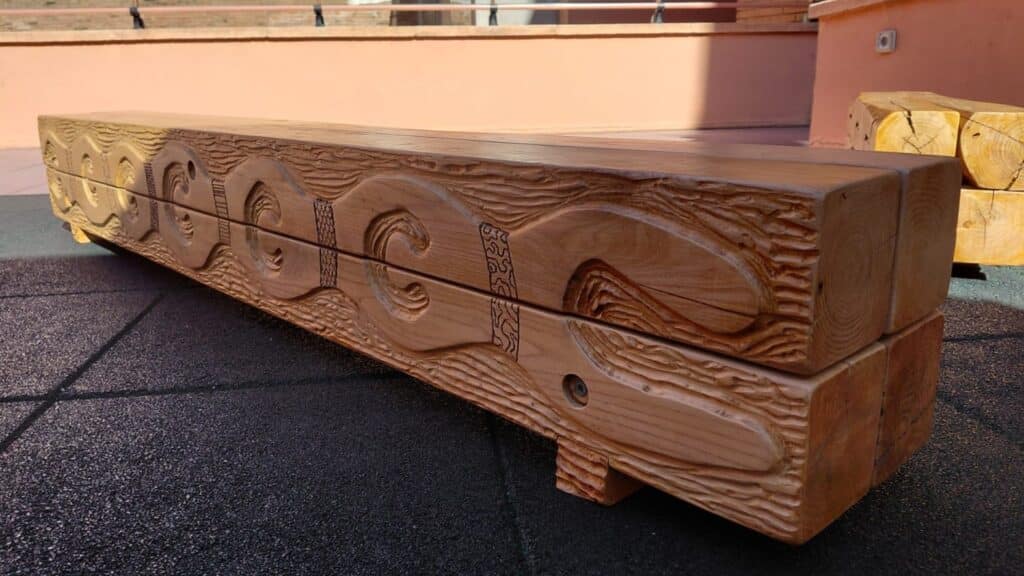
El Castell
The router was used to create the textures of Els Castellers.
Assembly and Finishing
After texturing and detailing, we dismantled the logs again to apply the finish. Our assembly intentionally had washers in between to allow for bending and warping, and water to pass through and dry. Both inside and outside surfaces of the logs had to be treated. A layer of pigmented sun-protection (dekor lasur) and two layers of water-repellent, UV-repellent outdoor finish (sol lasur) were applied.
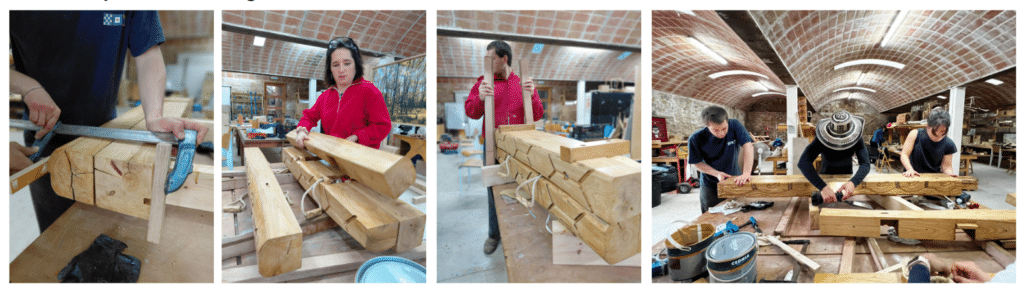
Problems Encountered
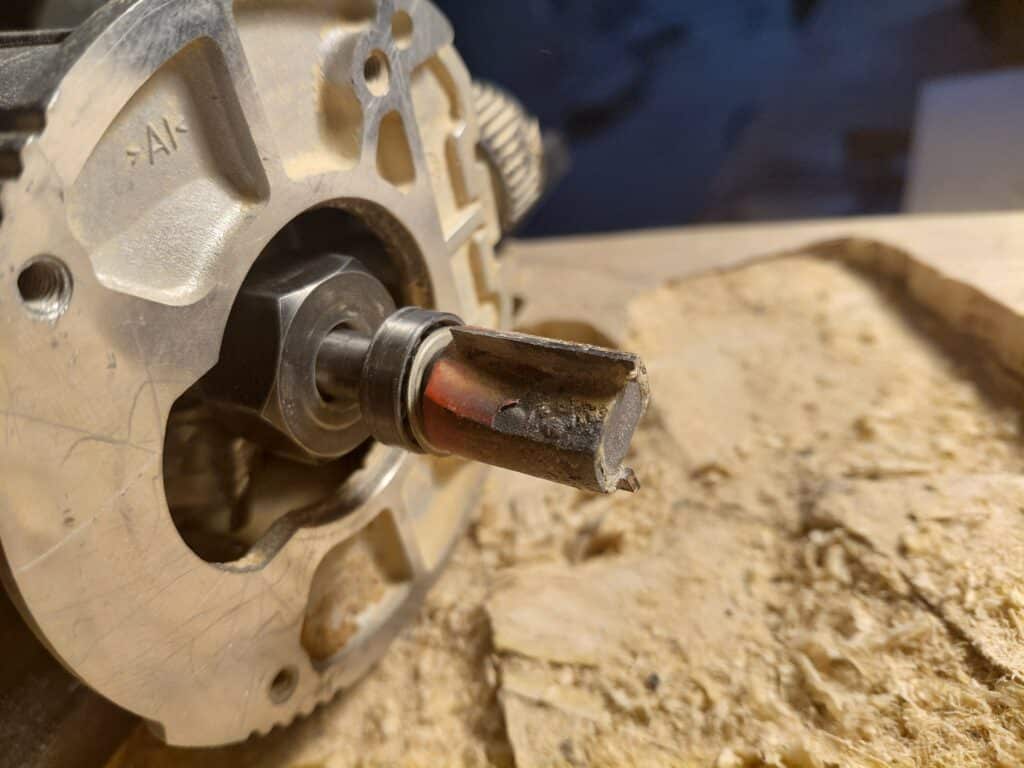
An auger bit broke while inside our Castell logs. Our screws are visible so we cannot just drill another hole next to it. To avoid damaging the logs, we opted to rotate them to release the broken drill bit.
During dismantling to apply the finish, we were unable to remove a loose screw head (vertical) on one of its “feet”. To remove the screw and dismantle the logs, we first cut the “foot” in half, essentially sacrificing it. That allowed us to separate the logs in two and provide leverage for us to rotate the two remaining logs to free the screw similar to what we did with the broken auger bit.
Due to the amount of manual routing we did, the router bit became too dull to safely continue. We replaced it with a different bit so the depth of the patterns changed slightly.
Installation
The installation was done las February 9, 2026 in Col•legi Mare de Déu dels Àngels, La Sagrera, Barcelona. We pre-assembled our pieces before transporting so no asembly or drilling are required. We just arranged the three pieces so maximize movement in the existing space while maintaining the “fallen totem” concept.
A handwritten certificate was given to the school indicating the concept behind our piece, characteristics and expectations of Chestnut wood with time and care instructions. We fabricated a wooden frame for the handwritten piece.
Lessons Learned
- What we want is different from what the client wants.
- What we think the client wants is different from what the client actually wants.
- What the client want and what they think they want can be different.
- Communicate well with the client. Repeat to them what you understood as many times as necessary.
