
The worked developed for Design and Fabrication course focused on the construction and exploration of prototypes for the Shelves project, part of the Collaborative Design Studio discipline.
Two different approaches
The design process commenced with various ideas and structural concepts, eventually narrowing down to two options: double columns and double beams. To investigate strength, assembly processes, and aesthetics, two distinct prototypes were developed. Subsequently, a final prototype was constructed at full scale, aligning with the ultimate design intended for production and construction.
Double Beams
The double beams prototype aimed to have the entire structure interconnected through notches, eliminating the need for dowels and screws. The model was crafted exclusively using a tablesaw in the carpentry workshop and is at a 1:2 scale. In this instance, the column features two notches (one opposite to the other) where the notch of the other beams are notched in. Further, another beam with a notch sits on top of the double beams and make a joint, forming a joint that securely connects and tightens the entire structure.
The model can be seen in the images below:
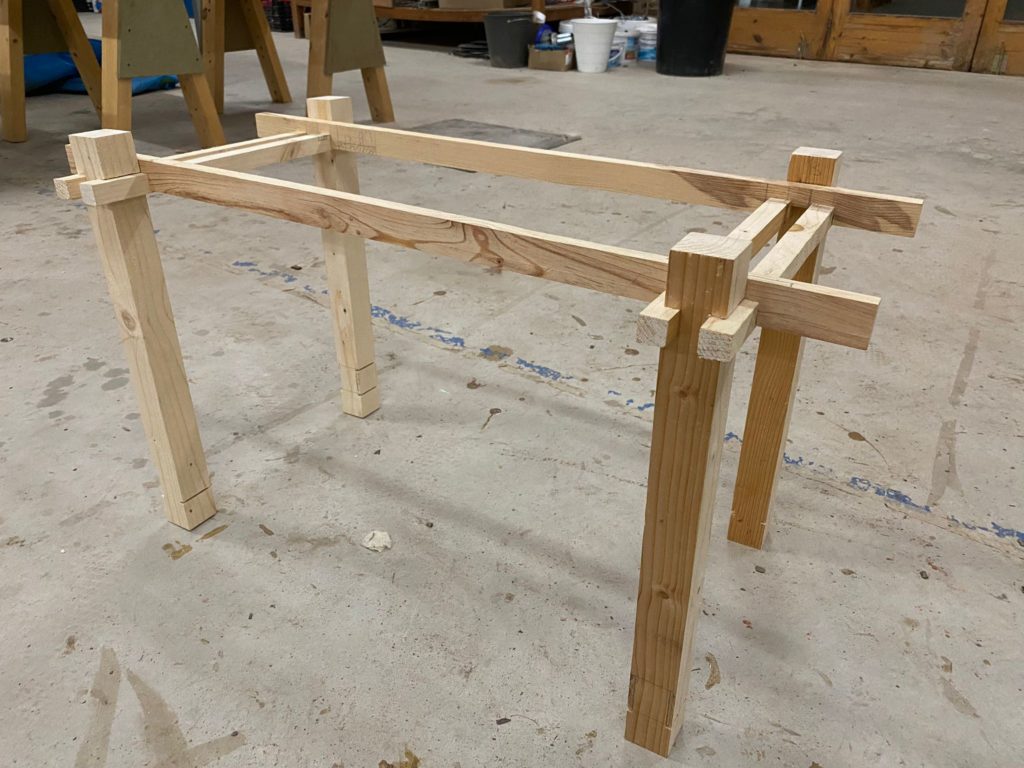
Image 01: Double beams prototype already assembled
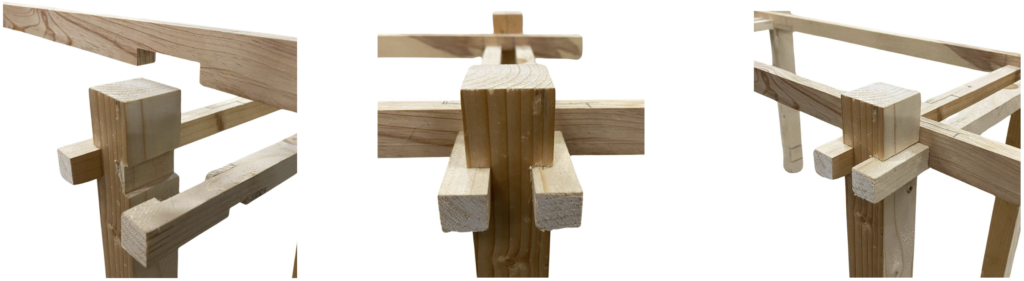
Images 02, 03 and 04: Prototype pieces disconnected and connected to better visualize the notches and the joints
Double Columns
The other approach was to have two columns and one beam crossing them. In this case, two different beam dimensions were considered (rectangular and square beams).
In the first case, the columns had notches and were connected by a small piece that notched inside, while the second case had one beam inside the notches of the columns. It’s important to notice that the connection between the two crossed beams is done by half notches. When they are jointed, it gets flushed and the beams are in the same level.
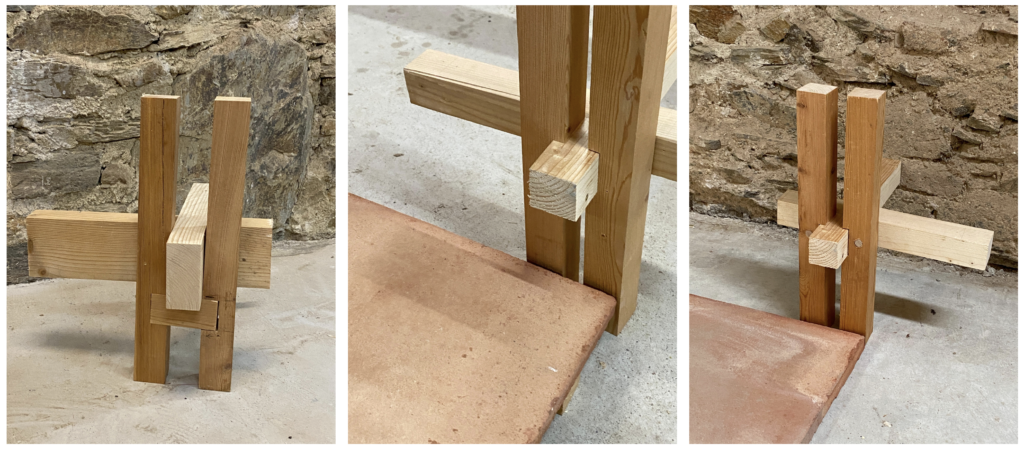
Image 05: Double columns with square sections with a small piece notched in and rectangular beams; Images 06 and 07: Both columns and beams with square sections
Later on, the double columns design with a beam notched in (all pieces with square sections) was chose for the final design, not only because of the aesthetics, but also because the two columns gave more strenght and stability for a high and slender structure.
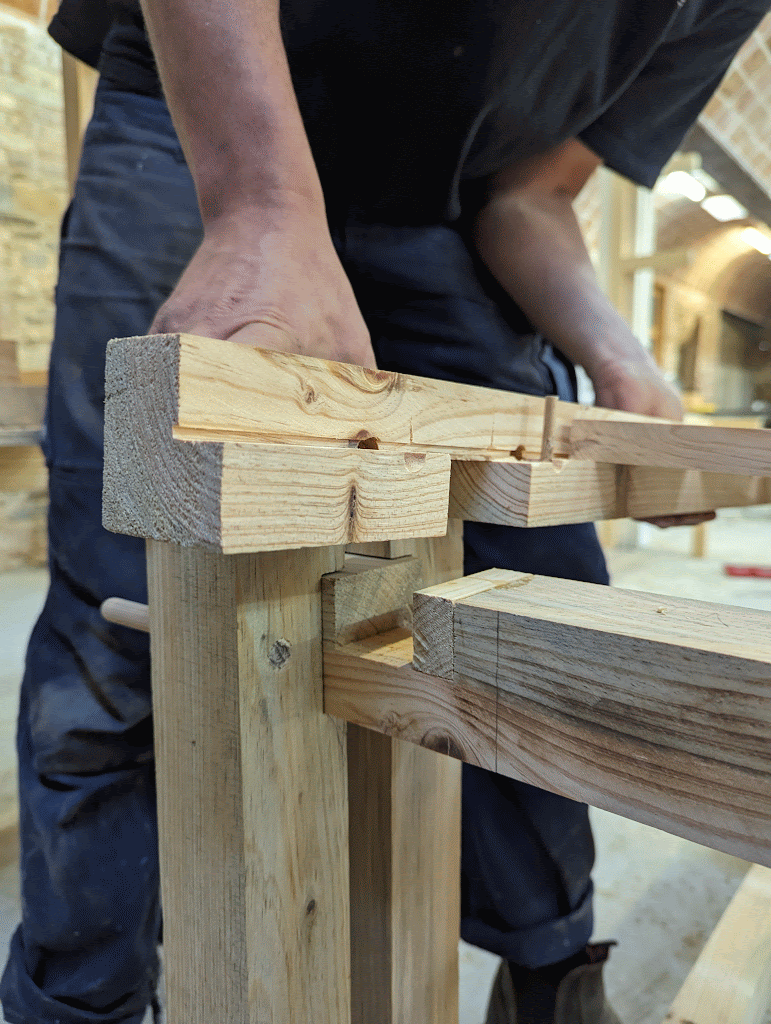
Final Prototype
The final prototype aimed to have a module of the vertical farming in real scale, which meant to have four pairs of columns along with two levels of beams, like shown in the picture below:
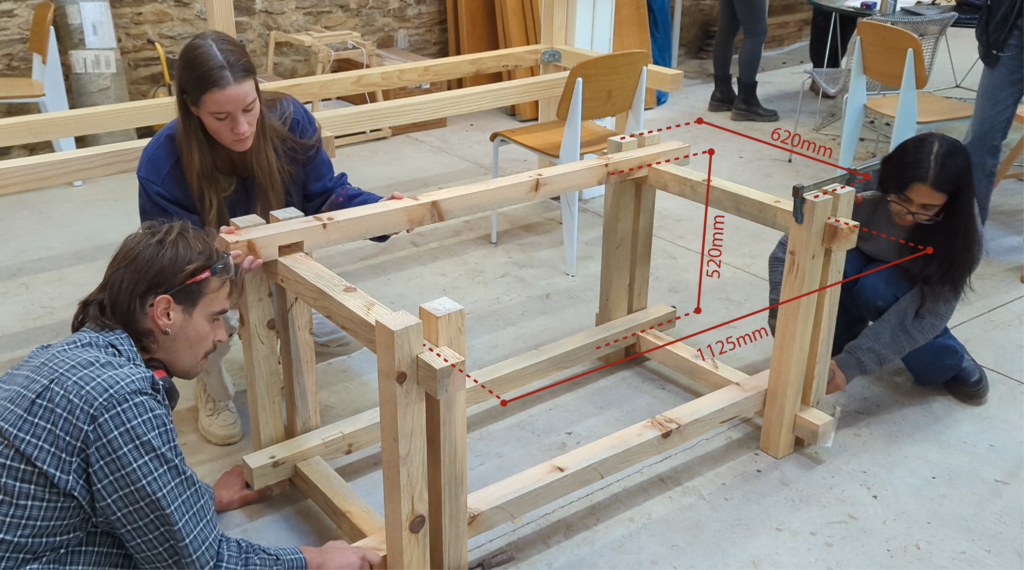
Image 08: Final prototype being assembled
For the first stage of development of the prototype, the focus was on the structure and how all the pieces would work together. The dimensions considered were 60x60x700mm for the columns and 60x60x800mm for the beams. Once we did not have wood in that dimensions available at the woodshop, we had to find some trunk in the backyard, cut it according to the dimensions we needed and process the pieces using the jointer and the thicknesser before going through the tablesaw.
For the next step, the shelf itself was constructed and placed flushed to the beams. That stage was important to see how the slats would look like, what dimensions they should have and the distance between them. Also, it was necessary to come up with an idea to not have an extra layer on top of the beams, but flushed to them. The solution was to have a slat mount, a long and thin piece that would be placed over the slats to make sure they would be separated and stable.

Images 08 and 09: Slat mounts before and after being placed over the slats and between the longitudinal beams. The dimensions are in milimeters.
Another important aspect of the process was to come up with the assembly sequence of the pieces. After having the double columns placed and the beams notched between they, we would have a frame built. Further, the longitudinal beam would be attached from the top of the beam, then the slats sit between the notches of these longitudinal beams. To finish, the slat mounts are positioned to make sure the slats are in place.
Gif 01: Animation showing the assembly sequence
In conclusion, the prototyping process played a crucial role in refining the details and design solutions for the shelves. It provided a valuable opportunity to visualize the structure, understand its functionality, and assess its strength. The necessity of using a trunk for the columns and beams facilitated hands-on interaction with carpentry machines, offering insights into the workflow and informing our approach for the final project.
