
– Not just to Climatic conditions
In the realm of modern architecture, the fusion of technology and design has become increasingly indispensable. One such innovative integration is the development of kinetic opening and closing windows using Arduino and physical computing. This groundbreaking approach not only redefines the conventional notion of windows but also introduces a dynamic and responsive element to architectural design. By harnessing the power of Arduino, a versatile open-source electronics platform, and employing principles of physical computing, architects can now seamlessly incorporate movable window systems into their designs. This not only enhances the aesthetic appeal of structures but also introduces practical benefits such as improved ventilation, energy efficiency, and a harmonious relationship between the built environment and its occupants. The marriage of cutting-edge technology and architectural form ushers in a new era where structures adapt and interact with their surroundings, epitomizing the essence of modernity and functionality in architectural innovation.
Problem addressed :

Solution :
What does the prototype do?
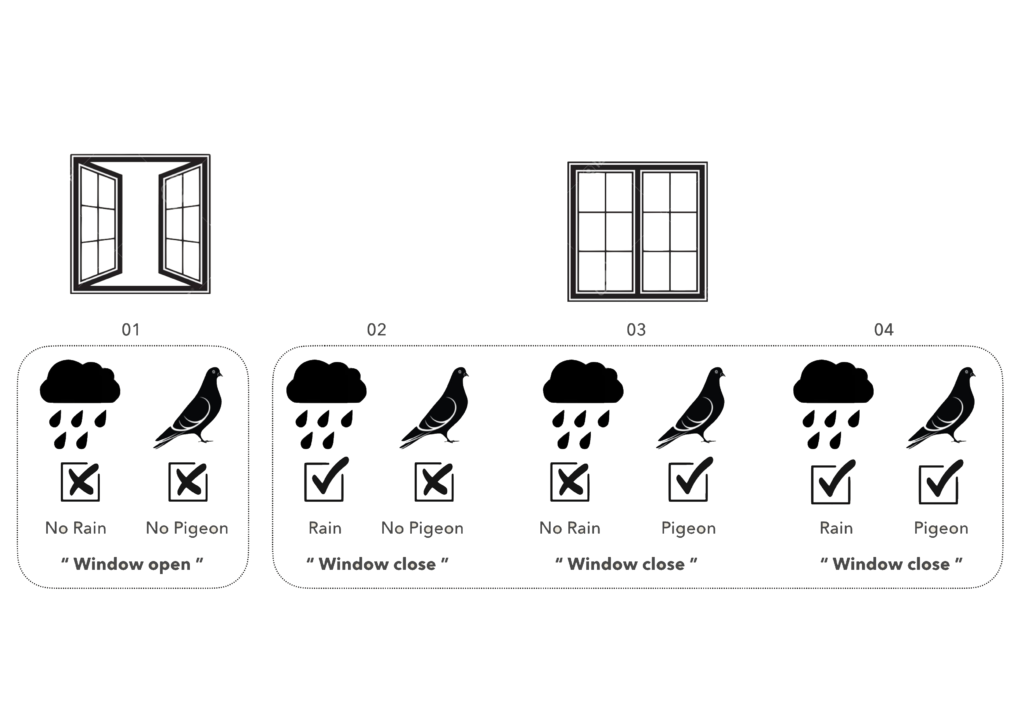
This window prototype emphasis on 2 more sensors :
- Sensing a bird approaching the window, after bird crossing the set threshold, the window closes automatically not letting the bird enter (with the help of Ultrasonic Sensor)
- Sensing the level of humidity and when the humidity crosses the set threshold, the window closes recognising it as a rain. (Using water sensor)
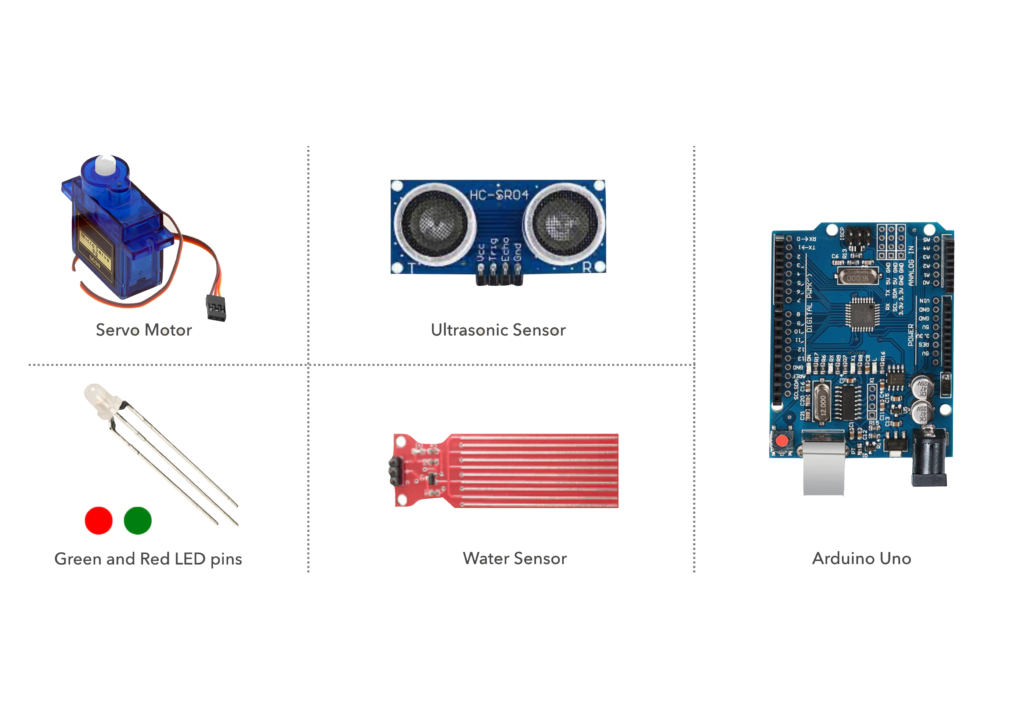
List of Materials :
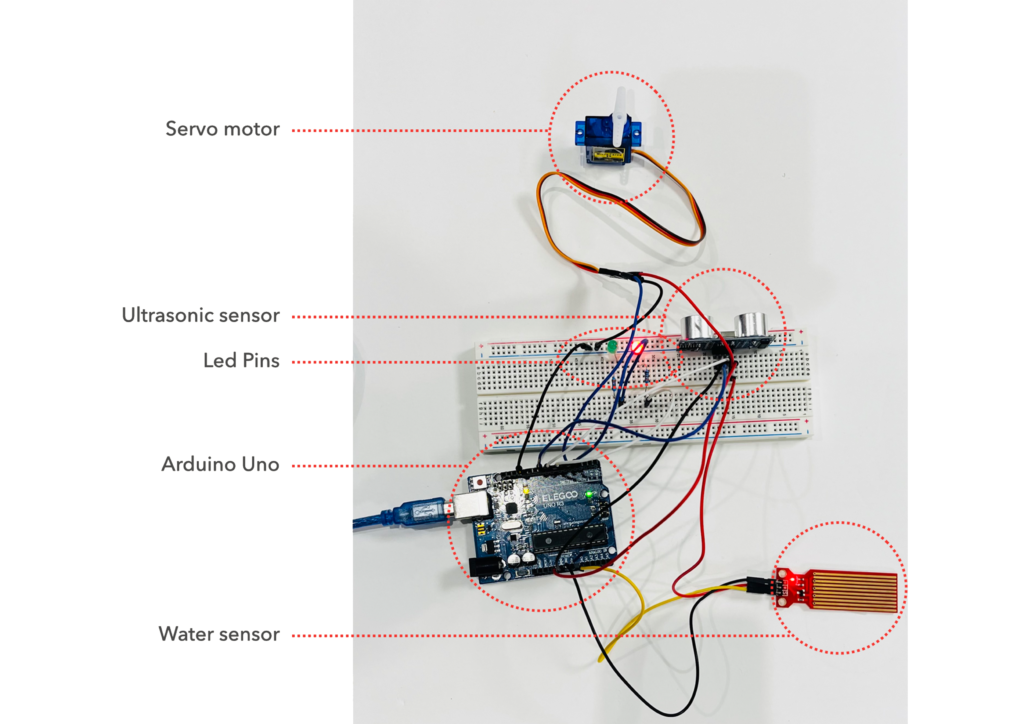
Circuit Diagram :
Arduino Uno code :
#include <Servo.h>
const int trigPin = 9; // Trig pin of the ultrasonic sensor
const int echoPin = 10; // Echo pin of the ultrasonic sensor
const int waterSensorPin = A0; // Analog pin for the water level sensor
const int greenLedPin = 4; // Green LED pin
const int redLedPin = 7; // Red LED pin
const int servoPin = 5; // Servo motor pin
Servo myServo;
void setup() {
Serial.begin(9600);
pinMode(trigPin, OUTPUT);
pinMode(echoPin, INPUT);
pinMode(waterSensorPin, INPUT);
pinMode(greenLedPin, OUTPUT);
pinMode(redLedPin, OUTPUT);
myServo.attach(servoPin);
Serial.println(“Ultrasonic Sensor and Water Level Sensor Example”);
}
void loop() {
// Trigger the ultrasonic sensor
digitalWrite(trigPin, LOW);
delayMicroseconds(2);
digitalWrite(trigPin, HIGH);
delayMicroseconds(10);
digitalWrite(trigPin, LOW);
// Measures the echo duration
long duration = pulseIn(echoPin, HIGH);
// Calculate distance in centimeters
float distance_cm = duration * 0.034 / 2;
// Prints the bird’s distance from the window
Serial.print(“Pigeon (Ultrasonic Sensor Distance): “);
Serial.print(distance_cm);
Serial.println(” cm”);
// Reads the analog value from the water level sensor
int waterLevelValue = analogRead(waterSensorPin);
// Map the water level analog value to a range that represents the water level (adjust these values based on your sensor)
int waterLevel = map(waterLevelValue, 0, 1023, 0, 100);
// Print the water level to Serial Monitor
Serial.print(” Rain (Water Level): “);
Serial.print(waterLevel);
Serial.println(“%”);
// Control LEDs and servo based on ultrasonic sensor and water level
if (distance_cm <= 15) {
// Ultrasonic sensor detects distance less than or equal to 15 cm
digitalWrite(greenLedPin, LOW);
digitalWrite(redLedPin, HIGH);
// Set servo to 180 degrees
myServo.write(180);
} else {
if (waterLevel > 10)
{
// Water level is more than 10%
digitalWrite(greenLedPin, LOW);
digitalWrite(redLedPin, HIGH);
// Set servo to 180 degrees
myServo.write(180);
}
else
{
// Water level is 10% or less
digitalWrite(greenLedPin, HIGH);
digitalWrite(redLedPin, LOW);
// Set servo to 0 degrees
myServo.write(0);
}
}
// Water level conditions
delay(1000); // delay
}
Video Documentation :
Below shown is a video of how the code and circuit work together. The threshold paramters set are less as this is a prototype.
