
In this term, we had the opportunity to explore the three distinct fabrication techniques- CNC Milling, Laser Cutting and 3D printing – which resulted in the production of our cabin components
CNC MILLING
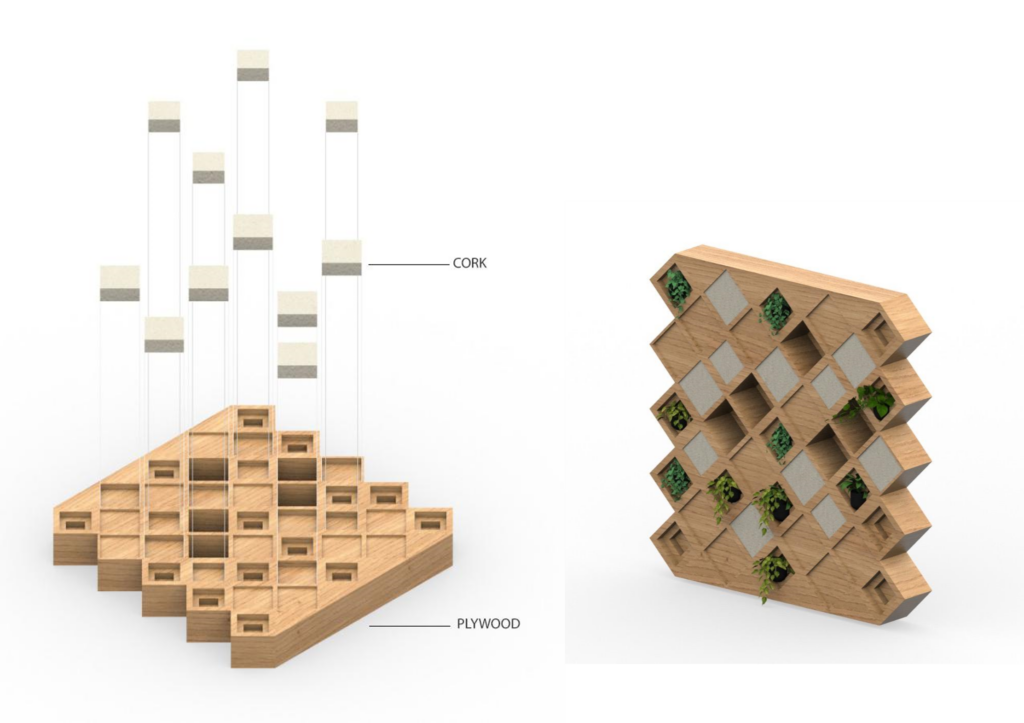
“Diamtic Echoes”
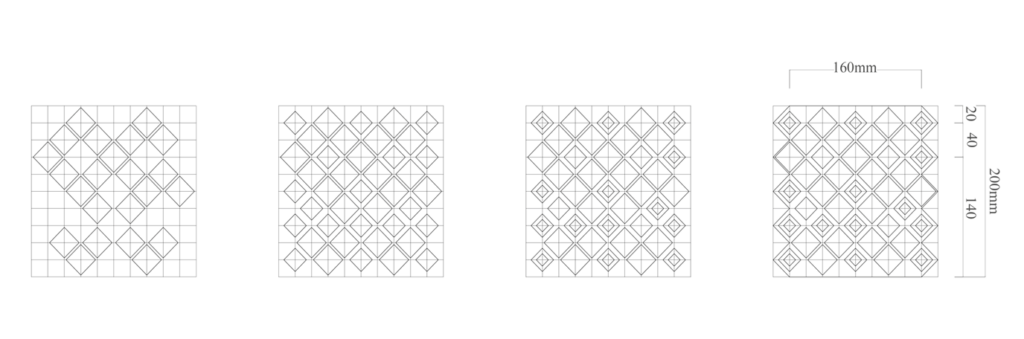
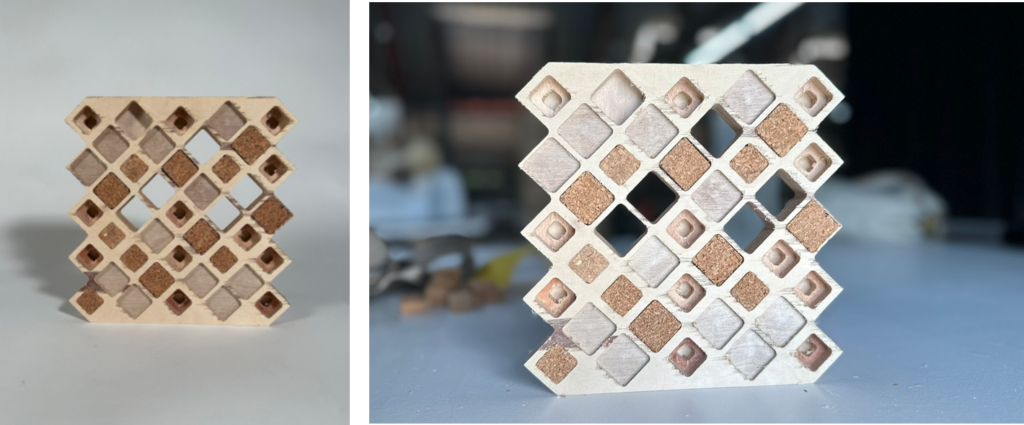
A wall was created with layered cutouts and a grid system to add depth. In order to experiment with material contrast, some areas have been filled with cork. These offsets provide multifunctional spaces to various activities like a small shelter space or even growing vegetation.
Reference
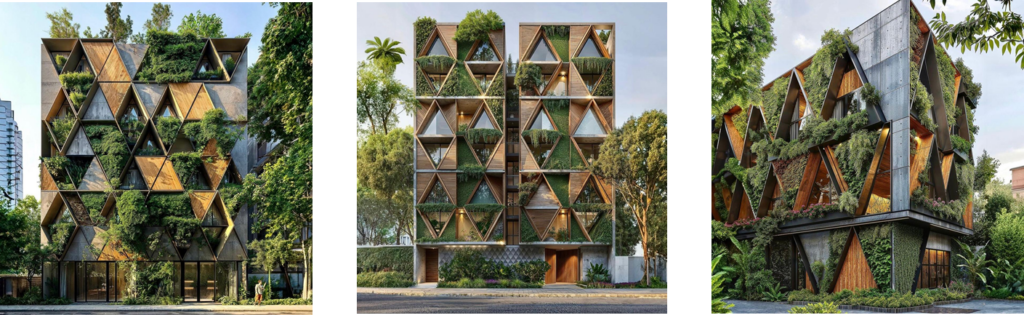
Trigon Cozy Homes created by Synthetic Architecture
https://www.instagram.com/p/C6ZF9v3tSYu/?igsh=MWpuMmg2N3ozbWU4eQ==
Concept/Design Strategy
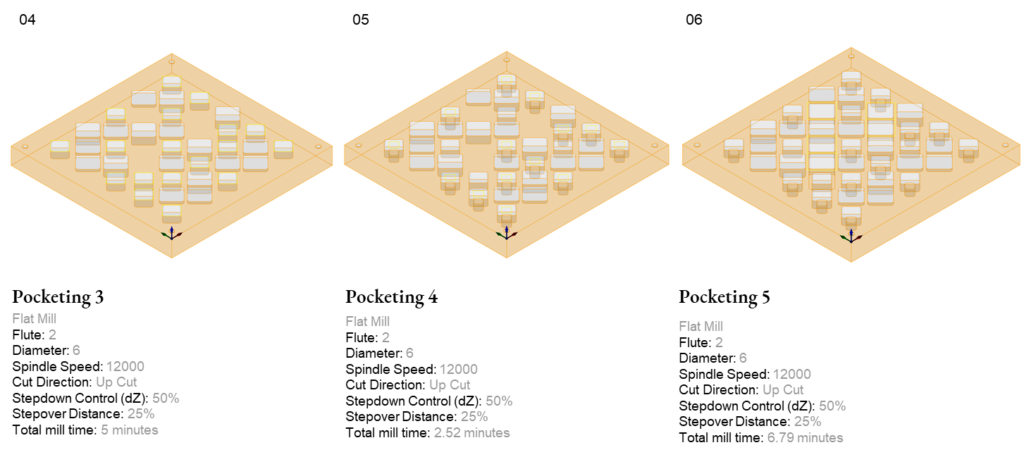
Production Process

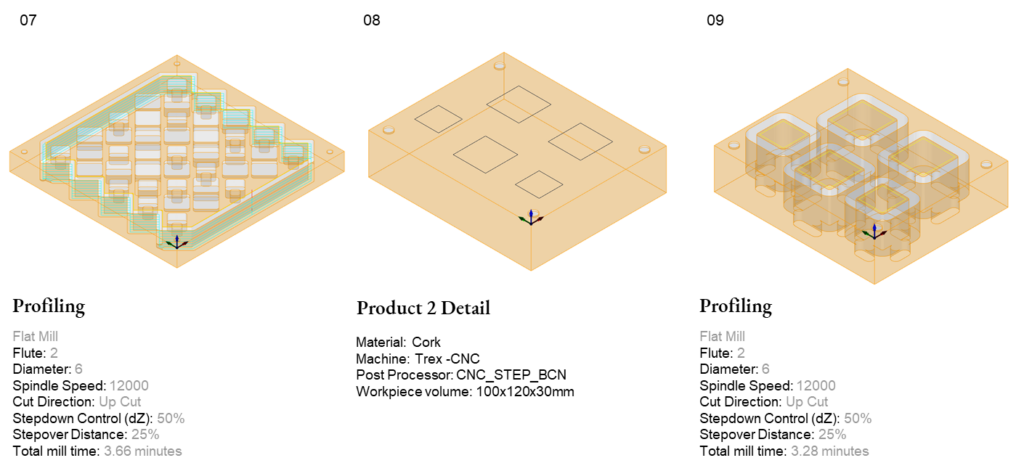
Product
LASER CUTTING
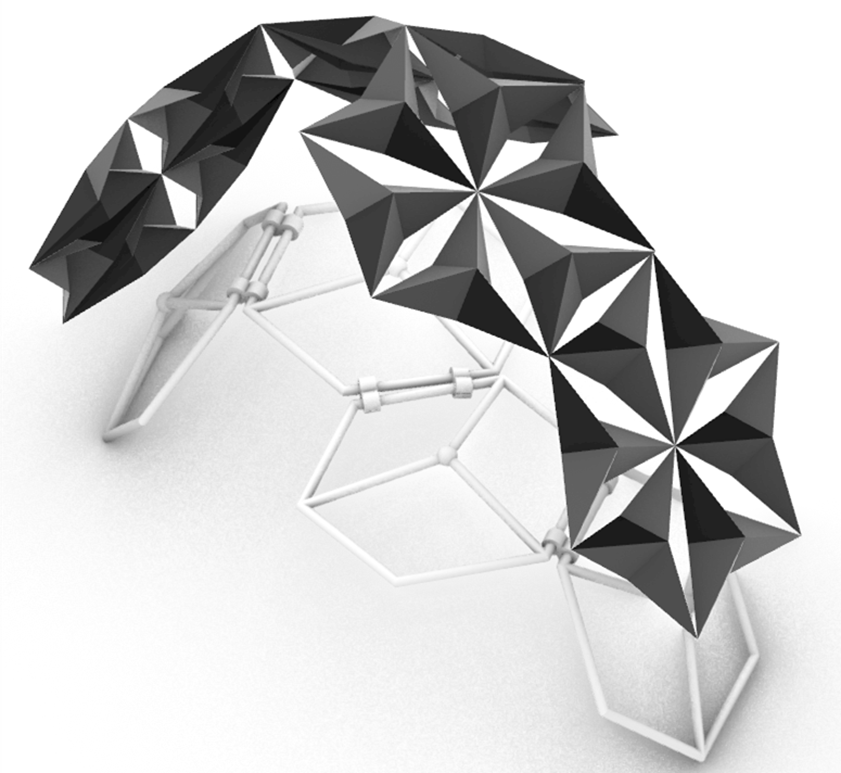
“Mirafold Facade”
Triangular modules and hexagonal panels were used to create an origami wall and roof paneling system that is completely foldable and erected utilizing folding techniques.

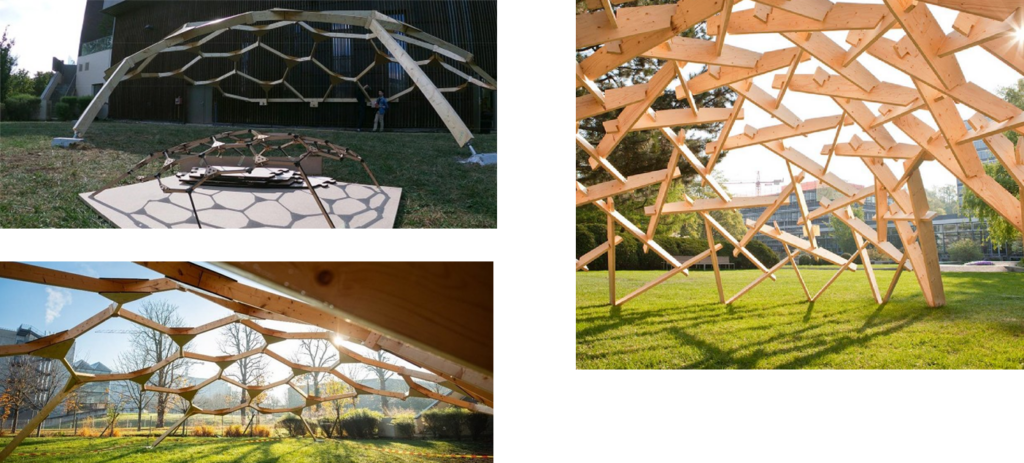
Reference
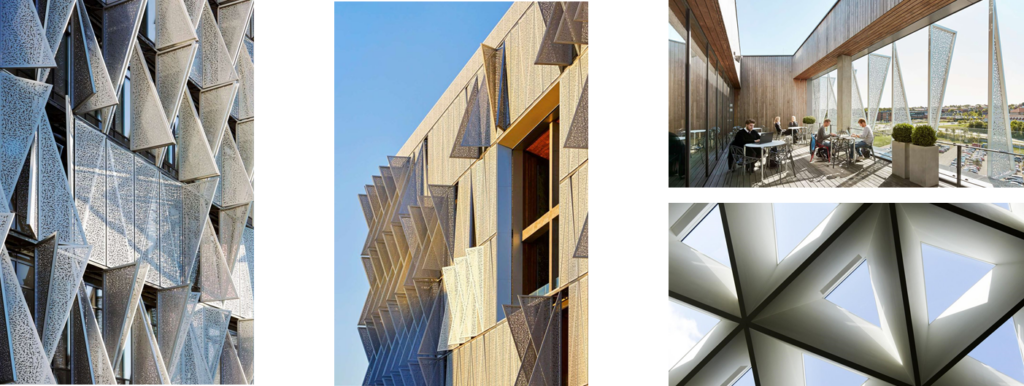
Kolding University by Henning Larsen
https://www.archdaily.com/590576/sdu-campus-kolding-henning-larsen-architects
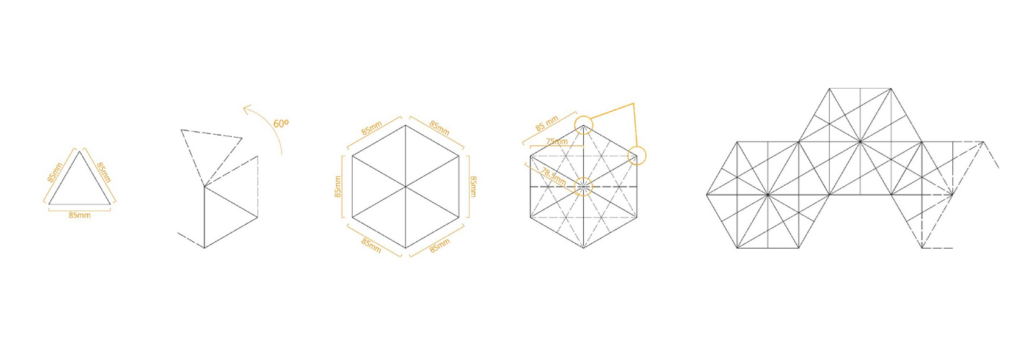
Design Strategy
Production Process
Material used : Polypropylene – 8mm thickness
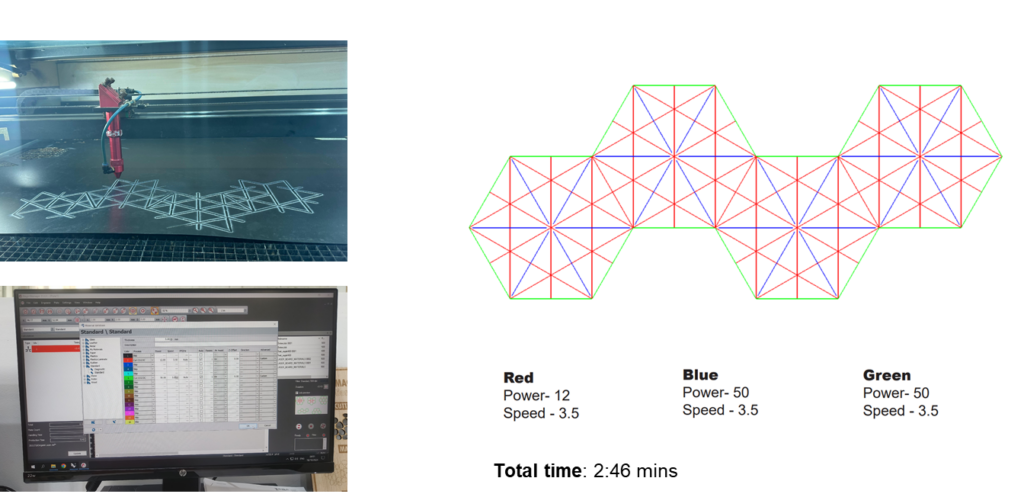
Using laser cutting, we fabricated the polypropylene cover, utilizing folding techniques to create the upper layer. The cover is designed to be flexible and lightweight.
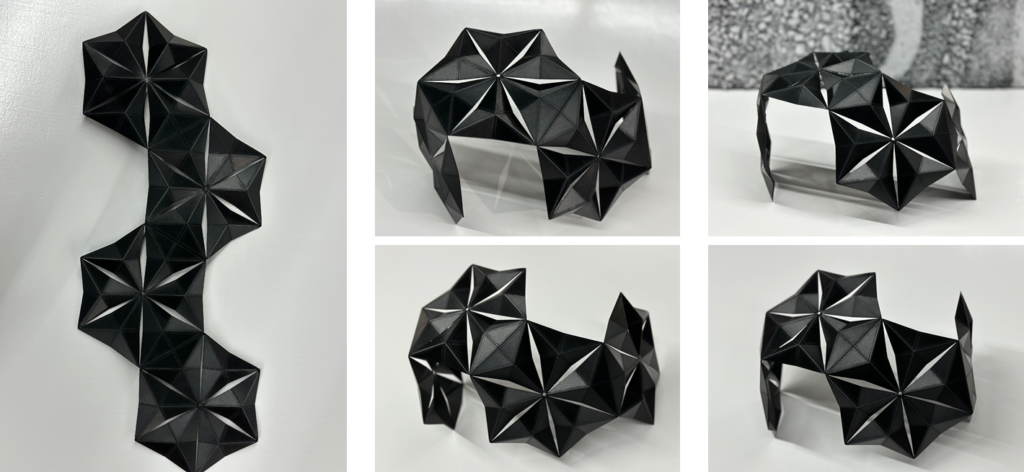
Form Finding
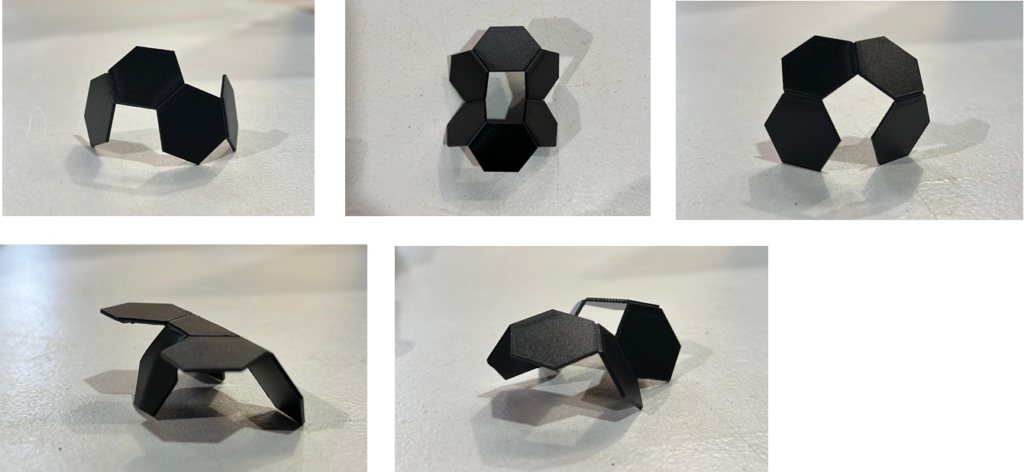
Product
3D PRINTING
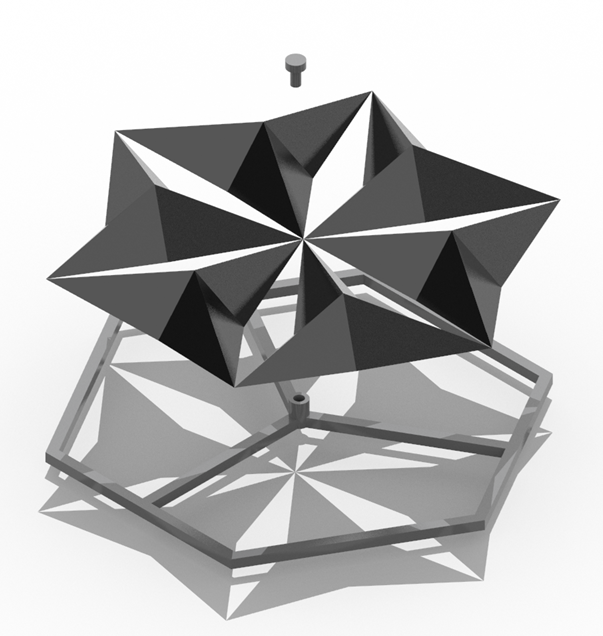
“Pinaxis Frames”
3D-printed a hexagonal frame structure with separate joints that allow movement while supporting the upper shell. Although our original concept involved round frames, we opted for angular ones to match the overall design. The frame was printed in the same scale as the laser-cut cover.
Reference
https://link.springer.com/article/10.1007/s42452-020-2561-2
Design Strategy

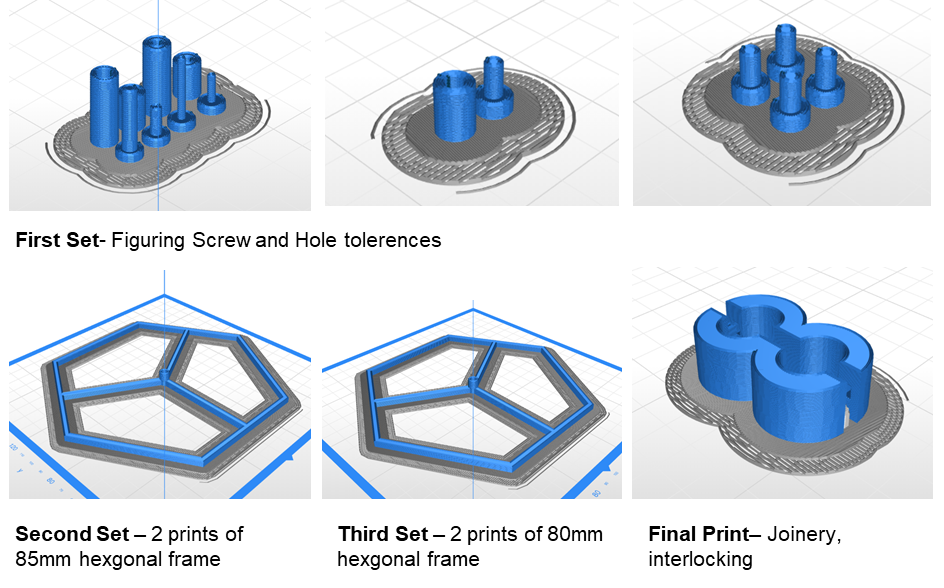
Production Process
For our final design we had to run several separate prints in the Zortrax M200. The first print consisted figuring out proper screw joint to hold the panel with the laser cut façade. Screw size 3.7mm diameter with a hole of 4mm, Production time 4 screws-20mins.Next,we printed hexagonal panels of 2 sizes Side Length 80 mm – 1:40 hr. each. Side Length 85 mm – 2 hrs. each. Final production, Interlocking Joint, used to hold 2 frames together (upscaled).Production time – 1 hr.
For all prints: Filament: White PLA; Temperature: 210°C; Layer height & line width: 0.3; Infill percentage: 100%
Mortise Joints
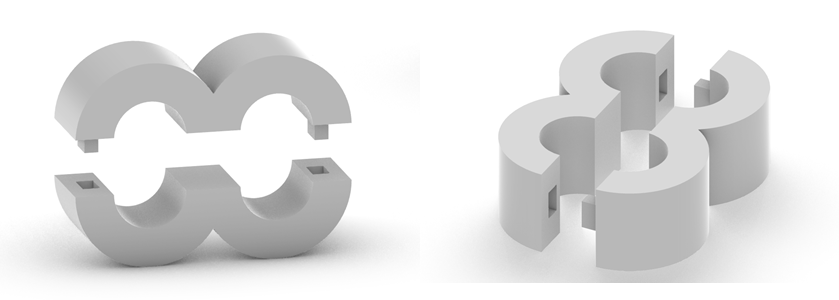
Mortise Fixture

Panel Joinery Detail
Final Model

