
01 l STUDIO BRIEF
The studio was divided into 7 groups. The focus of this group was to design a space terminal on Mars.
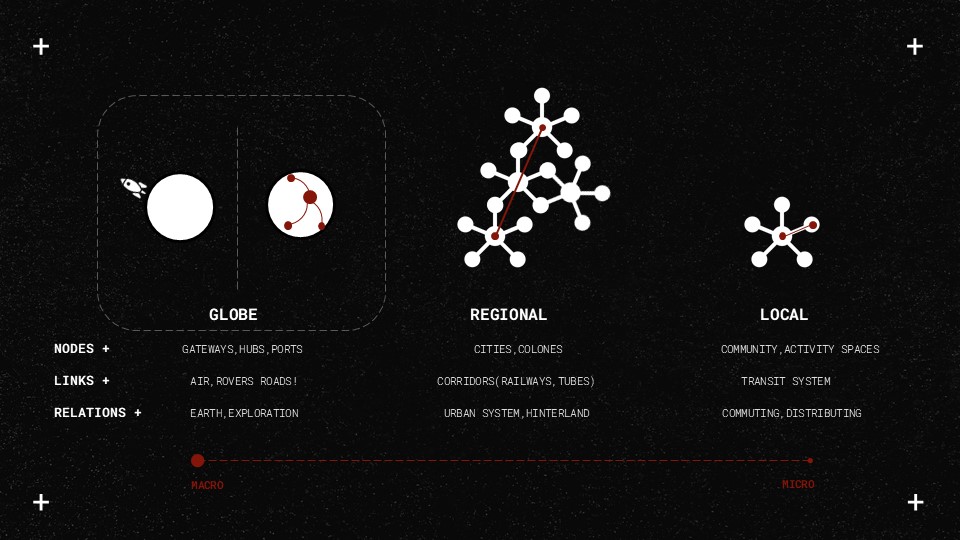
The scale of transportation can be global, regional and local. Space terminal falls into the global category with Terminal as a hub and launching/ landing pads as nodes.
The space terminal is located away from the human settlement for safety purpose.
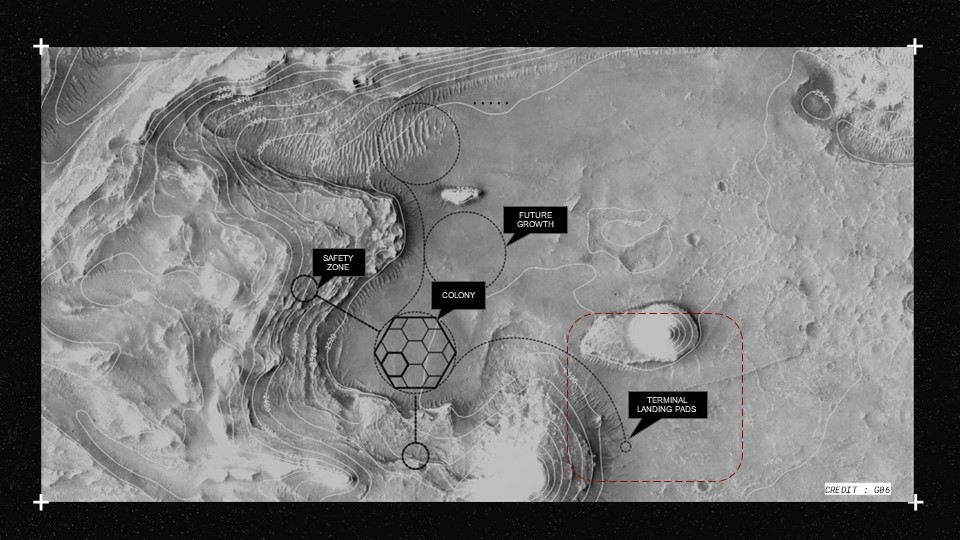
Masterplan: A monorail connects the terminal with the human settlement. The main terminal is connected landing/ launching pads.
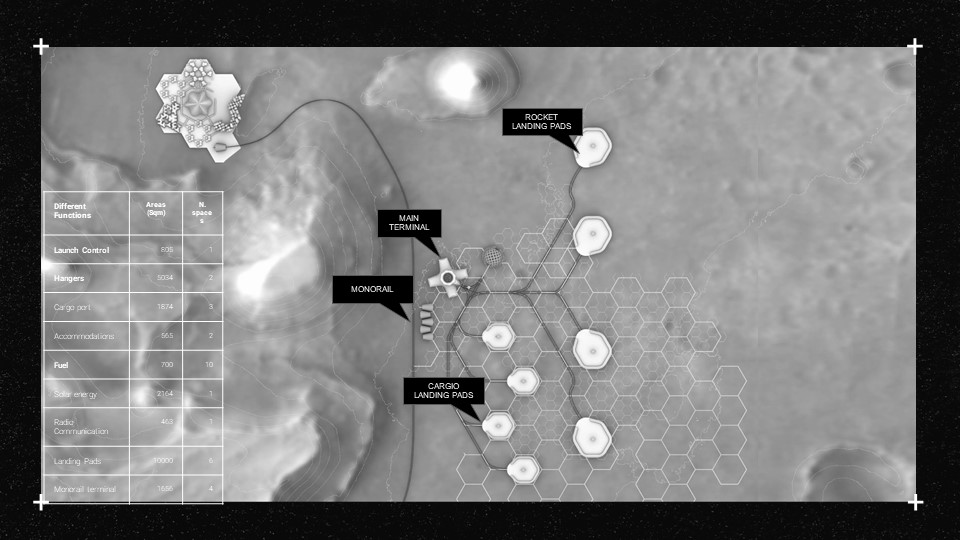
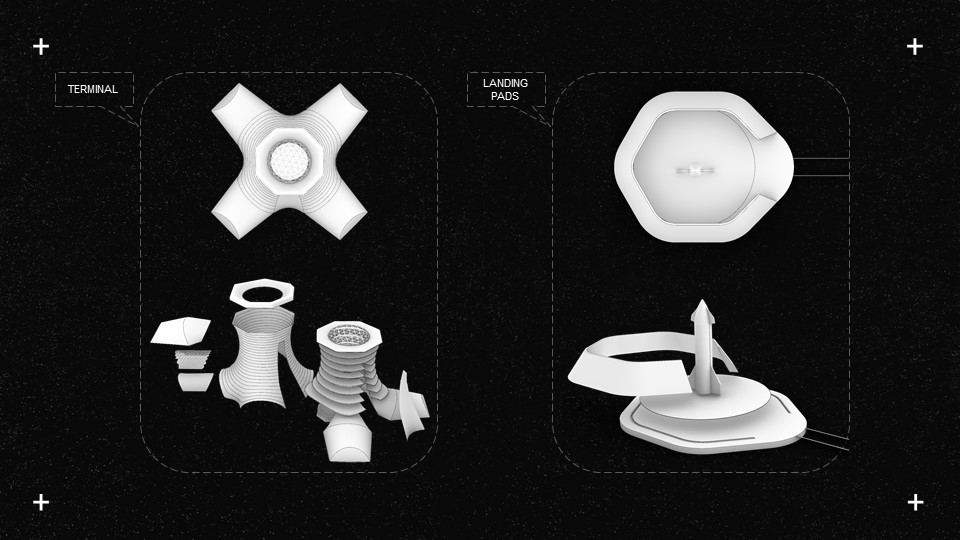
Terminal: The terminal has 4 vaults radially placed and is topped by a tower. The tower has a dome on top of it that allows natural light into the main rocket hanger and floor plates.
Launch pads: The launch pads are created over a flattened and hardened surface with barrier walls that separate the launch pads from the surroundings
02 l WORKFLOW PROCESS
The workflow involved staying coordinated with the other groups, who focused on other programs and also collaborating with our own teammates.
Workflow
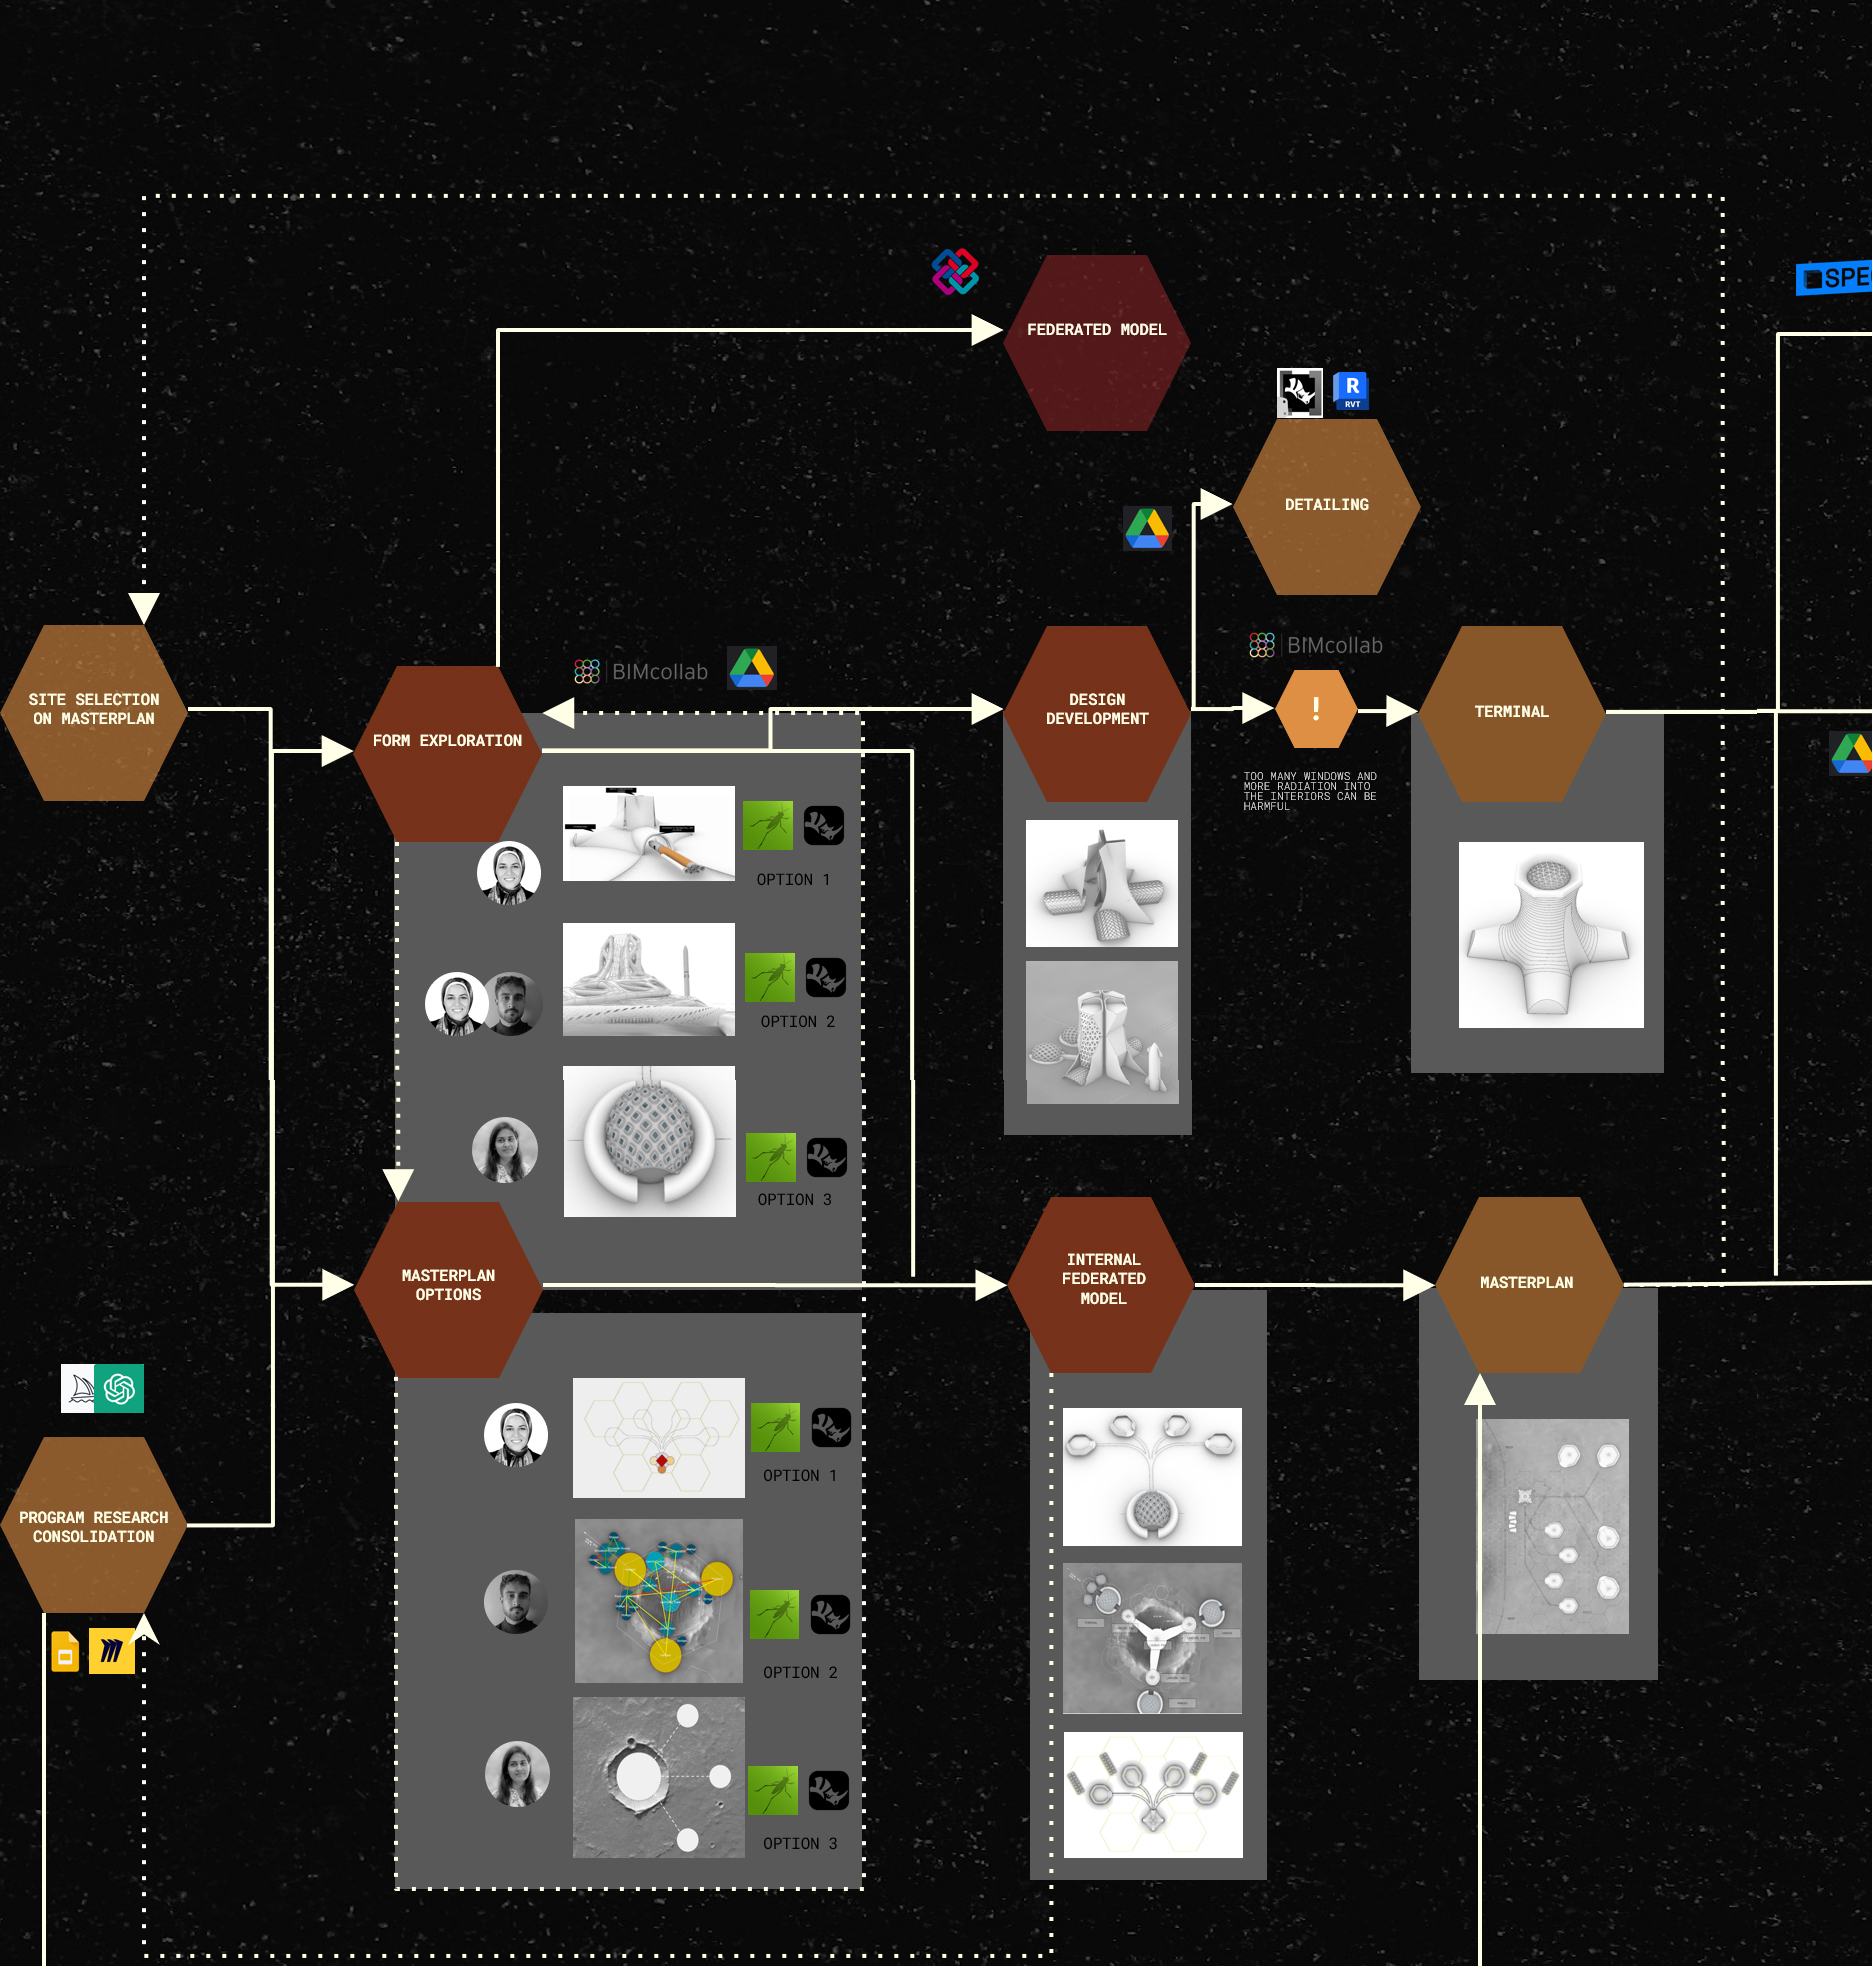
Phase 1: The first phase was the research phase, which focused on the site research, site selection, program selection and program research.
Phase 2: Was the longest phase. This is the design phase where every group member put forward different options and shared design ideas and merged some of them
Phase 3: The last and detailing phase. Involving changing the attributes of various elements by moving them from simple breps and meshs from Rhino to Revit.
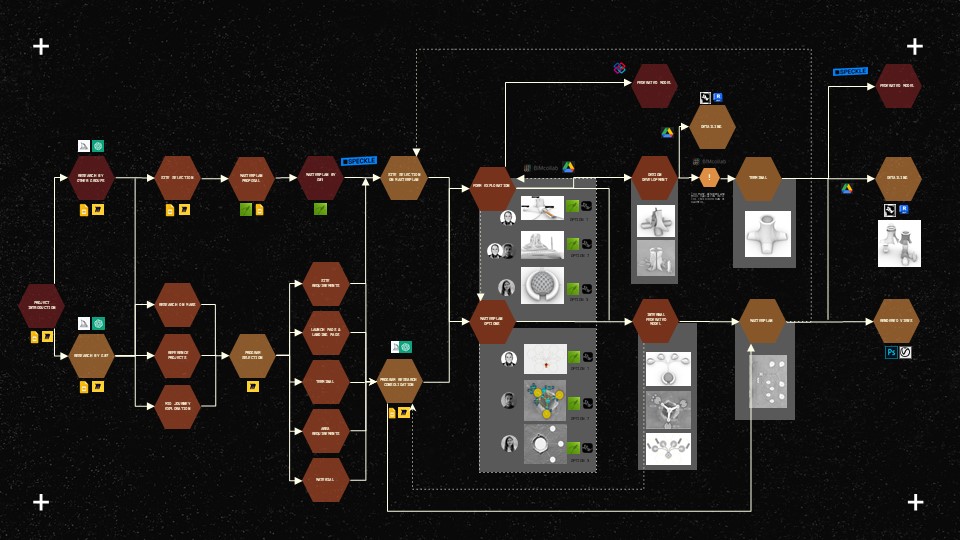

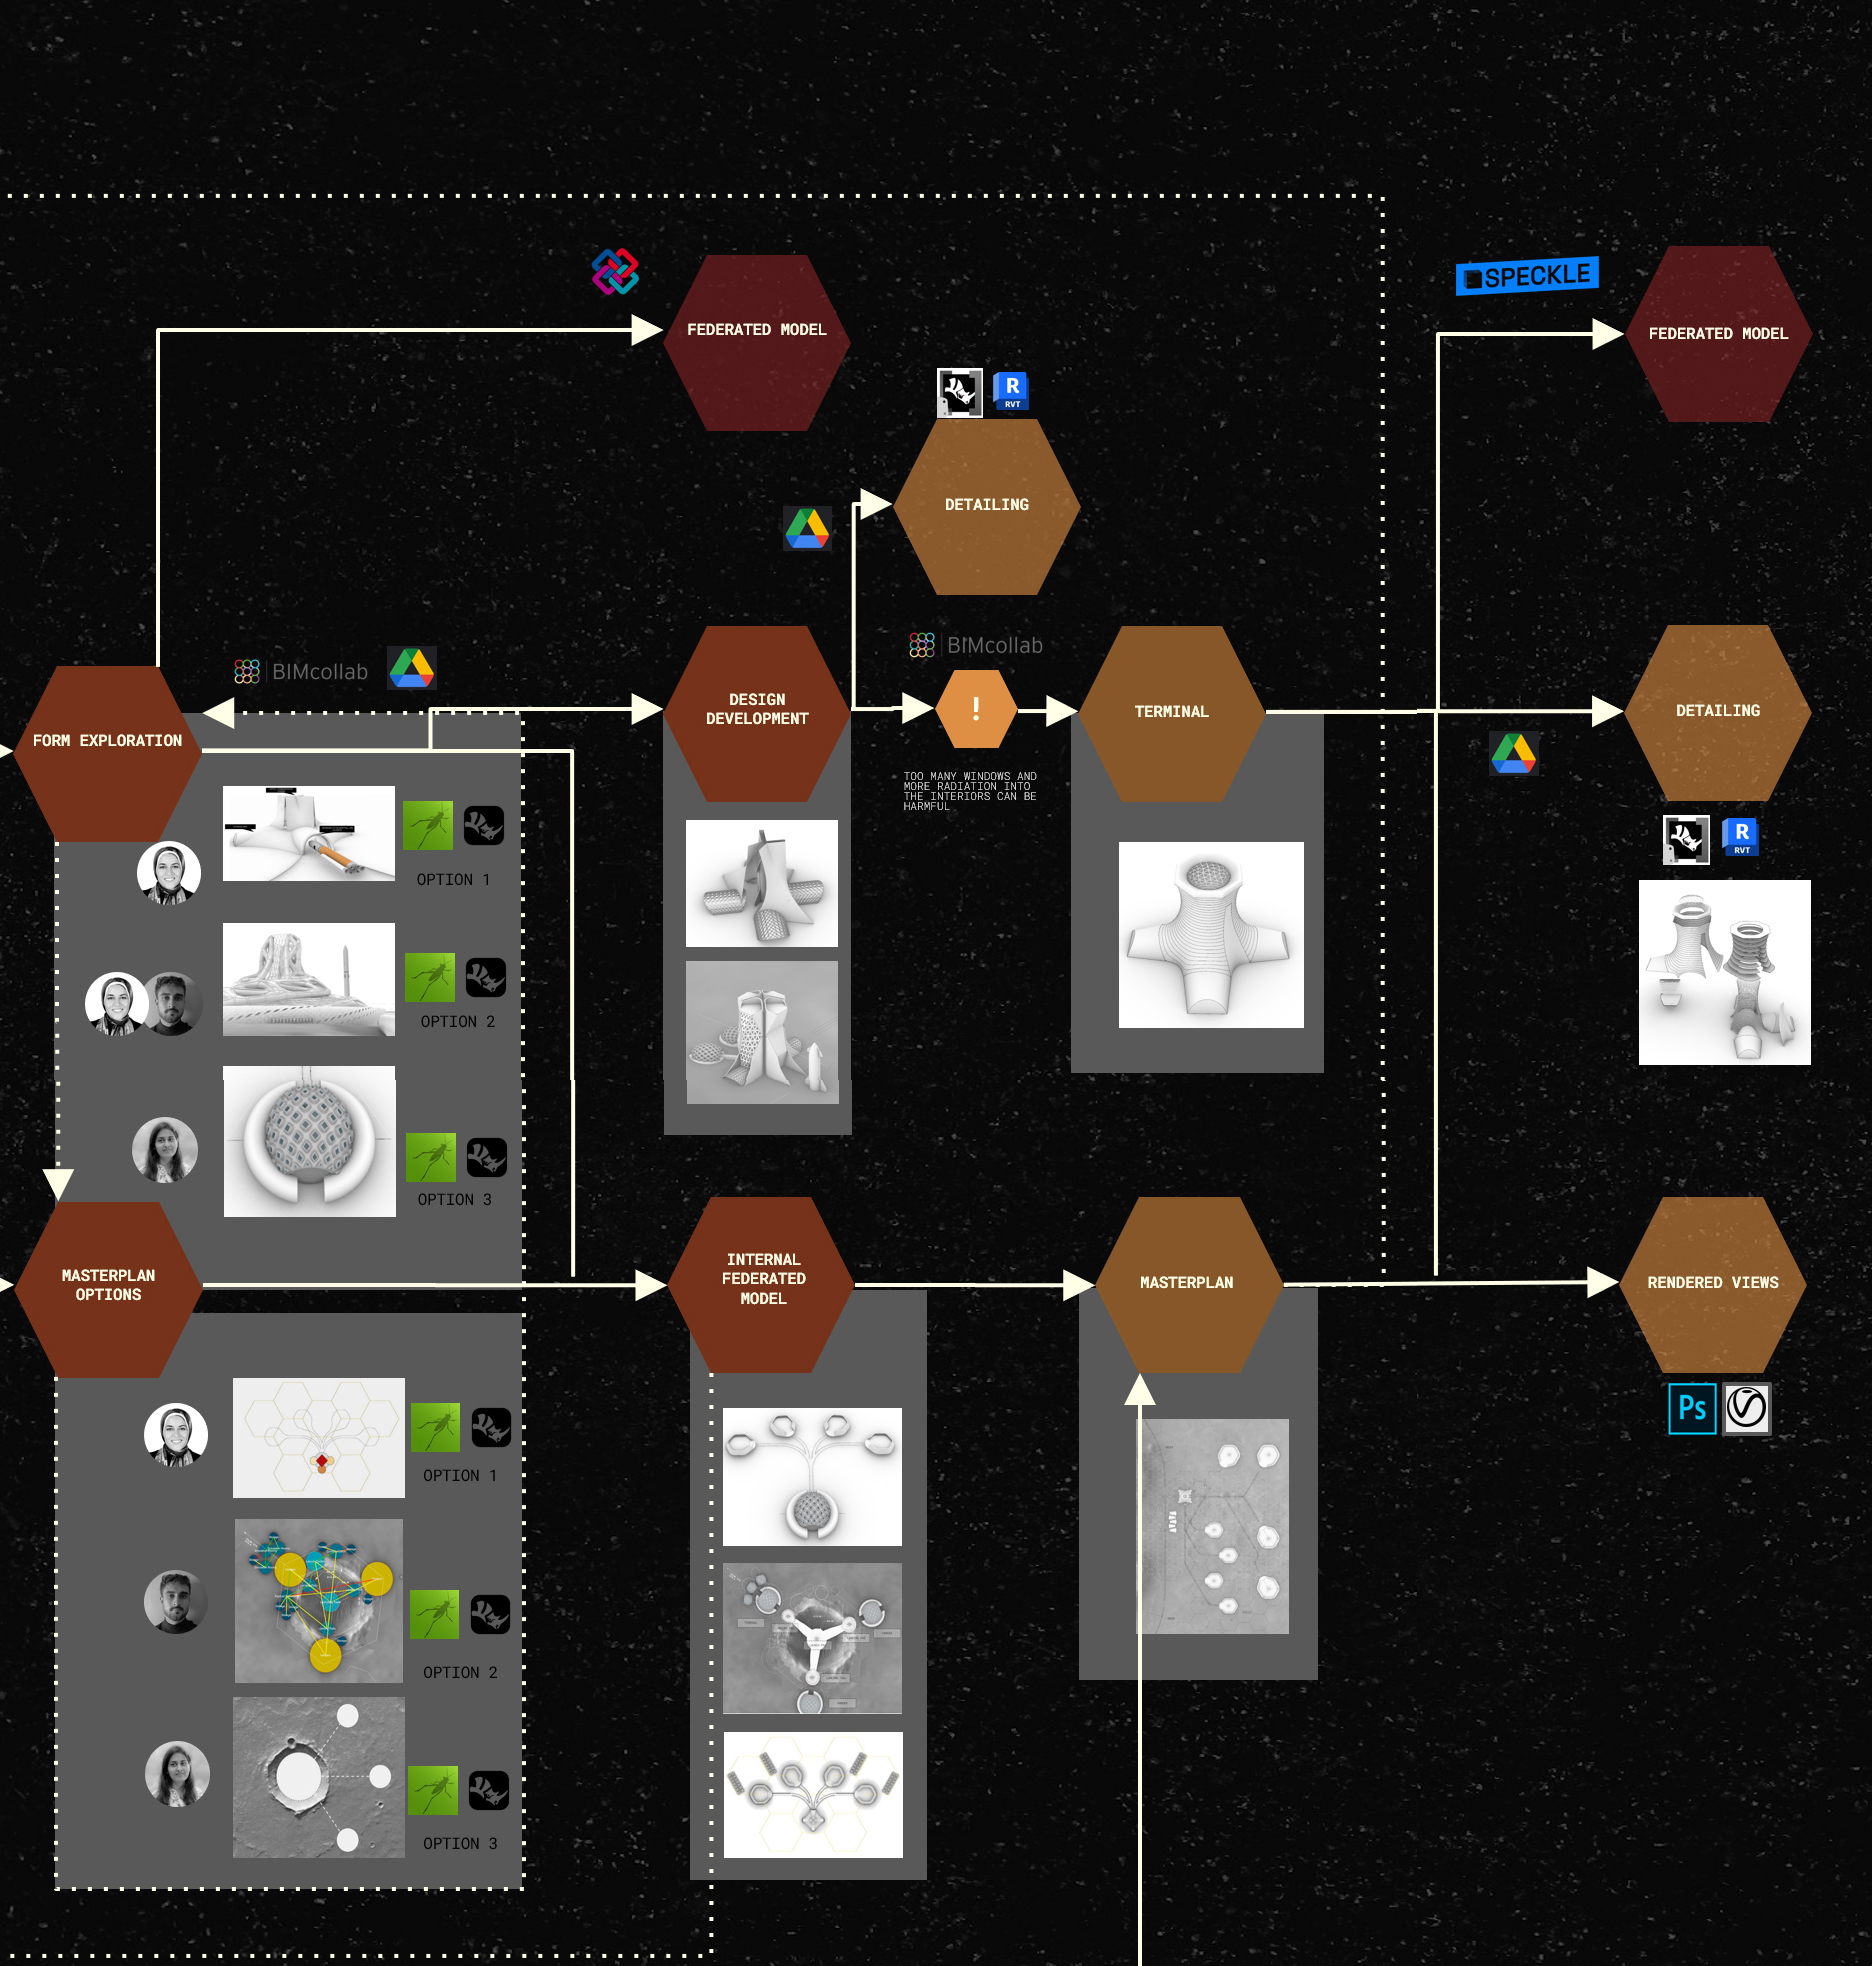
Detailed Design Phase
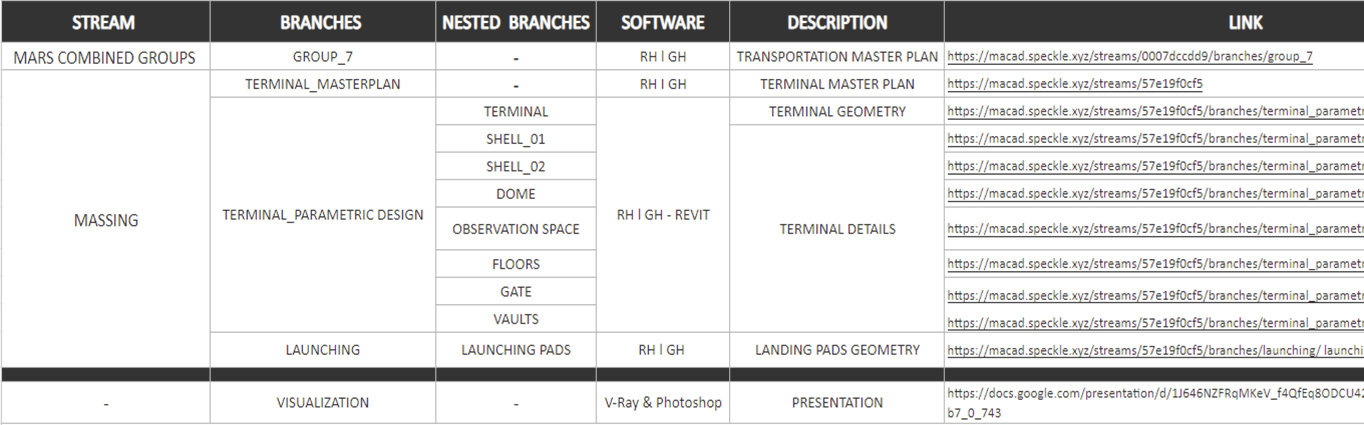
Moving to our documentation, we have two main streams using Speckle and one using Google Drive.
- The first one is the Mars combined groups, shared between all the colony.
- The second is the massing, which is shared between three of us
- The third, in Google Drive, is shared between three of us for visualizations like rendering and presentation
03 l EXPECTATIONS VS. REALITY
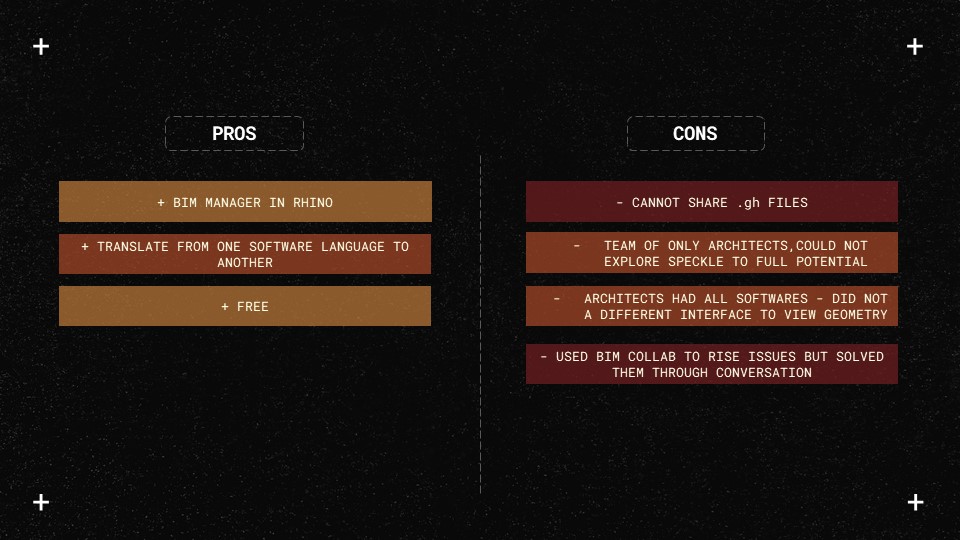
About the pros and cons of speckle we found that the Rhino manager it’s really time saving. A house could be translated easily into walls and floors in Revit through a unified language.
The downsides were grasshopper files incompatibility, forcing us to share whole files in the design stage.
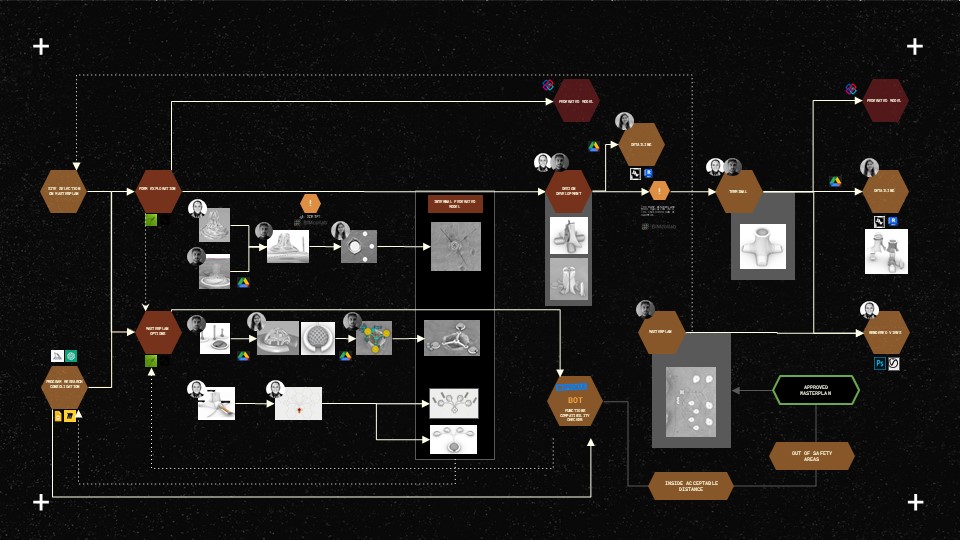
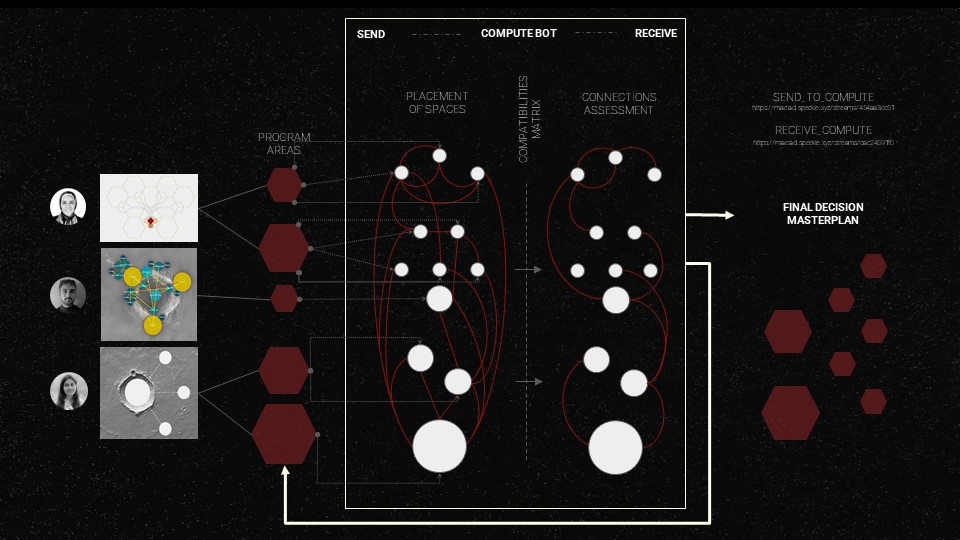
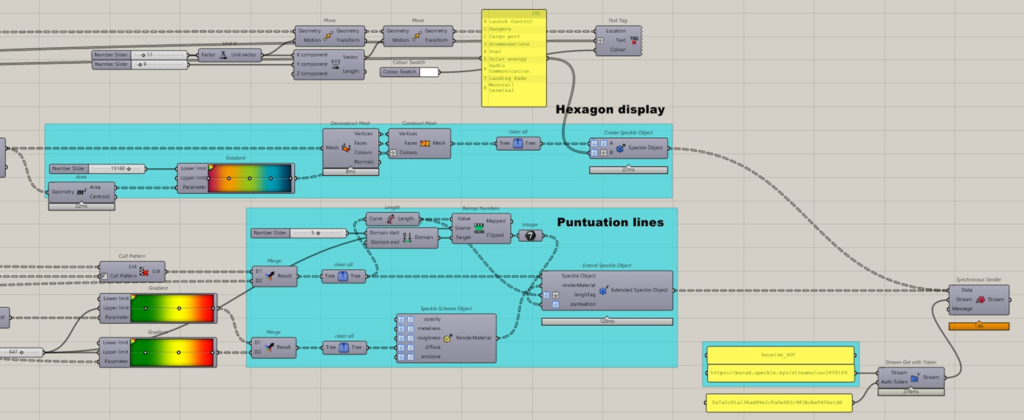
04 l AUTOMATED WORKFLOW
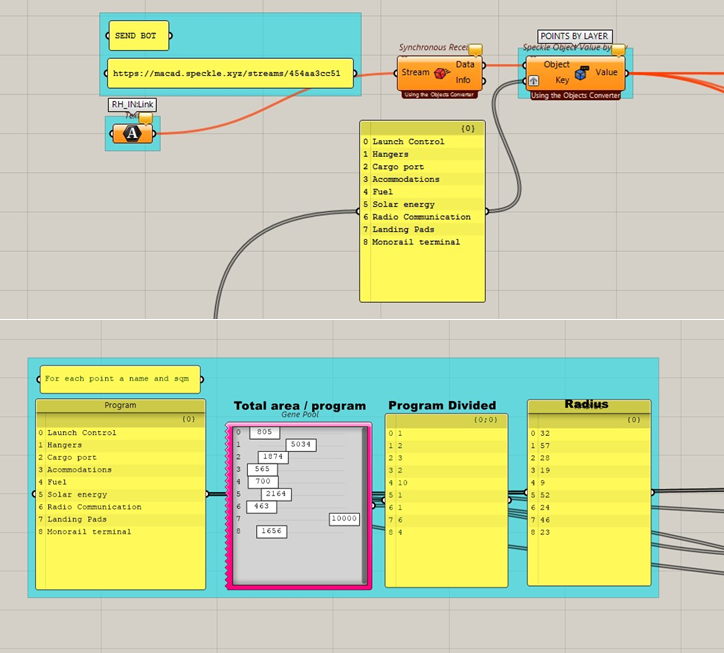
Starting from an initial schedule of program areas, team members start placing the programs in the spots they find better suited.
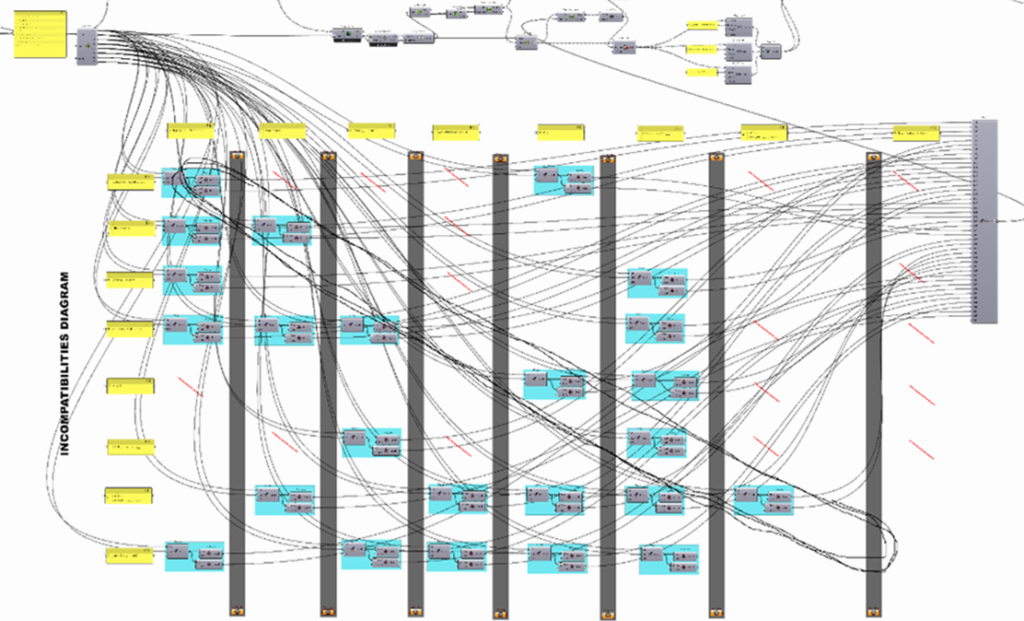
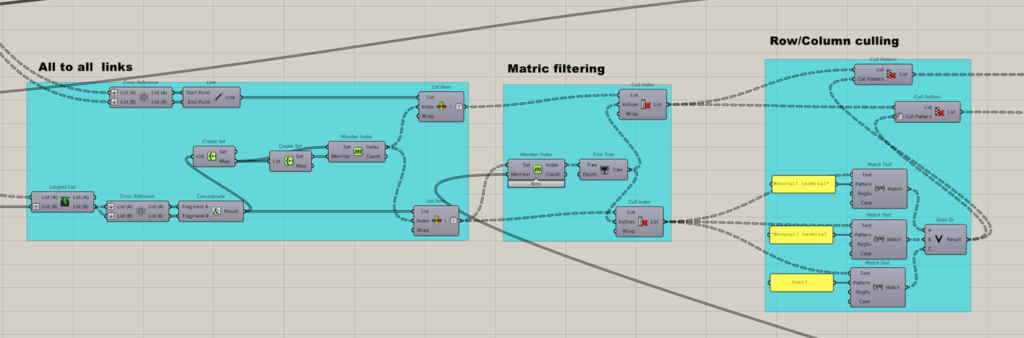
The main grasshopper script in the cloud will process the configuration received, and will filter the incompatible connections between hexagons, so that designers can get the latest results of the masterplan.
Finally, after several iterations, the team can commit the final masterplan to the main branch.
Here a showcase using the app for moving a program area in the speckle cloud.
