
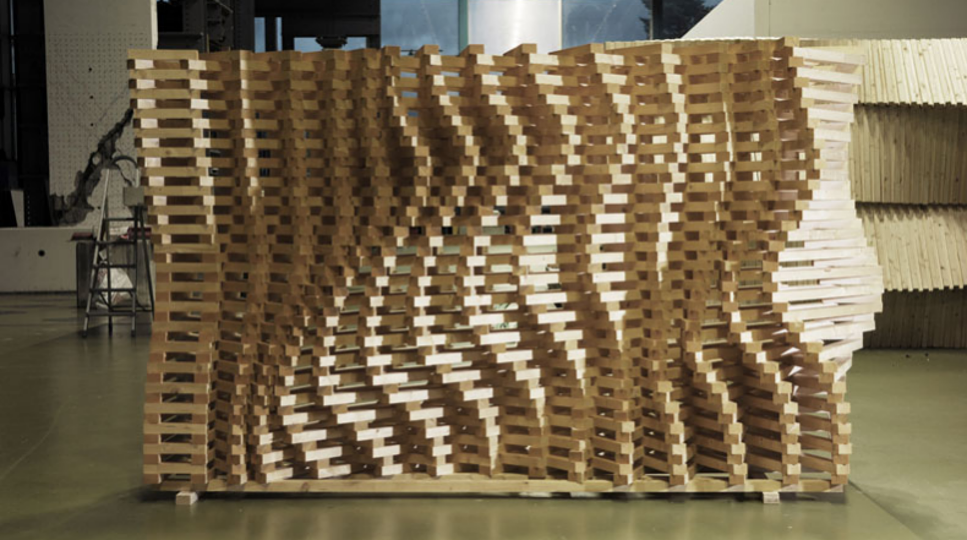
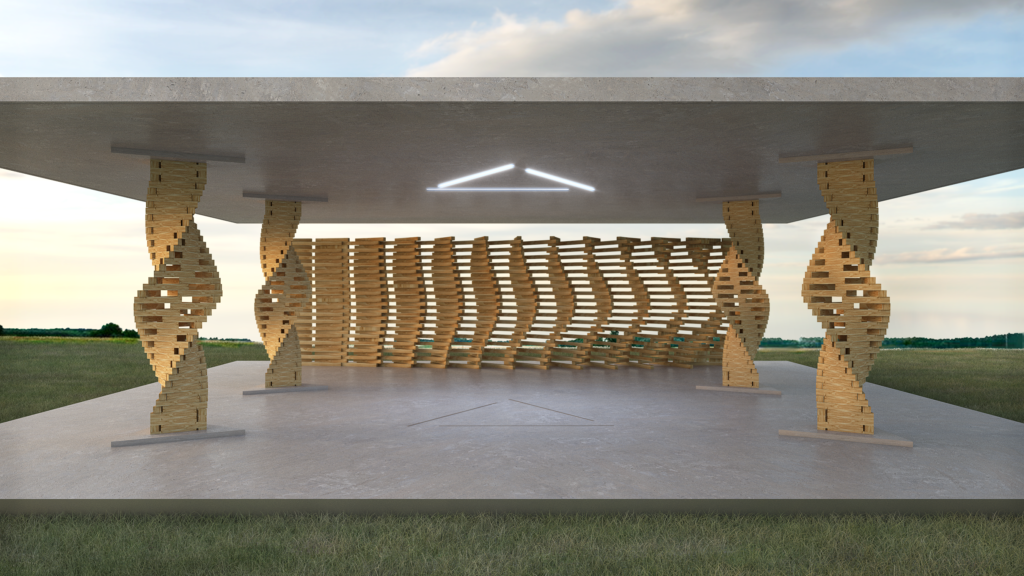
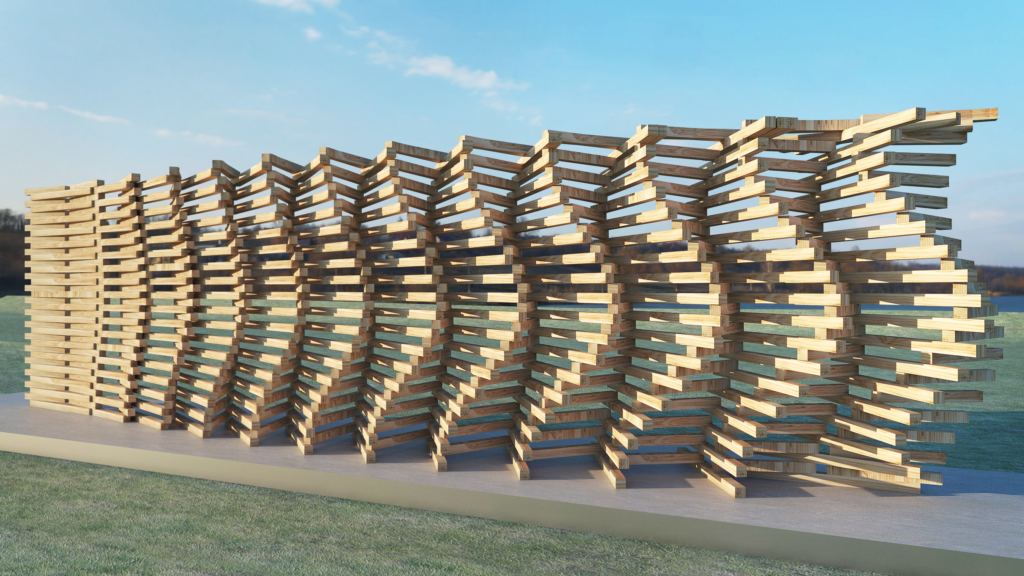
The objective of this project was to investigate the potential of the pick and place technique in producing a compelling vertical element that showcases the precision of robotic fabrication. Our column boasts an intricate design of oscillating, twisting triangles that expand and contract throughout the height of the structure. The purpose of this design is to demonstrate how a structure consisting of just three building blocks can create an open and dynamic pattern through meticulous placement of uniform, straight elements.
State of the art

ETH Zürich, spring 2010
Gramazio & Kohler, Benz Hubler and Christopher Rofe
ETH Zürich, spring 2008
Silvan Oesterle (project leader), Ralph Bärtschi, Mike Lyrenmann
.
…
Design process
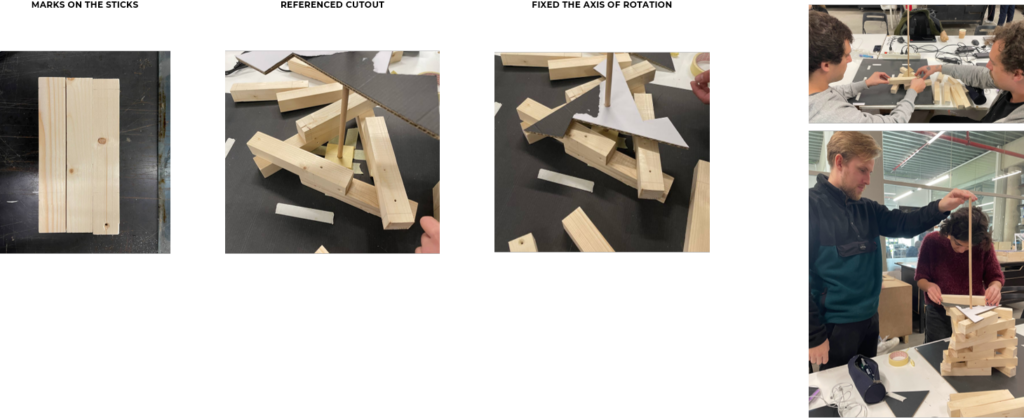
We wanted to ensure that our structure would be hard enough to produce manually that robotic fabrication would be a clear option when producing the elements. This is something that we can confidently say we have achieved as we struggled a lot with the manual model. The result of this manual pick and place was also somewhat unprecise, despite our combined efforts.
TRADITIONA ASSEMBLING: to assemble sticks into a column in a referenced manner, we had to create a tool, which allows to fix the vertical axis of rotation and rotate each layer exactly 10 degrees.
ITERATIONS OF DESIGN – WEEK 1 & 2
- Rotation of a singular module by different angle.
- Gradual tightening of the space between the timber bricks, gradually closing the gaps.
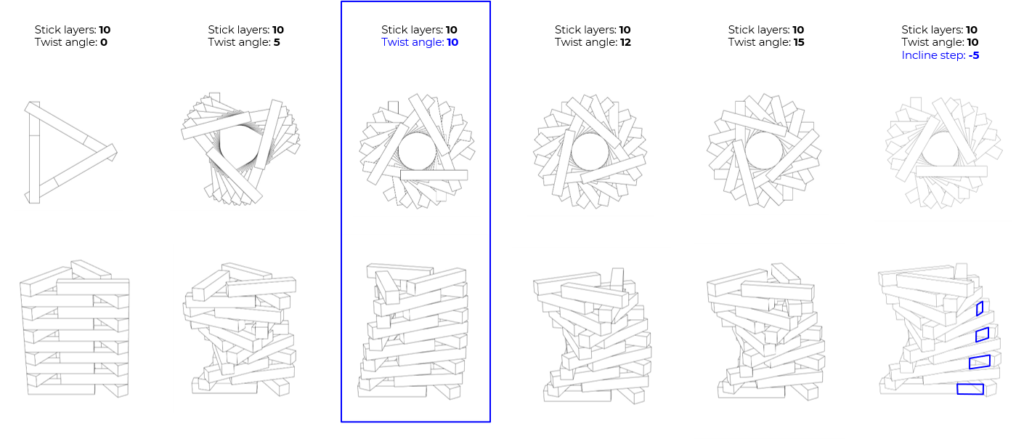
ITERATIONS OF DESIGN – WEEK 3
- Rotation of a singular module by different angle.
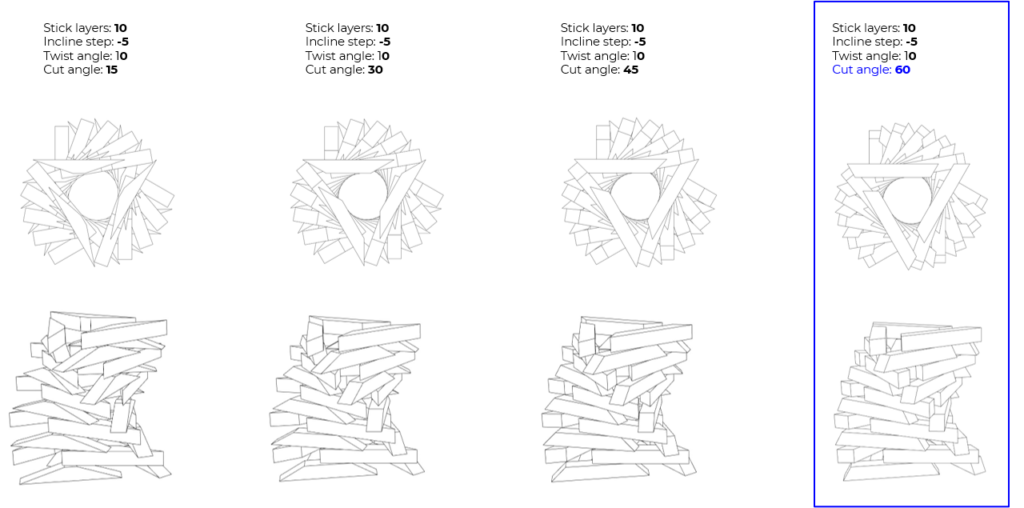
ITERATIONS OF DESIGN – WEEK 4
- Integrating the graph mapper to interfere with the series of angles and incline levels.
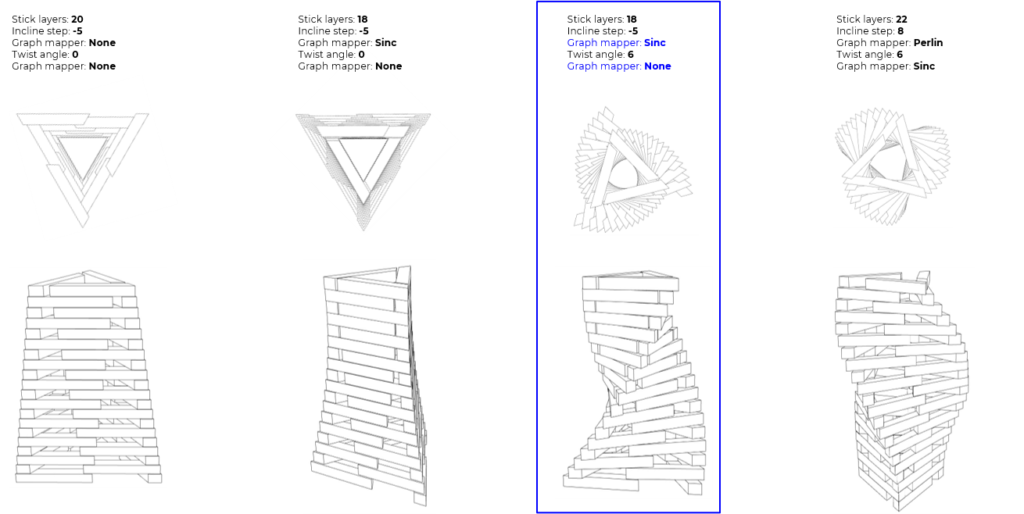
FINAL CATALOGUE
Fabrication strategy
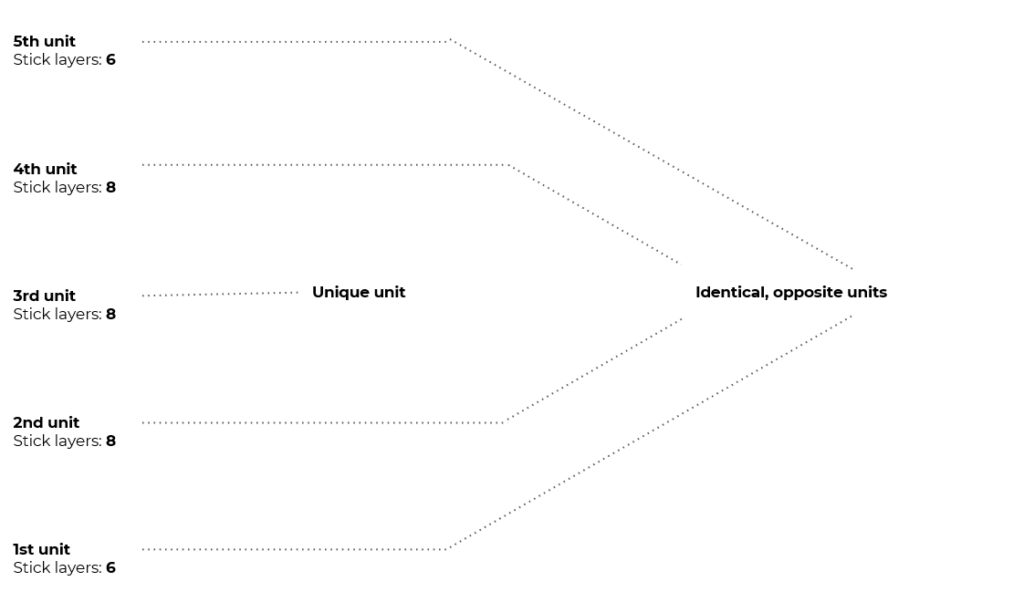
One benefit whit our structure being symmetrical is that we can make 5 different pick and place scripts, while we in reality only need 3 of them, as two of the elements can be fabricated “upside down”. This allows us to have some backup files if one of the scripts would fail for some reason during fabrication.
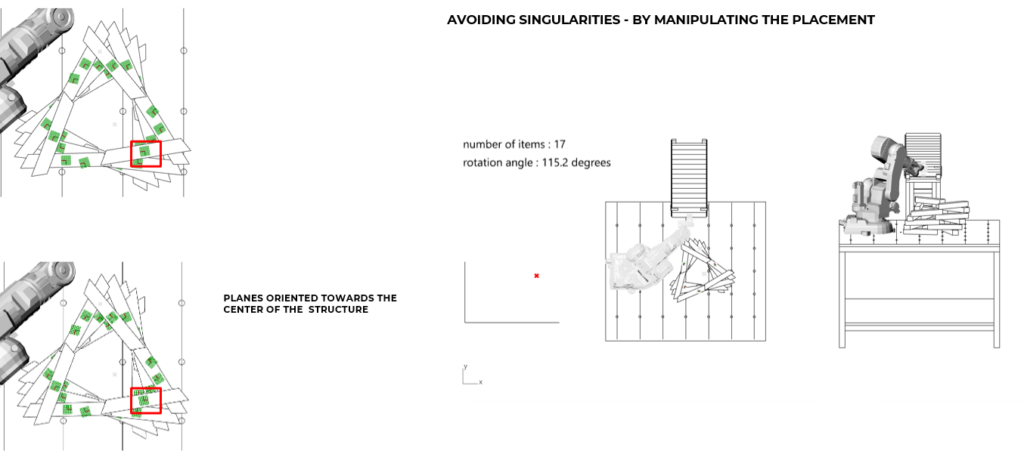
One of the main challenges in our fabrication strategy was orienting the sticks in order to secure that the long sided were always facing outwards. Each individual stick has one side that is 400 mm (constrained by the stick feeding setup) and one side that was shorter. The shorter side is a result of the 60 degree cutoffs that allow sticks to close the triangle. This means that if one of the sticks is placed with the long side facing inwards, we would have collisions. Thus the script is made in a way to ensure that the x-axis of the placing-plains are always facing outwards, and the y-axis is always facing to the right relative to the center of the geometry.
.
Software strategy
Element orientation to avoid singularties.
.
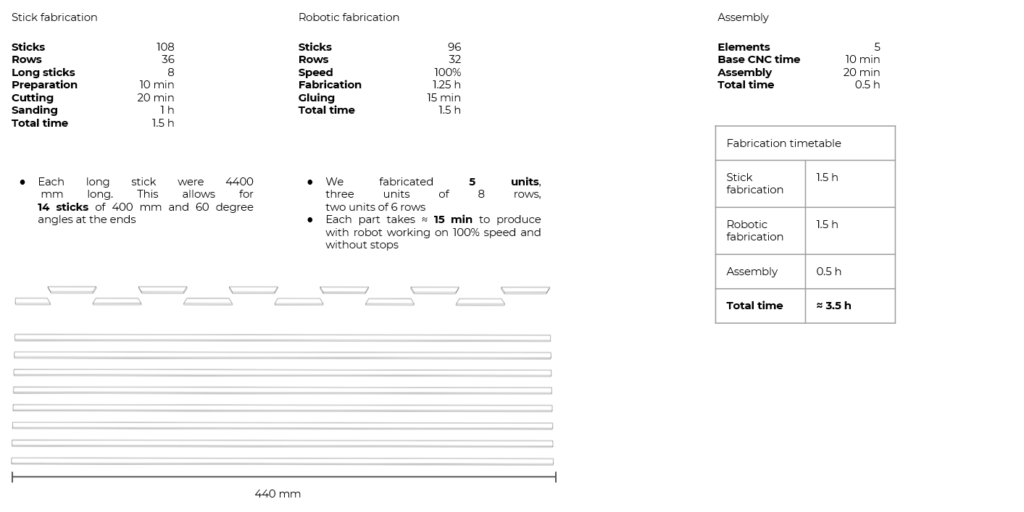
Fabrication parameters
.
Conceptual renders
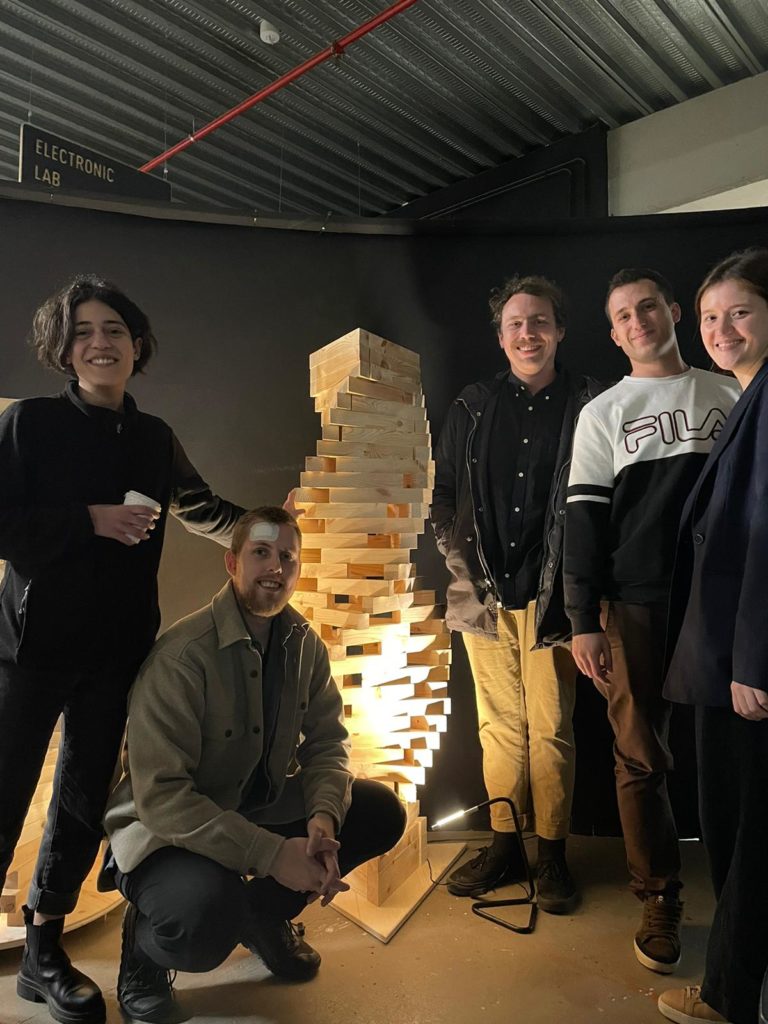
Photographs
Final thoughts
We are happy with our result and we have learned valuable lessons during this course. Looking forward to make more use of these amazing tool that the robotic arms are.
Thank you for an impeccable learning experience!
