Introduction
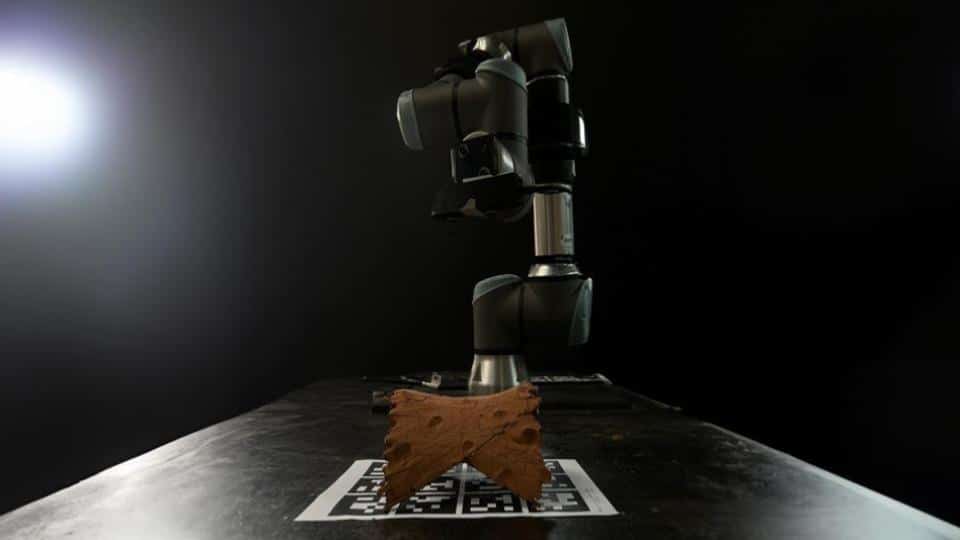
In this exercise, our objective was to scan a physical object and use the acquired data to generate a toolpath for non-planar 3D printing. To achieve this, we integrated tools such as Grasshopper, Python, and ROS (Robot Operating System) and conducted multiple tests to optimize the scanning strategy and post-processing.

Methodology
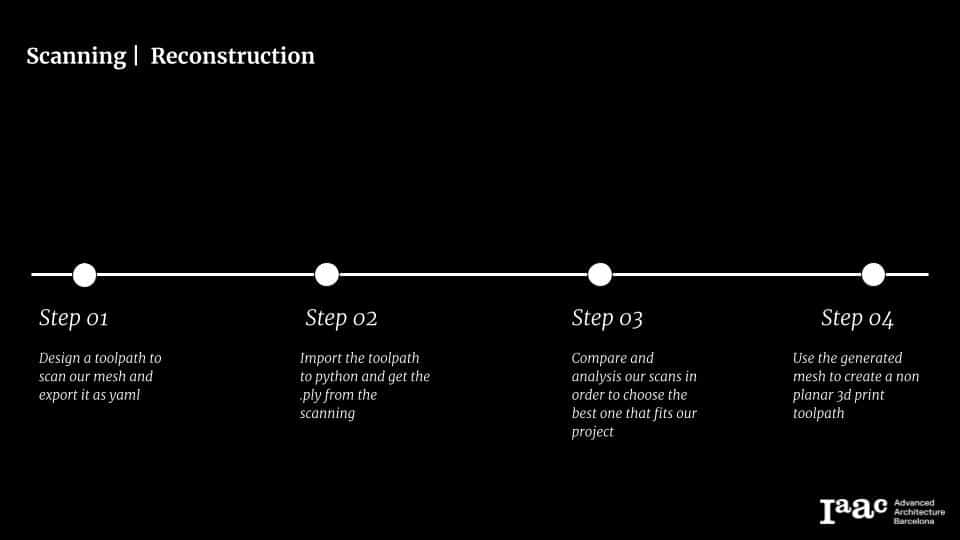
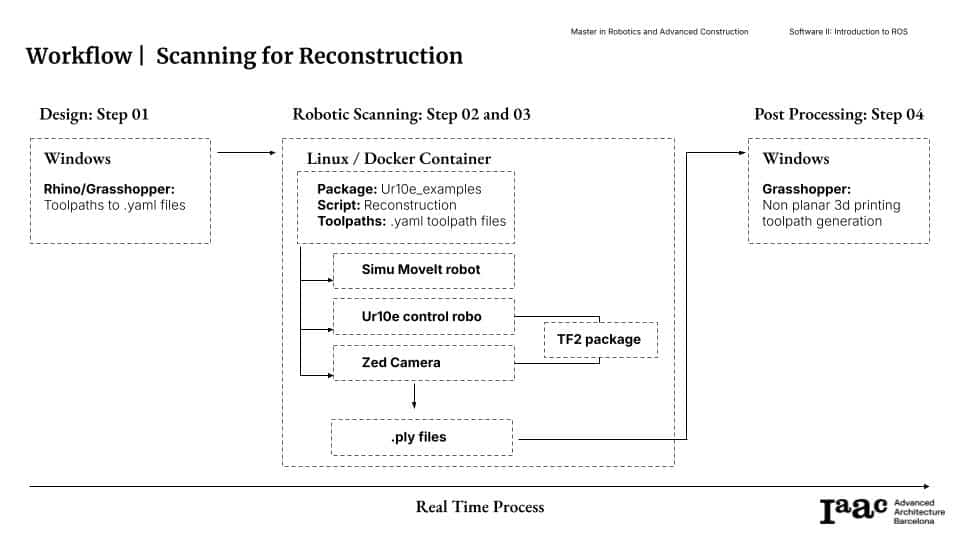
To achieve non-planar 3D printing on a non-planar surface, we followed a structured workflow. First, we designed a scanning toolpath in Grasshopper and exported it to Python for robotic execution. Next, we used a UR10e robotic arm and a depth camera to scan the physical model and generate a .PLY file containing the 3D mesh. After comparing different scanning strategies, we selected the most accurate one for our project. Finally, we used the optimized mesh to generate a non-planar toolpath for 3D printing, ensuring precise adaptation to the curved surface.
Step 01: Design Toolpath Strategies
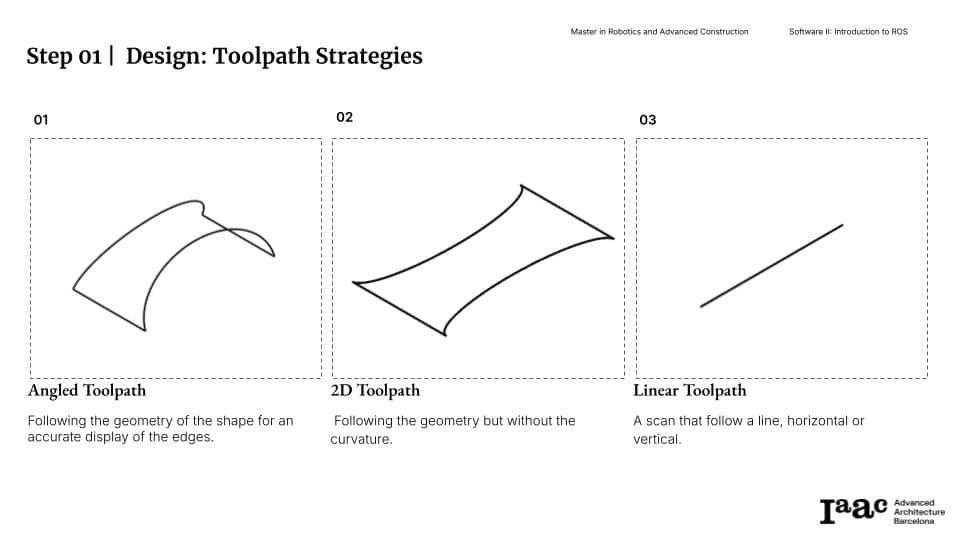
After modeling the geometry in 3D software, the next step involved developing a toolpath strategy, which was designed using Grasshopper. The toolpath is then exported as a .yaml file to be imported into Python, enabling the ROS scanning system to utilize the precise coordinates defined as lines within the Grasshopper model.
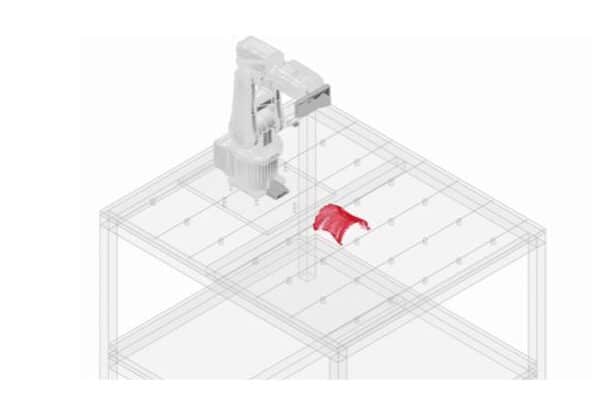
Step 02: Scanning
After importing the .yaml file previously generated in Grasshopper, the next step was to load it.This allowed us to extract the coordinates required for the scanning process, ultimately enabling the reconstruction for a generation of the 3D mesh in the .ply format.

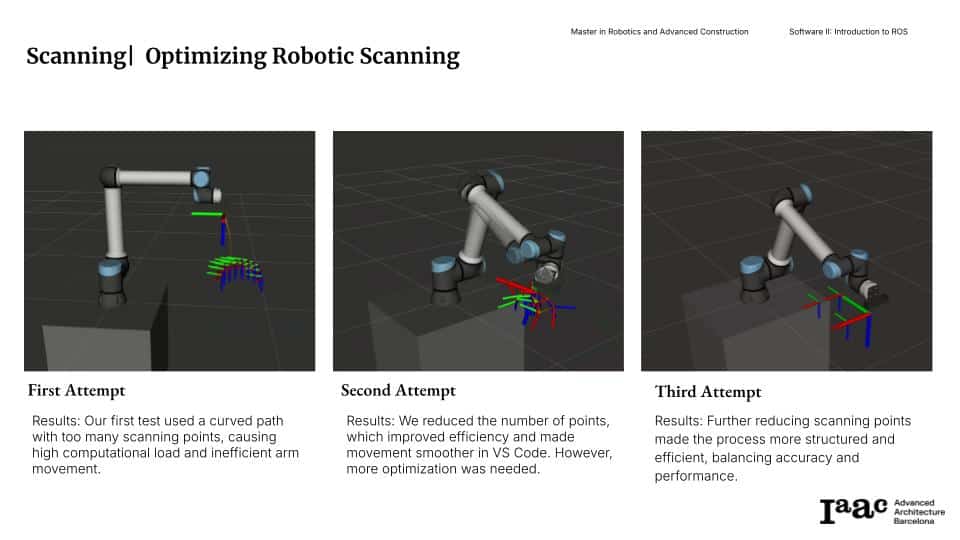
To optimize the robotic toolpath for scanning, we conducted three iterative attempts. Initially, the first test used a curved path with too many scanning points, resulting in high computational load and inefficient robotic arm movement. In the second attempt, we reduced the number of scanning points, which improved efficiency and smoothed motion execution in VS Code, but further refinement was still necessary. Finally, in the third attempt, we optimized the process by further decreasing the number of scanning points, achieving a structured, efficient, and balanced approach that enhanced both accuracy and performance.
Step 03: Comparisons
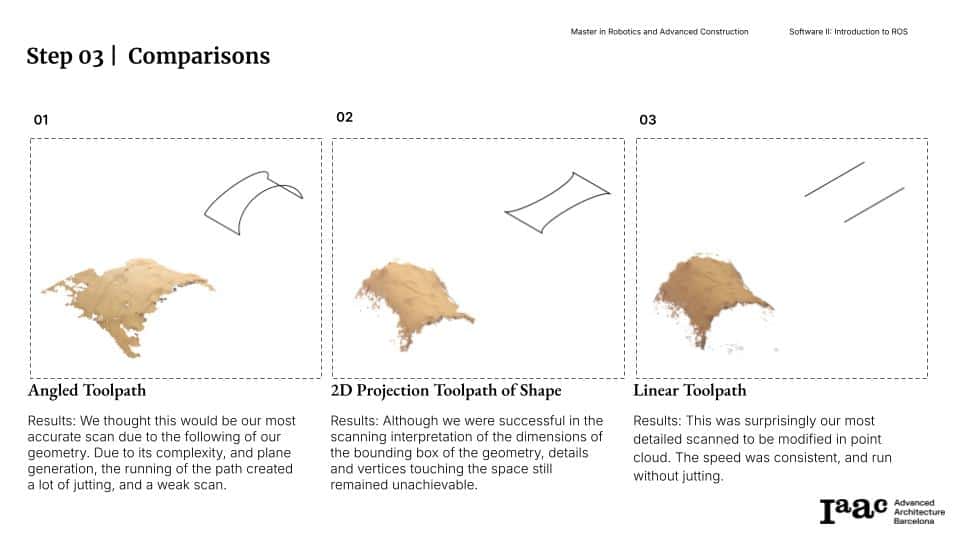
Once the scans are completed, we proceed to collect the .ply meshes for comparison. This allows us to evaluate which of the designed toolpaths is most suitable for our geometry. The optimal toolpath is determined by its ability to generate a mesh that closely resembles the real-world geometry.
Step 04: Post Processing
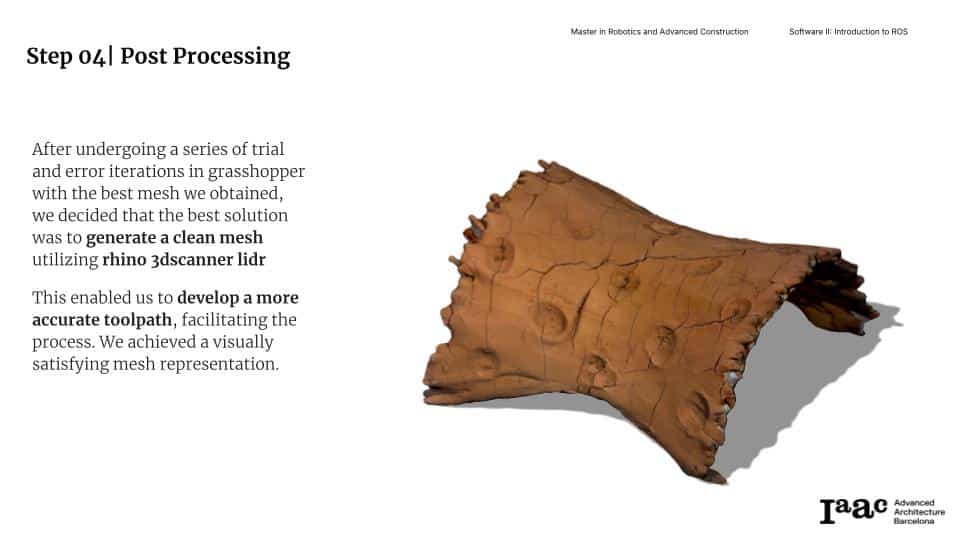
After obtaining the .ply mesh that best represents our geometry, we can proceed with designing the toolpath for non-planar 3D printing on a curved surface.
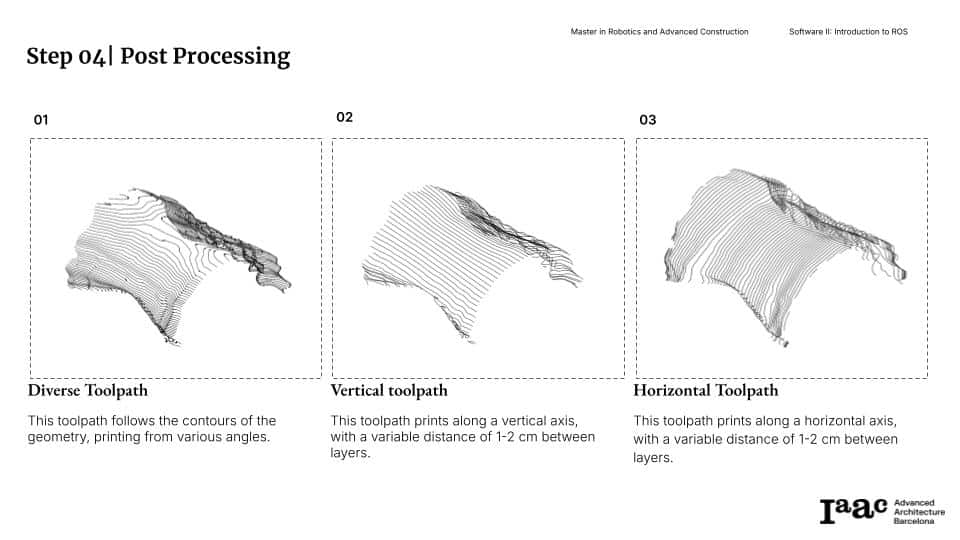
After exploring various toolpath options, we determined that the horizontal toolpath was the most effective choice for our project. This approach aligned better with the geometry of the object, providing a faster and more efficient printing process. It allowed for cleaner results, optimizing both the time and precision required for 3D printing on non-planar surfaces.
Conclusions and Next Steps
This exercise demonstrated the importance of a well-structured workflow for non-planar 3D printing. Throughout the process, we optimized scanning, improved toolpath strategies, and selected the best approach for fabrication.
- Post Processing:
- Open3D: provides robust tools for handling raw 3D data, including point cloud processing, registration, and classical reconstruction methods, offering a strong foundation for accurate mesh reconstruction.
- PyTorch3D: With its differentiable rendering and seamless integration with deep learning pipelines, it enables advanced reconstruction techniques like neural implicit surfaces and optimization-based mesh generation, making it a powerful choice for adaptable and innovative 3D reconstruction workflows.
- Toolpath Design: Design a more adaptable, automated scanning toolpath to accommodate different object sizes and shapes.
- Robotic Manipulation: Develop algorithms to extract optimal grasping poses from scanned models to improve robotic manipulation.
- Lighting: Improve lighting setup to ensure better consistency and capture quality during scanning.
- Camera Upgrade: Upgrade the camera system to enhance accuracy when scanning smaller objects.