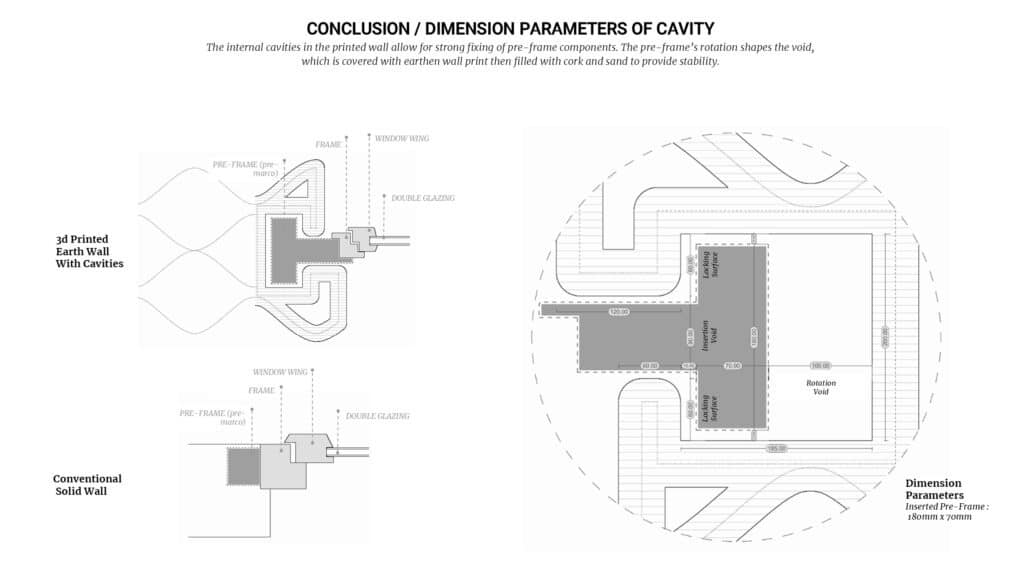
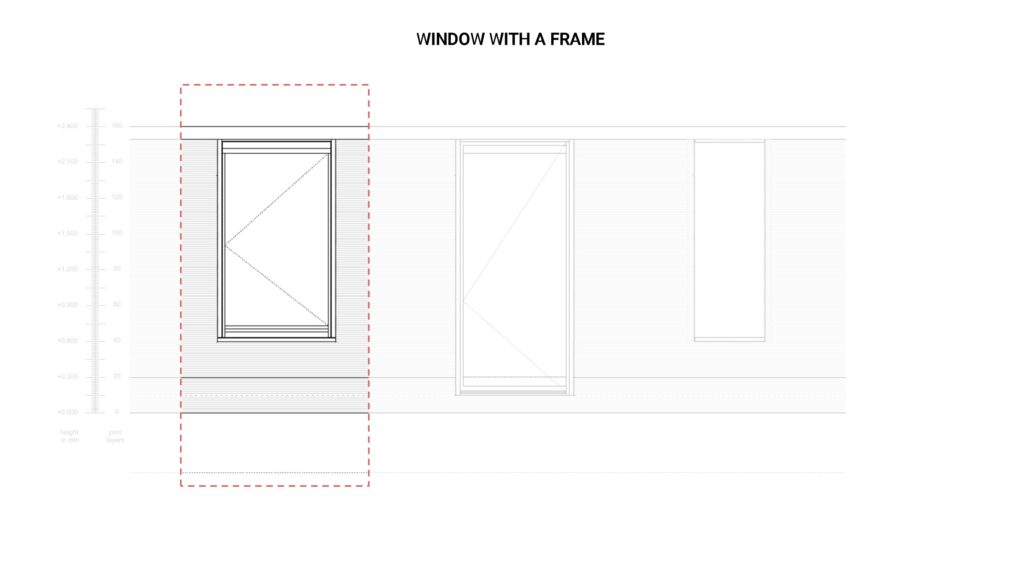
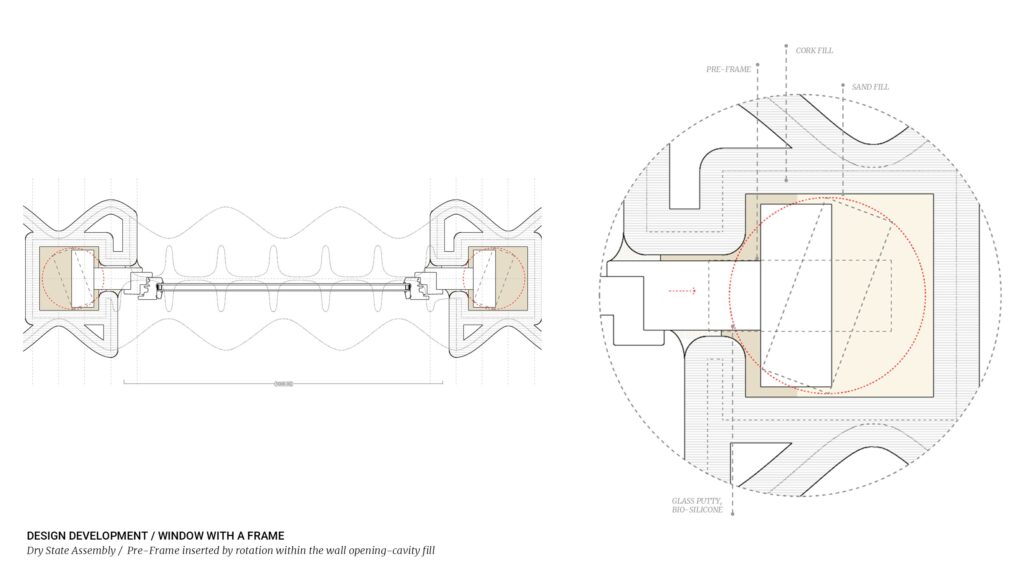
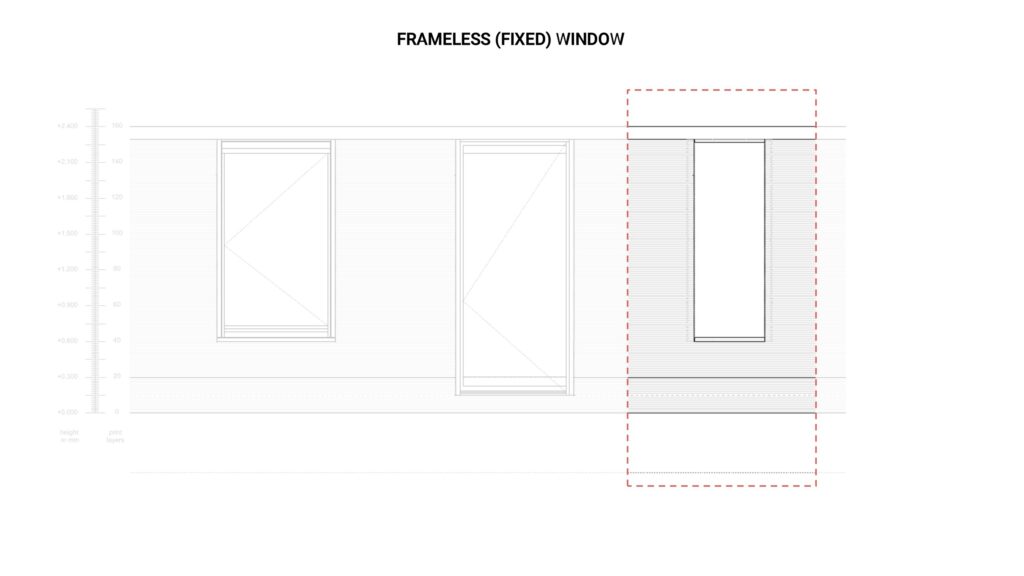
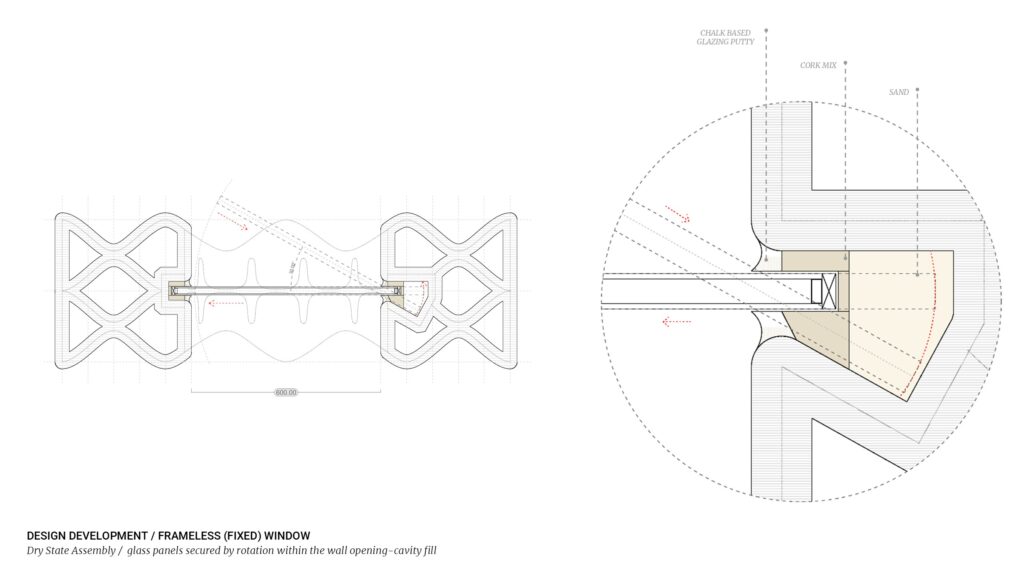
This study investigates door and window joints insertion solutions for 3dPA walls. Two design solutions: framed and a frameless system. The frameless design employs a biodegradable cork-based composite, while the framed configuration uses a sub-frame bonded with the same cork mixture and sand poured into the remaining gaps for stability. Both methods improve structural integration and material compatibility.
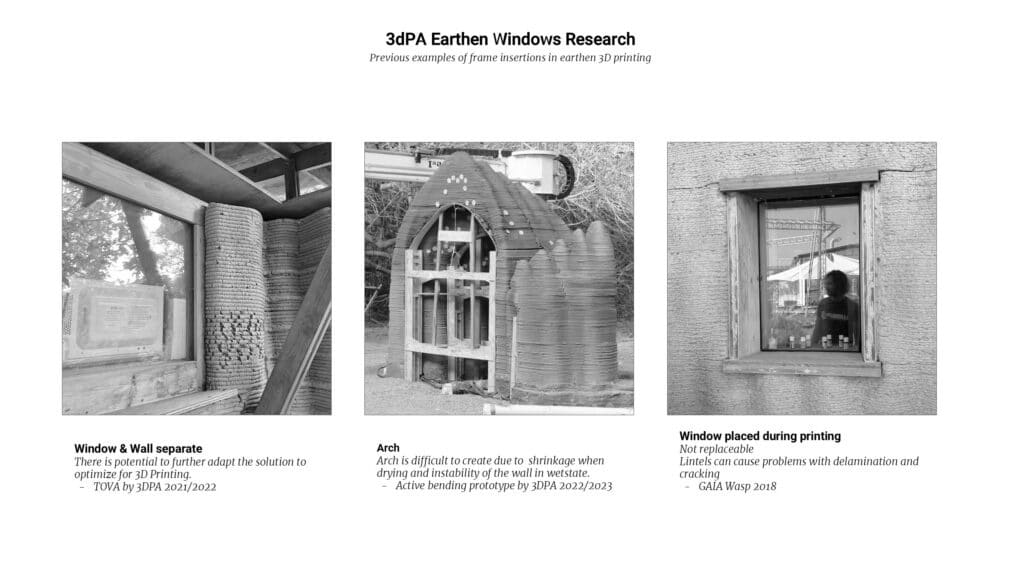
Shrinkage, warping and the instability of the material in wet-state make standard window solutions like lintels and arches difficult to adapt to 3DPE structures. In this research, our aim was not just to make a window fit into a 3DPE wall, but not see the constraints of the material as an obstacle, but rather use it as a design driver to create joinery detail utilising the 3DPE logics.
Pre-set requirements
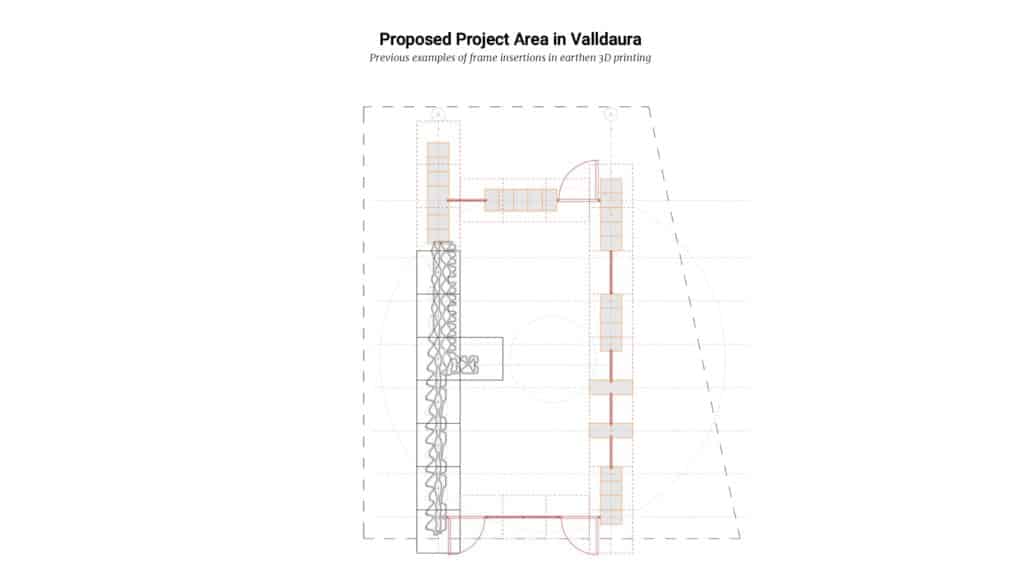
- This year, we are working with a fragmentation strategy for the walls and the windows. This means that there will be wall – window – wall – window, etc… In this way, we can finish the last three walls within the set time of around 25 days of printing time.
- Standard doors and windows. Only pre-frame or joinery to the windows is custom for 3DPE.
- The windows and doors are installed in the dry state, ideally after the roof is already installed.
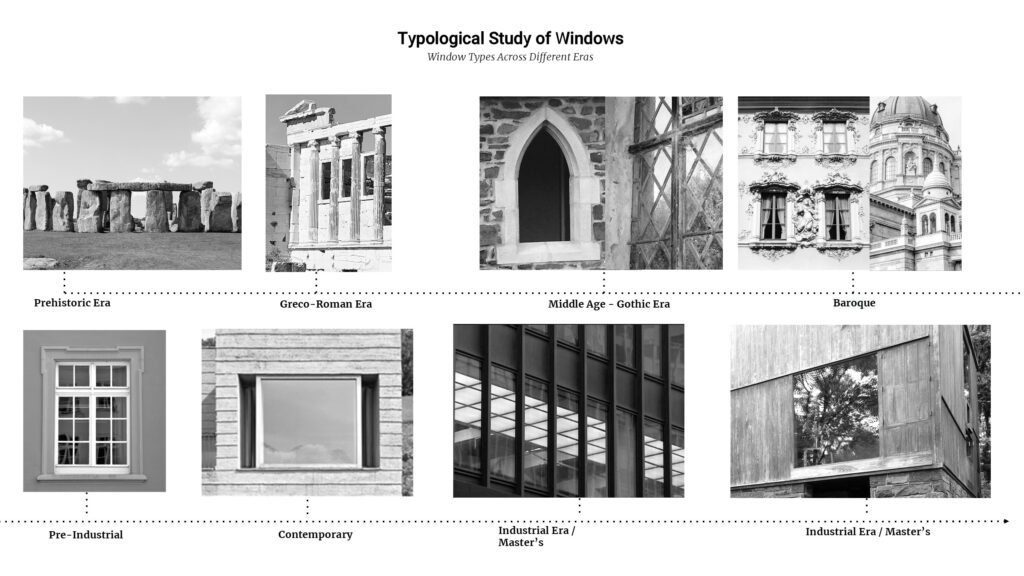
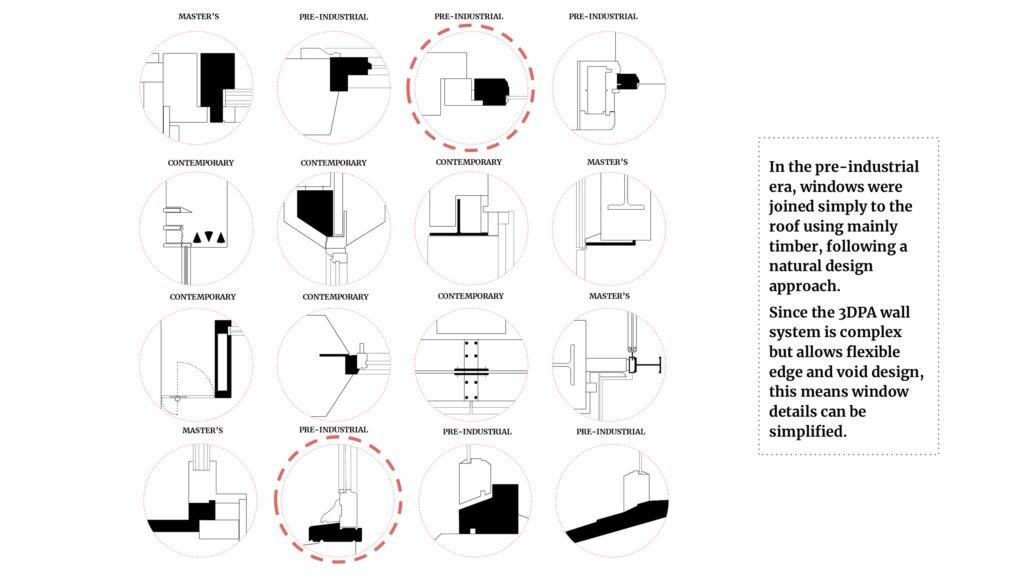
We started the research by looking into examples of windows and doors from different parts of history, from prehistoric to contemporary examples. To understand how the windows worked. Drawing all the details was helping us to decipher how the connection mechanics and details changed over time.
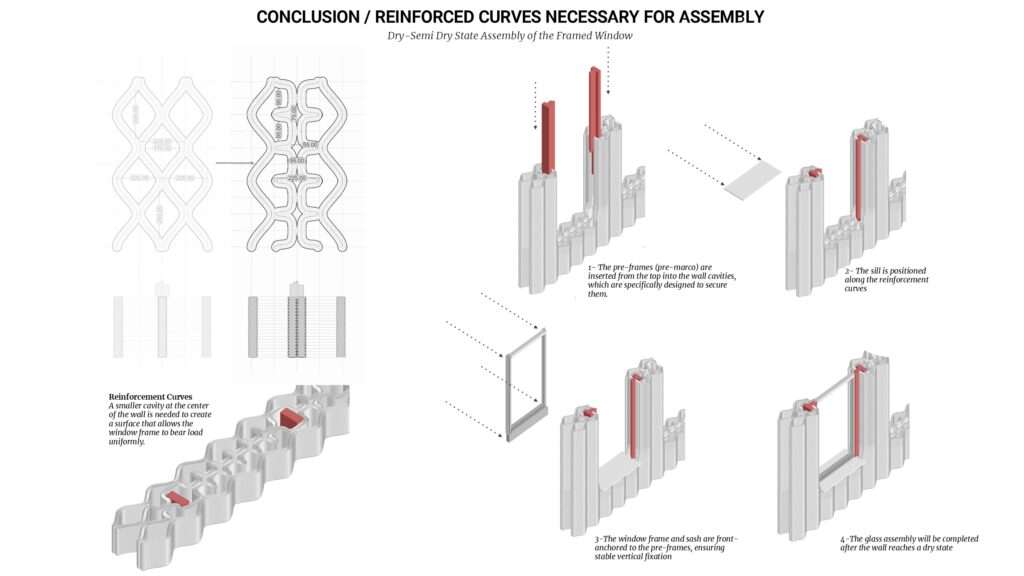
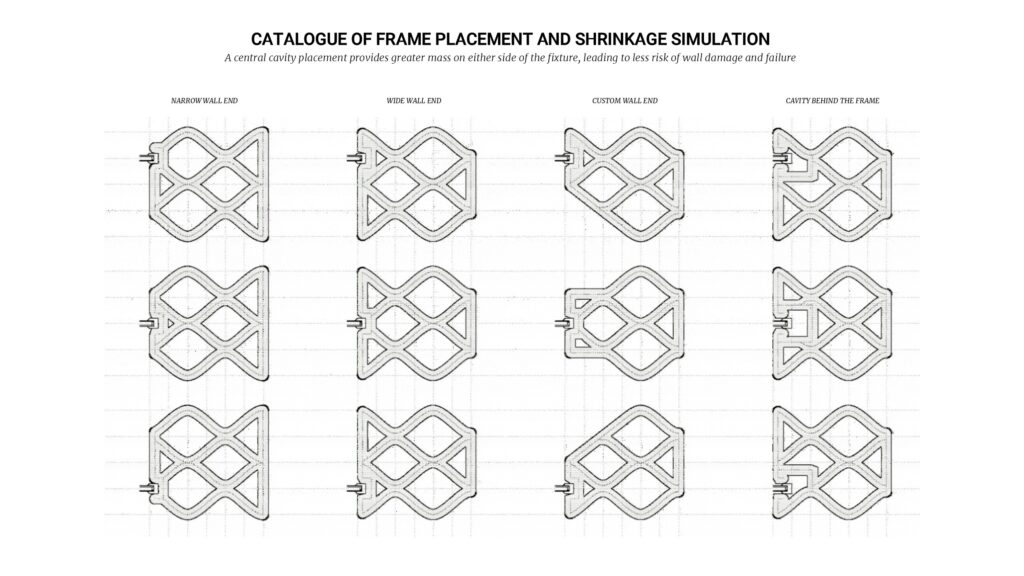
After the historic research, we started to model simple joinery details in plain view to understand how the detail would change as it was placed closer to the inner or outer edge, or in the middle, or how it interacted with the dova curve pattern. We found that keeping the detail in the centre (or close to the centre) was important for the strength of the joint.
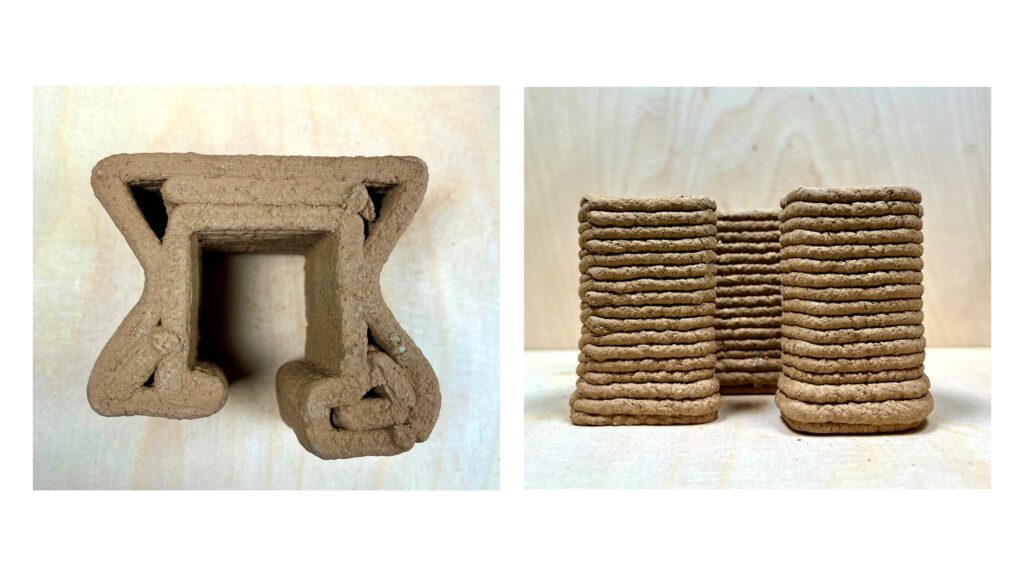
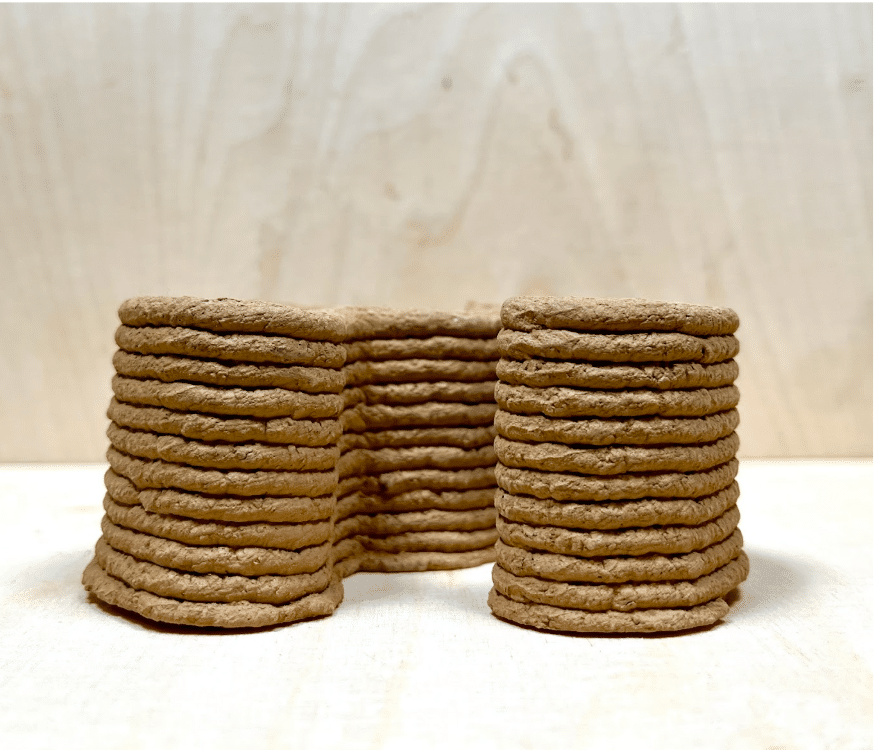
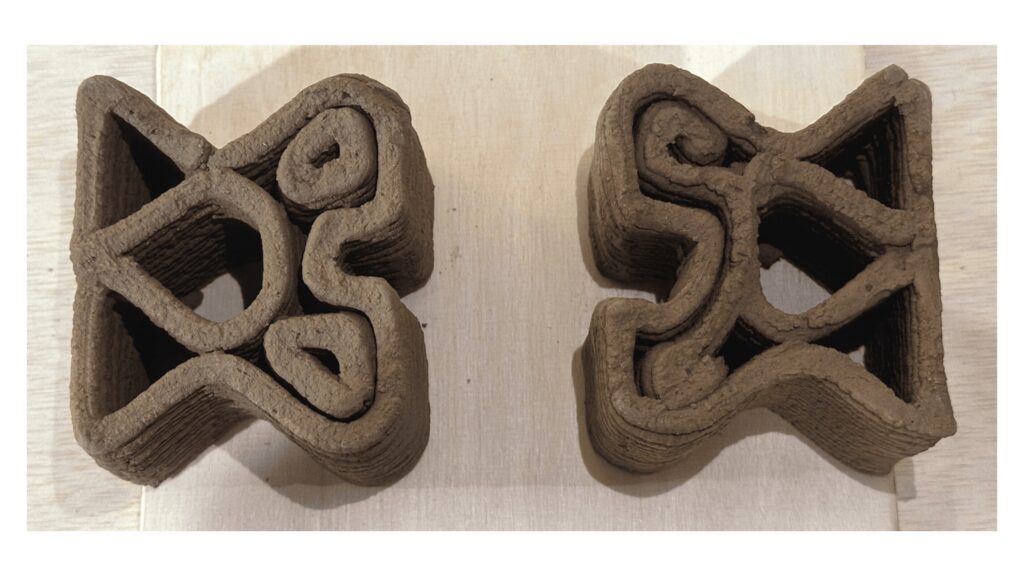
After testing a variety of different joints, we landed on two concepts that were printed 1:1 scale. One was a solution for a frameless window, the other for placing a pre-frame for a framed window.
1:5 Prptptypes
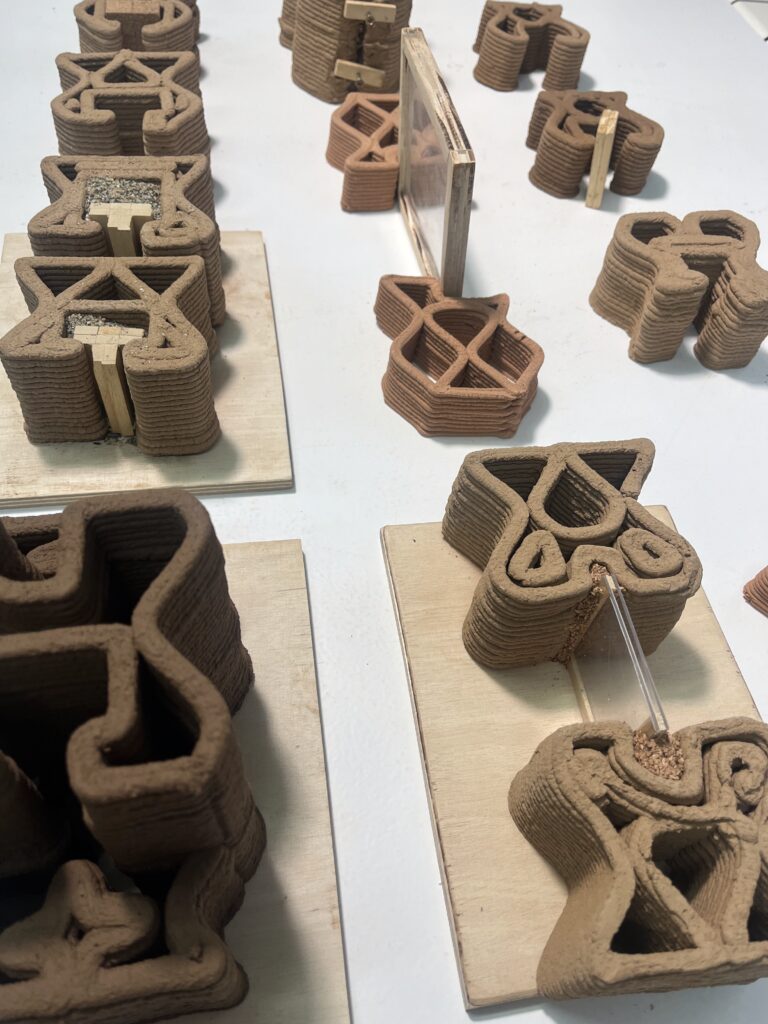
1:1 Prototype


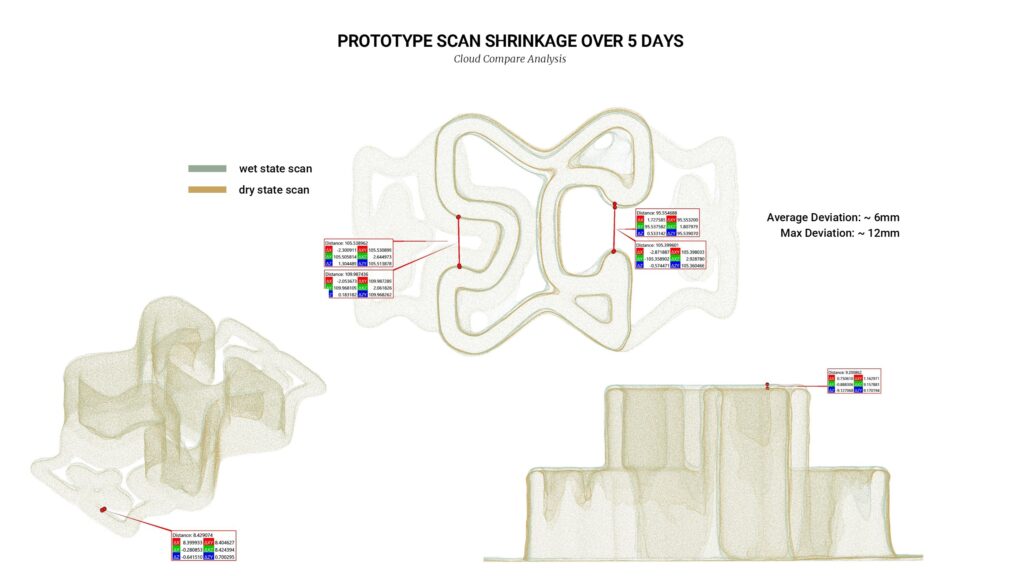
Learnings from print:
As the earthen wall shrinks when it dries, it is important to take scan of the opening when the wall if completely dry, to make sure it is the final shape. This shape can then be used to create CNC-milled costume pieces where needed.
Testing the materials on 1:1 scale was important to get a more realistic understanding of how it works, as well as what best ways to apply the joining materials on site.
Next step:
After printing the 1:1 prototype, we developed a third concept as well, for a framed window. In total, we have three solutions: one for a window with a frame, one for a door, and the last for a frameless window.
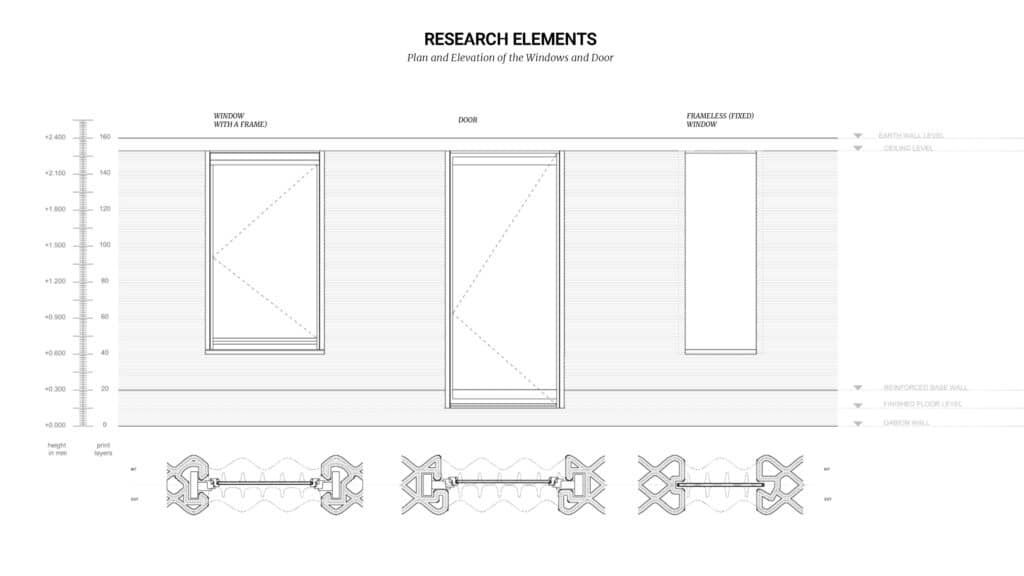


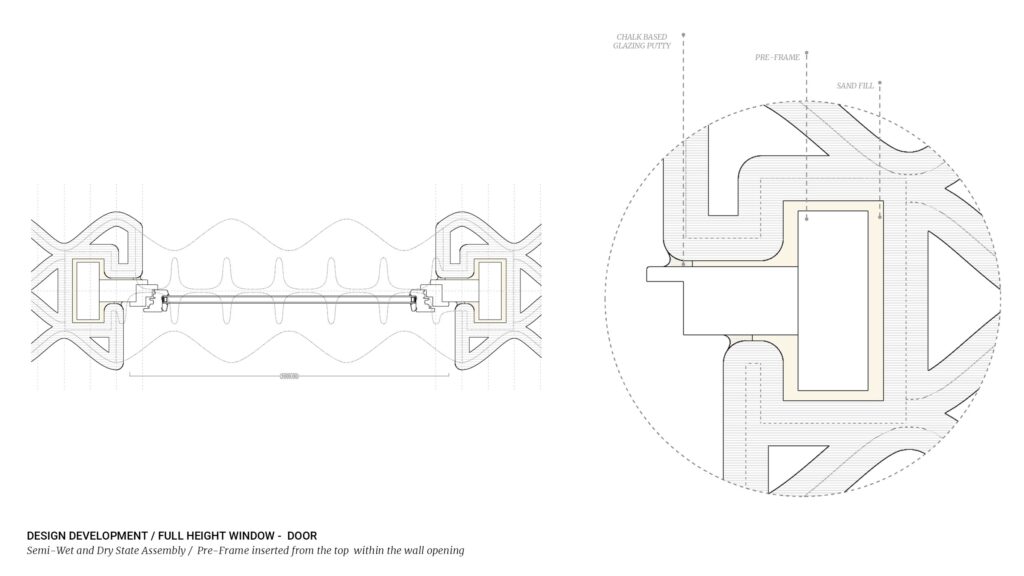
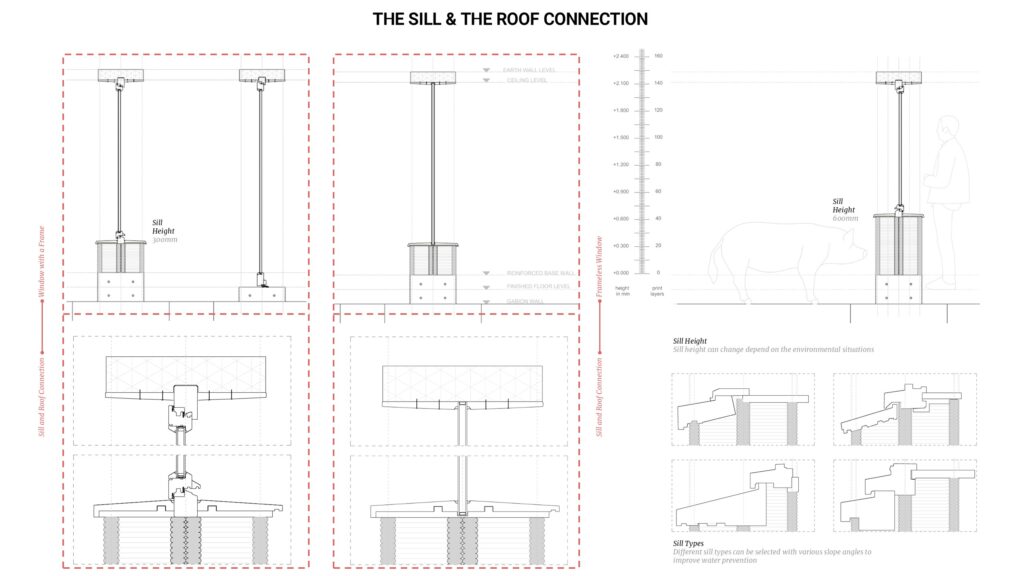
Although the joint between the wall and window was the main detail to solve, the top and bottom of the openings is also important to avoid water entering. Especially the sill (bottom part of the opening) must be customised to fit the earthen wall.