
Problem statement
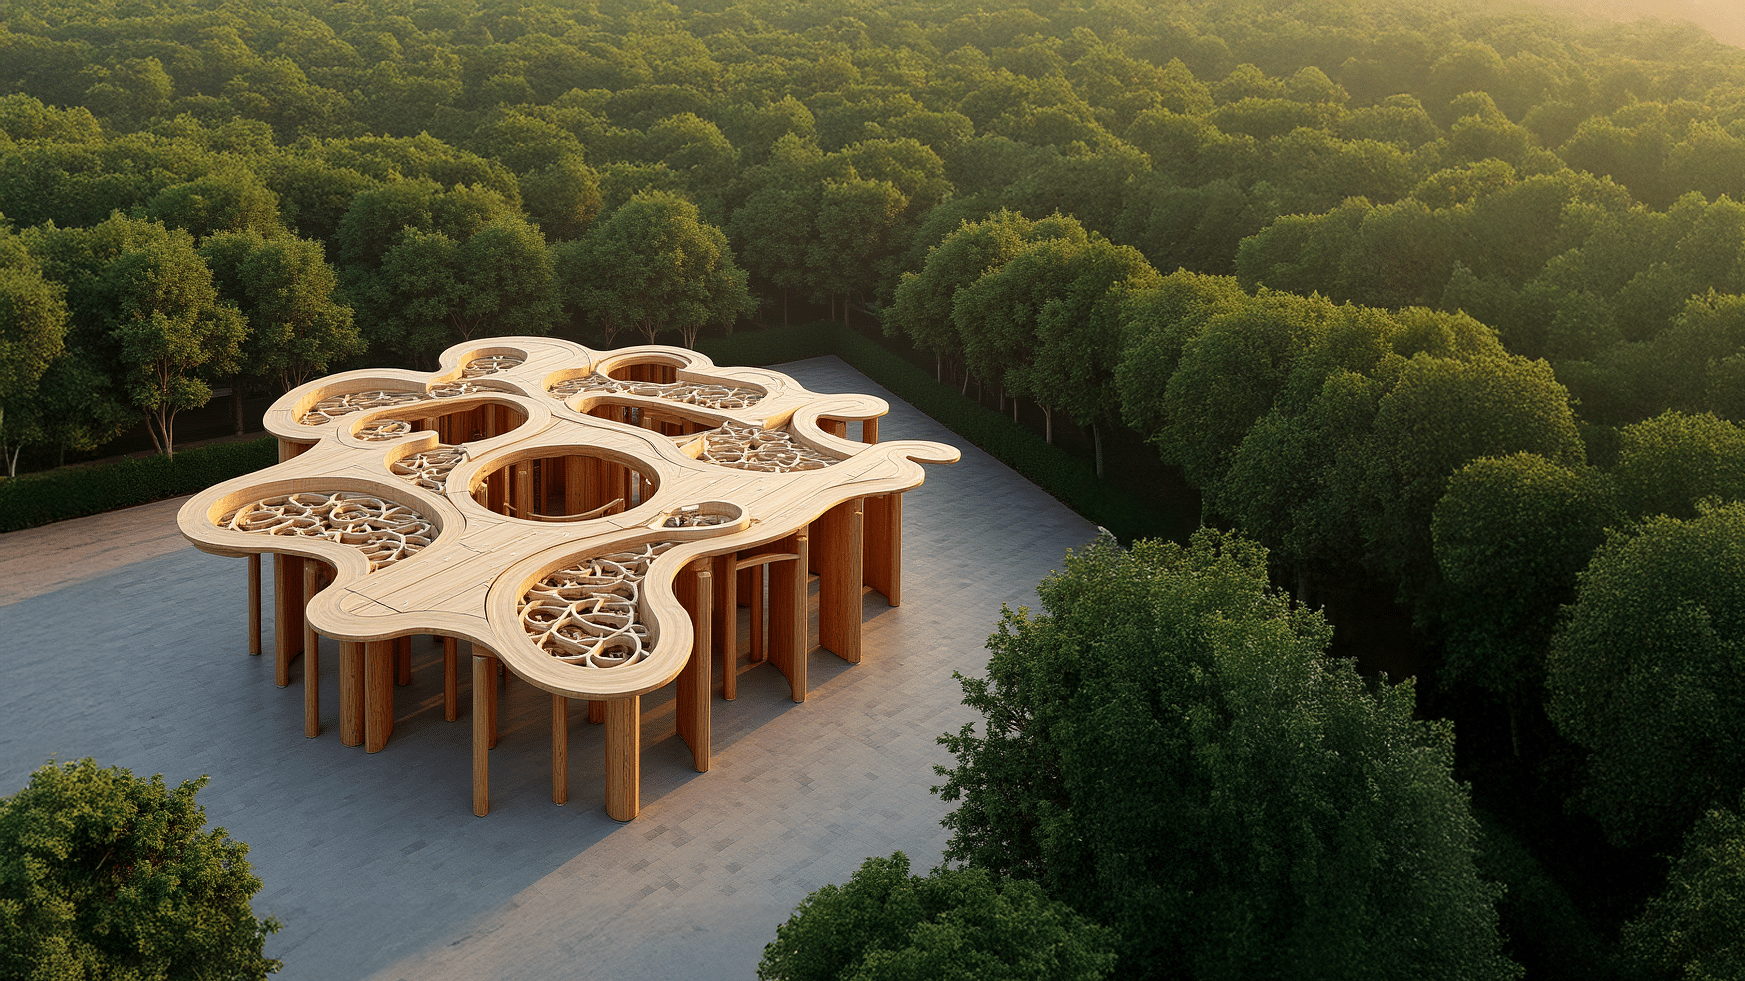
Pavilion design is deceptively demanding. Even though these structures are small, the creative expectations are incredibly high. In most competitions or studio settings, we’re expected to deliver rich, meaningful concepts – drawing on cultural references, environmental context, and symbolic language – all within just a few days or even hours.
At the same time, the process must be technically precise. We need both expressive design ideas and clean 2D documentation.
This tool is built to support that exact pressure. It accelerates conceptual generation while preserving the designer’s creative voice, and automates documentation to save critical time during production.
Value Proposition
This tool addresses four major bottlenecks in the early-stage architectural design process:
- Creativity Under Pressure
Offers meaningful support in time-constrained settings, allowing designers to focus on concept refinement rather than repetitive technical tasks. - Text-to-Concept Translation
Converts descriptive prompts into spatial massing ideas within seconds—bridging the gap between abstract thought and visual form. - Rapid 3D Prototyping
Enables near-instant creation of mesh-based pavilion models with minimal manual input. - Automated Documentation
Extracts 2D drawings—plans, sections, and elevations—directly from 3D meshes, eliminating the need for manual drafting.
Workflow
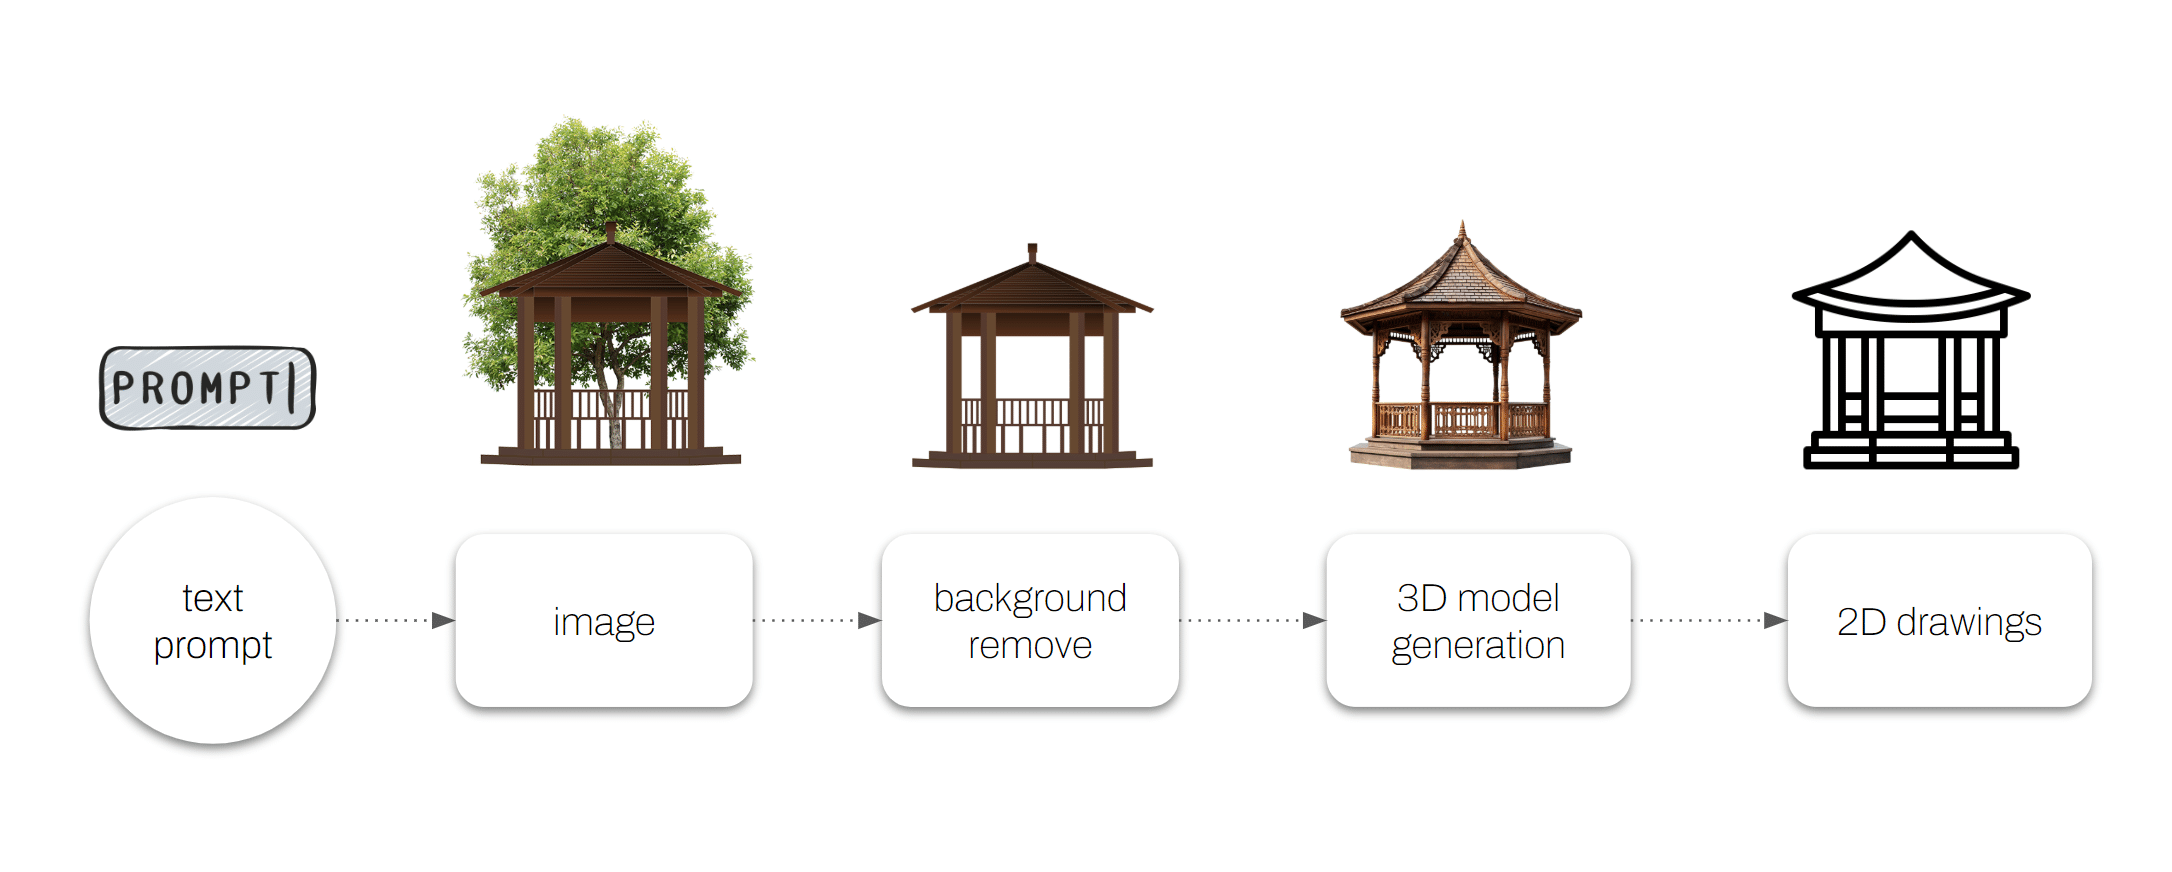
We have developed a structured workflow that enables the generation of both 3D models and 2D architectural drawings directly from a natural language text prompt. The process begins with a simple descriptive input — for instance, “a pavilion with a pitched roof” — which is used to synthesize an initial concept image. This image is produced using advanced image generation models such as SDXL or Flux, which are capable of translating textual descriptions into visually coherent architectural renderings.
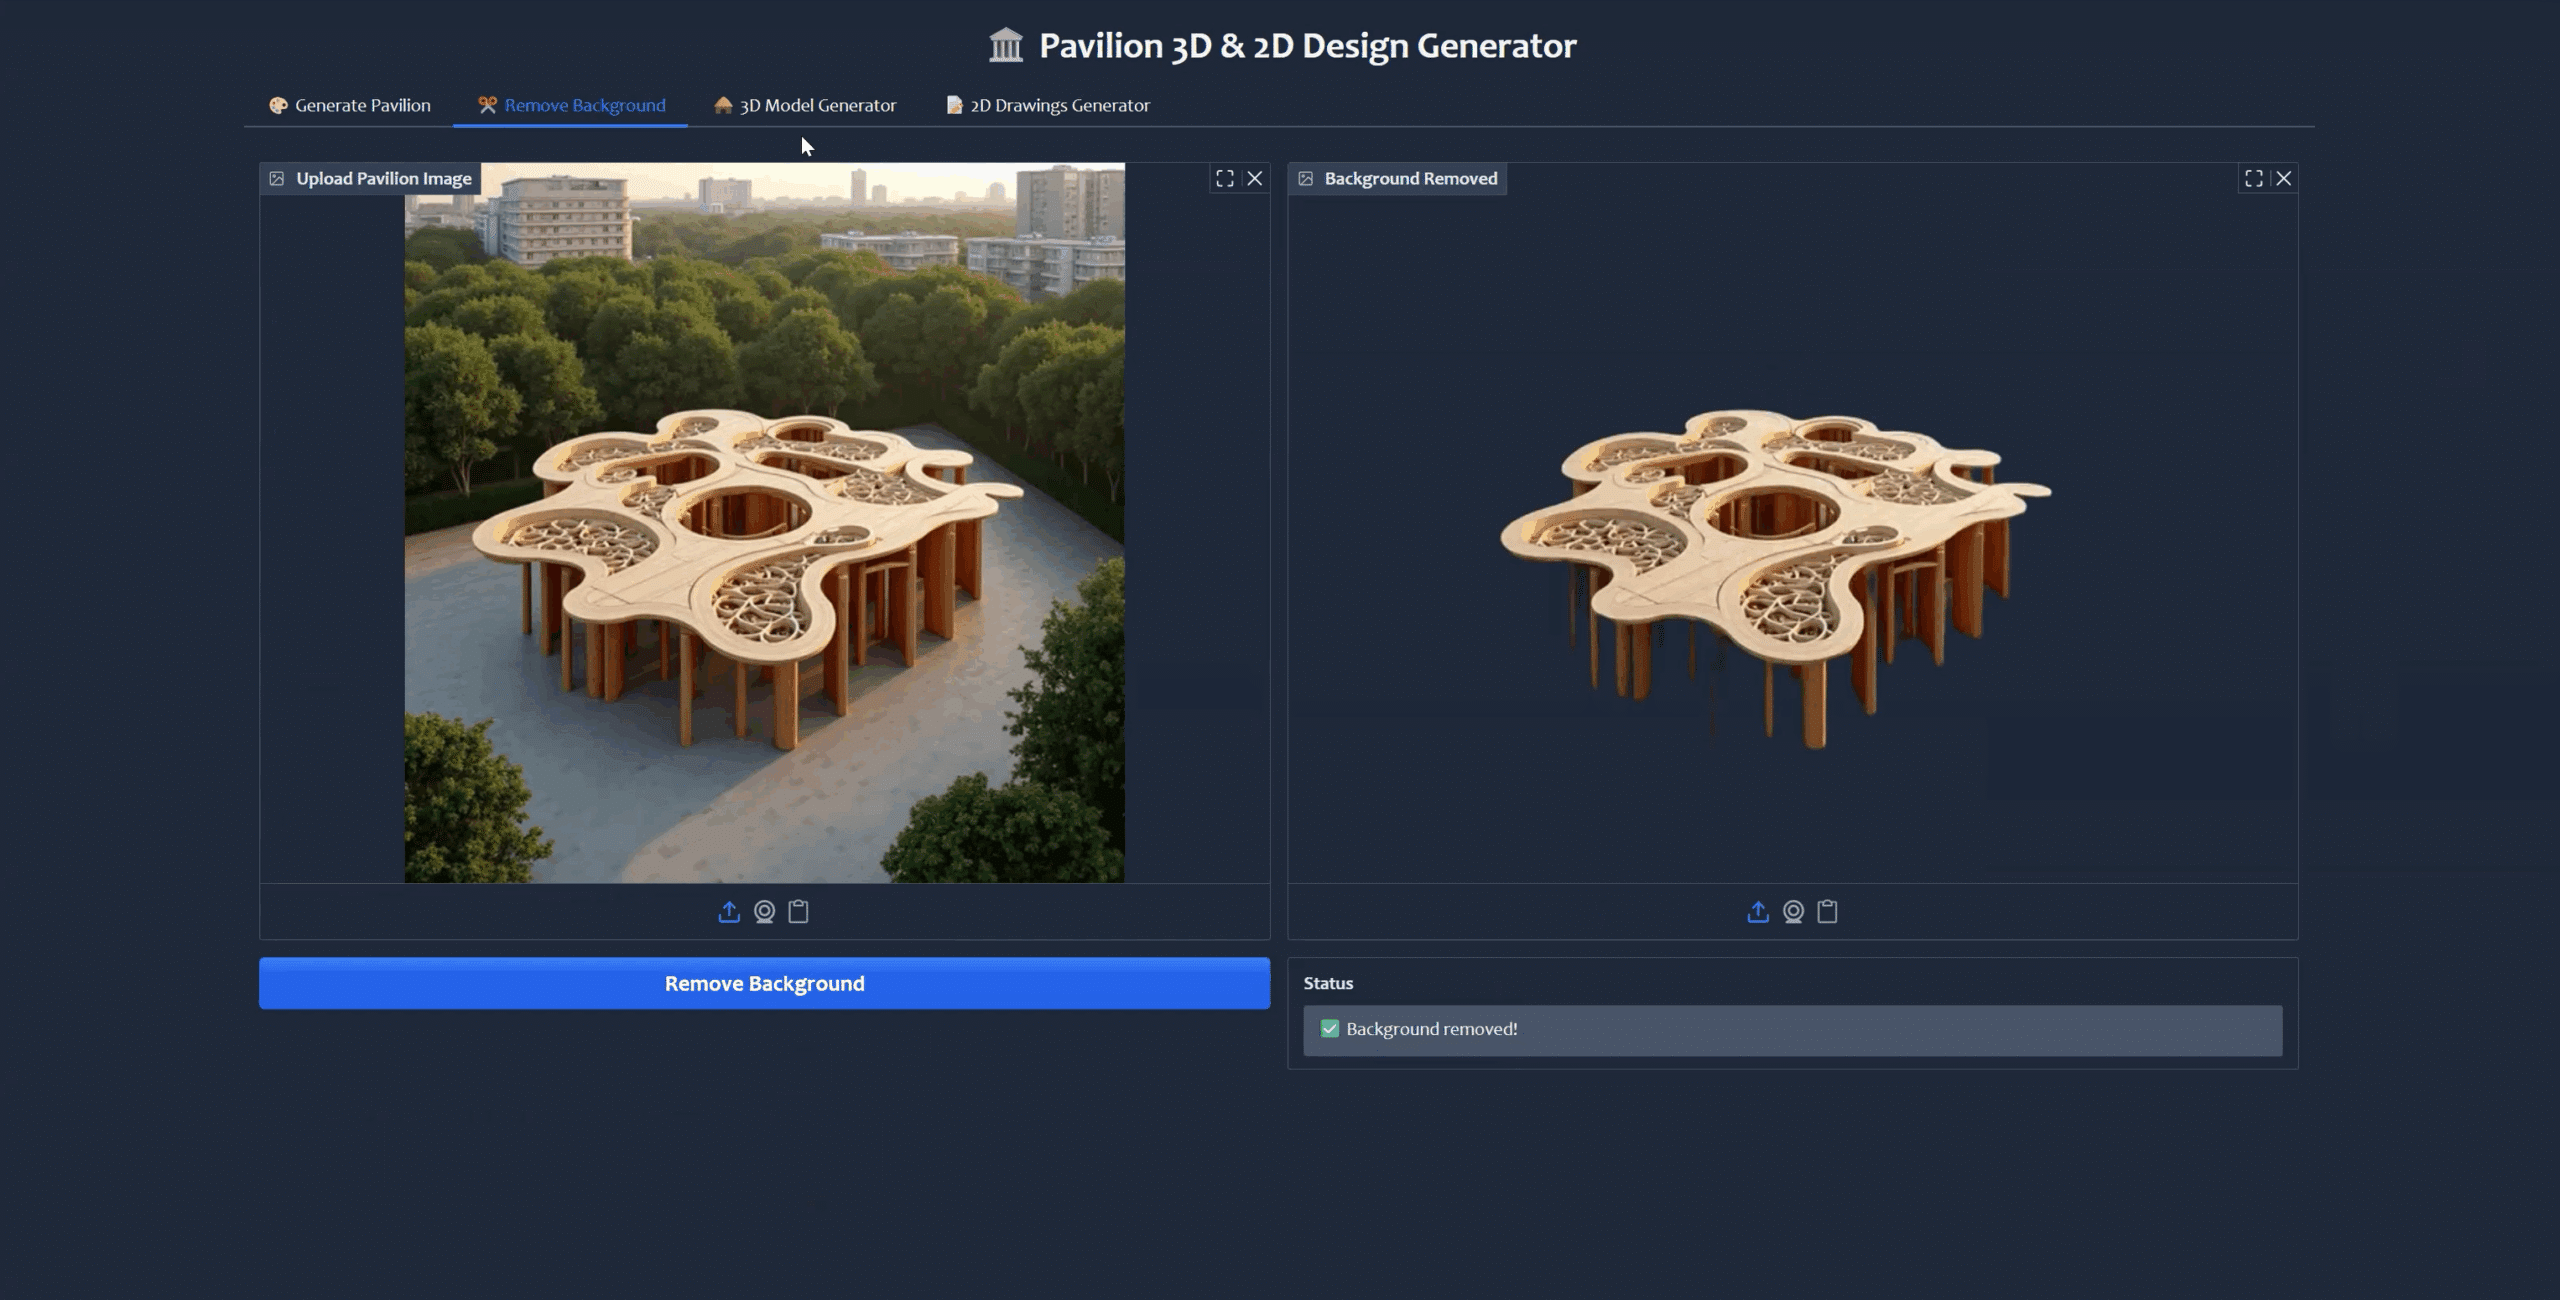
Following image generation, the background is removed in order to isolate the architectural object from its surrounding context. This step is critical, as it allows for a clearer focus on the structure itself and improves the accuracy of subsequent stages. The isolated image is then used as the input for 3D reconstruction. From this, a spatial model is generated that captures the form, proportions, and geometry of the described structure.
Once the 3D model is complete, it is further processed to produce 2D architectural drawings. These drawings include simplified linework and elevations commonly used in schematic design and drafting. The entire workflow offers a streamlined pipeline from conceptual idea to design-ready assets, significantly reducing the time and manual effort typically required during early-stage design exploration.
3D model generation
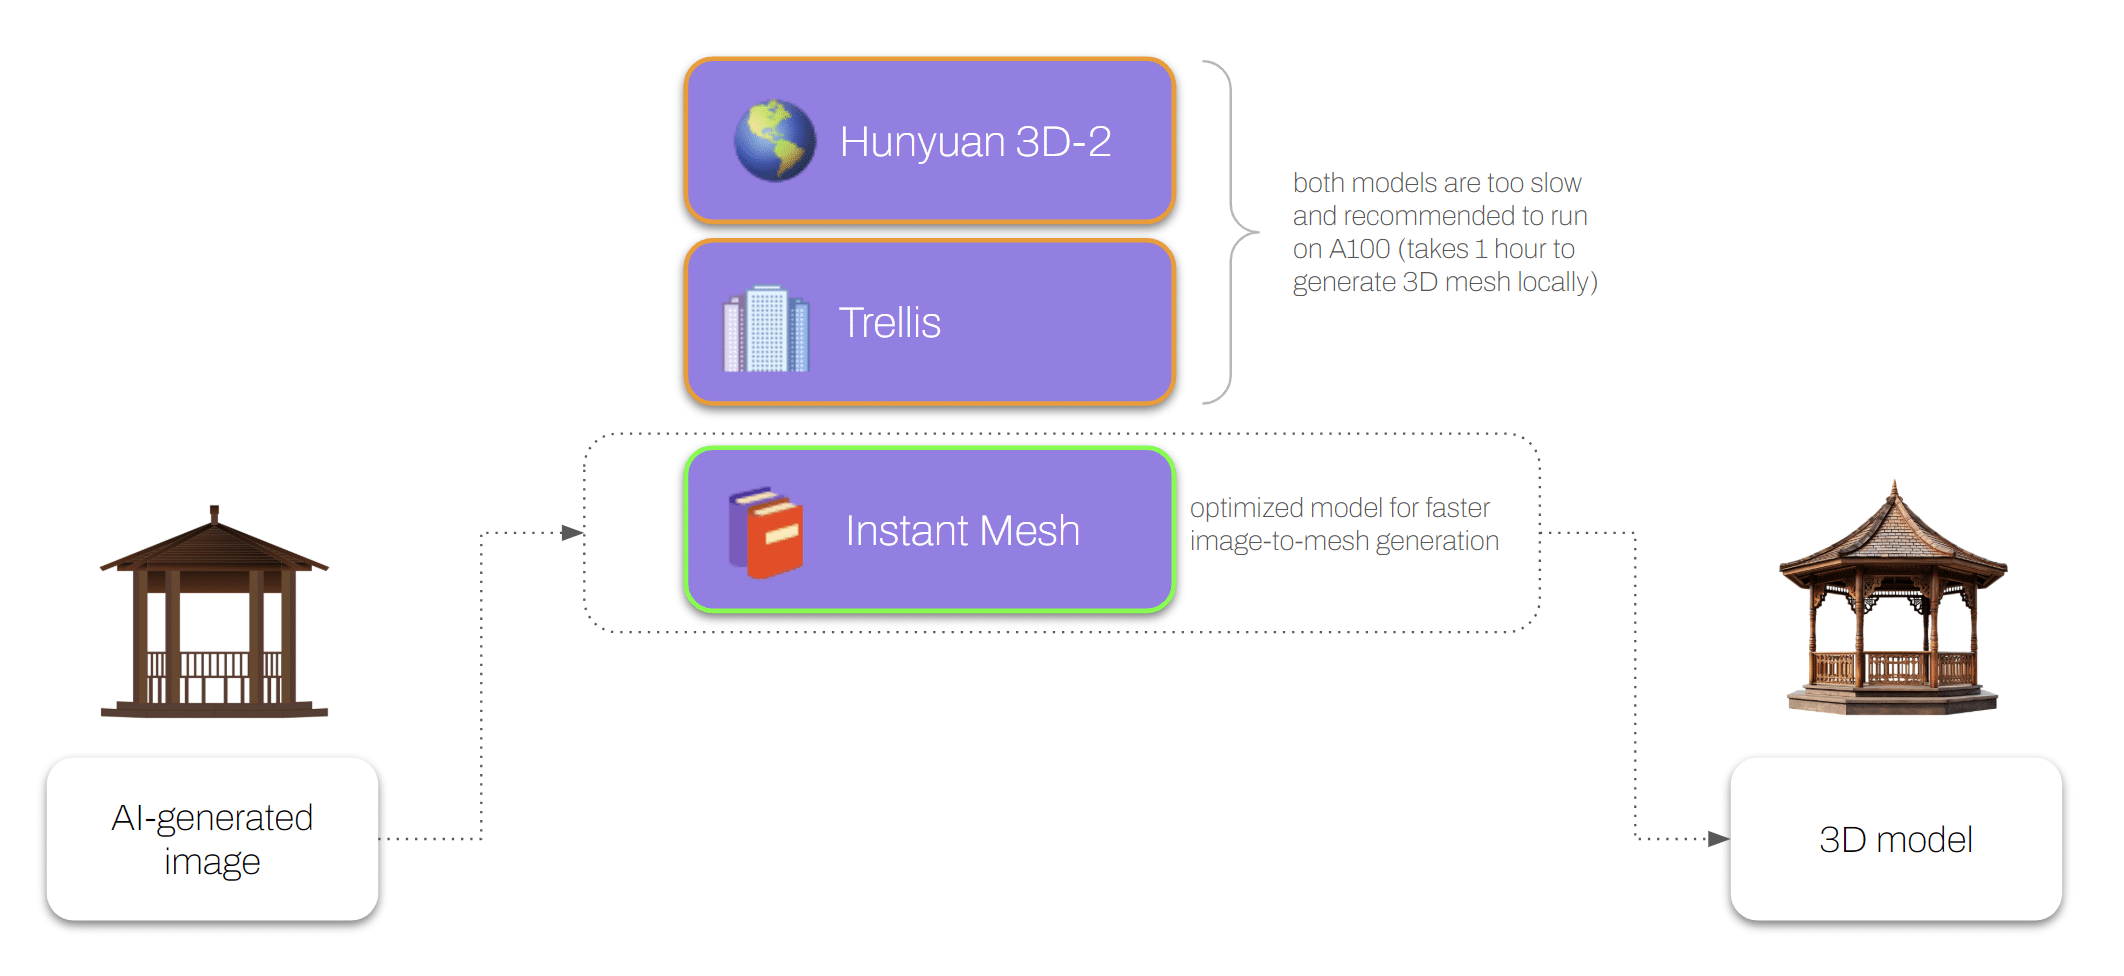
In the 3D model generation stage, we evaluated several state-of-the-art solutions, including models such as Hunyuan 3D-2 and Trellis. While both offer high-quality results, their performance limitations quickly became evident in our context. On standard local hardware, these models required up to an hour to generate a single 3D mesh — a delay that significantly slowed down our design workflow. Due to these constraints, they are typically recommended for use on high-end GPUs such as the NVIDIA A100, which are not always accessible or cost-efficient for iterative or large-scale use.
Given our focus on speed and usability, particularly for exploratory design tasks, we opted instead for a more optimized and lightweight alternative: Instant Mesh, built on Zero123Plus and available via Hugging Face. This model offers a much faster image-to-mesh conversion pipeline, enabling us to generate usable 3D assets in a fraction of the time. While it may not match the fine detail of heavier models, its speed and efficiency make it a practical choice for rapid concept development and early-stage visualization, aligning better with our needs for quick iteration and prototyping.
2D drawings generation

For the generation of 2D drawings, we explored multiple workflows with the goal of achieving both automation and compatibility with standard design tools. Initially, we tested an approach based on the Rhino API. However, this method proved impractical within our pipeline, as it required manual intervention to convert input data into the .3dm format — a step that introduced unnecessary friction and broke the automation chain.
As a result, we developed two alternative workflows that better align with our requirements. The first relies on Python-based libraries to extract and render 2D projections from the 3D mesh, offering flexibility and ease of integration with other Python tools. The second leverages the Blender API, which provides more control over camera positioning, lighting, and rendering configurations. Each approach comes with its own trade-offs. The Python method is lightweight and scriptable, making it suitable for batch processing, while the Blender-based solution offers greater visual fidelity and customization for presentation-quality output. By supporting both options, we are able to adapt the workflow depending on the technical or visual priorities of a given project.
Interface
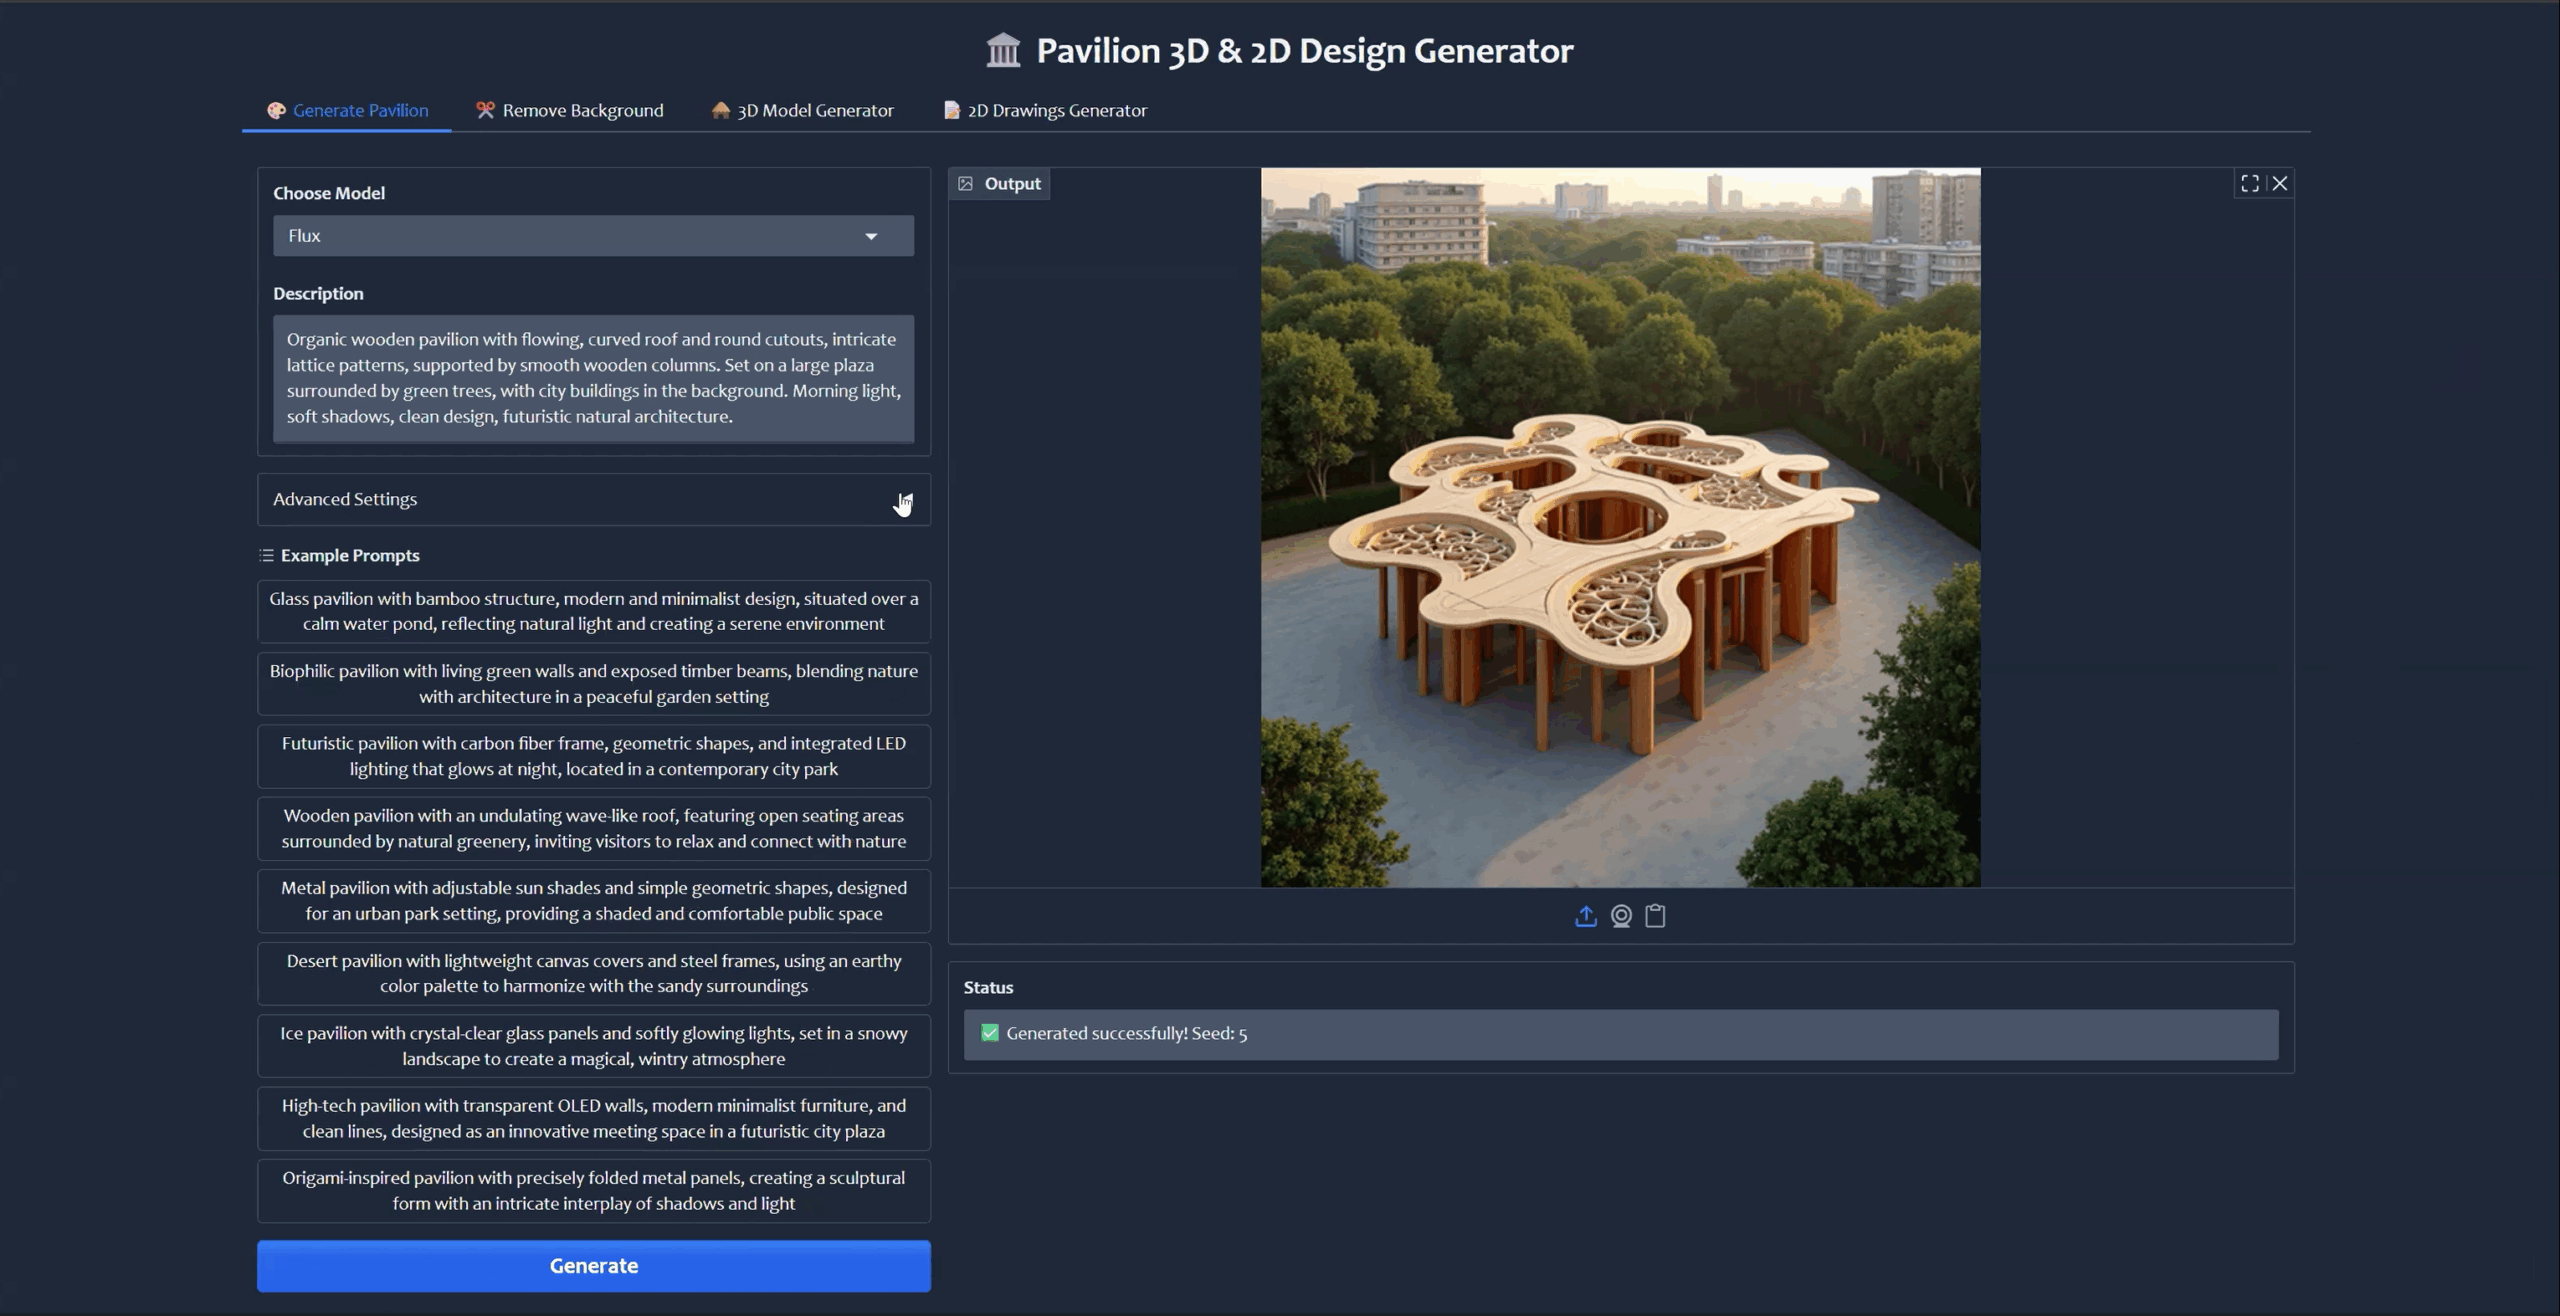
In the first application, which relies solely on Python libraries, we begin with a text-to-image generation step. Here, you can choose the model you’d like to use — there are several options available depending on the quality and style you’re aiming for. To get started quickly, you can pick from one of the example prompts we’ve provided, or you can type in your own custom prompt if you have something specific in mind.
There’s also an “Advanced Settings” section where you can fine-tune the generation parameters. For example, you can adjust the number of steps the model takes during generation (which affects image quality and detail), and set a specific seed value if you want repeatable results.
Once you’re happy with your setup, you just hit the “Generate” button. The system will process your request and, within a few moments, produce an image based on your input. This generated image is then automatically passed on to the next stage in the pipeline, so you can continue working with it without any extra steps.
In the next tab, you have the option to remove the background from the image with just a single click. The tool automatically detects the main subject and separates it from the background, making it ready for the next phase. Once the background has been successfully removed, you can seamlessly move on to the 3D model generation tab, where the processed image will be used as the basis for creating a three-dimensional representation.
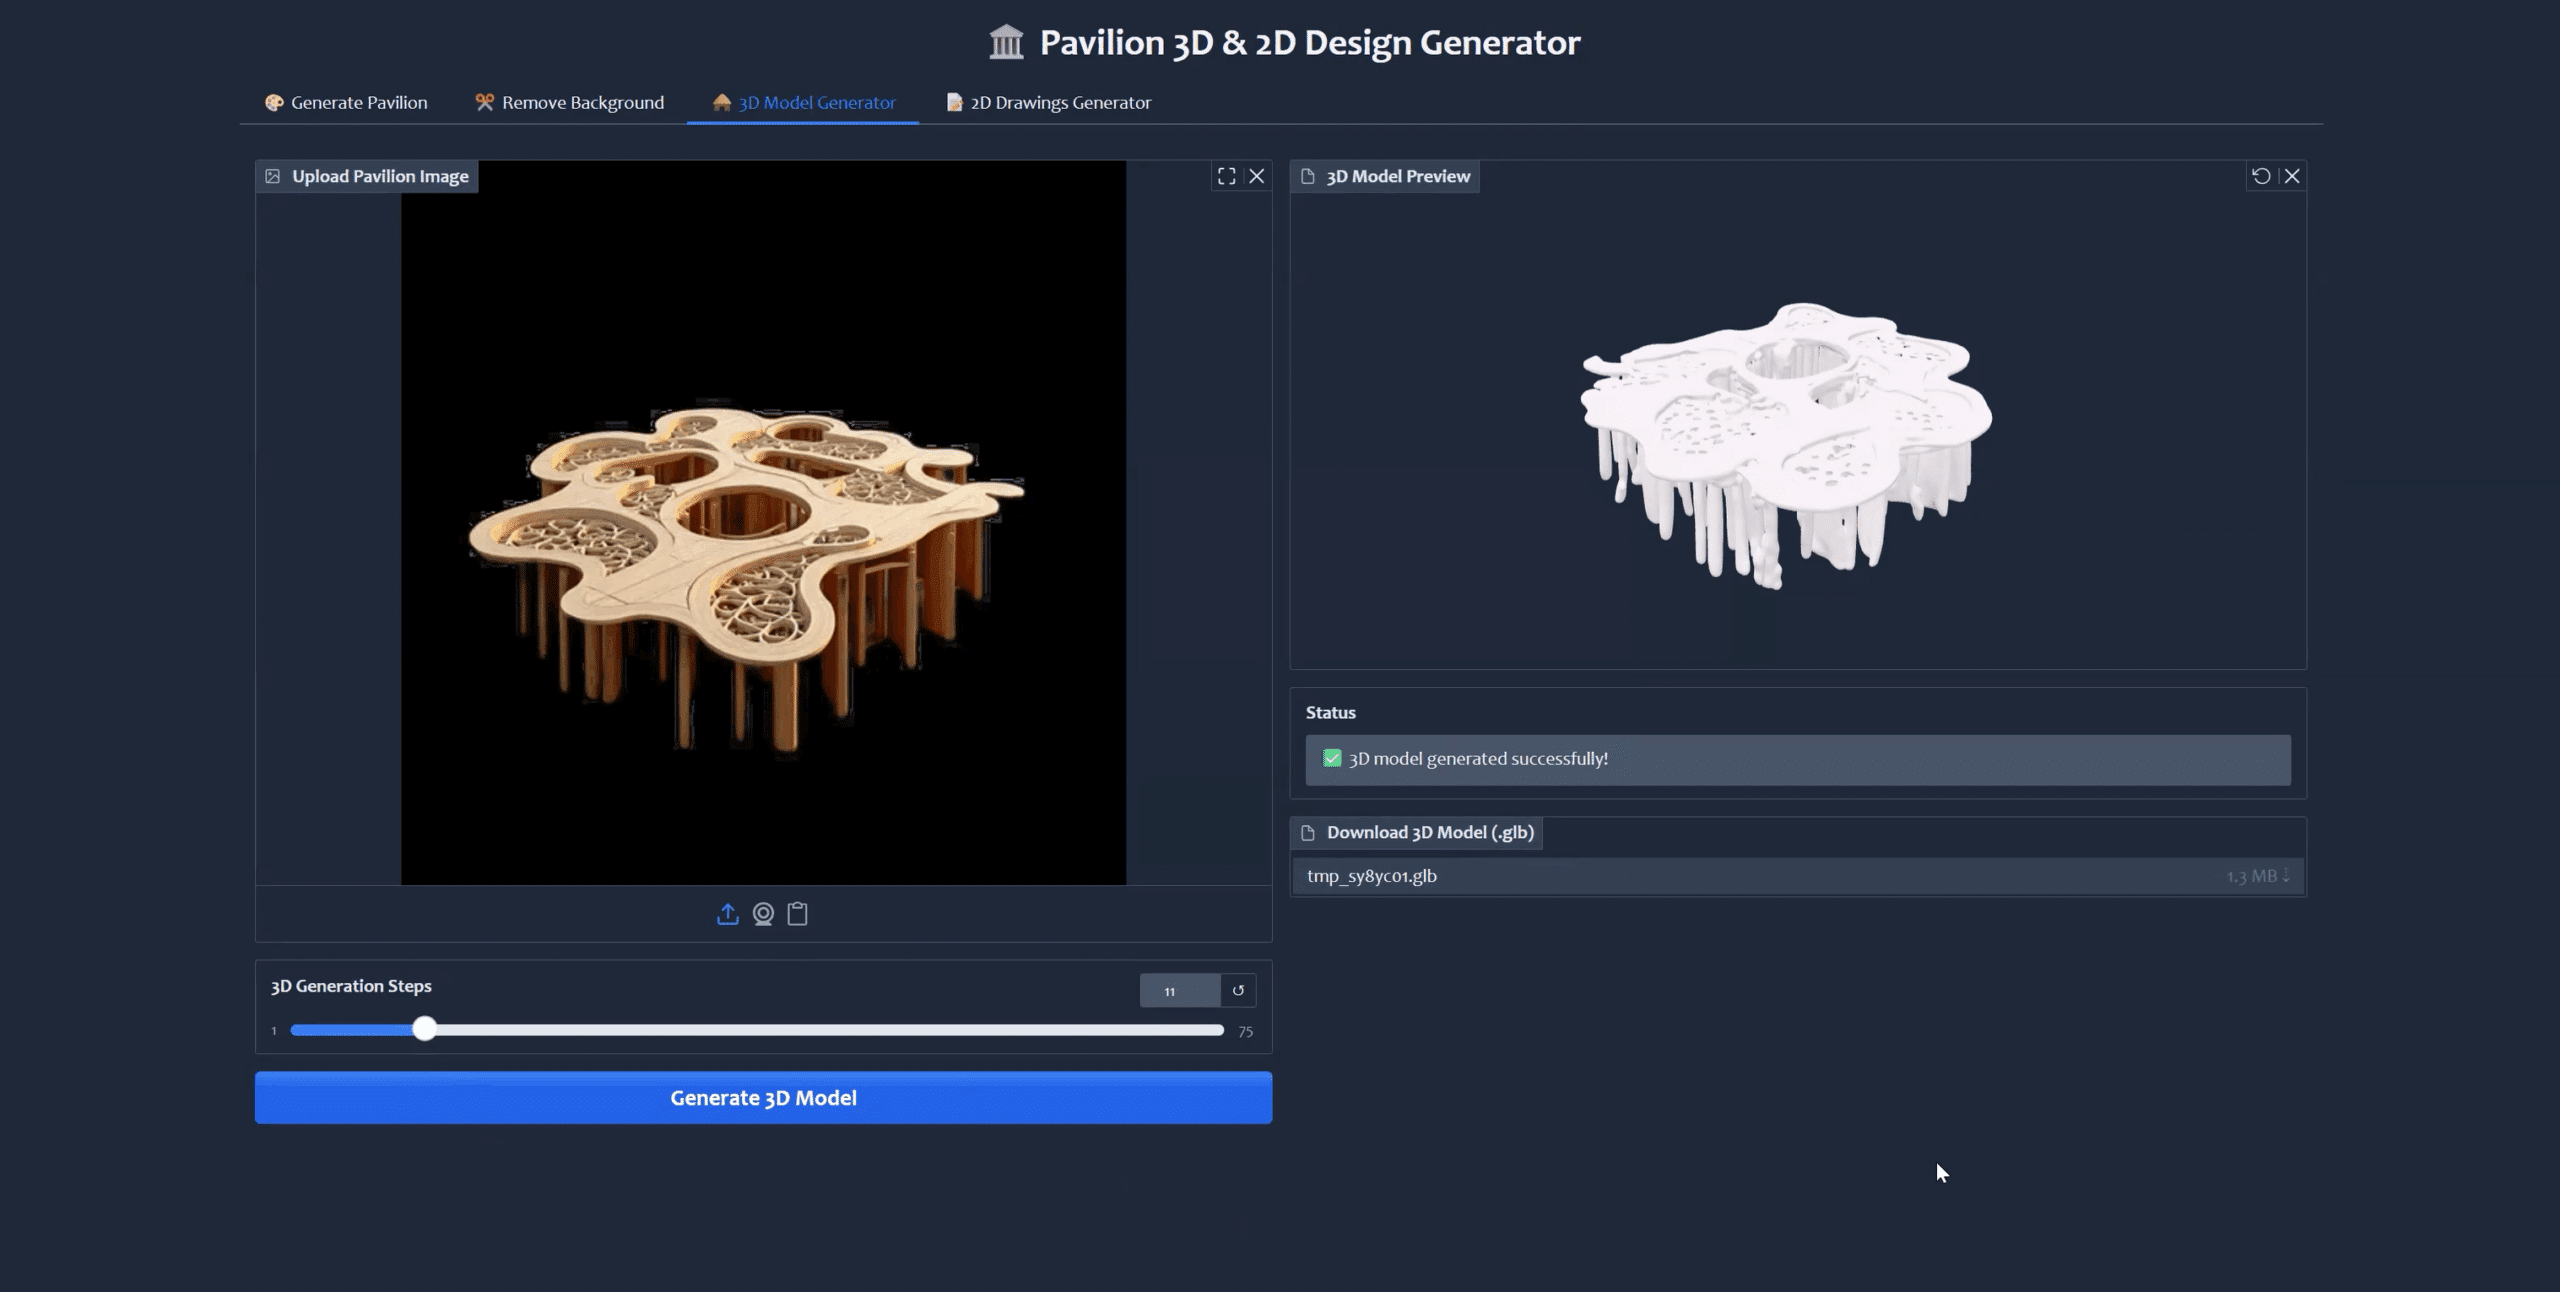
After making a few quick adjustments to the number of generation steps, depending on the level of detail and quality you’re aiming for, you can begin the 3D model creation process. After a short wait, while the system processes your input, the 3D model is successfully generated and ready for review or further editing.
In the final stage of the process, we generate 2D views from the 3D mesh. These views, specifically the top, front, and left projections, provide a clear, flat representation of the model from different angles. However, due to limitations within the current Python-based tools, the system does not support the exclusion of hidden edges in the mesh. As a result, all edges, including those that would typically be hidden in a technical drawing, are displayed.
Despite this limitation, the generated views can be downloaded as DXF files, allowing for easy import into CAD software. From there, you can make any necessary edits or refinements to suit your design needs.

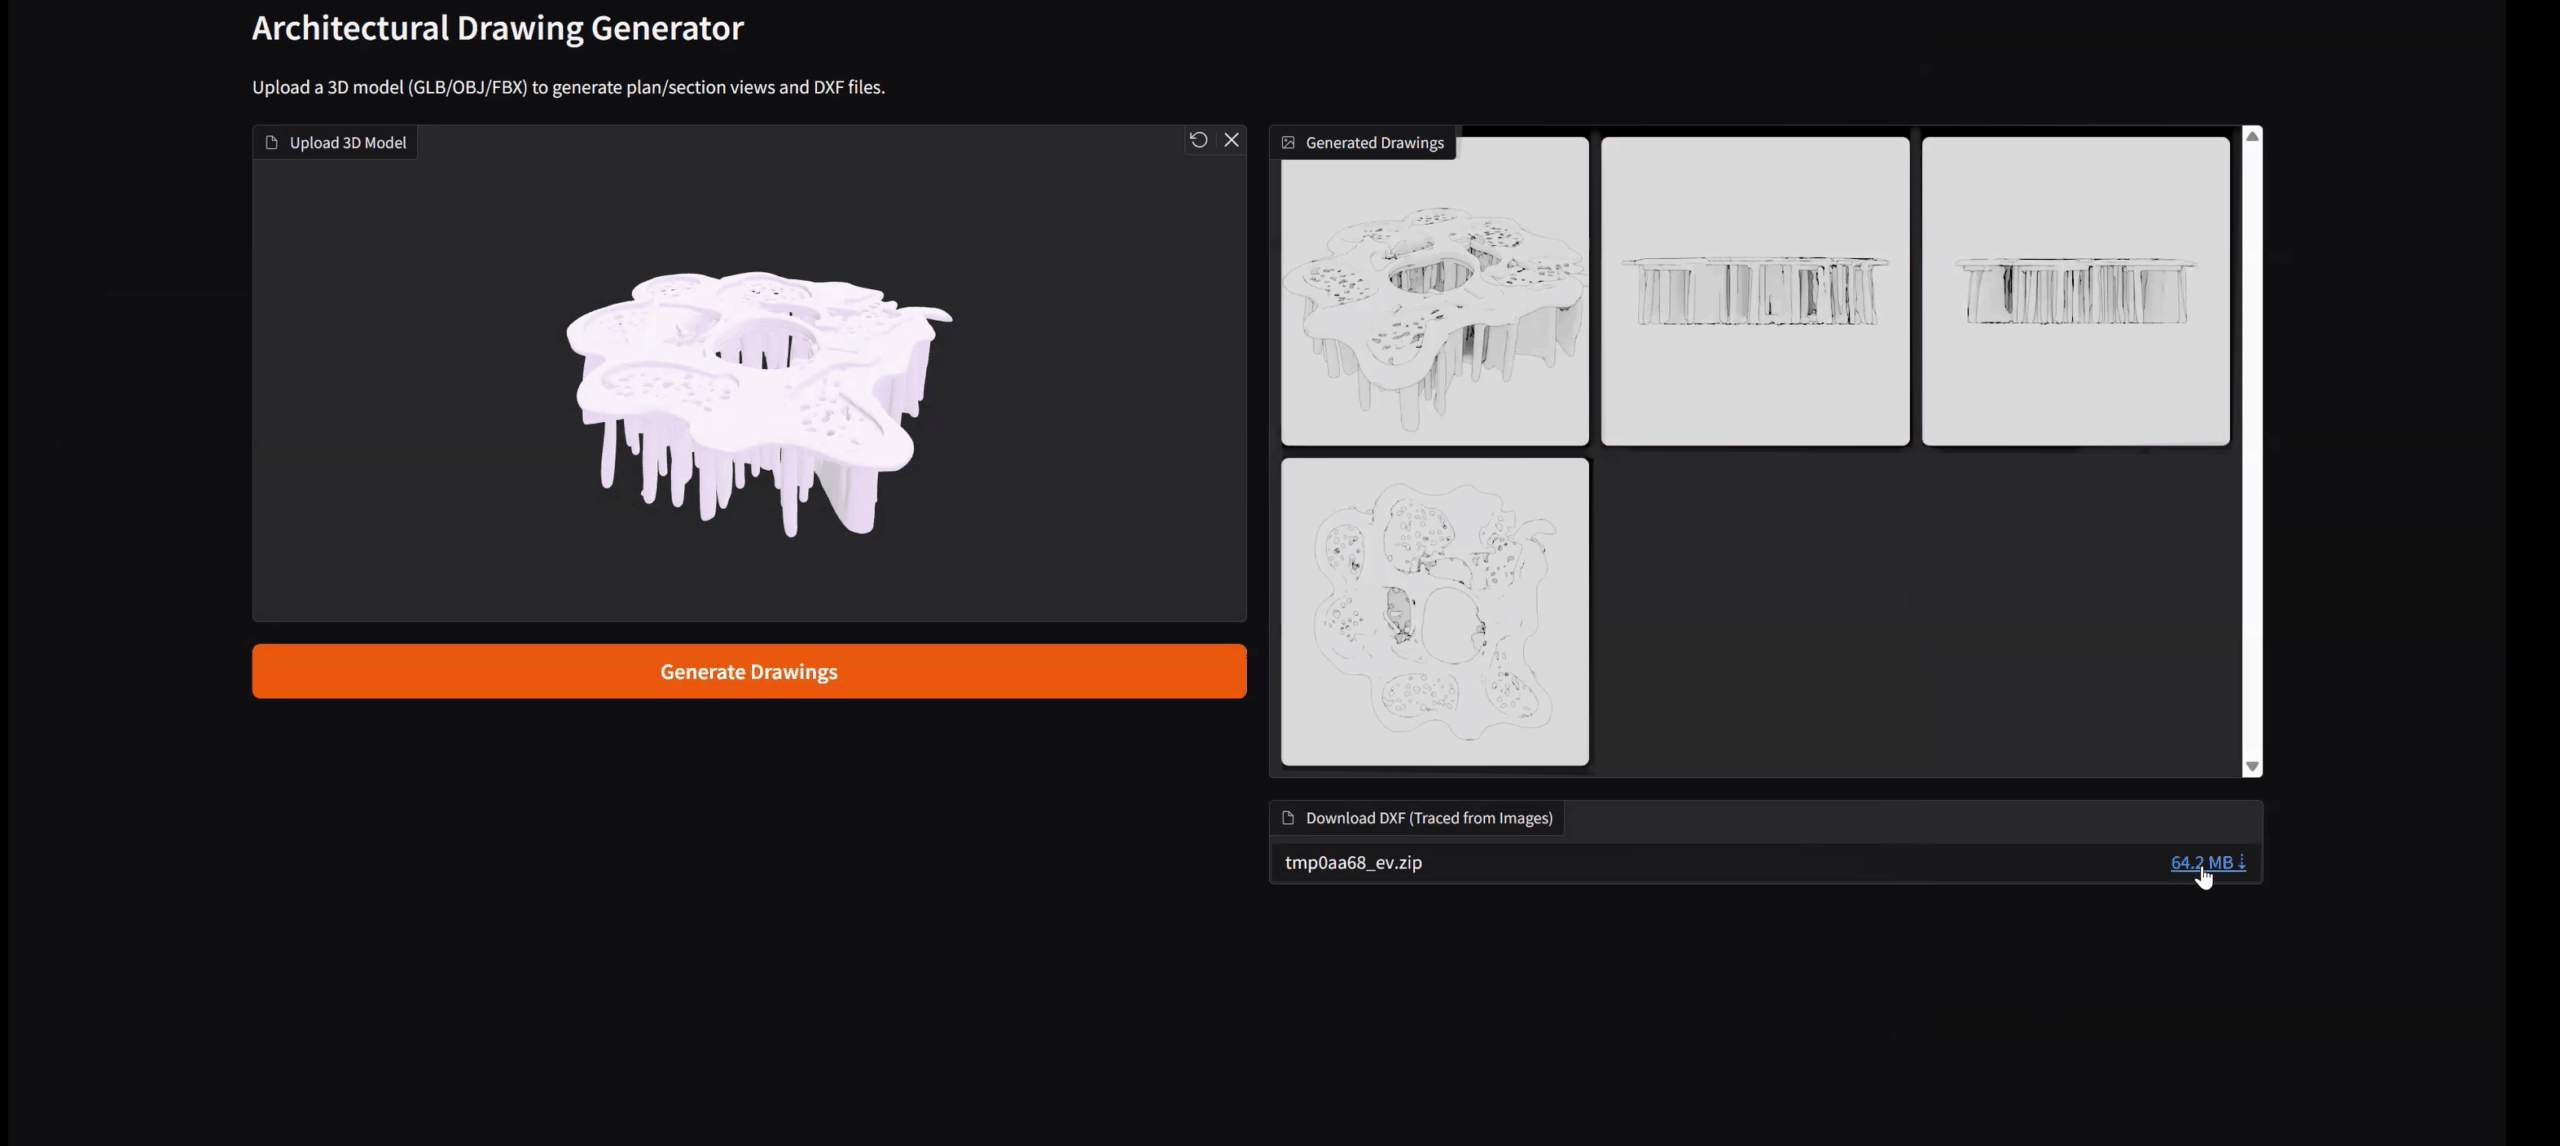
The second application leverages the power of the Blender API to enhance the drawing generation process. To get started, all you need to do is upload your 3D model — supported formats include GLB, OBJ, and FBX. Once your model is loaded, simply click the “Generate Drawings” button.
The application will then create a series of images, including front, left, top, and axonometric views. These visual outputs give you a comprehensive understanding of your model from multiple angles. Additionally, the tool allows you to export these views in DXF format, making them compatible with most CAD programs. After you’ve uploaded the DXF archive, you can easily preview the technical drawings directly within the app. This feature not only helps verify proportions and geometry at a glance but also assists in practical tasks like estimating material usage and costs.
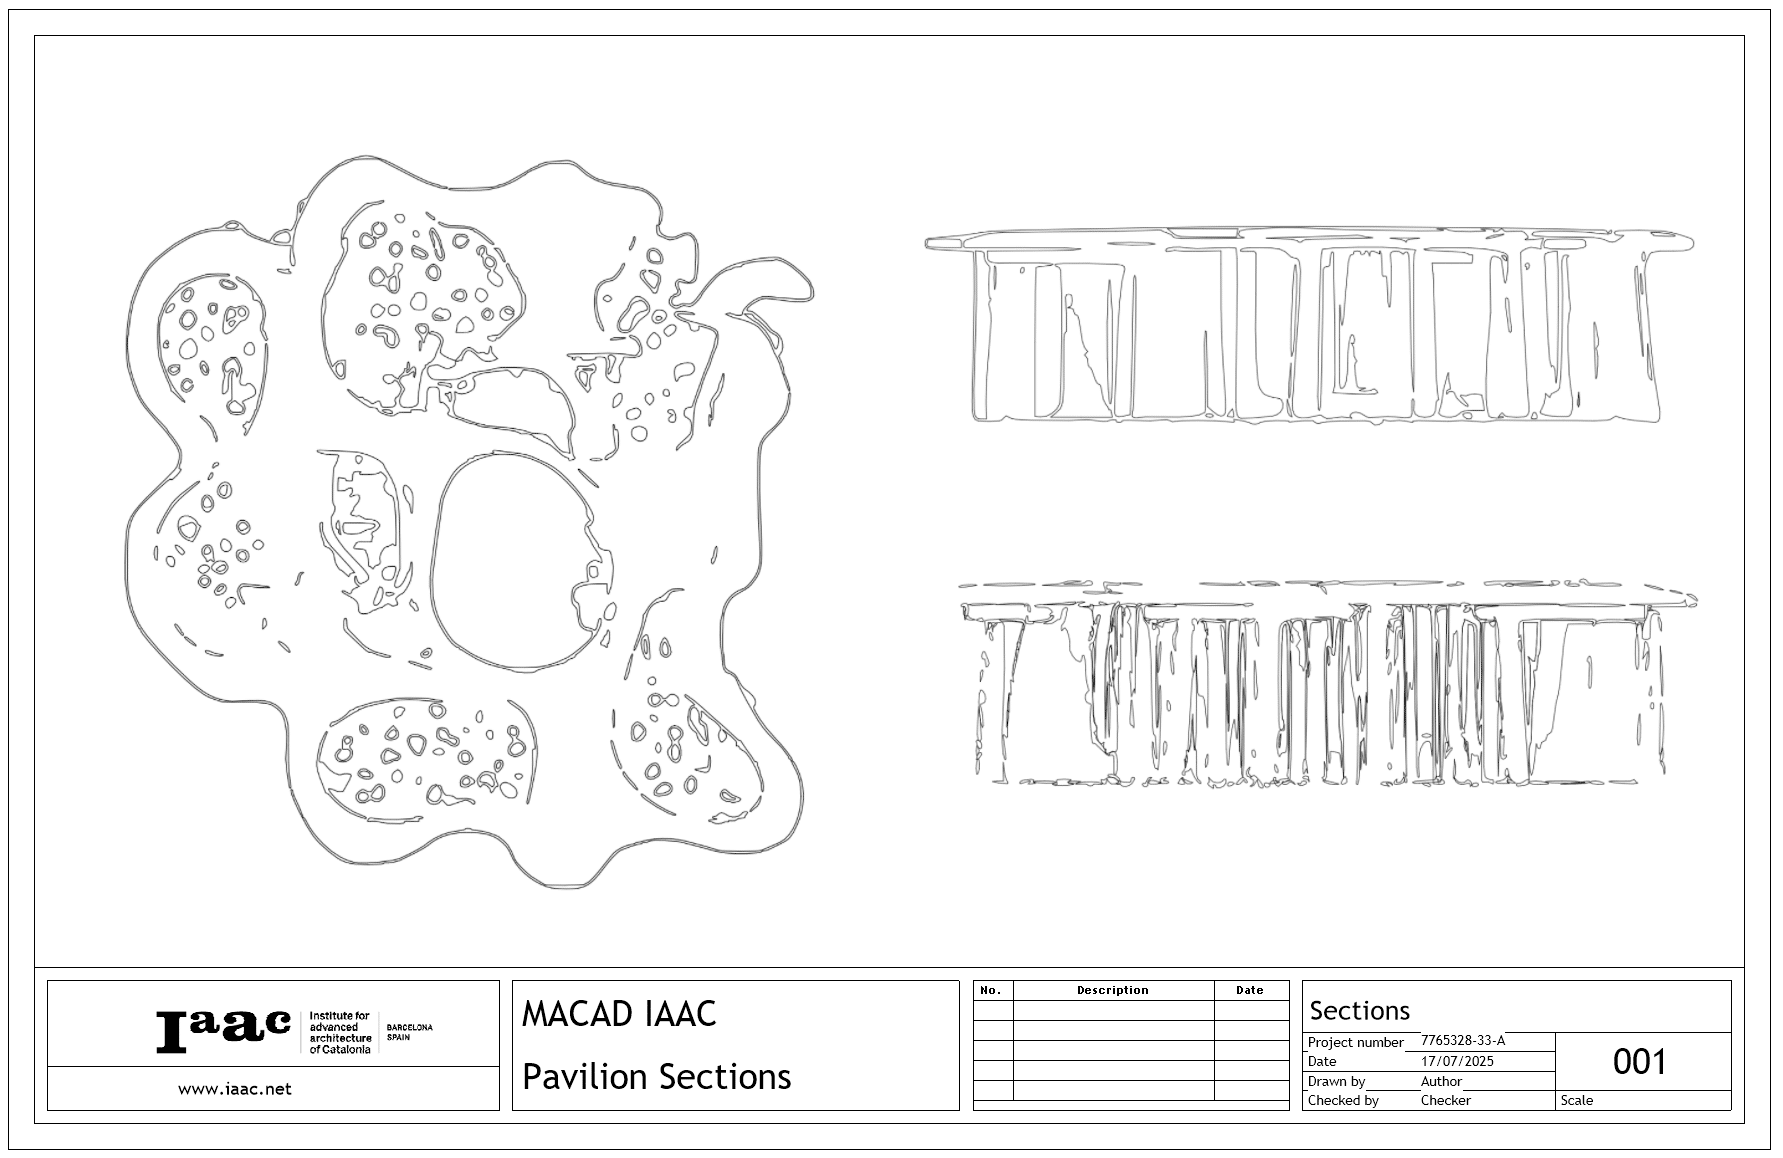
The outputs as DXF file that we fetched from the 3D model:
Ways the workflow could evolve
This workflow can serve both immediate design needs and long-term development goals. In the short term, it enables quick idea generation for pavilion competitions, design sprints, and client presentations – where time is limited and visual clarity is key. It supports real-time sketching and iteration, helping align diverse stakeholders around shared concepts.
Looking ahead, the tool could evolve in several impactful ways:
- Prompt templating for exploring typologies, motifs, and materials systematically
- Mesh optimization for physical fabrication, including panelization and joinery
- Parametric integration with tools like Rhino or Grasshopper for deeper control
- Design education support, offering rapid feedback loops and a focus on narrative, context, and symbolism
Together, these uses highlight how generative tools can enhance creativity while bridging the gap between fast-paced ideation and architectural intent.
Closing Thoughts
In pavilion design, small scale does not mean small ambition. By combining generative AI with architectural thinking, this project shows how even the most conceptual ideas can be brought to life – faster, sharper, and with meaning intact. The goal isn’t to automate design, but to amplify the architect’s reach – transforming time pressure into creative momentum.
In a world where deadlines shrink but expectations grow, tools like this don’t just save time. They give it back – to design, to think, to imagine.
