
Introduction
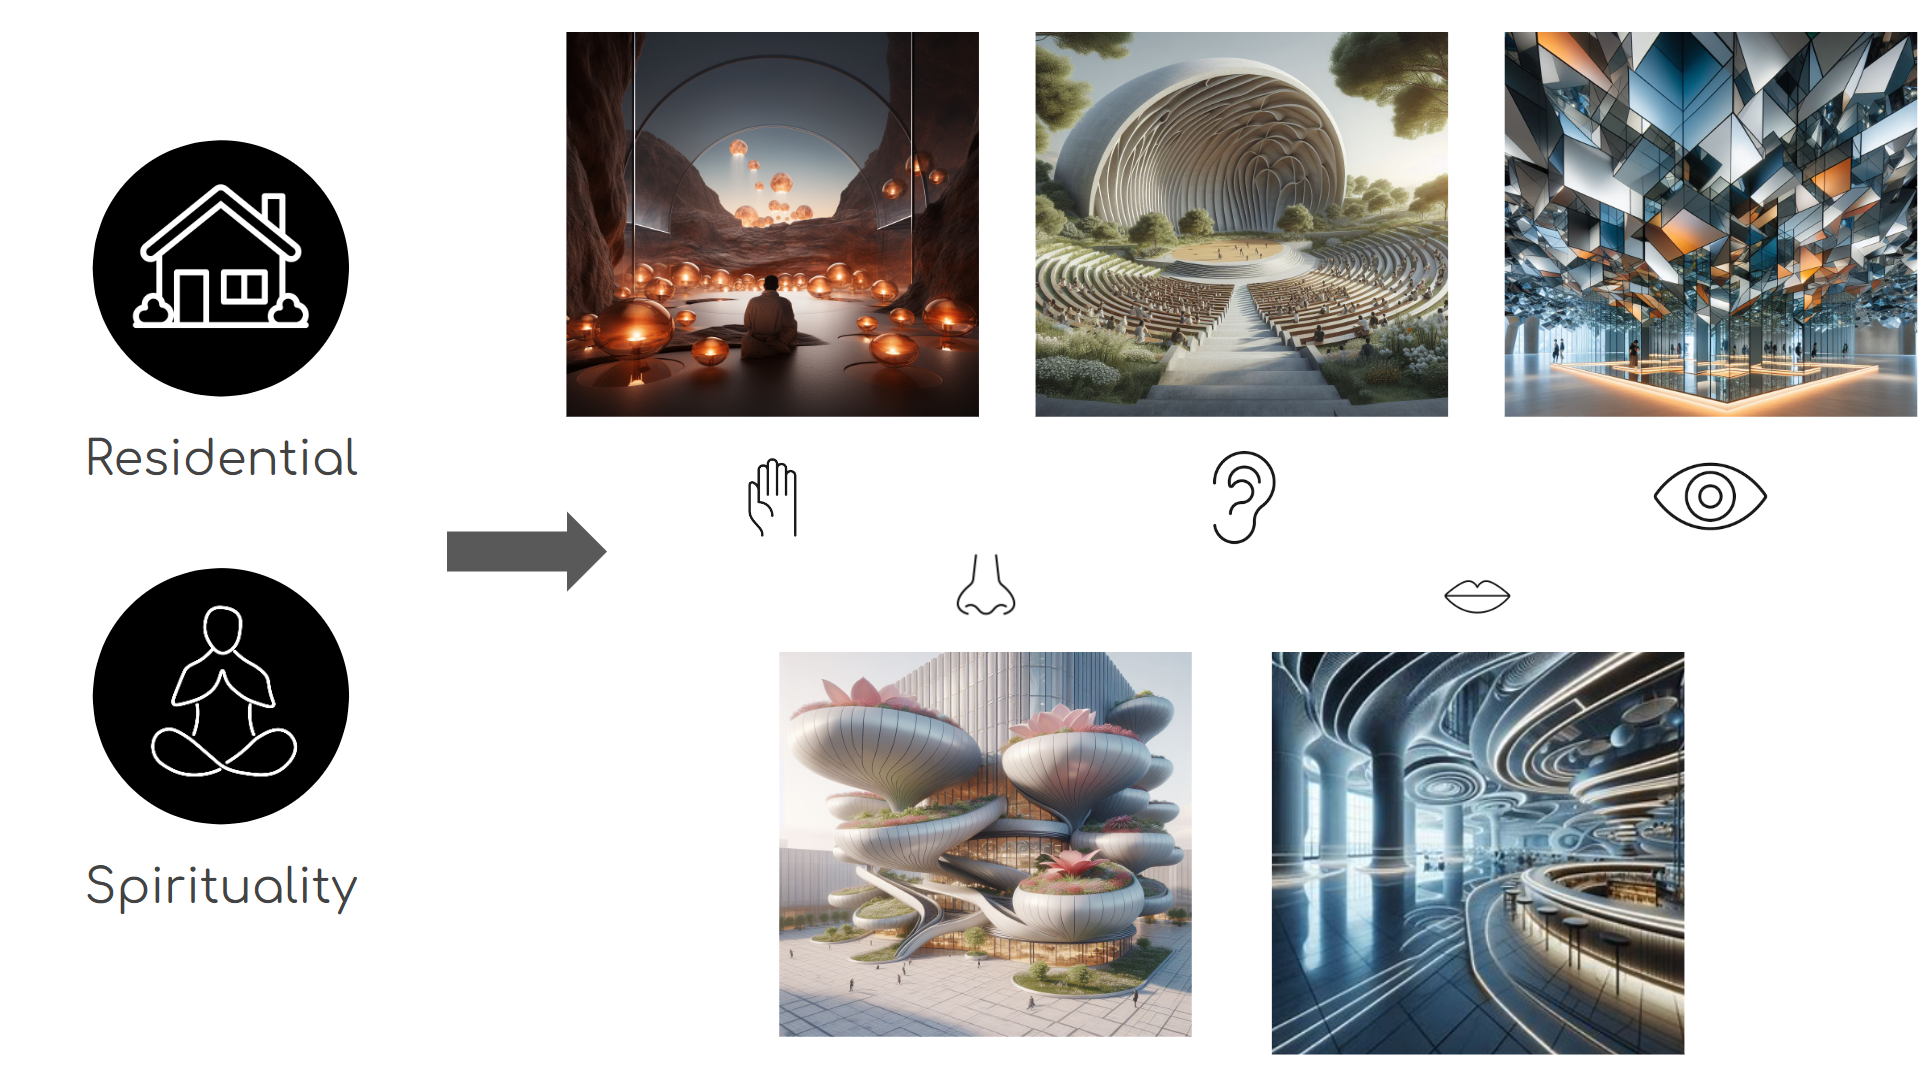
Marsensate is a project based on our Studio course where we explore designing on Mars in order to habit a Marsian colony. The primary goal of our colony was based around Sprituality, to provide a more human environment that appeal to everyone, regardless of their beliefs, genders, preferences, and we focused on the aspect that we all have in common, which are the senses. Having chosen a complex topic, we started our journey with AI images, trying to discover creation of spaces, that would stimulate a specific sense. We chose a subtractive method of excavating the ground in order to carve all our sense nodes within the Martian topography. This was to ensure that it would always be protected from the harsh martian environment such as the low temperatures, meteorites, radiation and sandstorms. The top of the sense nodes are above ground to achieve light and protected by 3D printed ice as well as 3D printed regolith panels.
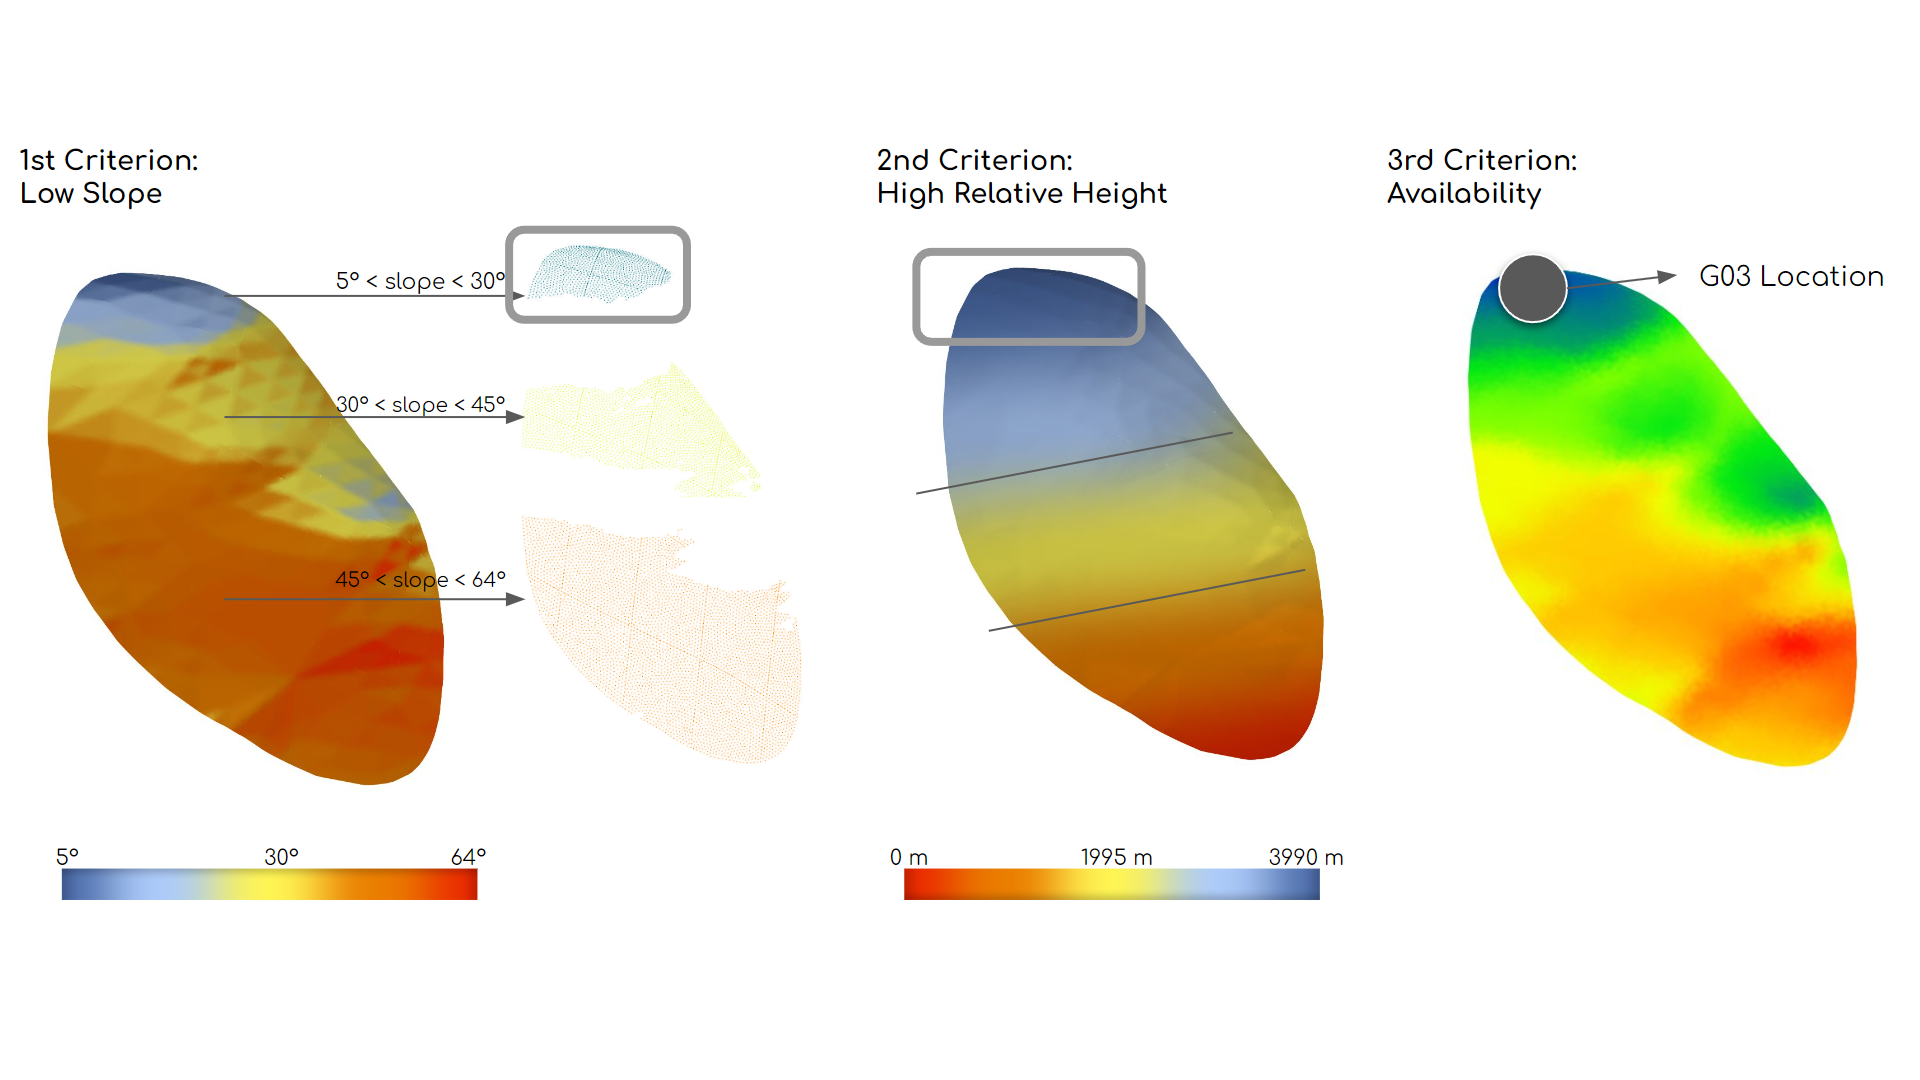
To select the ideal location on Mars for this function, we chose to have a low value of slope, to facilitate the circulation between all the independent spaces of senses. As well as a location that would be visible from everywhere in the city of Aleph, within everyone’s perspective as the spiritual unit of the city.
Workflow Diagram
The collaborative process throughout the whole module can be divided into three, and is color coded depending who was in charge of what area in each stage.
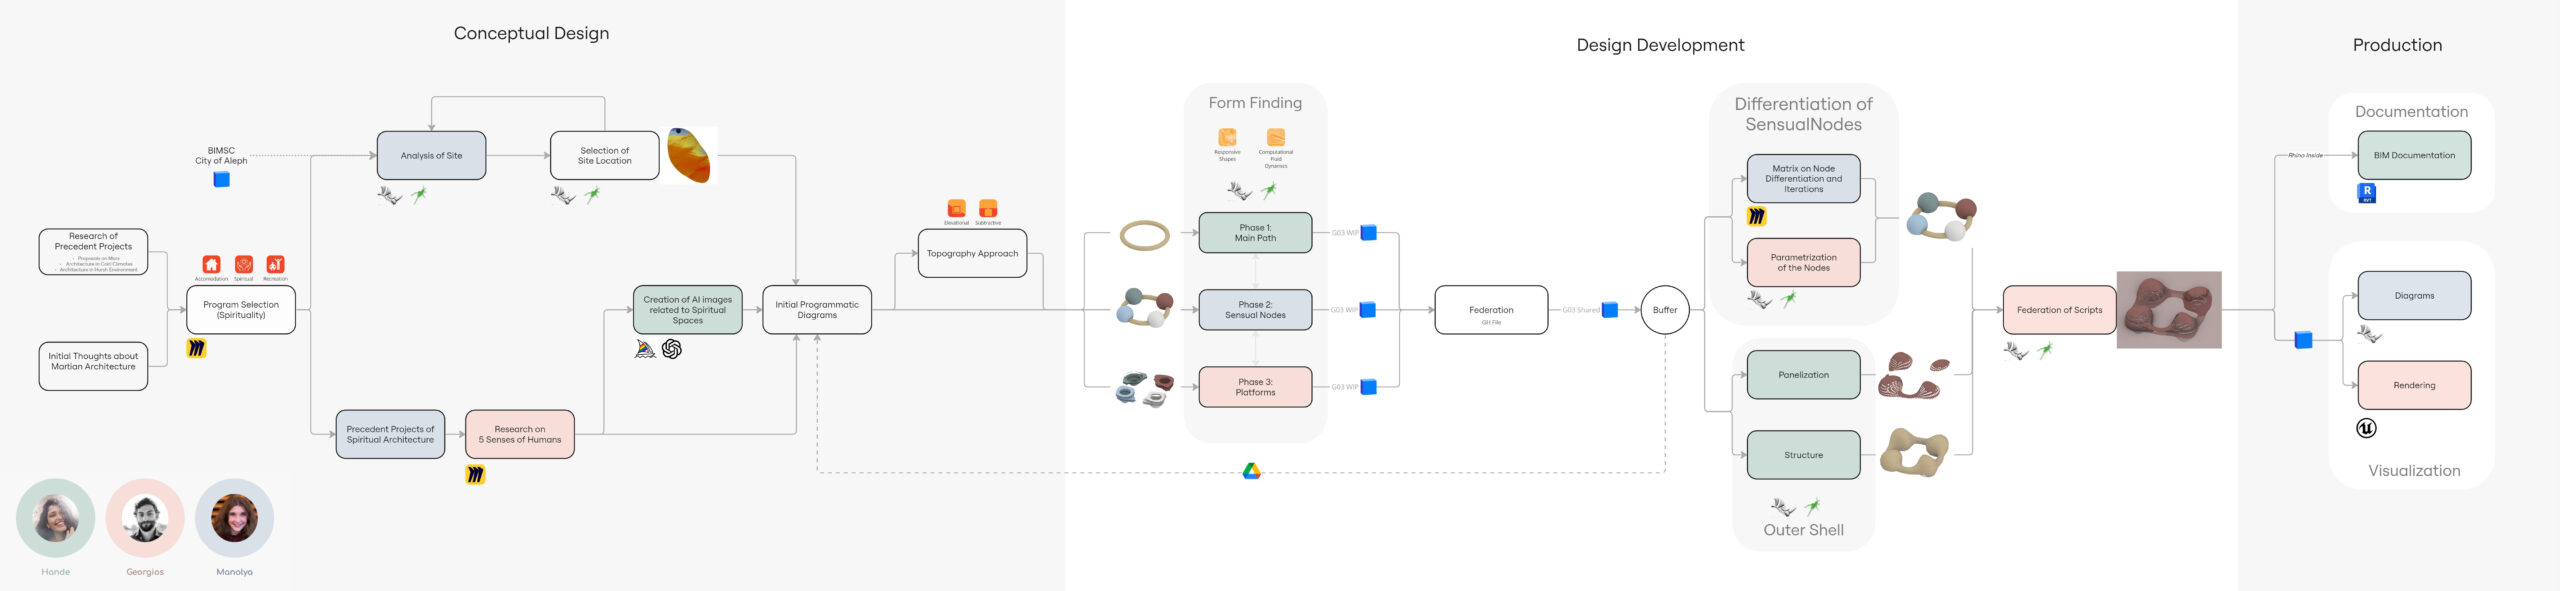
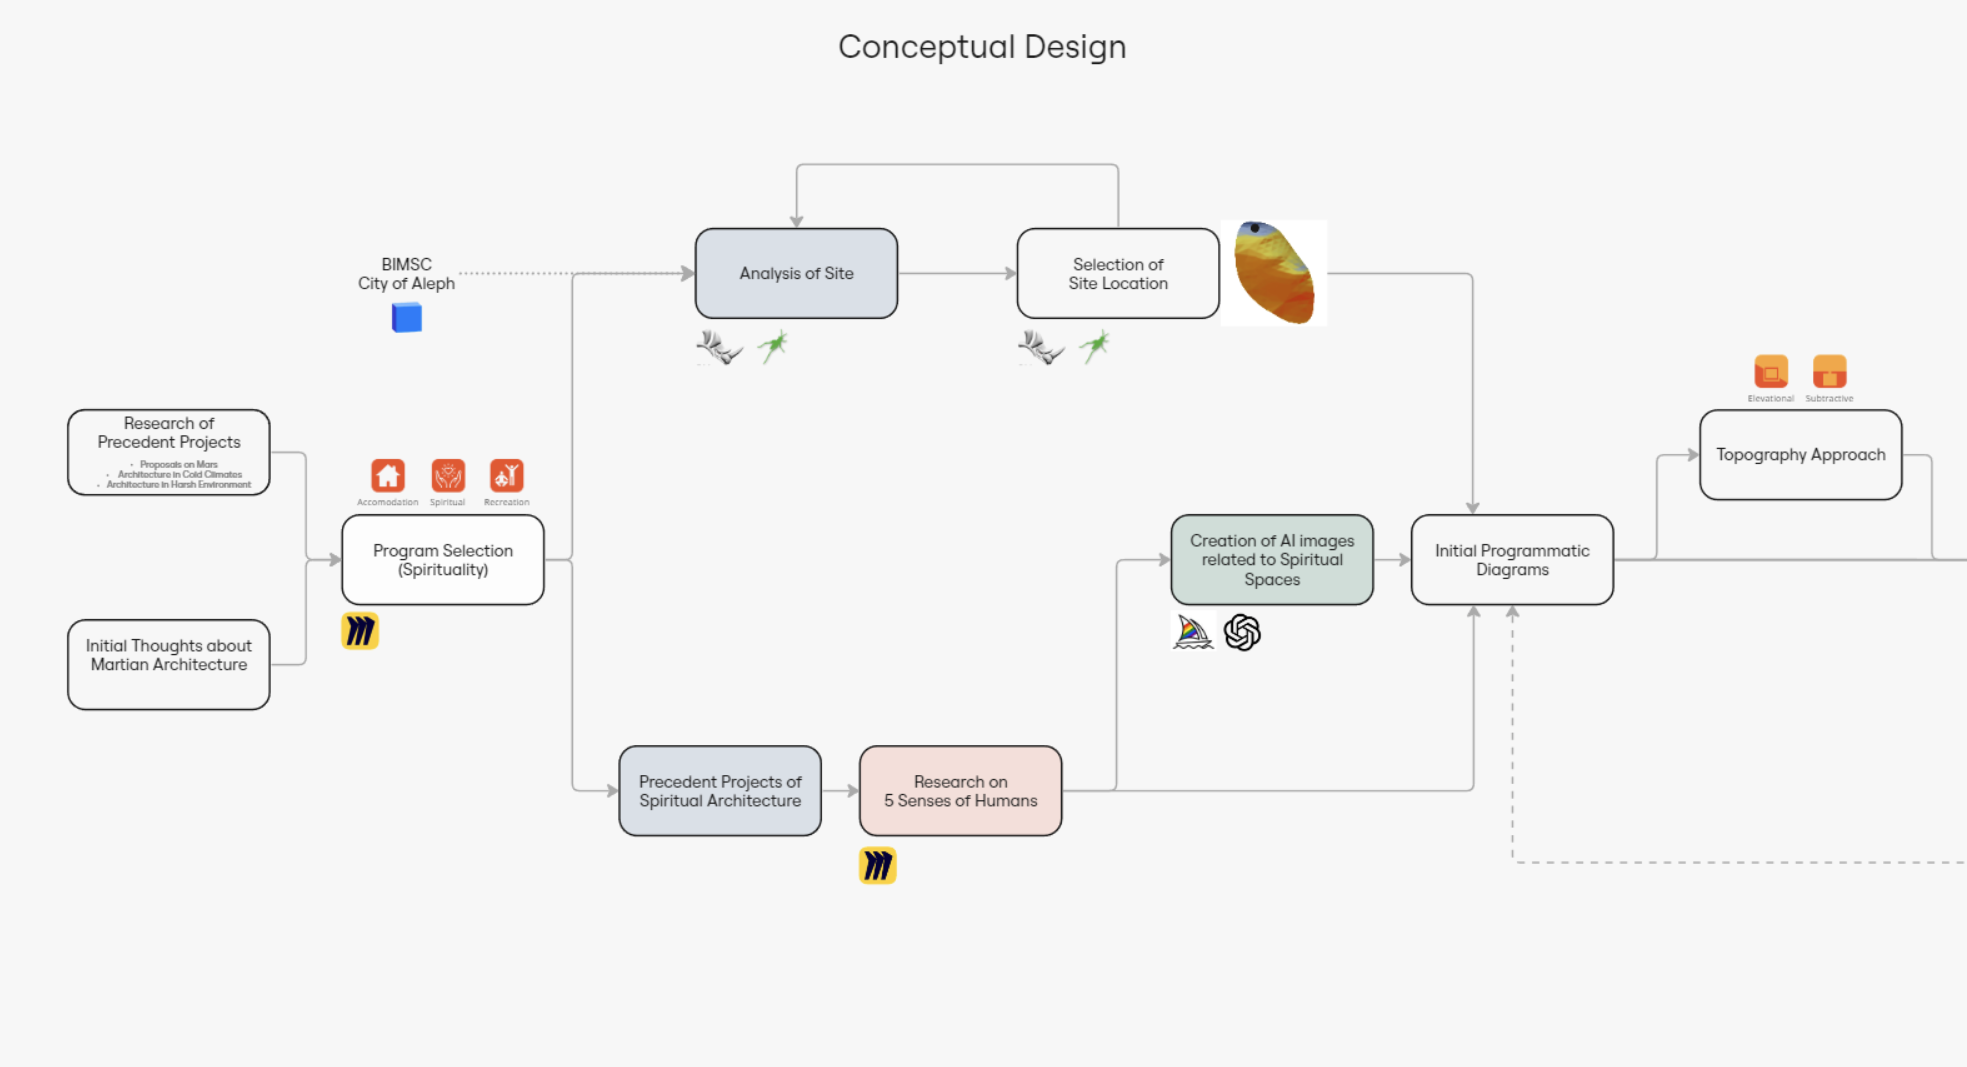
The first step was conceptual design. At this stage, we all tried to be active in all of the roles to have a strong conceptual base that we all agreed on. In the Conceptual Design phase, our groundwork begins with research on precedent projects and contemplation on Martian architectural principles, informing the selection of the program. Analysis of the site is conducted determining the most suitable location within the City, guided by topographical analysis and spiritual requisites of the community.
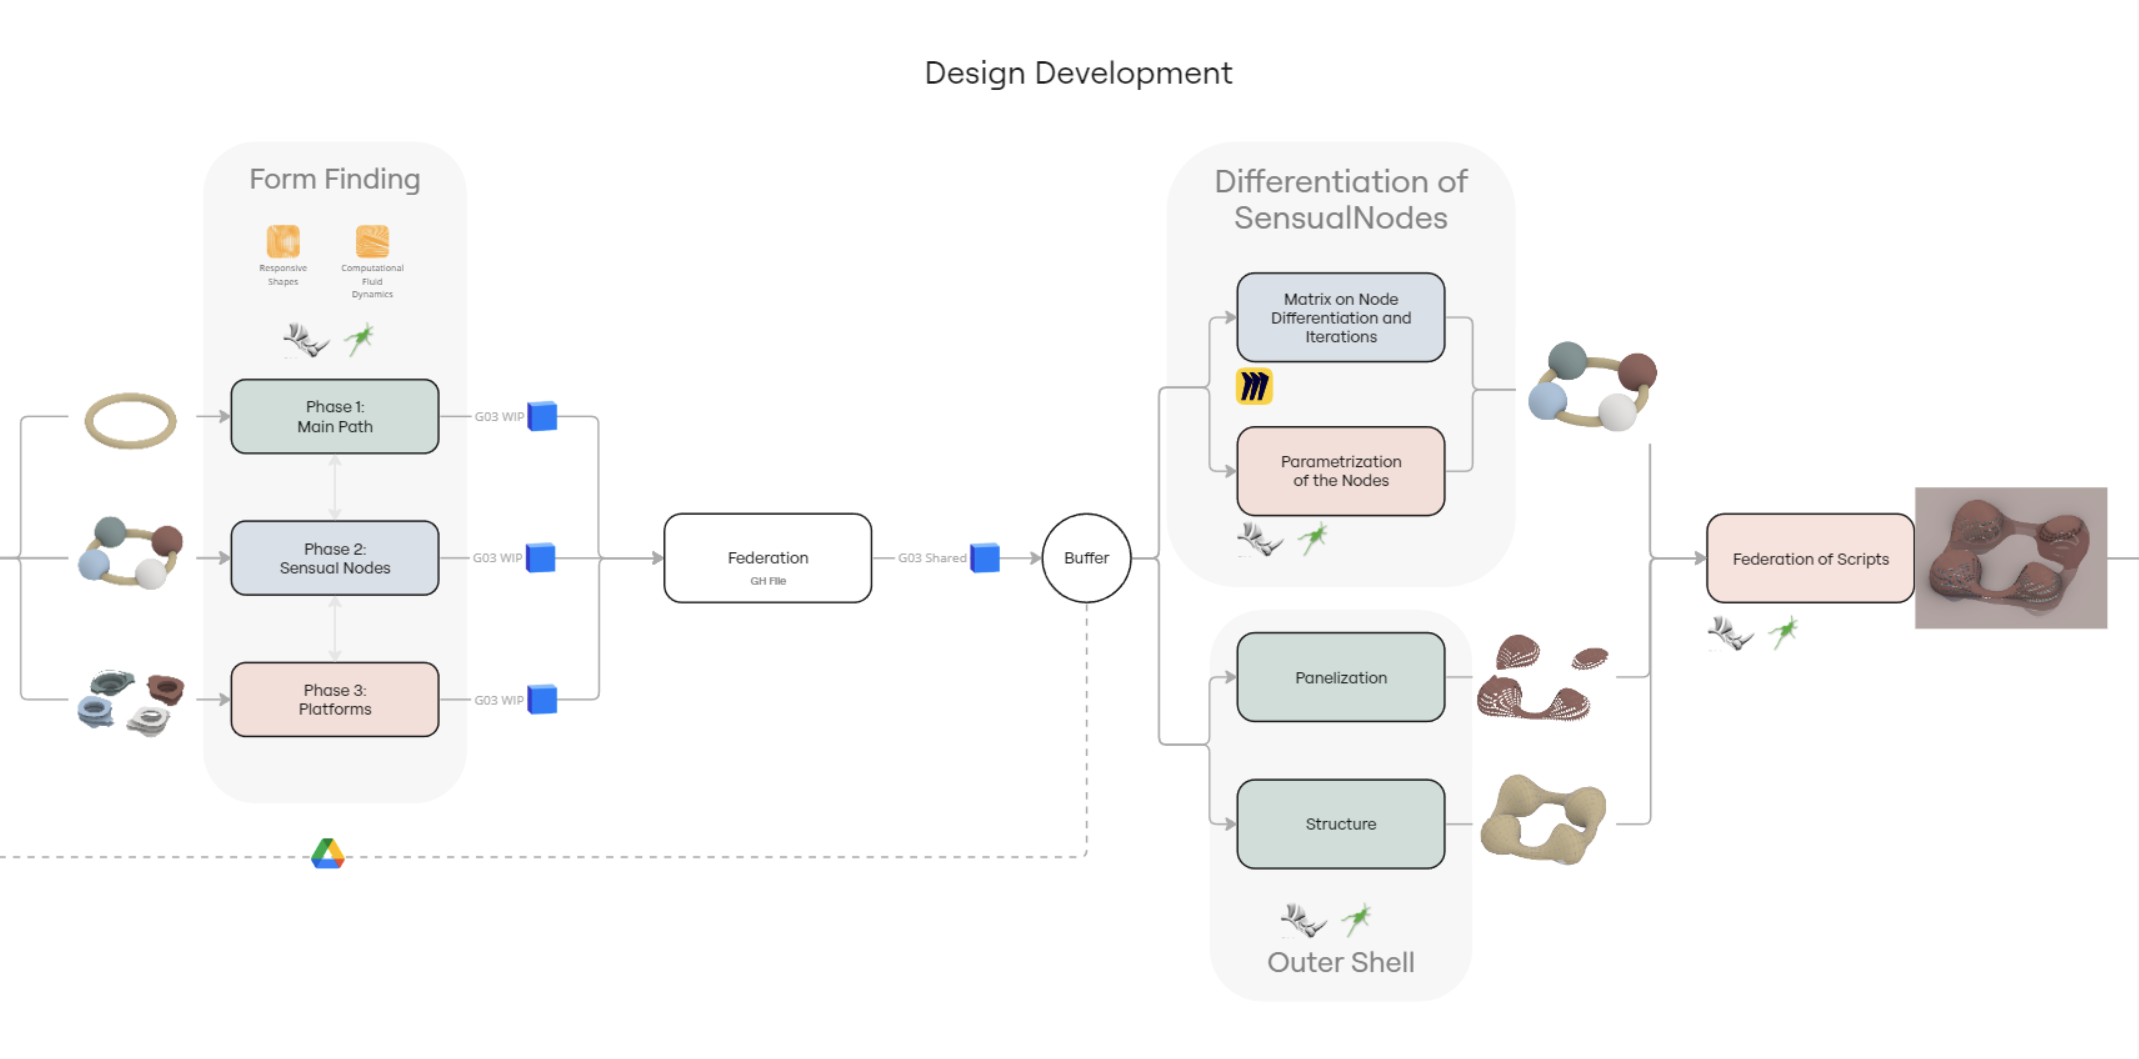
At the second stage, which is design development, we started focusing on different areas of our design independently. Despite the challenges in collaboration using Grasshopper, speckle acted as a useful tool to actively federate our independent works and show the conflicts. The Form Finding stage involves our series of developments. It commences with Phase 1, concentrating on the primary circulatory paths. Phase 2 involves detailed attention to the sensual nodes, examining their topographical interactions and Phase 3 culminates with the creation of the structural platforms where we then federate these models and go back in each review to the initial programmatic diagrams to alter our form. Then the sensual nodes are refined through a matrix of their differentiations. This stage is marked by a detailed examination of node requirements leading to the parametrization and panelization processes as well as the structure.
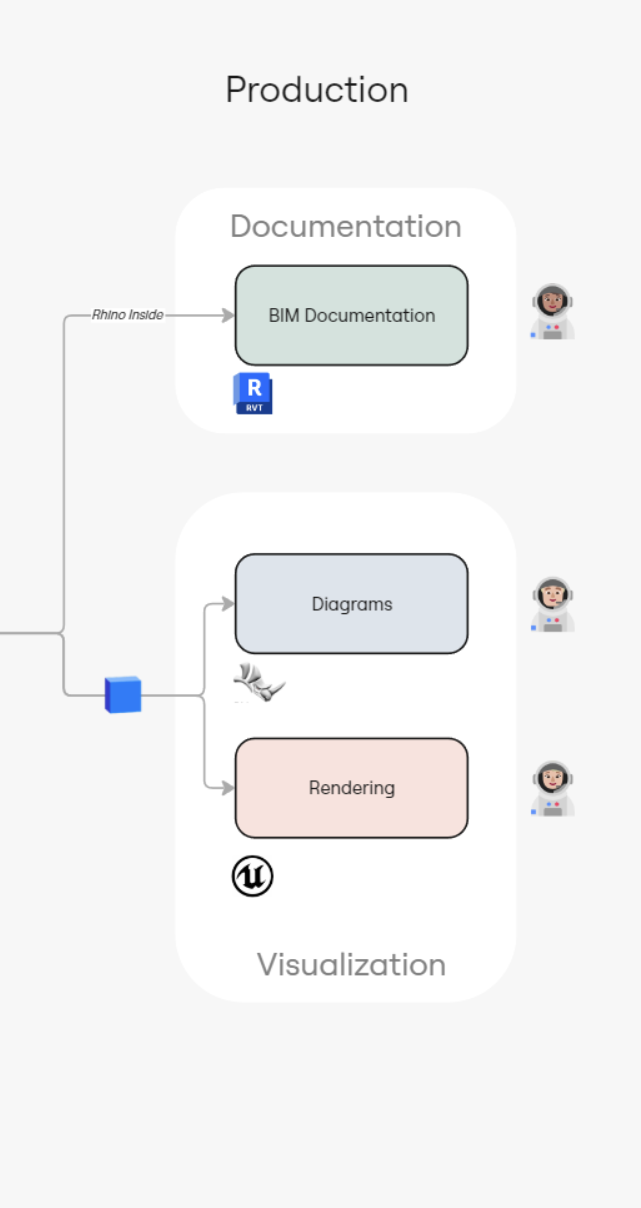
At the last stage, which was production, the need for collaboration was the least and we specialized in different areas to focus on. We divided it so that one of us would have collaboration tools in Speckle, one of us focusing on the Documentation and another focusing on user experience in Unreal Engine.
App Automation: Speckle Revit Previewer
For our automation project, we focused on creating a Revit plugin concept. This plugin enables users to swiftly preview various design versions within Revit, worked on by various users, eliminating the need to import the entire geometry every time.
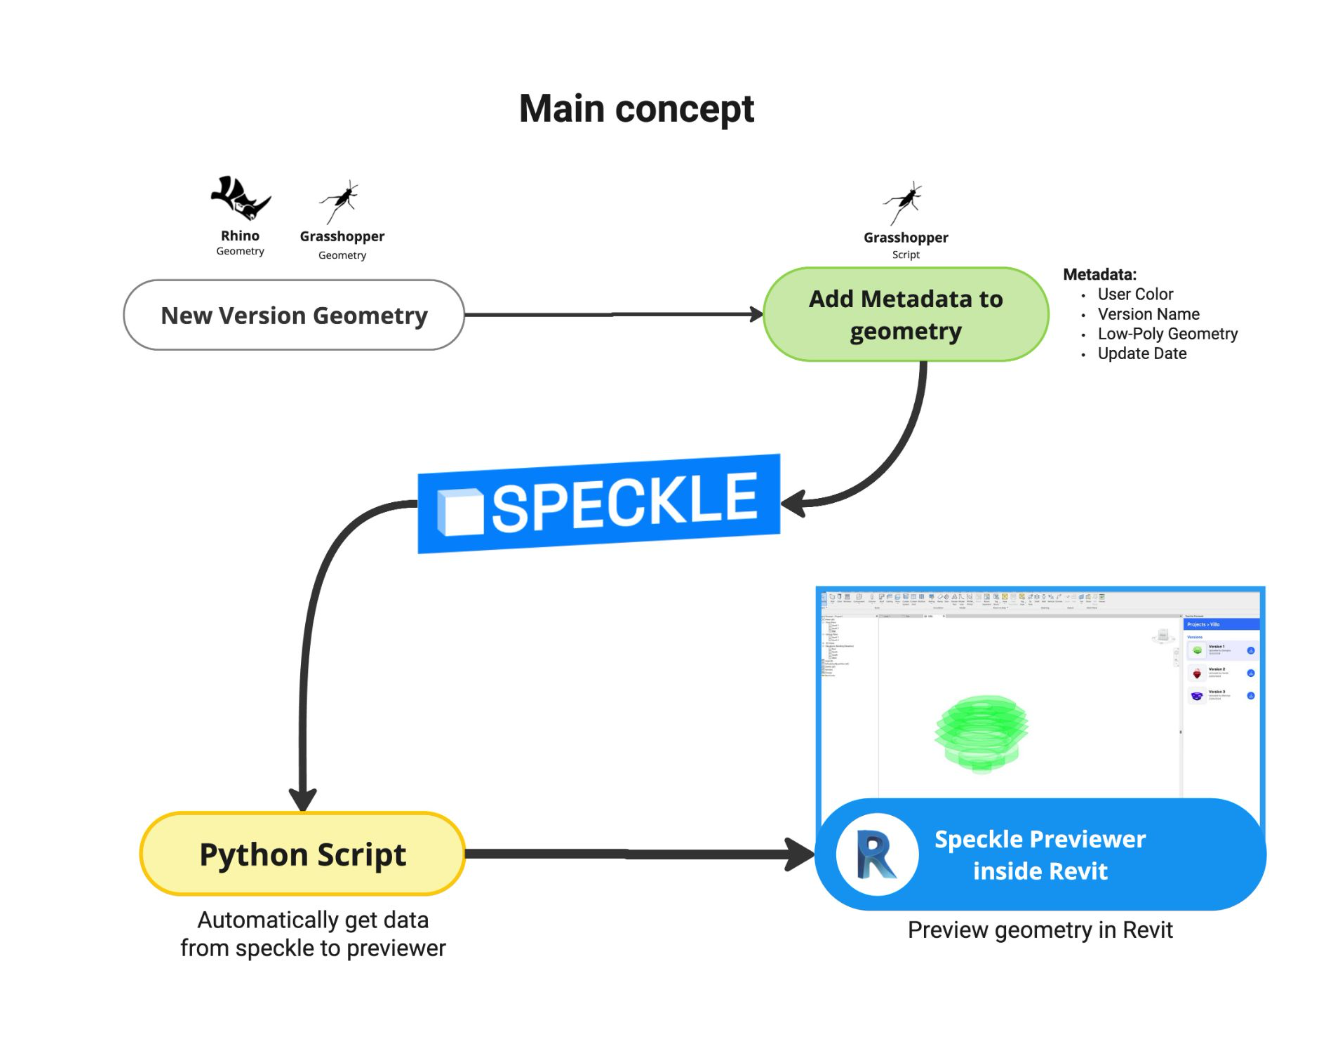
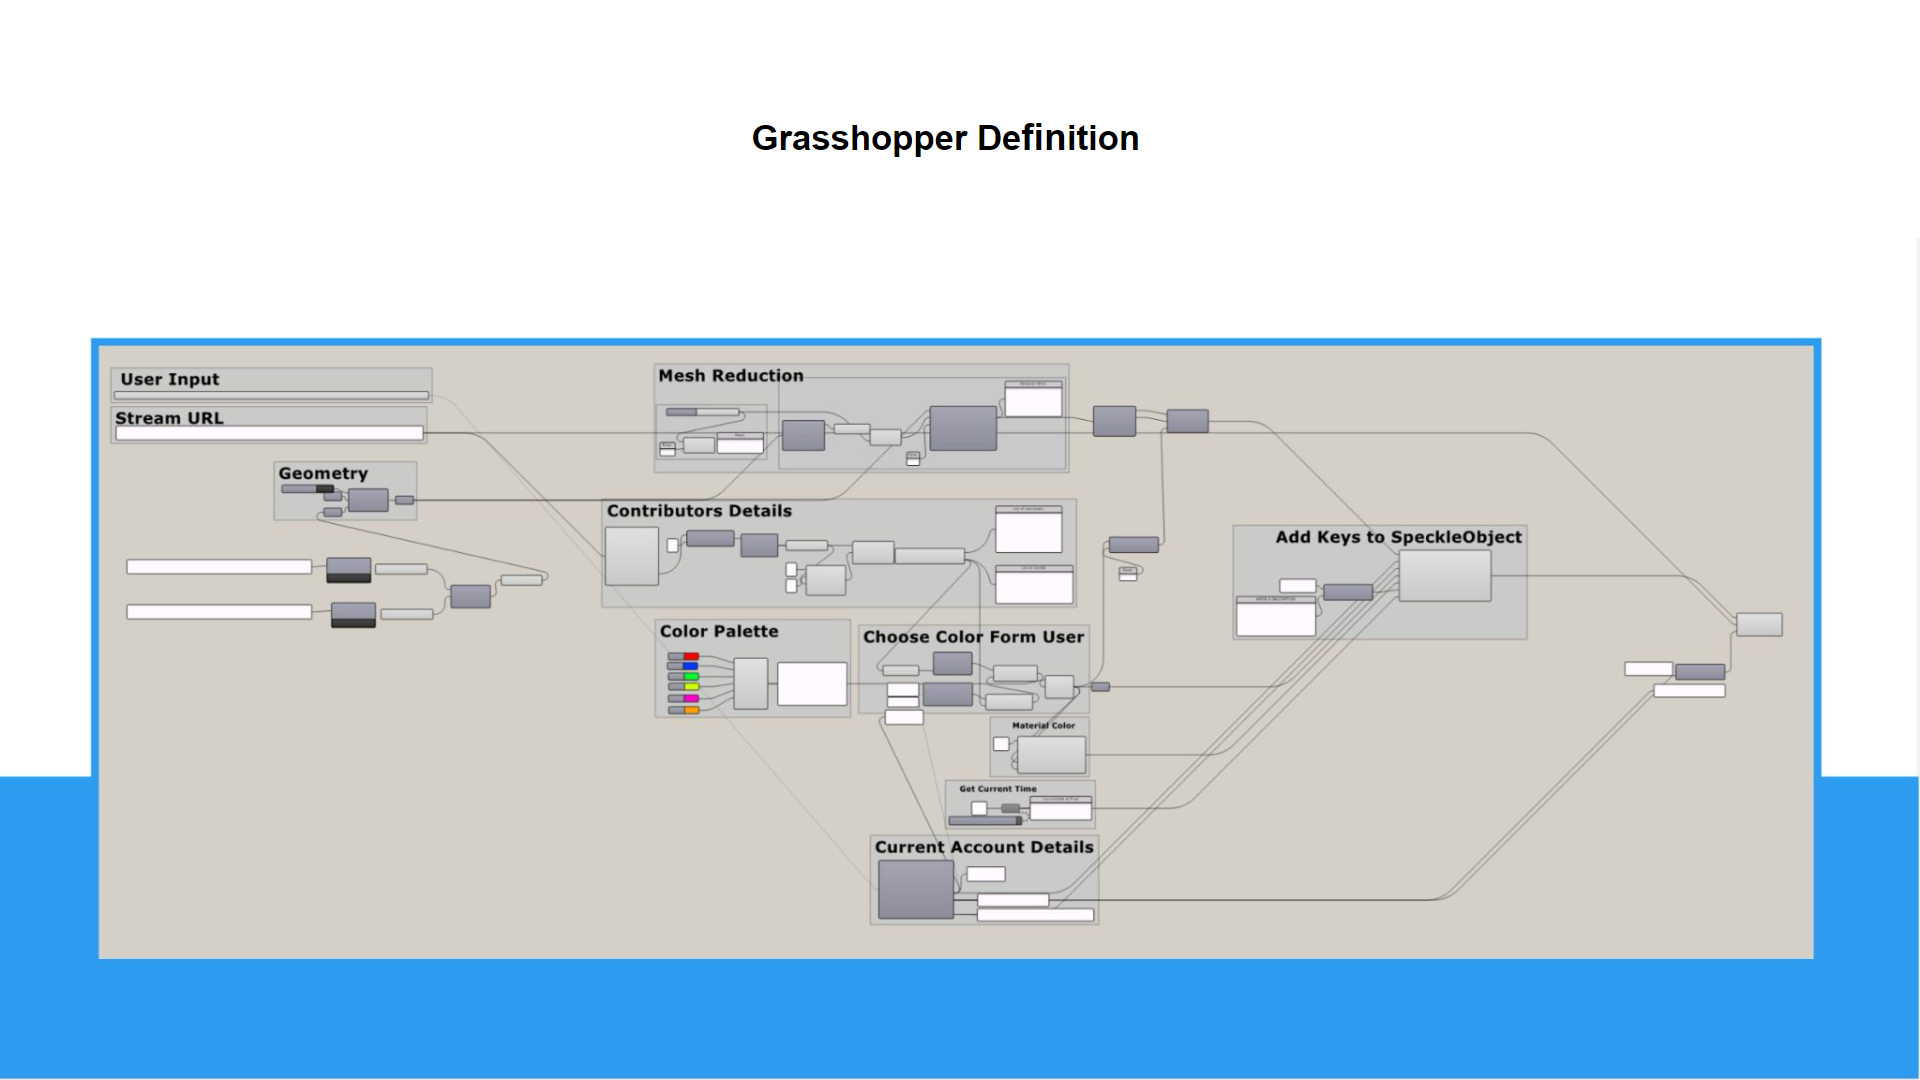
The main concept relies on a grasshopper definition that attaches metadata to the geometry created, and through python script it will get the data from speckle to display it in Revit.
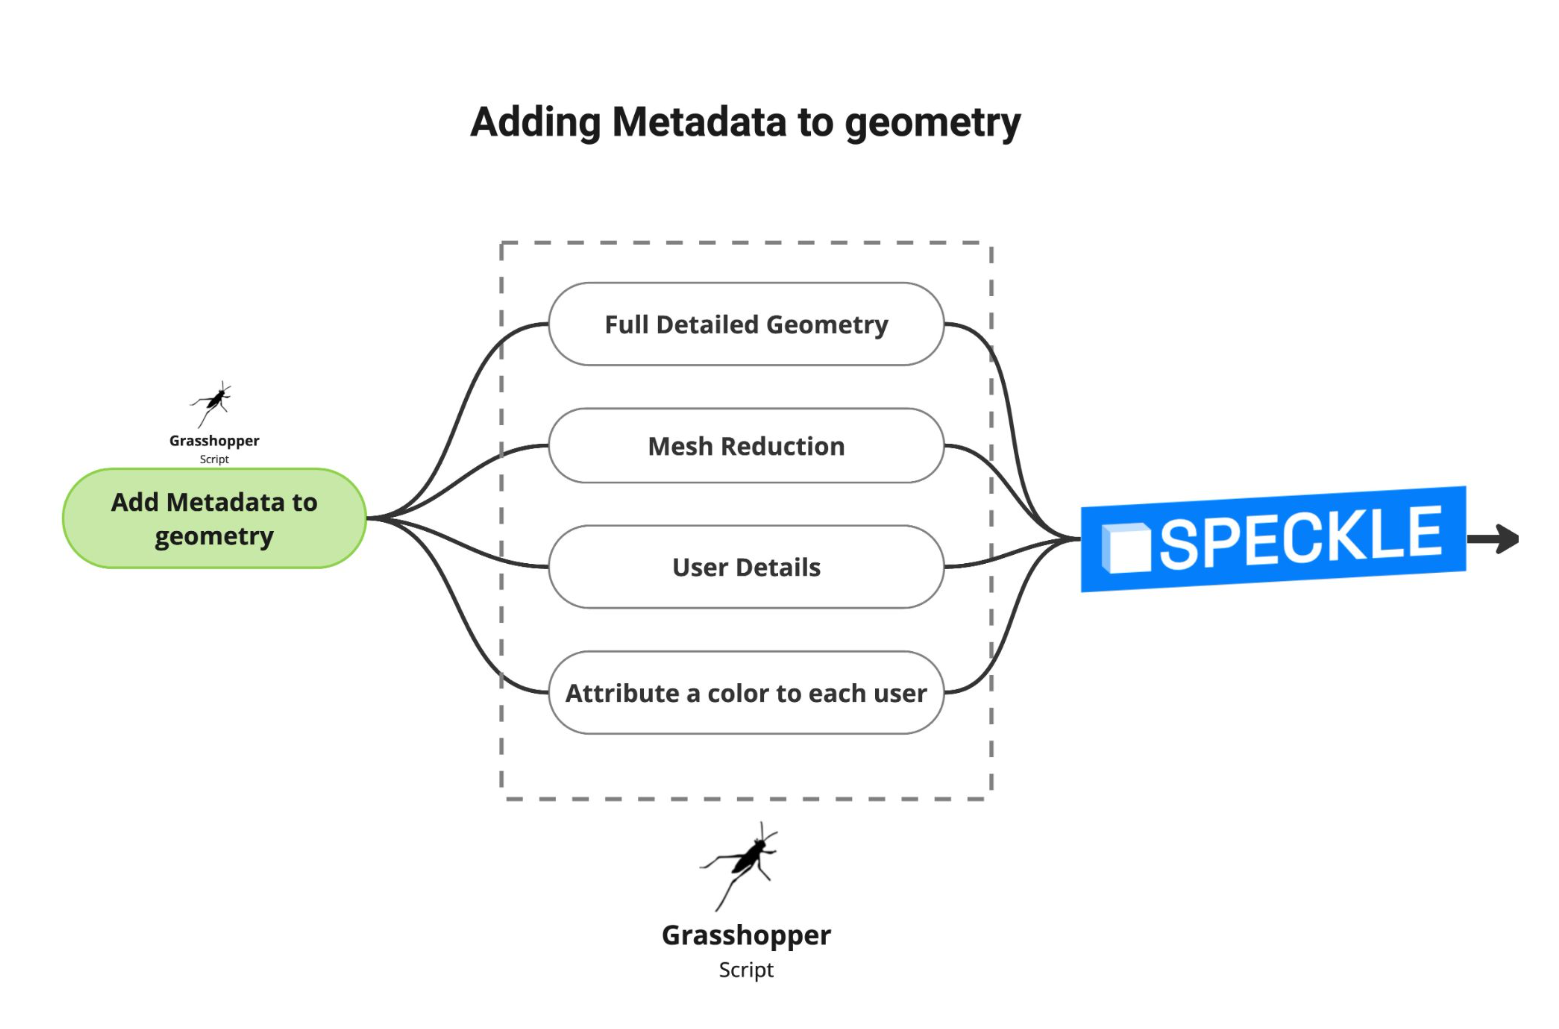
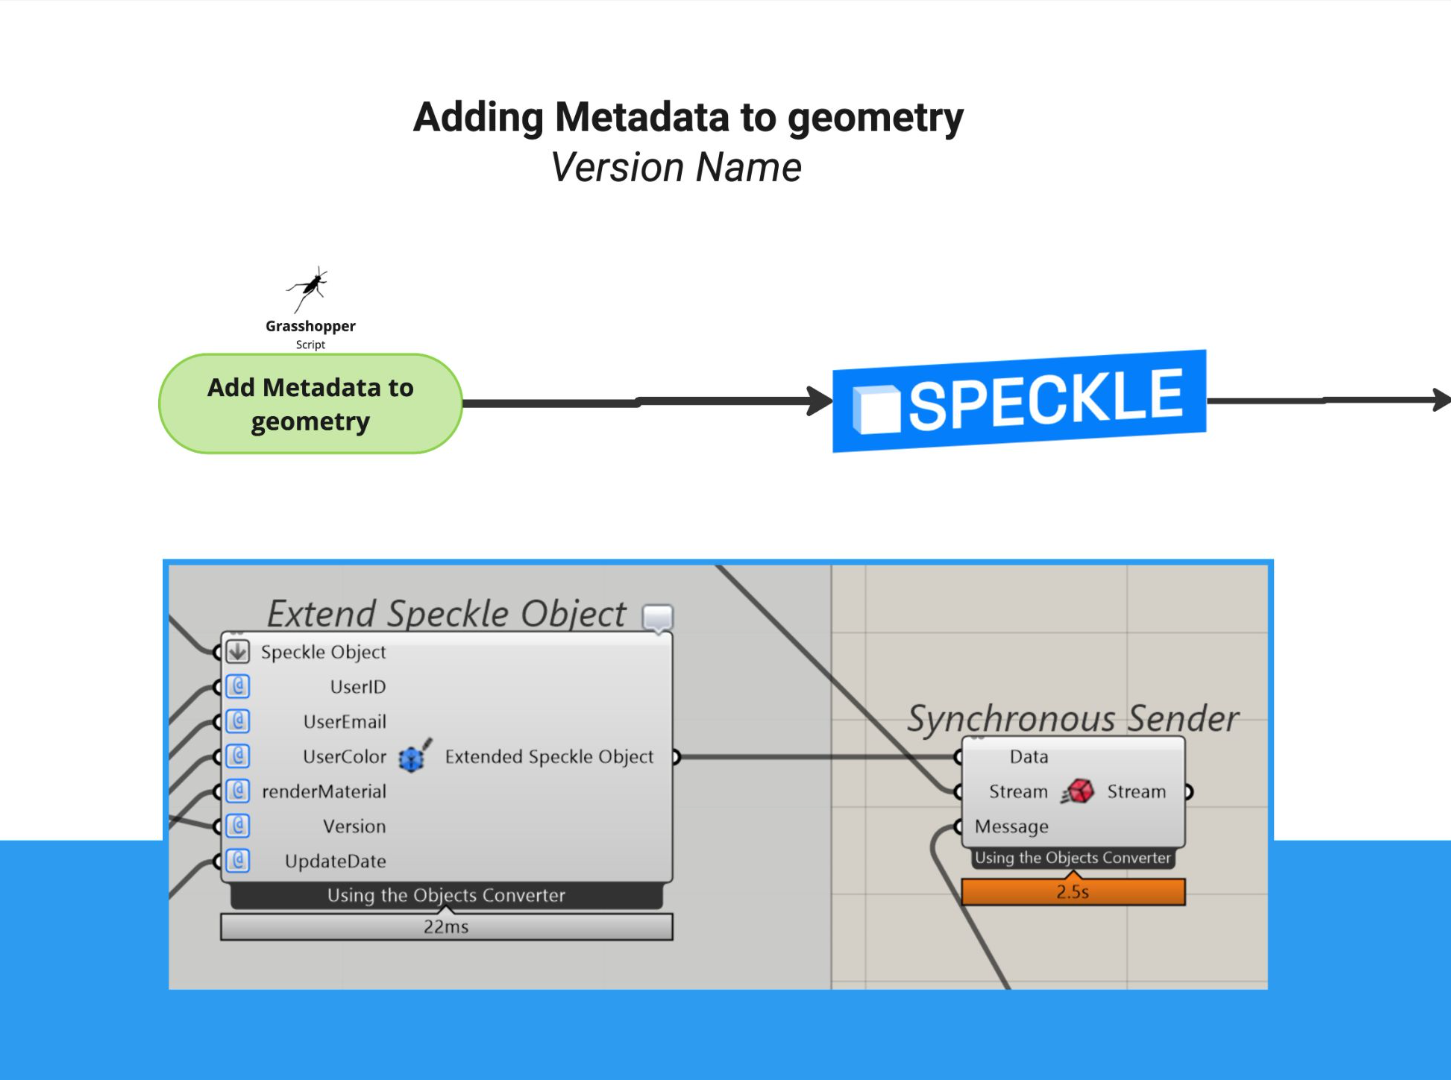
First the grasshopper definition attaches the data about the user who created the geometry such as their ID and Email

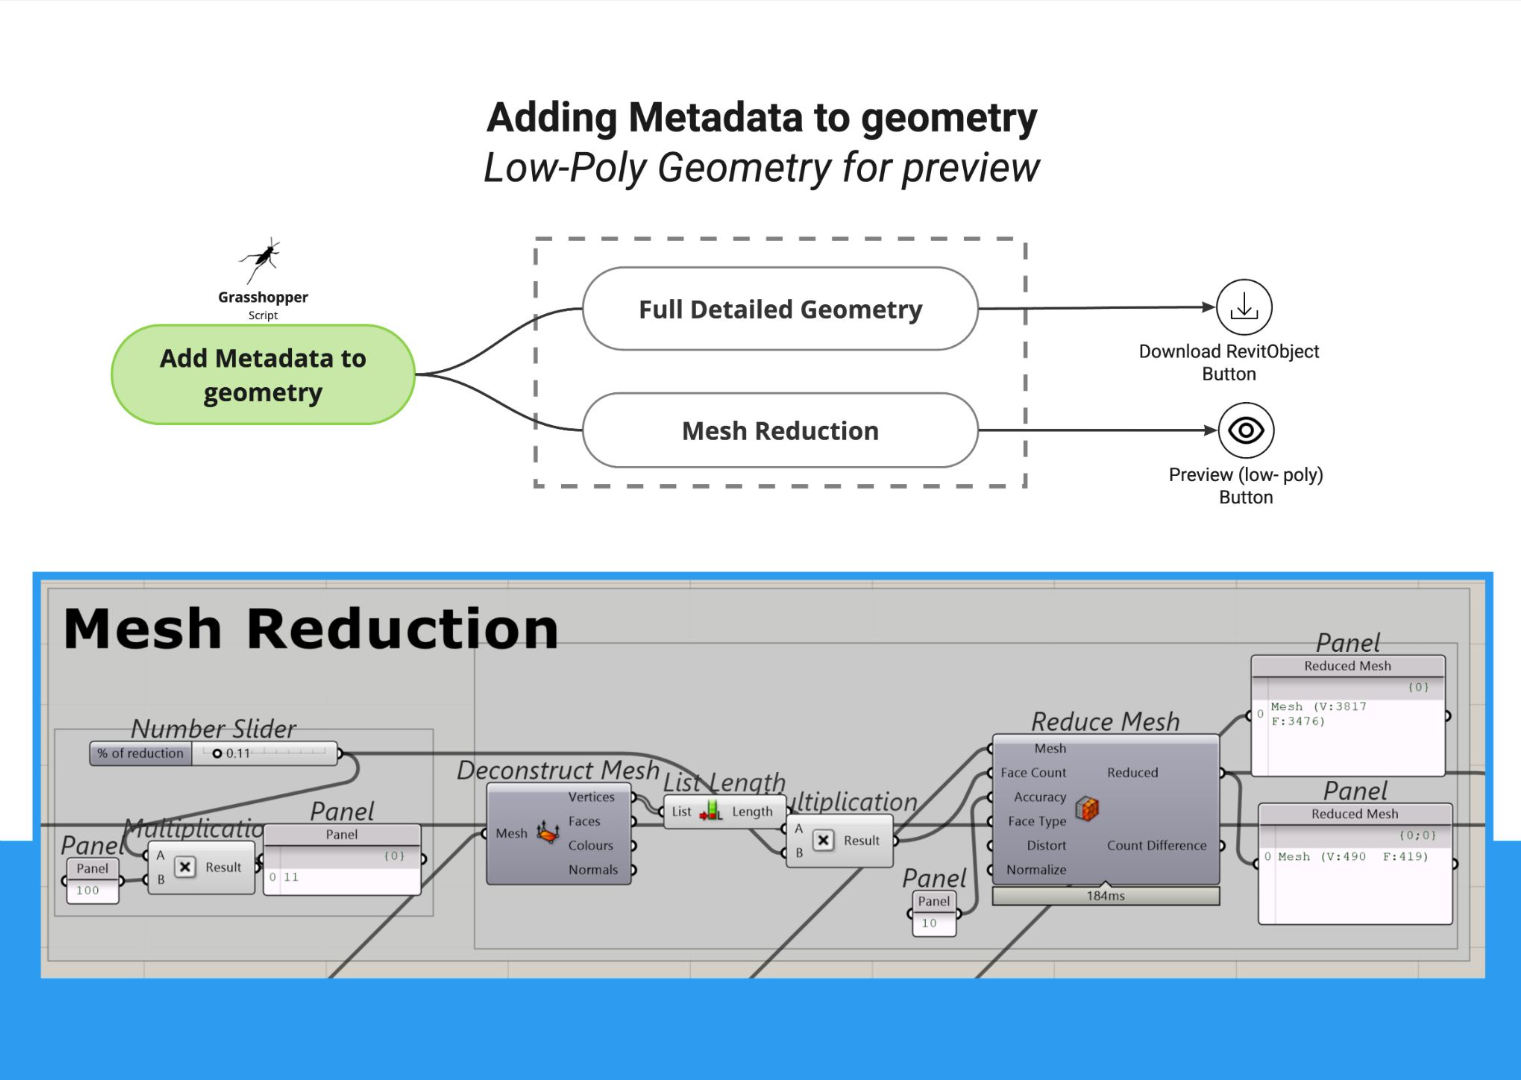
It then reduces the mesh faces in order to have a lighter geometry to display before uploading.
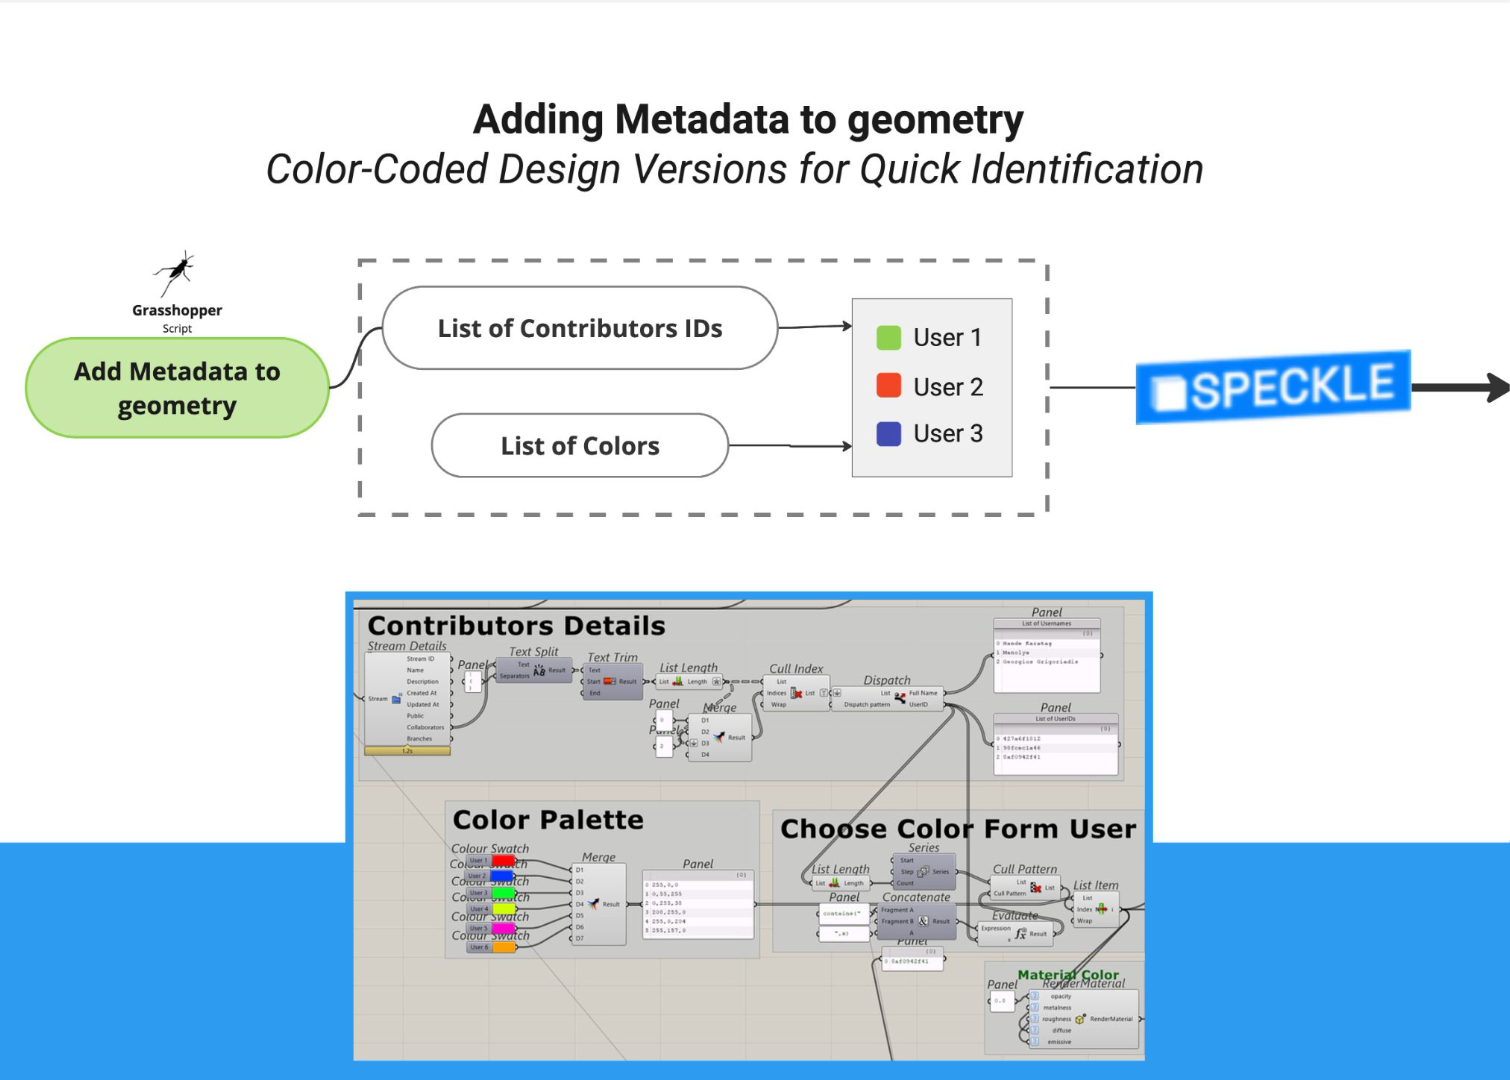
Next the script gives a color to the geometry based on the ID. This will be used in order to quickly identify who has made an update.
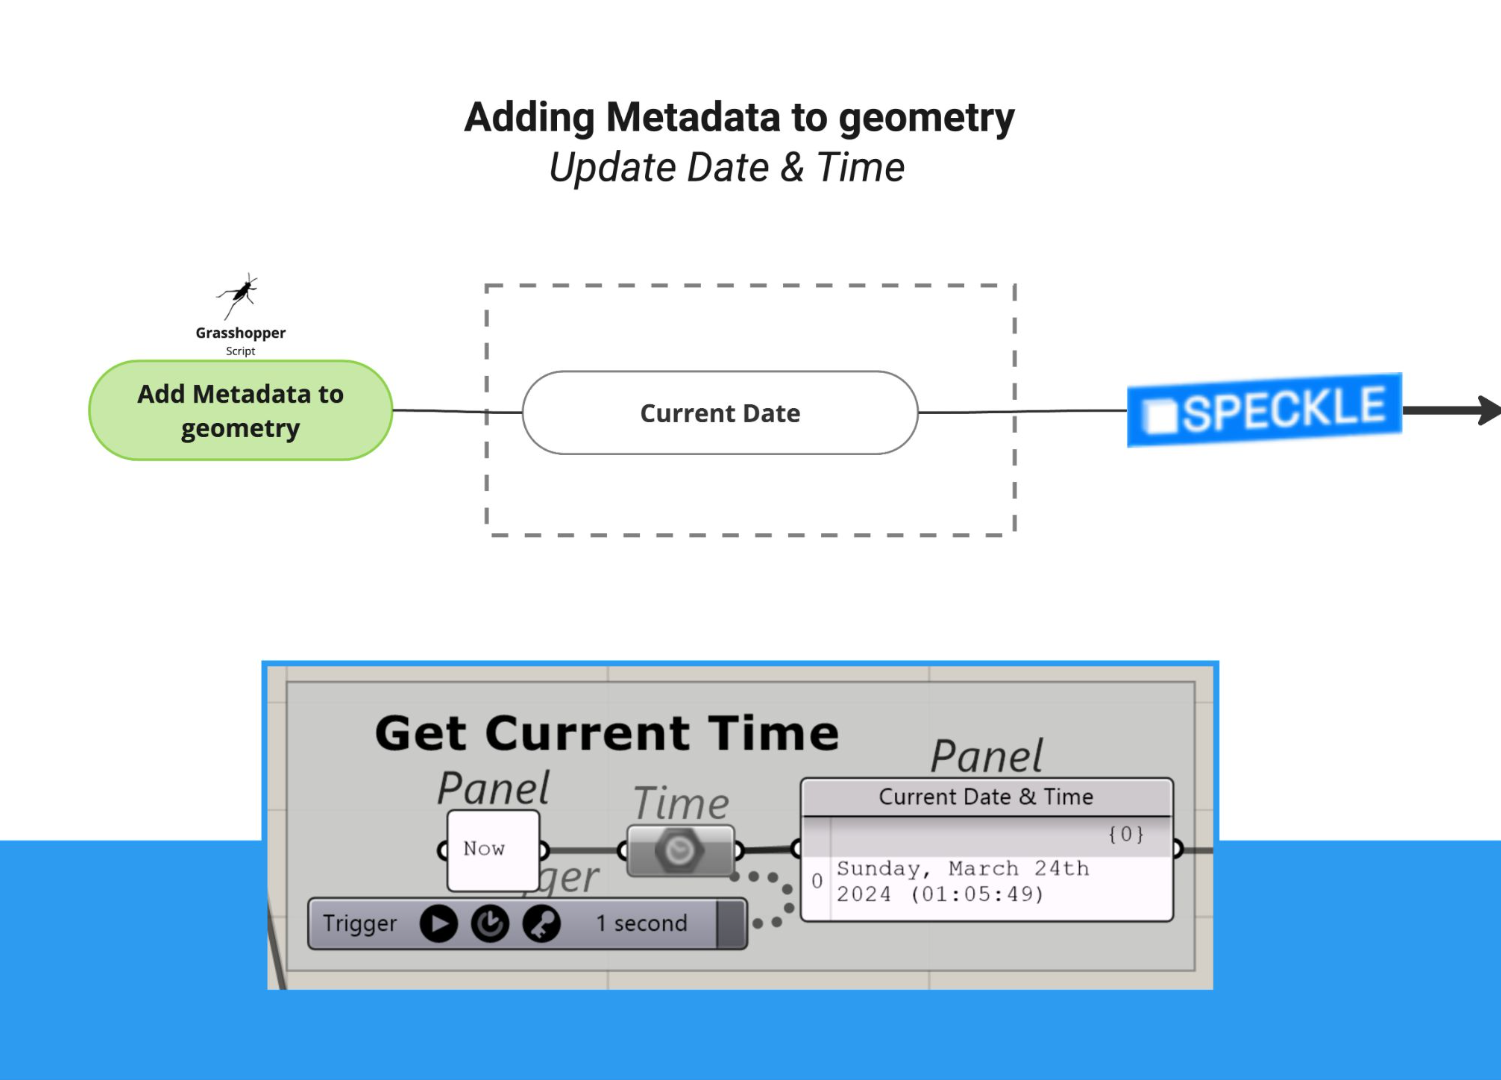
The script then adds the current time and date the geometry was created.
The user can also add a description for the version of geometry to verify the updates.
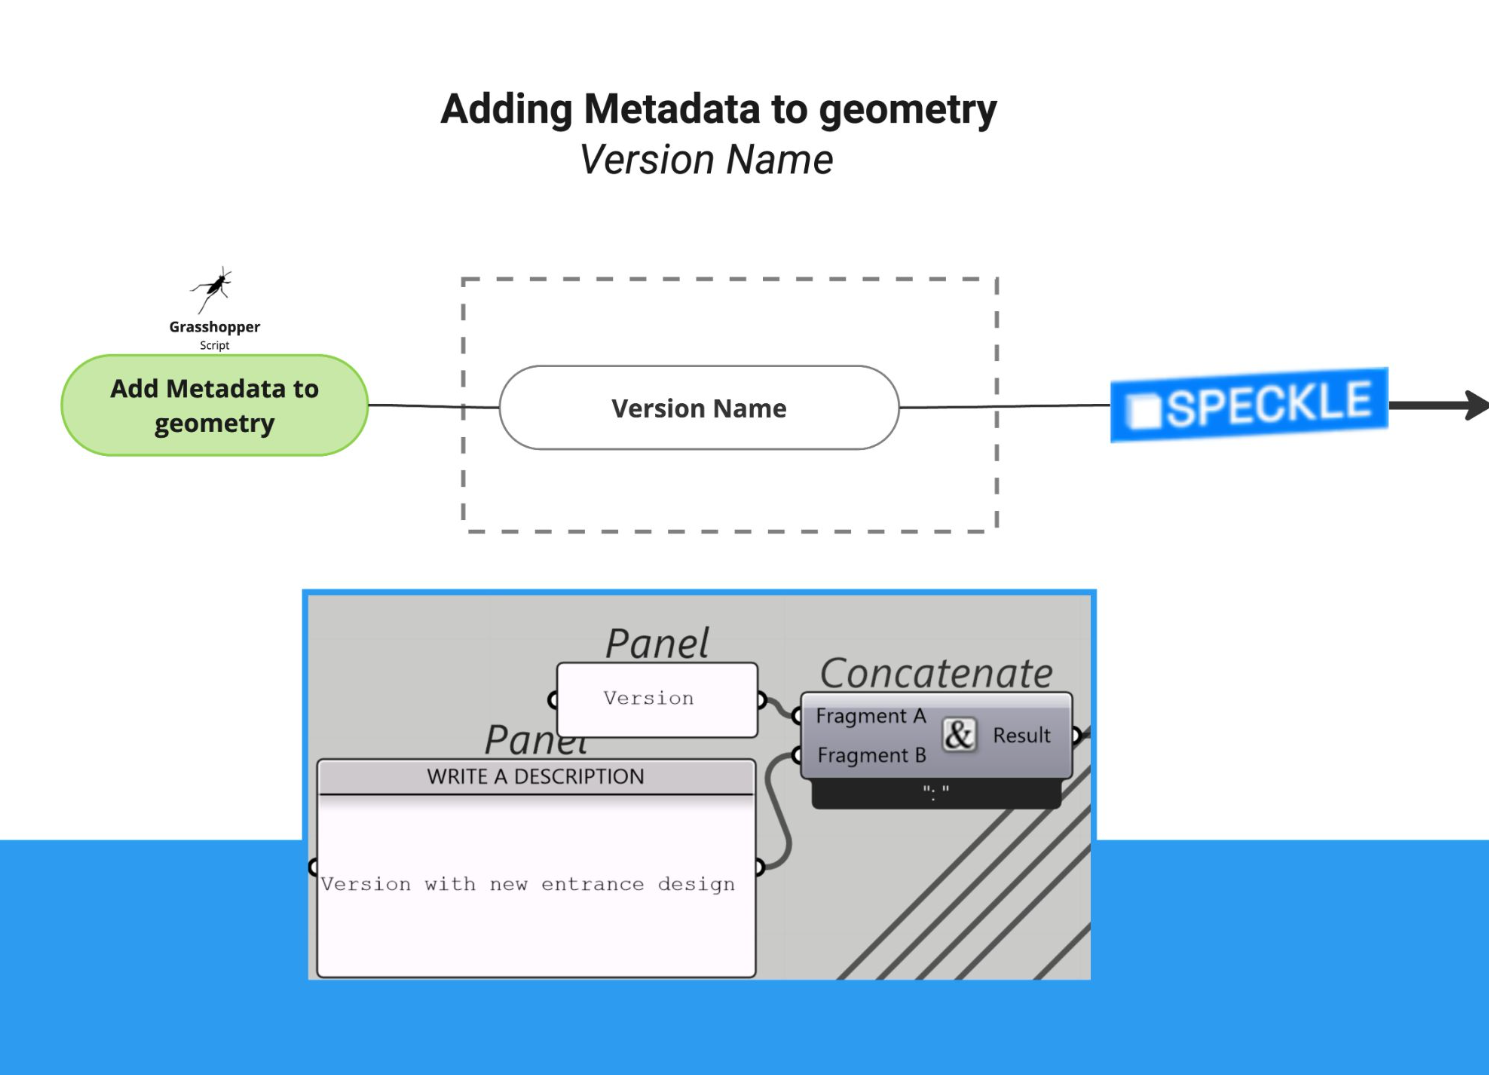
All the data are then attached to the geometry and sent to speckle.
Finally the python script receives the data from speckle to display it on the Revit plugin.

Demonstration Video
