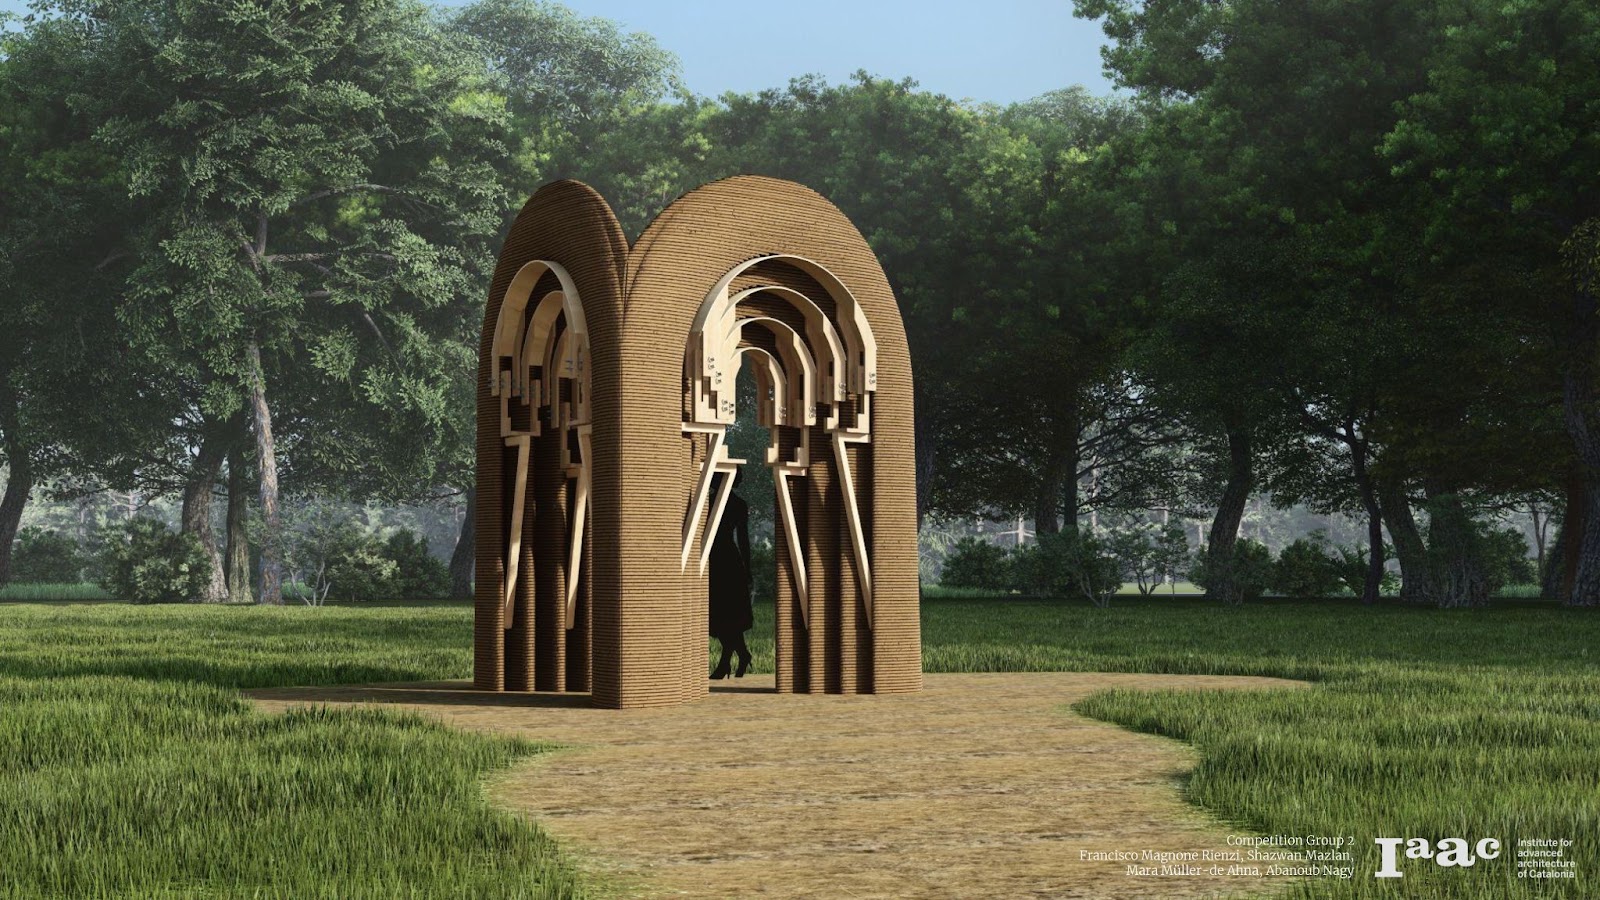
Presented is a proposal for building a 3d printed pavilion with biomaterials in Valldaura camp with the main challenge of covering a horizontal 3d printed surface. The project is part of an internal competition during the 3DPA 22/23 postgraduate studies. The winning proposal will be finally built.
Several iterations were made as part of the design process until a selected geometry was developed deeper. A set of variables behind the geometry can be controlled and modified using algorithm design. The result is a print of a total length of 3.300 m which could be produced in 12 days.
To able horizontal printing, specific research using Active Bending Support is applied. The construction schedule and critical steps were studied in depth to anticipate critical production moments. Lastly, a set of possible external roof geometry is showcased for further development.
——
Design Process
The design process started with an abstract geometry of the wall axis. Altering controlled parameters a set of more than 50 iterations were made. A final geometry was selected based on optimizing parameters, such as total wall printing length to allow the maximum covered area, the total span, and others.

From the set of iterations, a group of geometries was developed further. Two different open strategies and design languages were explored. The first one would allow the geometry to be printed without any external support or scaffold, while the last one would allow having longer spans to the total high of the printing. Parameters such as total printing length or max span ratio were evaluated to make a final selection.
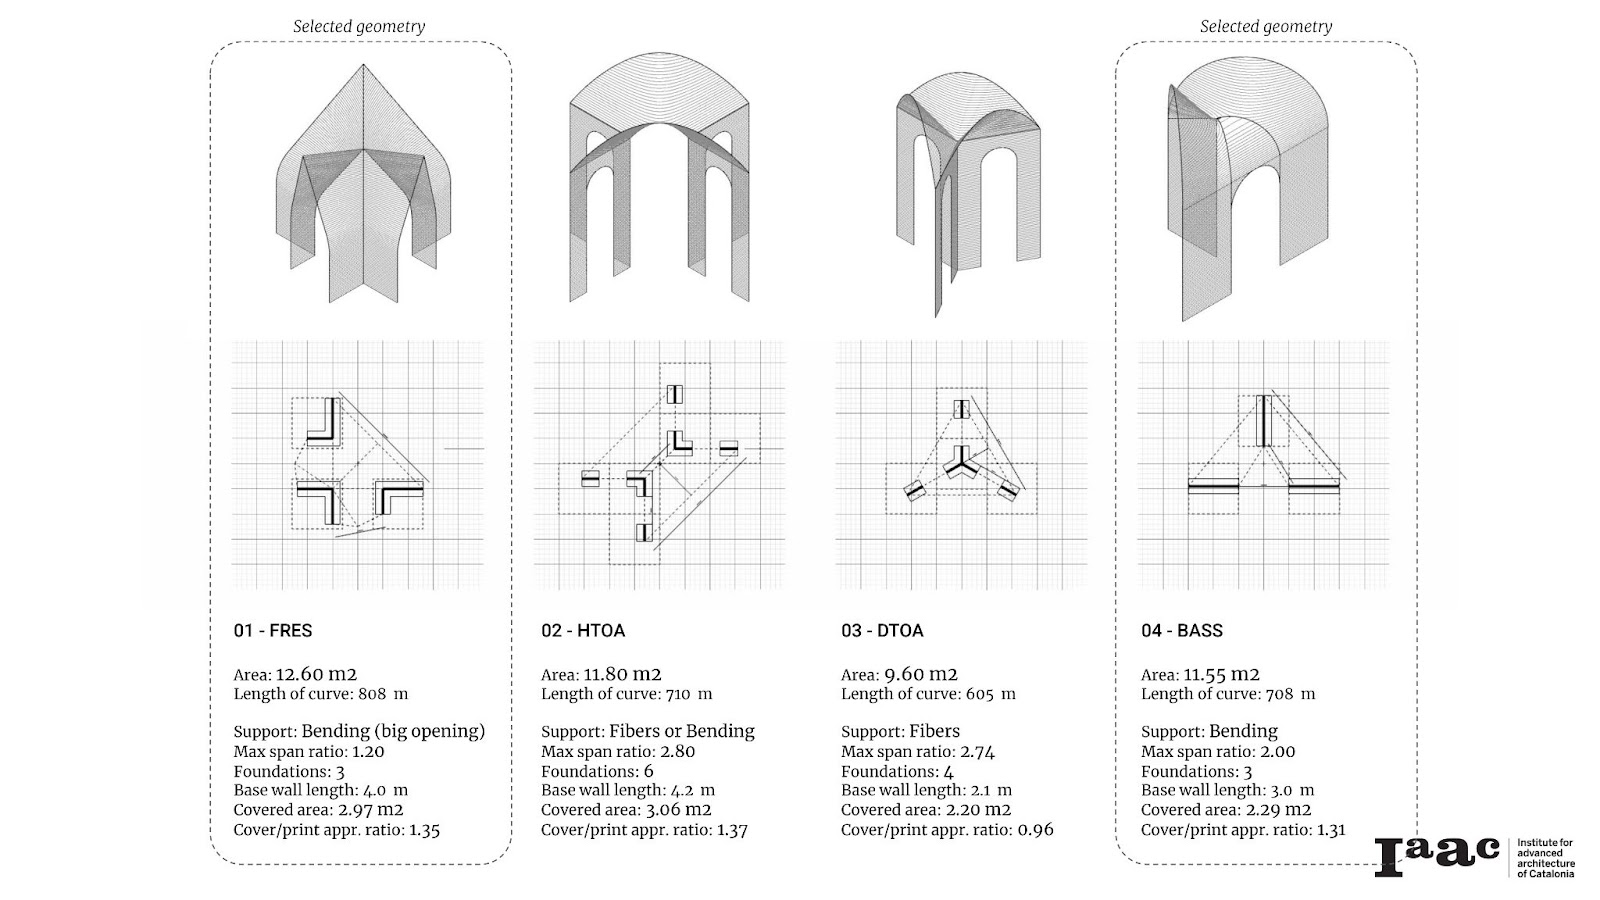


A final geometry was selected based on optimizing parameters, such as total wall printing length to allow the maximum covered area or the total span.

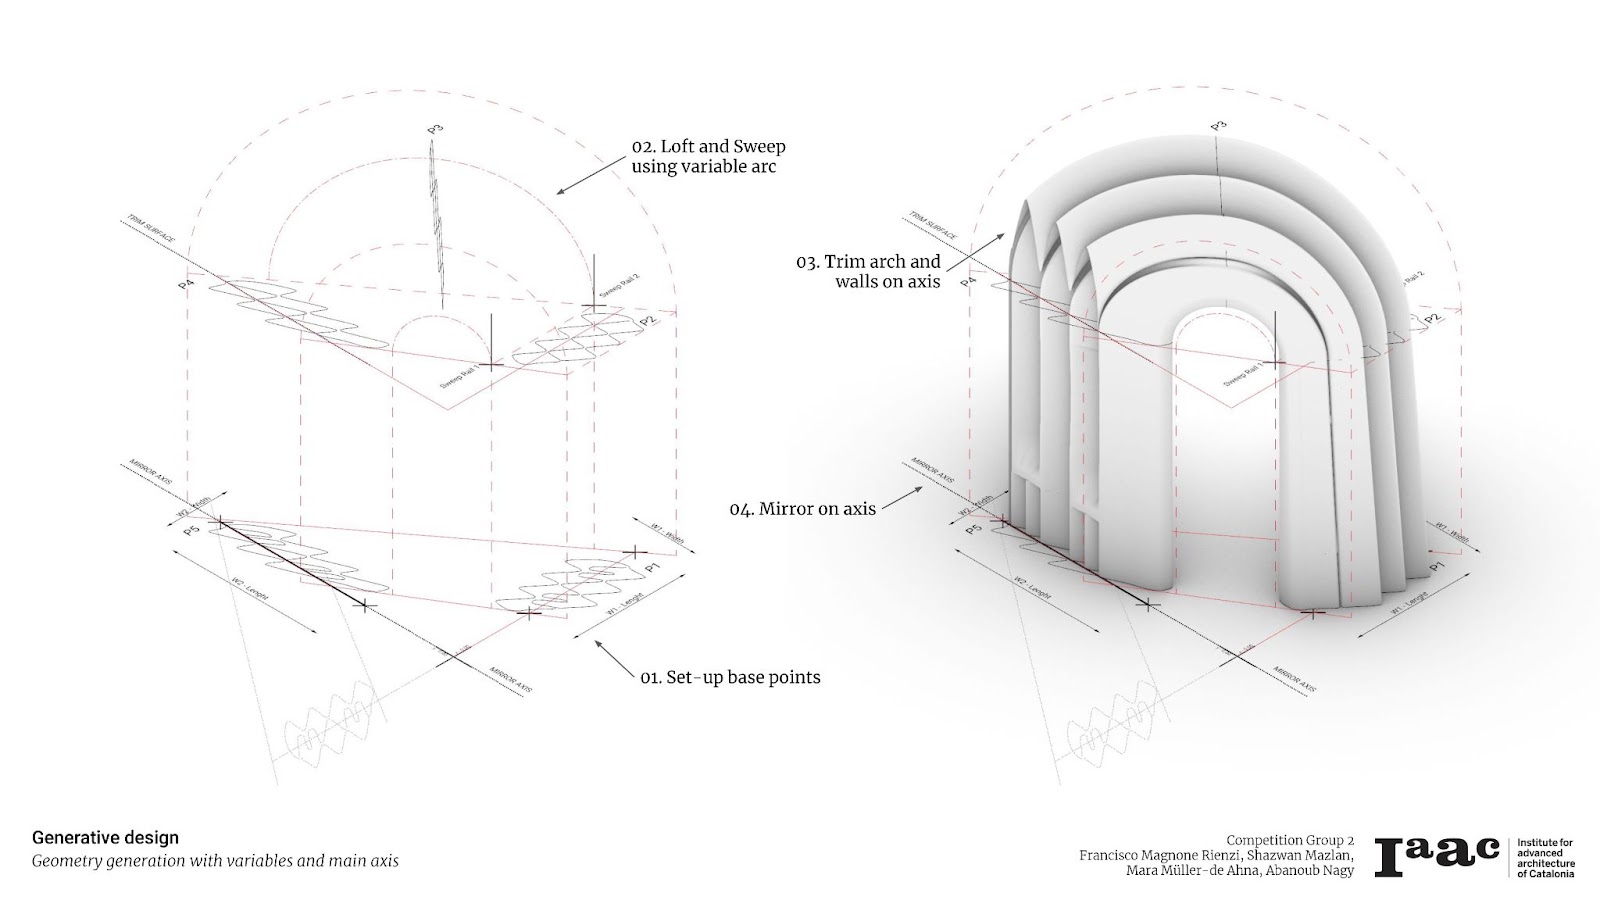
A set of variables behind the geometry can be controlled and modified, such as the arc curve, or the position of the points that generate the space and walls. The steps to construct the shapes are the followings:
- 01. Set up base points
- 02. Loft and Sweep using variable arc
- 03. Trim the arch and walls on the axis
- 04. Mirror on axis
After different explorations of infill geometries, the curve used in the previous 3DPA project Tova was selected and applied on the walls and arches using three and four layers. An algorithm developed for this geometry can do the automap from a bounding box to the final infill perimeter. This results in a total printing length of 3.300 m which could be printed in 12 days.

Foundations can be done with 3 or 4 gavions easily distributed on the ground. A first layer of geo polymer is needed to ensure insulation from earth to humidity. A span below the main arches of 0.60 to 1.6 m could be reached covering a total area of 2.5 sq mt. The walls are tapered to improve stability, while the wall infill is designed to allow support inserts. The layers on the top arches will be printed over active bending temporary supports. The final geometry reaches a total height of 3.05 m and builds a final triangular Pavilion of approximately 3 m side.
Using the advantages of abstract geometry, complexity was added to the walls to be able to hold the wood supports. This is a set of control curves designed based on the strategy of previous 3dpa research.


Active Bending Support
To be able to absorb the eccentric movement of earth retraction the proposal takes advantage of the research done during the previous phase Eccentric Support System. One of the main topics of the research is how active support systems can control retraction during drying.

This approach was adapted on a large scale while controlling the dimensions of materials and crane collisions. The position of the scaffold is organized into different stages to reduce risk during print. Support strategies were developed from a continuous wood sheet to individual wood ribs. An individual set of ribs allows earth shrinkage individually according to the printing time, while also letting the position be adjusted during print.


Construction schedule and critical steps
To anticipate critical moments a calendar visualization over the geometry evaluating height and layers was developed as a printing schedule. From day one to day six walls and support for scaffolding were introduced. From day seven to day twelve, the final active bending support scaffold is inserted and printed. Days eight, nine, and ten are critical due to several risk situations such as the change of the nozzle to avoid collisions, the scaffold position, and the 3d print over them.
To understand risk level a rate from one to five was assigned. 3d print arches represent the higher risk.

Related to production strategy the crane movement was studied in detail to ensure collision is not happening but also to reduce unnecessary movements which will represent extra production time. In the critical days of production -while the supports are added- a new nozzle with an extended height of 600 mm needs to be introduced.


A construction sequence with critical steps was defined from wall first layers above the foundations to printing finishing and roof position.

External roof
A future possible roof development is tested in the geometry following the original curved shape of the horizontal surface. Selected options include a simple curvature bent wood sheet with protection layers or custom-made ceramic tiles.


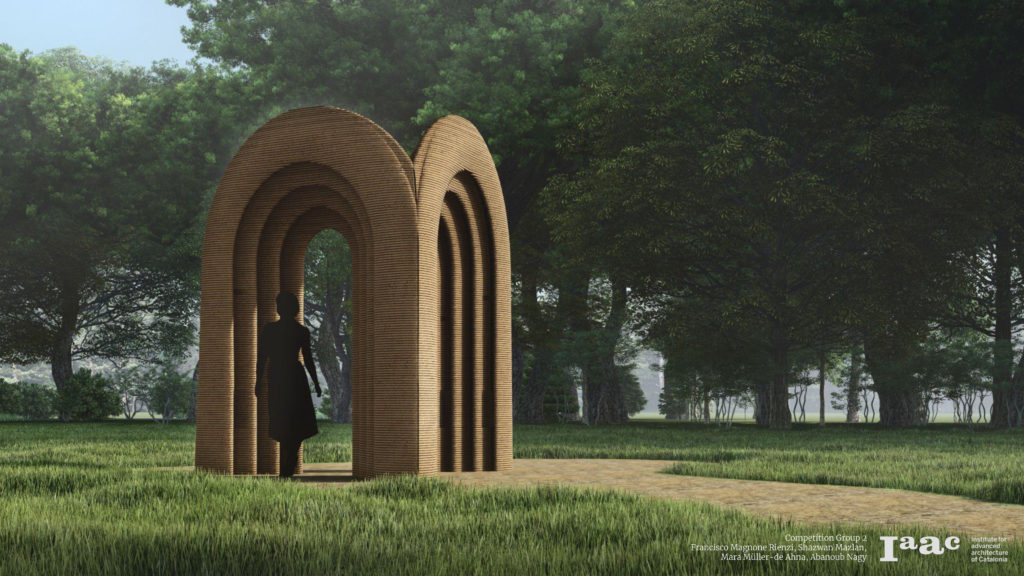
Final vision