
Introducing the Mobility Footprint, an interactive dashboard designed to promote awareness about mobility in urban environments and its impact on CO2 emissions. By selecting your typical mode of transportation and choosing from eight pre-determined destinations, the dashboard will provide you with a recommended route, estimated travel time, and the CO2 emissions associated with your selected mode of transportation. The available options range from public transit to walking, and are tailored to popular destinations for IAAC colleagues. To make the results more relatable and engaging, analogies are used to illustrate the CO2 emissions generated by each transportation option based on the chosen destination. Use Mobility Footprint to explore the city while reducing your carbon footprint.
PREMISE
Transportation is a major contributor to CO2 emissions in cities. To address this issue, cities are implementing various strategies to reduce emissions, including promoting public transportation, active transportation, and electric vehicles. The ultimate goal is to reduce emissions, improve air quality, and provide a better quality of life for urban residents.
INTERACTION, CODE and FABRICATON
The interaction for the user is kept very straightforward, where he is given some introduction about the project and asked 2 simple questions and has to input 4 different actions to activate the visualization. After going through the introduction, the interaction starts with the first input i.e. to press/touch the START button to activate the board. Once activated, the user is asked about the options of preferred mode of transport to move around the city, between walk, public transit, bike or car.

Upon answering the first question, part two is activated , where the user is asked to input his preferred destination to go from IAAC using the selected mode of transport. For answering this question the user has eight different POI’s and is able to answer by removing the slit of the destination from the dashboard. The last and final interaction is putting the slit in the position demarcated on the right and activating the visualization of the results of your action on the screen.
For this interaction multiple sensing technology is used to activate and light up different parts of the dashboard. The start button and the selection of mode of transport works on the conductive paint interaction that while being touched gets some resistance in the flow of energy and thus records the user’s input. While the slit uses an object detection sensor and once removed from the position, the sensor captures the input. The final interaction is based on the circuit being completed, which is that the slit acts as a puzzle piece that when kept on the position completes the circuit and activates the light and the visualization on the screen.
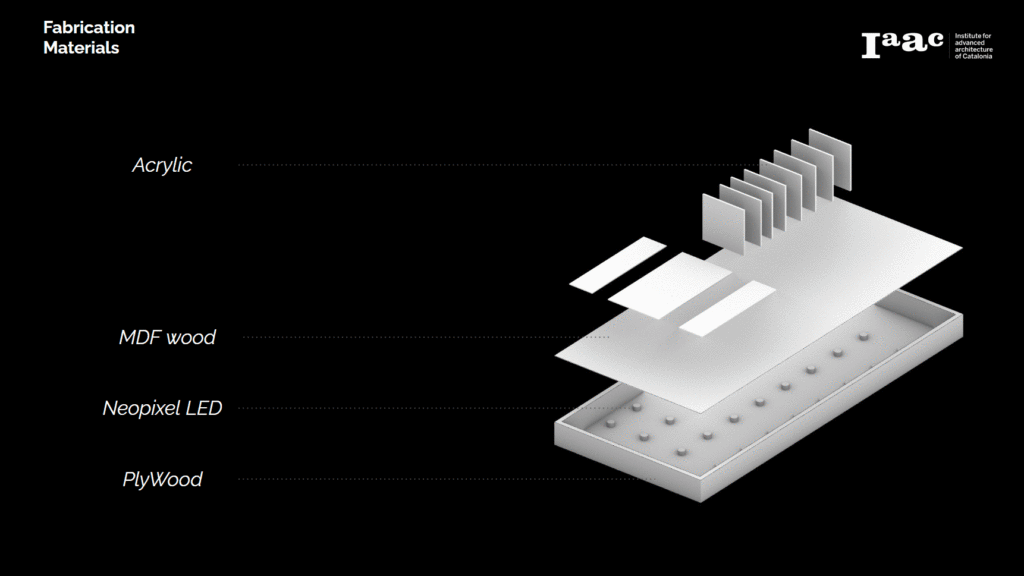
In terms of fabrication, 4mm thick mdf is used as the base material to make the dashboard box, with the lighting and the wiring placed inside itself. The interactions are made using 4 mm acrylic. Using acrylic helps distinguish the interaction aspect from the skeleton of the dashboard and to retro illuminate the dashboard in the dark space. RGB Neopixel led lights are used for retroillumination as it helps to control individual leds and also the intensity of illumination. Multiple partitions are made inside the board to prevent the illumination in the particular input parts and translucent paper is used to diffuse the light.
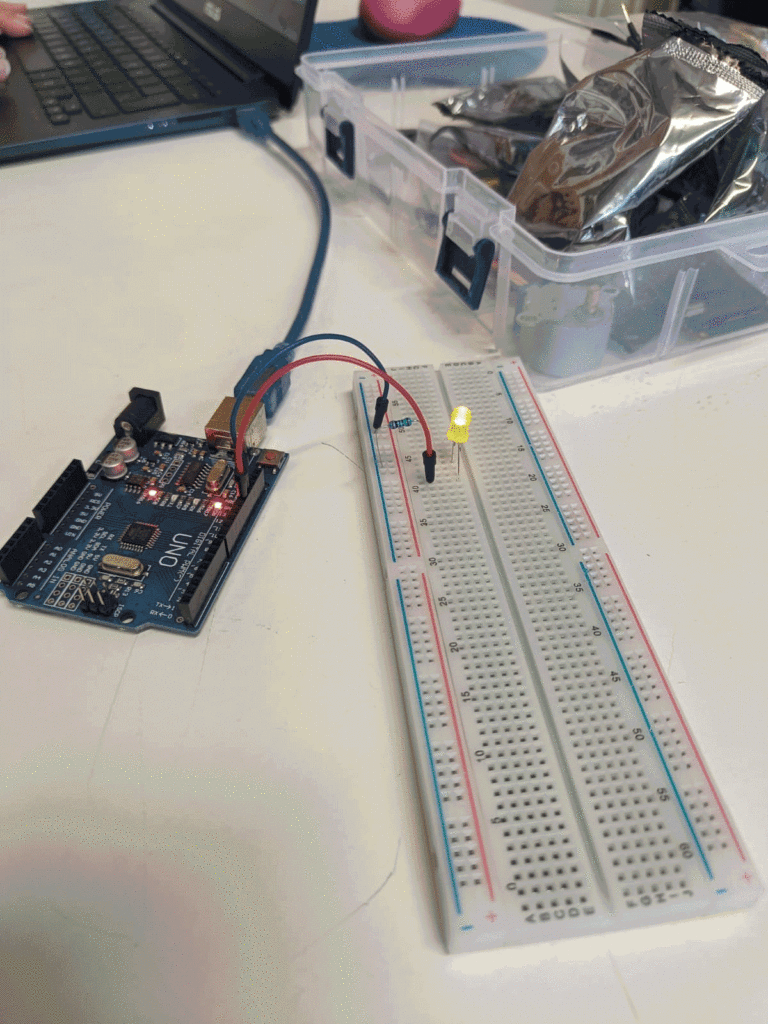
For the interaction Arduino uno is used as the microcontroller. Adafruit, the capacitive circuit is used to take the input of the capacitive sensor that in this case is the conductive paint. the 56 neopixels are powered by external source of power. The output from the serial monitor of the arduino is connected to touchdesigner application that plays the video on the screen. Multiple if loops are used in the code that acts as a gate switch for the selection and activation of 32 permutations of the resulting visualization.
PRODUCT
The final product is a combination of two entities. First is the fabricated dashboard, that is the part of the interaction and the second is the screen that displays the outcome of your choices. The video below is the documentation of the interaction.
